What's on your Workbench - APRIL 2023

Steve Sanford

Well-known member
All~


My "bench" has been overflowing with a bewildering array of gunning stool - Herter's, Chesapeakes, E Allens, Wildfowlers - needing to be put back into working trim. There is somewhere between 40 and 50 birds - of 6 or 7 species..... And, I just custom-cut some parts for a friend's IKEA kitchen cabinets, fed some neighbor's goats with the many limbs that came down in our recent heavy snow, and cut a horse-trail onto our farm for another neighbor....


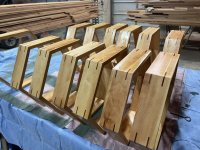
These Herter's Model 81 Brant heads were removed - one requiring a creative new approach - from the over-size Model 92 bodies. They were then coated (epoxy + fine sawdust) and primed and will go back onto Model 81 bodies once they have received their topcoats. To my eye, the life-size head on the over-size body never looked right - an abrupt and "un-fair" transition from neck to breast. And, the Model 81 Brant is already over-size - and makes a fine gunning decoy once the foam bodies are hardened.
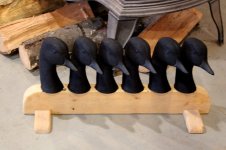


Decoy Head Rack - with Model 81 Brant.JPG


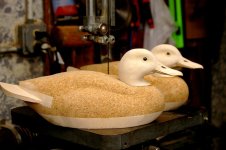
Not many photos of the rest of the fleet yet. So, I give you some nascent Green-wings From the Bench of George Williams:
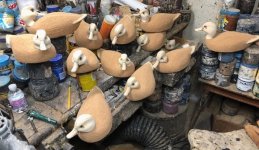

G Williams - Mixed Teal.jpg


All the best,


SJS


Last edited:
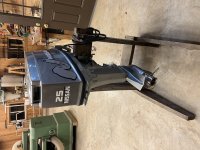
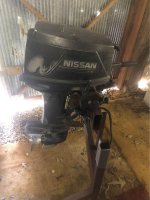
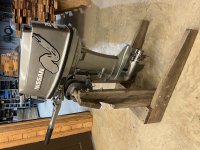
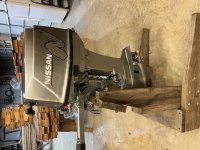
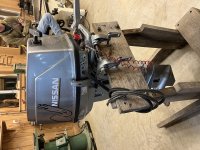
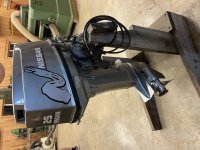
This is no longer on my workbench as of last night. The outboard Thomas bought and we restored is complete. It took forever to get the lower unit back from the repair shop. Since the housing was brand new we had to send it off to have the gears properly shimmed by a factory trained mechanic. There are very tight clearances that have to maintained or the gears will eat themselves. The original lower unit was cracked and gears trashed so we bought all the parts and built a new one. The lengthiest part of the restoration.


291059451_4049068308550963_4283598964337463062_n.jpg
Before Photo. The condition was much worse than this picture shows.

After photos.


IMG_5365.JPG

IMG_5366.JPG

IMG_5368.JPG

IMG_5370.JPG

IMG_5374.JPG
 
Eric,
Setting gears can be a real PIA if one does not do it on a regular basis. As you said, everything must be just right for longevity. Did you get your babbit bearings on your wood working equipment, scrapped in to satisfaction?


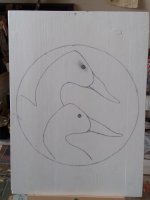
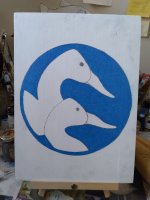
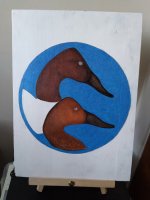
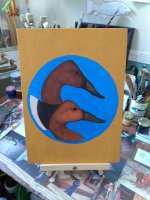
13 3/4"h x 10"w oil on wine case lid sign. Decoys ala Ned John Hauser 1826-1900 Sandusky, Ohio. Soon to migrate to Ohio.

Duck Shack drawing.jpg
Duck Shack first layer.jpg Duck Shack third layer.jpgDuck Shack fourth layer.jpgDuck Shack sign finished.jpg
 
Dave

Not only that, but it requires a special tool that is no longer available from Tahotsu/Nissan. Typically one doesn't have to re-shim after it is set up from the factory. Since we bought a new lower unit housing it has to be done like the factory would do. This makes it an uncommon job and I had to call around a lot to find someone with the tools and know how.

BTW, we fired the motor up for the fist time tonight. Not sure how many years it has been since it last ran, but it ran great. Time to put it on the boat and head to the river.

Eric

Edit: I did complete the babbitt scraping. In fact I completed the machine Friday night. Just too busy to get pictures of the finished machine this weekend. Maybe this week I'll get some good pictures of it and how it works. I did make some test cuts and am very pleased.
 
Last edited:
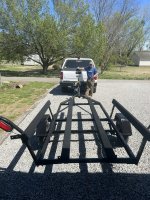
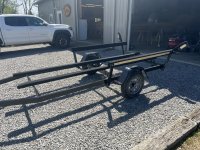
I've been covered up with projects since duck season ended. Not only did we finish the outboard today but we also completed the trailer. All that is left is the hull, a War Eagle 1542. Thomas will probably start stripping the old paint next weekend.

We are happy with the way the trailer turned out. Thomas paid a local place to sandblast the frame. We then primed, painted, re-wired, carpeted and installed new bunks/guides, and installed new hubs. I'd say she's ready for the upcoming season road trips.


Img_5381.jpg


IMG_5380.JPG
 
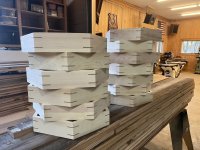
This was a busy weekend, not only did we finish up the motor and trailer, but Friday night I was asked to help a friend who is getting married. They need some table decorations for the rehearsal dinner and wedding reception. The groom's mom saw hexagon frames on Pinterest and asked if I could make it. We knocked out thirteen Sat and today. Varnish is drying as I type this. They are white pine with cherry splines. I'm rather pleased with how they turned out.


IMG_5388.JPG


IMG_5390.JPG
 
Last edited:
Rick

They were not, but I do have it up and running and made some test cuts. I planned to take pictures/video of the box joint machine over the weekend but this hexagon project was an emergency job and bumped those plans. The splines were cut with a jig on the table saw. The jig was a box that held the hexagon on an apex and you push it along the fence through the blade. All the angles are 30 degrees so one set up was all it took.

Eric
 
[size 5] Man, Eric ! Is there anything you can't do in that shop???? The transformation of that outboard is a thing of beauty.

Vince: I'm beginning to wonder about how you keep that pipeline of wine case lids coming in [sly] Beautiful cans.

Steve: The weather never keeps you in need of something to occupy you time.

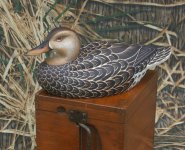
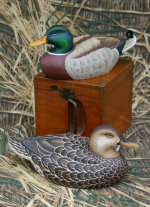
We've had a cold, windy, & rainy week here. I got a lot of time in the studio and finished up the spatter-painted hen mallard to the cork gunning pair I was working on.


IMGP9171.JPG


HenMall.JPG

Flicking in feather splits:


IMGP9255 (2).JPG


IMGP9270 (3).JPG
IMGP9277 (2).JPG
 
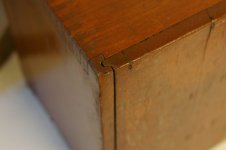
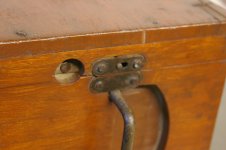
Bob, Thanks. Not to detract from your gorgeous decoys, but can you tell me about that box? The construction is outstanding. It kind of looks like the handle is also the latch. Very cool.

Eric
 
Last edited:
Eric Patterson said:
Bob, can you tell me about that box? The construction is outstanding. I

Eric

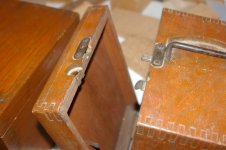
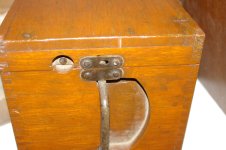
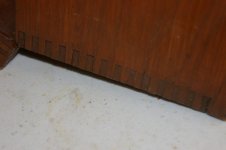
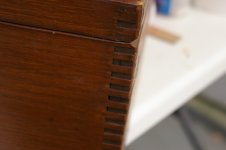
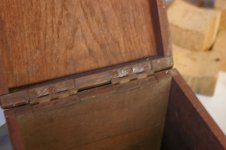
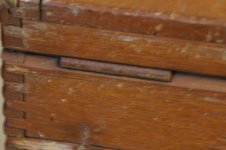
Eric, I came across two of those boxes some 50 years ago while helping clean out a storage barn for the widow of a gentleman who had been in the business of selling heavy construction equipment. She told me that her husband had supplied most of the heavy equipment used in the construction of the Bret Spence Bridge, which is the main artery across the Ohio River into Northern Kentucky at Cincinnati. They appear to be oak and have been assembled using box finger joints. They had a large parcel of property in what has always been one of the upscale areas NE of Cincinnati called Indian Hill. I used to fish a pond on their property. The property was sold off quite a while back sold to a developer who put custom built homes on it.

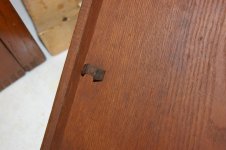
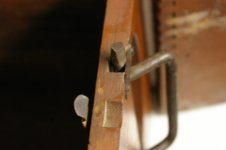
There is a metal tang latch that slides behind a pin with a button as well as a tang on the handle that locks down the top solidly when the box is being carried with the handle upright. I am assuming they were used to carry some sort of tooling for equipment. There is also a spring U-clip off to one side inside each box lid. Besides using them for picture taking props, I have always stored my poured lead decoy anchors in them..

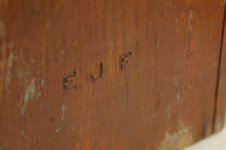
Took pics of the boxes for you:


IMGP9300.JPG


IMGP9301.JPG


IMGP9304.JPG


IMGP9305.JPG


IMGP9310.JPG


IMGP9311.JPG


IMGP9312.JPG


IMGP9314.JPG


IMGP9317.JPG


IMGP9318.JPG


IMGP9319.JPG


IMGP9321.JPG
 
Last edited:
Tain't no foolin' around this April, lots of very good work across the board.


Decoy Monster Machine, thank you. Yer capacity as a rig maker never ceases to amaze and inspire me. Man O Man.


Steve, you just keep on keepin on rehabing, and repairing gunning decoys and boats to gettem back into the fray. Mighty fine work.


Mr. Bob, my goodness. Your work is always "In The Zone" with your unique style and interpretation. The wine case lids were salvaged and free from liquor stores when wine came in wooden cases. Lids and wine boxes I've in good supply to take me deep into geezerhood.


Here's to The Geezer Squad of Duckboats. Salude!


Best regards
Vince
 
Bob

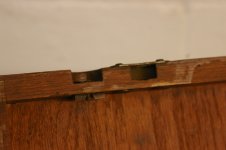
Boy I sure do appreciate you taking the time to provide those pictures. I have been wrestling with how I would attach the top and bottom on the boxes I want to build given the small fingers my machine makes which complicates hiding the top/bottom joints unless you do some sort of stopped plunged dado cut. That box circumvents my stumbling point by using T&G on the sides with open front and back. It looks both traditional and eloquent. I have looked at many box pictures and have never seen the joint done like that, but it makes sense.

Excellent reference material found serendipitously. Thank you!

Eric
 
[size 4] Eric,

I added that last picture specifically to show how those panels ( I considered them the top & bottom) were attached with a T&G arrangement. Glad it provided useful info.

Also wondered if the box might have been assembled and then the lid portion cut on a table saw one side at a time.
 
Bob

I thought that too but then noticed they used wedged T&G. Probably made that joint on the shaper. The fingers may have been cut on a machine similar to my box joint machine. I think the box is age appropriate.

Food for the woodworker's brain...

Eric
 
Back
Top