Broadbill patterns

Ed L.

Well-known member
Supporter
After putting up the Christmas tree and watching the Packer's game I decided since I haven't pushed a pencil on paper or anything else for that matter in some time, I thought I'd layout the various parts of the Broadbill on cad so I can plot full size patterns. The purest will most likely want to loft the lines on wood. For me I'd just as soon not have to get my electric eraser out. Also if anyone has a scarfing tool for a circlular saw that would consider renting for a weekend, I'd like to talk to you.

Take care.

Ed L.
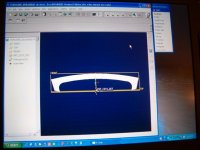
bulkhead.jpg
 
Ed,

Cool. I did not find lofting the traditional way all that tough, and a few nails and batton were cheap, but, if you can find paper big enough..... Sometimes it is good to embrace the technology.

Did you decide on any modifications, and what size wood you are going to go with?

Even with the electronic patterns, you may still want to make luan "try" bulkheads prior to cutting the good wood. Sometimes things do not turn out quite like the plans list. Good luck with the project.

Take care!

-Bill
 
Last edited:
Hi Bill,

The main reason I used the cad system was I have it and I have access to a plotter with the full size sheet capability. I like being able to "nest" the various parts on the pywood sheet prior to cutting so I know I'm not running short on material and not creating a bunch of scrap.

I'm going to stay pretty close to the plan. The material I could find locally is 3/8" and 1/2" which is what the plans call for. I did buy some laun to cut patterns to check fitup before cutting the good stuff. The first thing I'm going to do is make a full size mock-up using card board. I think If I do anything I'll add an inch to the side panels to increase the height and increase the radius on the decks. As far as length, I haven't convinced myself that increasing the length of the boat adds any benefit.

Ed L.
 
Ed,
Don't worry about a scarfing tool. Just stack them up with the right amount of stairstep and work it out with a belt sander, have done it that way every time and works great. Full size patterns sound like a great idea, then you can keep them for the next one. OOPs not supposed to do that. Keep us posted on the progress. I am going through a bit of the "no boat started" shakes.
Shiny side up,
Wicker T, Walker & Charlie
 
Can it pull the sheer and chine after you are done to check for fair? All you need now is a cnc router and you wont even need a skill saw.
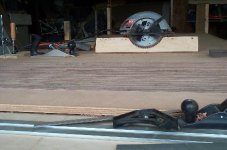
I built my own scarf jig. Easy. Two pices of 1"x6"x12" pine with your scarf bevel cut on a side each. Attach them together with screws and glue. Then reinforce the inside of the angle with two 1x triangles screwed and glued in as gussets. Clamp the rig to my 8" makita skill saw(10 inch would be even better) with a carefull measurment of blade clearence and then cut. Not for the first time saw user, but if you know your saw and are comfortable using it, it does work. Will finish most of the 3/8ths and about 3/4 of the 1/2 inch. Touch up with a sharp hand plane.
As others have said a beltsander works too.
If you want I will try to get a picture today or tomorrow.
 
ed,

just go ahead and print out two of those sets ;)

seriously.. i have the BBIII plans... i'm hoping they'll take a trade in or something on a smaller boat like the Bill.

Jeff
 
Ed,

How do you know what radius to use when laying out the hull panels on CAD? The radius changes from lofting point to lofting point. I can see the benefit from a nesting/material saving standpoint but I can't seem to visualize how you accurately loft on a computer. Personally, I'd layout the lofting points full size and nest accordingly but do a batten line like traditional lofting. It'd make me real nervous to trust a CAD lofted line.

RE: Scarfing. I know it appears to be real difficult process but in fact is really easy and you don't need a special jig. As others have said, set up your panels on a stair step with an 8:1 ratio and use a belt sander, power planer, etc. to cut them down. Takes a bit of time to do but not difficult at all.

Pete
 
Cool, Ed.
I made mock parts (bulkheads, etc.) from 1/8" luan trimmed to fit as needed, then used those as final templates to cut the real deal. Looks like most folks do (did) that....

Fun stuff!

Best,
Brian F.
 
with you having access to the cad machine and your buddys CNC that makes things super easy . Full size templetes are the way to go if your using someone elses plans anyway
 
You have to be able to understand engineers and designers. Their thought process goes something like, " If I can draw it on paper or a computer screen, you can machine it out of the real stuff."

Ed, give me a shout when it comes time you need an extra pair of hands. If my schedule permits, I'll drive down for a weekender. Ditto on using a belt sander or planer. I used a hand plane and beltsander with good results. The other option would be a horizontal boring mill. Stack the wood up against a set of knees with the rotary table turned to the correct angle and mill it all off in in one pass. Take about 3 minutes to cut and an hour for setup and cleanup. hehe
 
Dave,

That did cross my mind. My brother works as a machinist for a company here in town. I thought about asking if he could sneak my plywood in and do a setup on the Mazak. He ought to be able to kick this out over his lunck break....hehe

Thanks for the offer. I may just do that. Give me heads up next time you're heading towards Dewitt for a visit. Hopefully I'll at least have something to show you.

Ed
 
Hey Ed,got a table saw? I fastened a 1x8 to my fence, set the blade at 10 deg(I think)...then made featherboards to hold the ply against the fence and ran my ply through it..1st sheet was a bitch but the rest were easy when my buddy showed up for a beer.
 
Pete,

To answer your question, I'm really doing the same thing on the screen as you do when lofting on the plywood. Where you use the edge of the plywood as your reference base line when measuring to place your points, I draw a 4'x16' rectangle that represents the two pieces of scrafed and glued plywood sheets. Then I'll draw vertical construction lines based on the 12" spacing as shown in the plans. I use the edges as my reference base line to measure from. Once I have points shown on the screen based on the station dimensions, where you place nails and hold your batten to produce the arch. I have the computer construct a spline line though the points which is the same as the batten line. Nothing to it.

Ed
 
I have a 10" Delta tablesaw. A bit small for what you did. I like your style though! If my wife saw me holding a 4'x8' piece of plywood in the vertical on my tiny table she'd have the hospital on standby. Hehe
 
Ed,

I'll second or third the belt sander method. I was surprised how easy it was. I took about 95% off with the belt and then moved to a palm sander. Easy peasy.

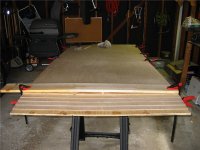
The setup - Scrap piece of ply on the bottom and then I used a 8:1 ratio to space my boards. The top sheet of okoume started to bow so I placed a small spacer in the middle and clamped it down. Everything was nice and tight.
[inline settingup.jpg]

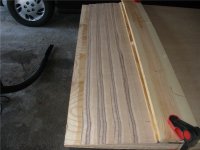
Use the belt sander to take it down. As you do, you'll see the ply's start to show through. I used these as a guide - the straighter the ply line the better.
seetheplys.jpg

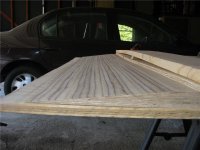
Here you can see the lines are getting close. This is just about done. I then used the palm sander to bring it in a bit closer. My wife enjoyed the layer of saw dust on her vehicle....
justaboutdone.jpg

Hope that helps, and good luck.

Hunt Safe.
Ryan

Settingup.jpg
 
A "spline line". Ah, didn't know that CAD had such a thing. I got all the other stuff but wasn't aware that they had an electronic batten the exactly mimicked the real thing. Nice to know.
 
Back
Top