Steve Sanford
Well-known member
All~
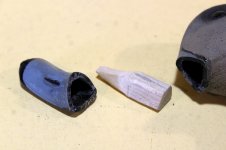
Having mailed 6 Herter's Model 63 Mallards and Wigeon down to South Jersey, I was disappointed to learn of a bit of damage to one bird:
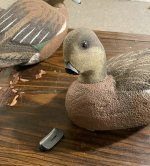
I thought I had packed and padded everything carefully. As the Bluebill head I put on this Wigeon was quite old, I cannot help but wonder whether the bill break was incipient....a hairline fracture I had never noticed when painting and installing it on a Mallard/Black body.
The owner had tried gluing it back together - but the repair failed almost immediately. He sent me both pieces - and so I set out to carve the necessary third piece for a strong repair. The White Pine was carefully carved to fit snugly into both the bill-tip and the face.
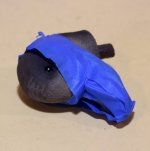
The wooden insert/plug was slathered with thickened epoxy (epoxy + fairing compound) and held in place with masking tape. I made sure the epoxy did not stray beyond the bill itself - to avoid having to refinish the face.
After making sure everything was snug and aligned, I put the head in a vise so that the bill pointed downward. This step is critical. It keeps the epoxy from moving away from the wooden plug inside the head during the curing process - when epoxy becomes less viscous before it hardens. Gravity ensures that the epoxy will surround the plug and the inside of the face and then harden.
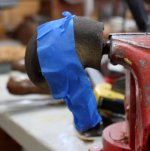
The next day the epoxy had cured and the seam was sufficiently tight.
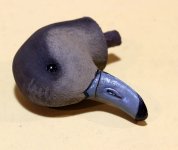
I sanded all around the seam with 80 and 120-grit paper before repainting the entire bill. After an overnight drying, I coated the whole bill (and eyes) with spar varnish (as usual).
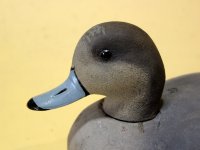
She will migrate back South in tomorrow's mail - to be re-united with her body.
More Model 63 adventures in the next post.....
SJS
Having mailed 6 Herter's Model 63 Mallards and Wigeon down to South Jersey, I was disappointed to learn of a bit of damage to one bird:

I thought I had packed and padded everything carefully. As the Bluebill head I put on this Wigeon was quite old, I cannot help but wonder whether the bill break was incipient....a hairline fracture I had never noticed when painting and installing it on a Mallard/Black body.
The owner had tried gluing it back together - but the repair failed almost immediately. He sent me both pieces - and so I set out to carve the necessary third piece for a strong repair. The White Pine was carefully carved to fit snugly into both the bill-tip and the face.

The wooden insert/plug was slathered with thickened epoxy (epoxy + fairing compound) and held in place with masking tape. I made sure the epoxy did not stray beyond the bill itself - to avoid having to refinish the face.

After making sure everything was snug and aligned, I put the head in a vise so that the bill pointed downward. This step is critical. It keeps the epoxy from moving away from the wooden plug inside the head during the curing process - when epoxy becomes less viscous before it hardens. Gravity ensures that the epoxy will surround the plug and the inside of the face and then harden.

The next day the epoxy had cured and the seam was sufficiently tight.

I sanded all around the seam with 80 and 120-grit paper before repainting the entire bill. After an overnight drying, I coated the whole bill (and eyes) with spar varnish (as usual).

She will migrate back South in tomorrow's mail - to be re-united with her body.
More Model 63 adventures in the next post.....
SJS
Last edited:


