March 2017 - What's on your workbench?

Good morning, Bob~

Love that Tallneck!

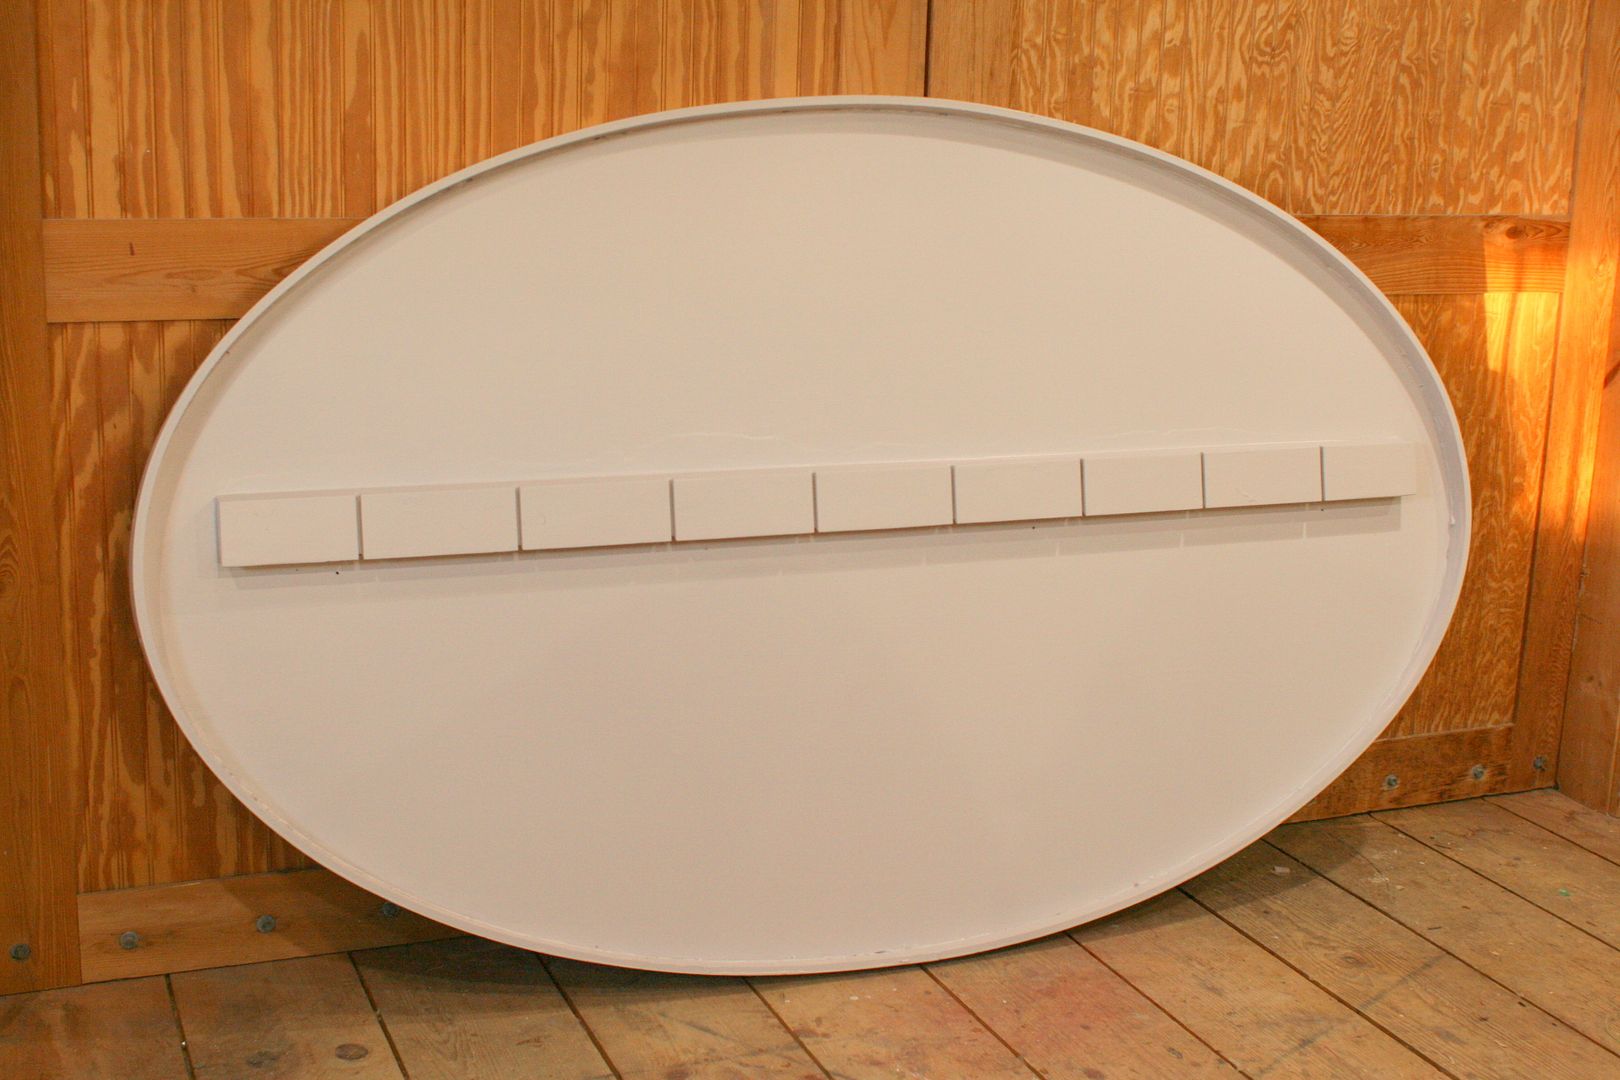
This project is NDR: a signboard for our local food co-op - of which my wife Susan has been board president of late. I dropped it off this morning for others to complete. And - best of all - I do not have to hang it 16 feet up on an old brick wall.

I used 3/4 -inch MDO. I consulted the web to help me draw the 48" x 80" ellipse. Lip/banding is PVC lumber. I used half-inch to make the tight bend and then doubled it on the face to get the "right" proportions.


Co-op%2001_zpstwshsfxl.jpg


Co-op%2002_zpstiggblhb.jpg


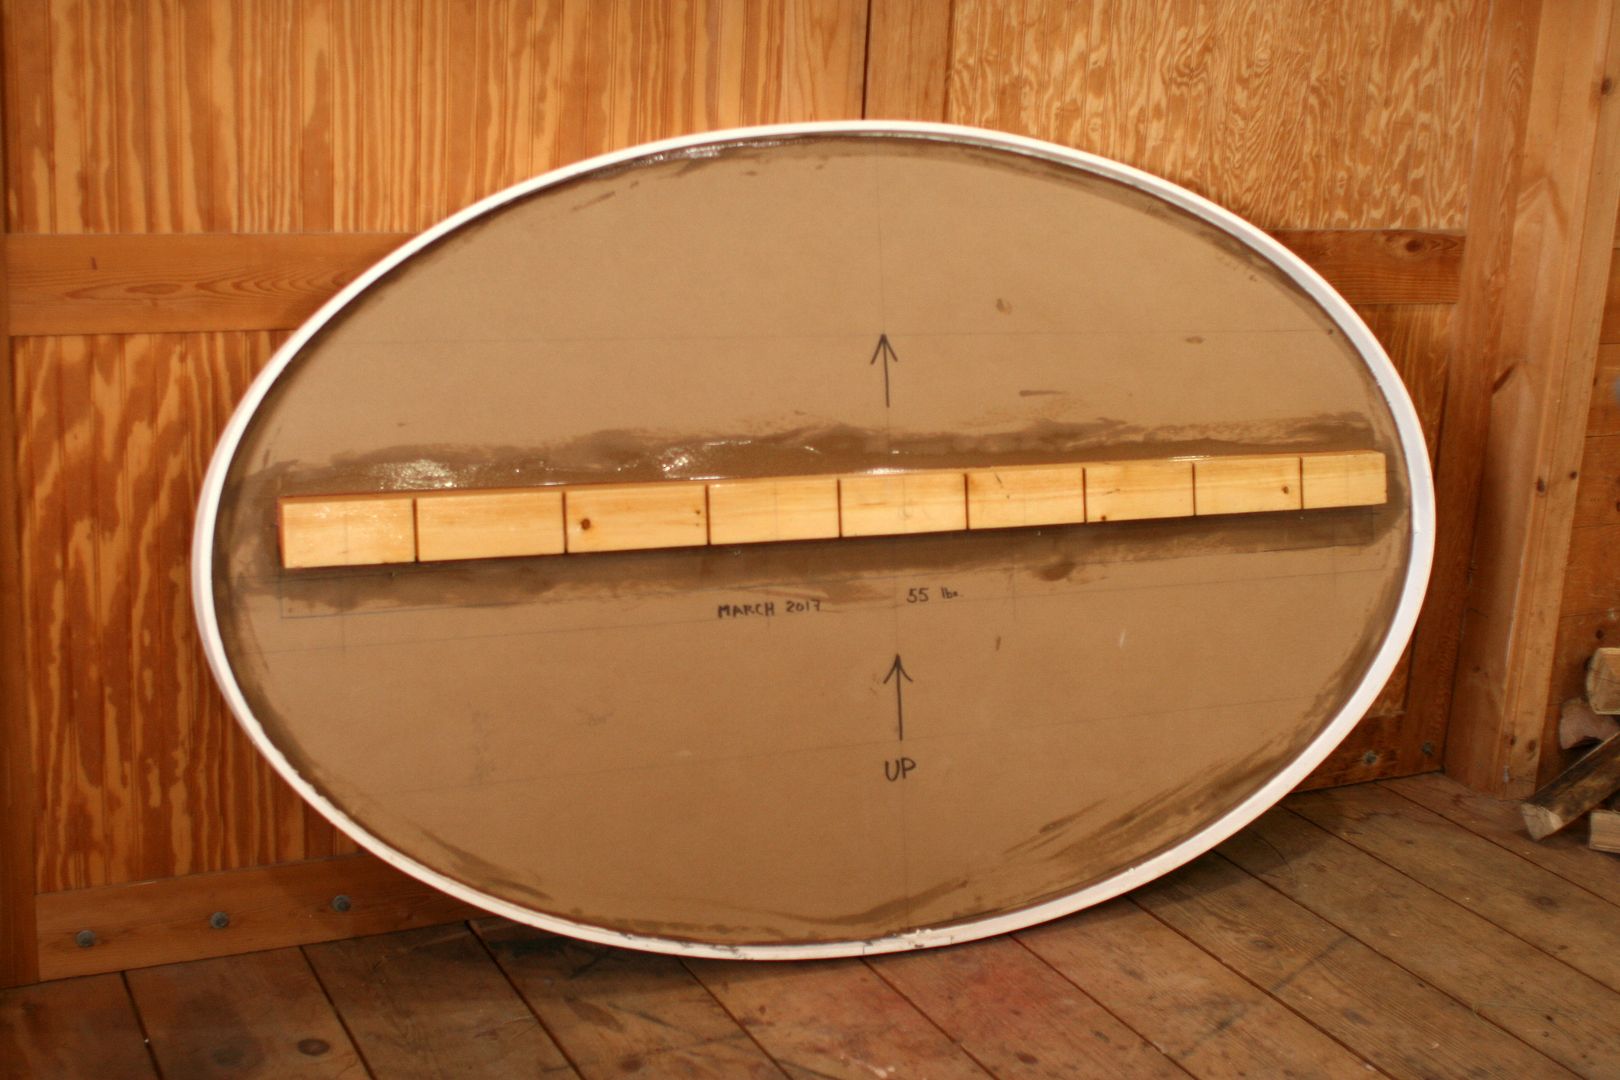
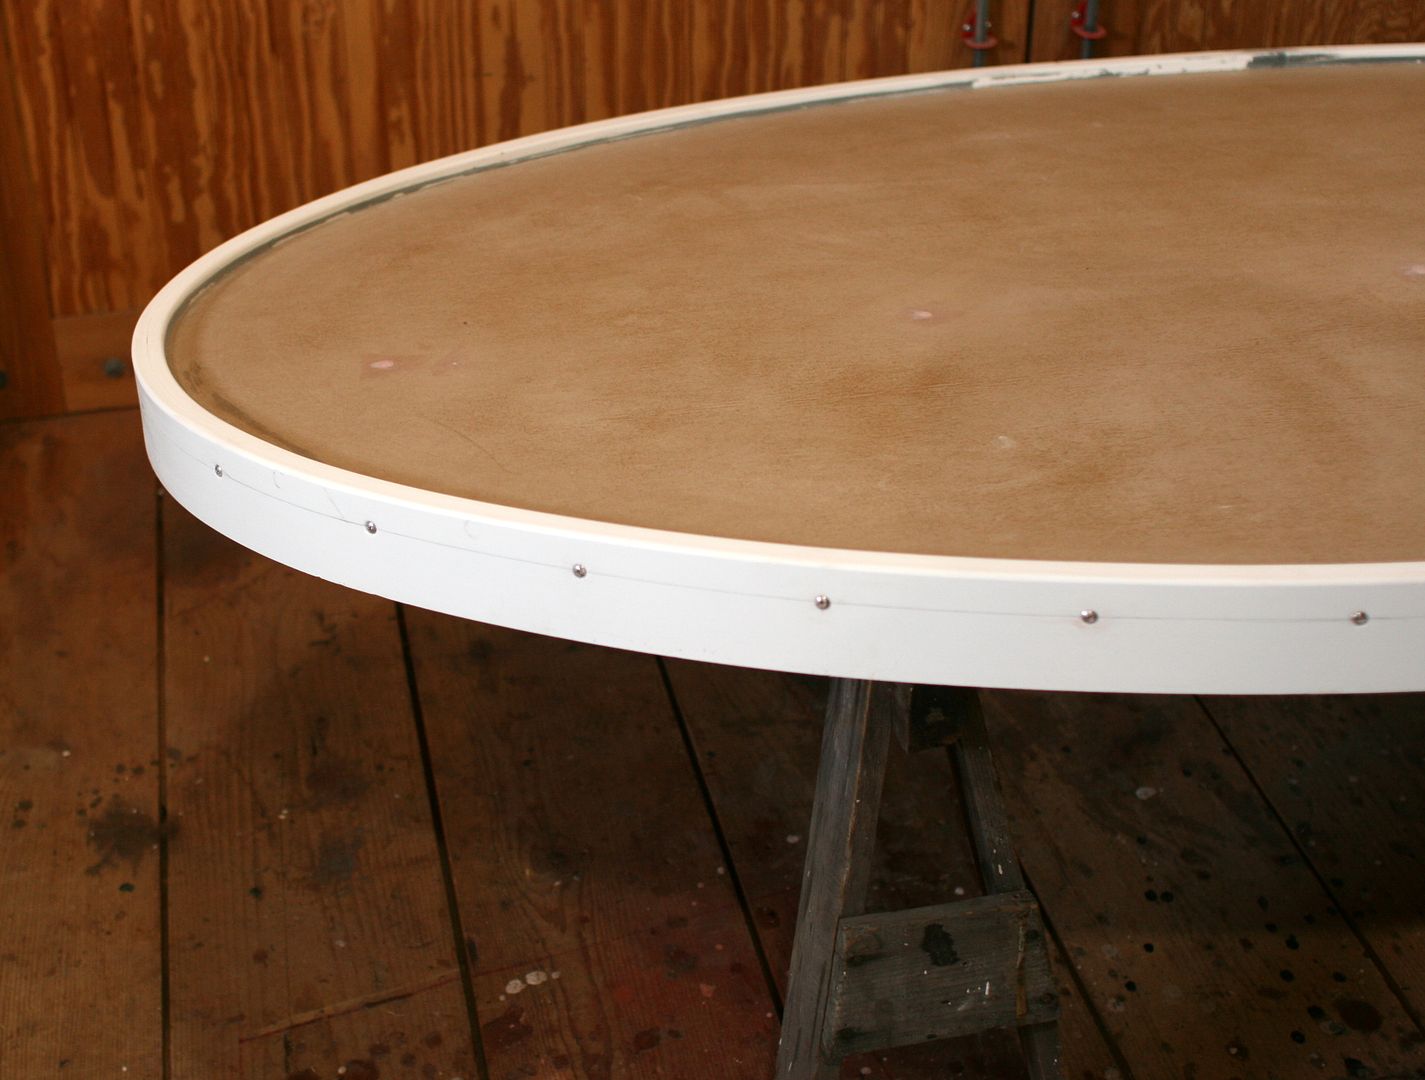
It's primed with 2 coats - then 3 coats of latex enamel on the face.


Co-op%2003_zpsbxn7huzf.jpg


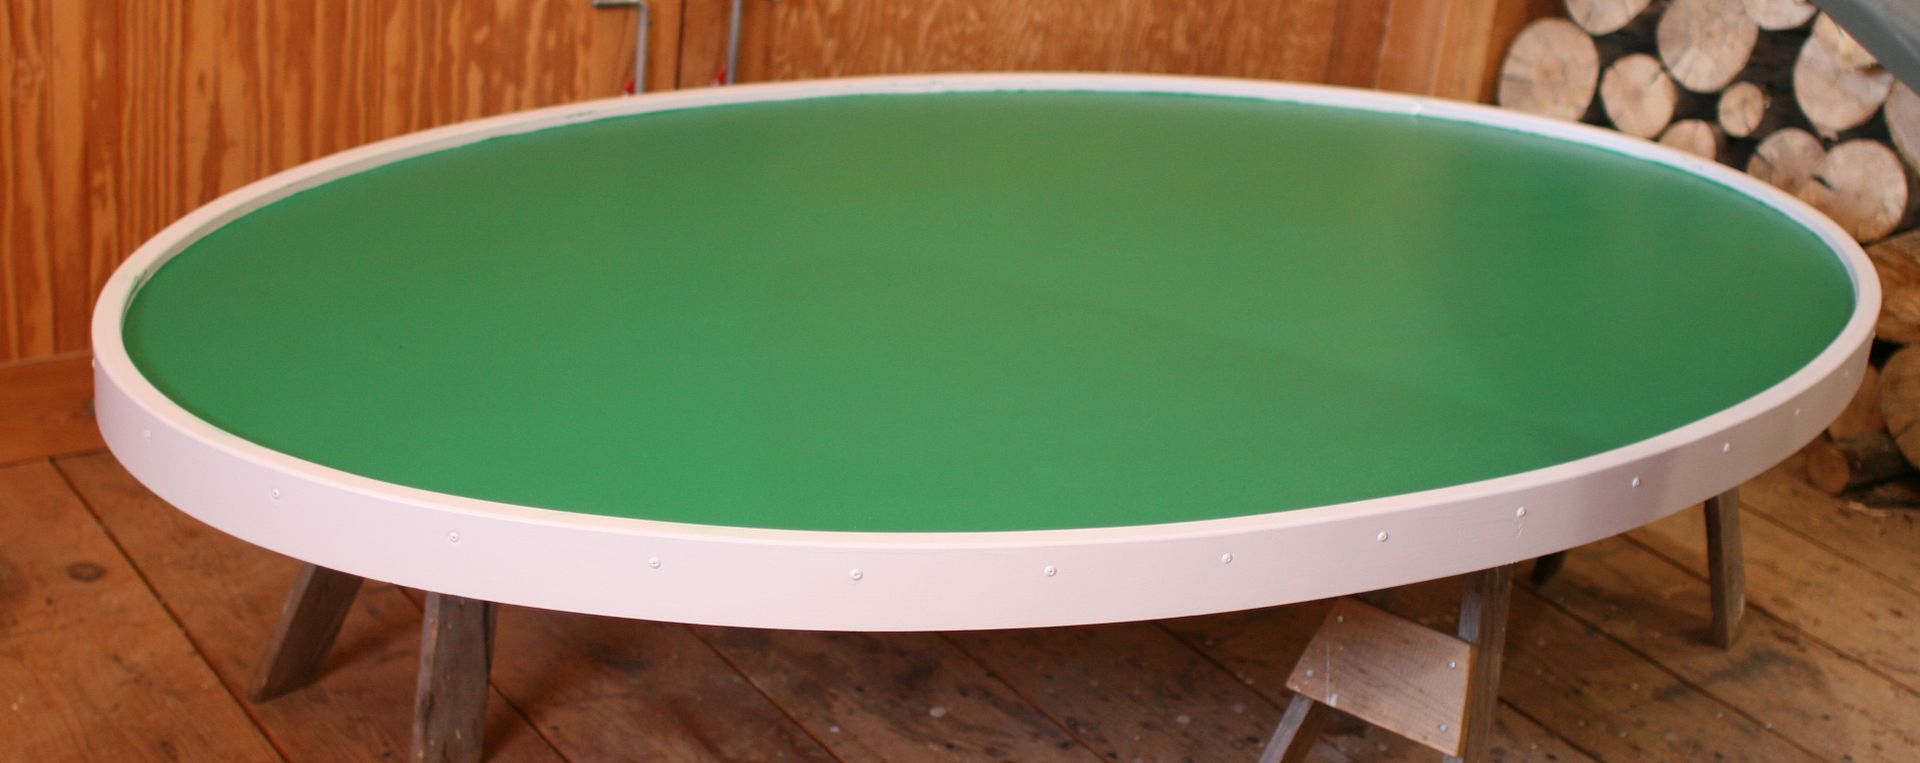
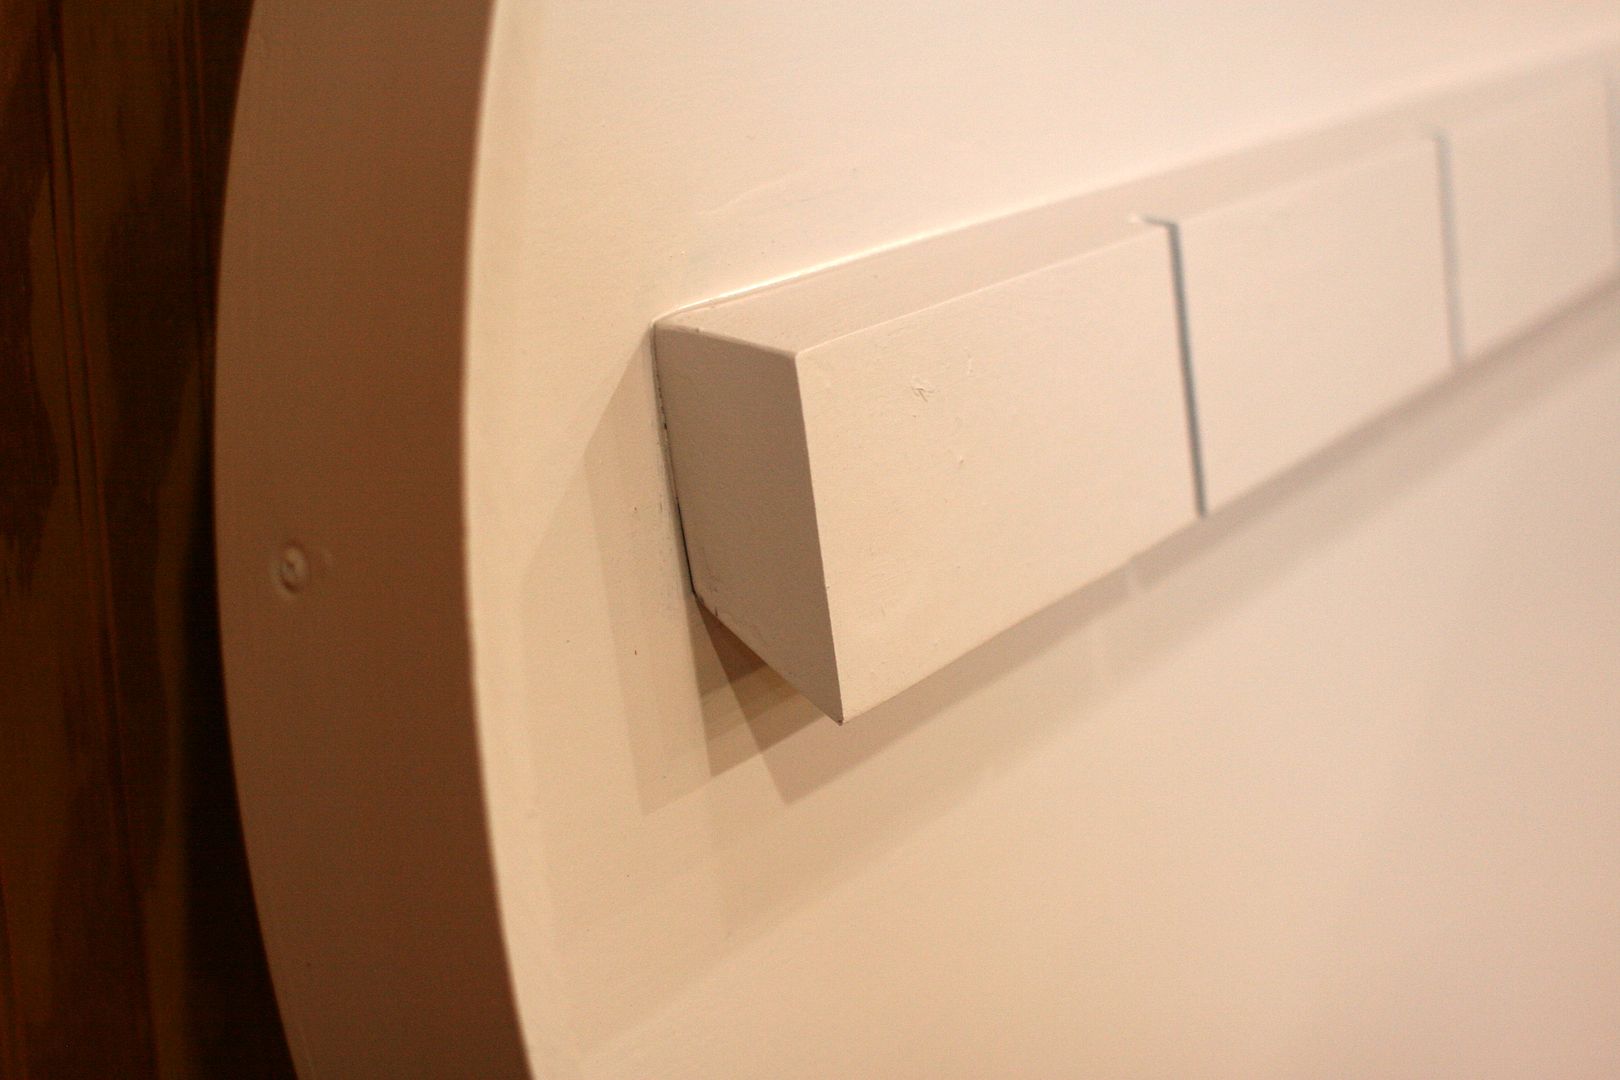
It'll be hung with the "two beveled cleats" method. I also beveled the upper edge of the upper (signboard) cleat - and plowed scuppers every 8 inches through the wall side of both cleats- so rain will not lay on the installed cleats. The cleats are framing lumber - sealed with epoxy plus primer.


Co-op%2004_zps2bxmkcdz.jpg


Co-op%2005_zpsq2rrlupy.jpg


Now back to "DR" stuff......

All the best,

SJS

 
[size 4] Doggone Steve, between the engraved owl and the food co-op, you are becoming quite the "signage" pro. That food co-op sign is pretty hefty - I can see why you're glad just to be dropping it off for someone else to hang!
 
Nice fish Dave. Makes me think of trading fishing stories while sipping a little rum flavored drink. :)

Tim
 
Bob, is it anatomically possible for the primary feathers to exit at that angle and in that position relative to the tertials and speculum feathers?
 
Yup~ with the 3/4-inch MDO, the sign tips the Toledos at 55 pounds.

SJS

Holy moly. When I read your comment I had to go back and look at the sign... I think I skimmed over the 48x80" comment the first time around... I was thinking how is it possible that sign is that HEAVY!?!
 
Steve, Beautiful Black Duck Decoy , I am sure he is very Proud to have it . It was very nice of you to do one for him & he will always treasure it.
 
Bob, is it anatomically possible for the primary feathers to exit at that angle and in that position relative to the tertials and speculum feathers?

[size 3] Absolutely, Rick. The primaries hinge at the carpal joint and fold under the secondaries that form the speculum. As such they will exit at a wide range of angles depending on whether they are fully crossed or dropped and relaxed. My concern on this bird is that the trailing edge (lower) of those primarieswould line up in a manner consistent with where everything folds into the leading edge of the side pocket. This picture (....taken before I shaved more surface from a way too high "shoulder" area - may show that angle better.
View attachment prim.jpg
I like to drop the primaries on most of my working puddlers and divers as it is easier on the wear and tear that they'll get when carved in a raised and crossed depiction. If you look at working Cans by Schmeidlin, Joiner, Schmidt, The Wards, Ben Heineman, etc, etc you'll often see this dropped & relaxed position used.
J.S.:
View attachment Schmeidlin2.jpg
Ward:
View attachment War.jpg

Oftentimes the downward angle of the lower edge of some of the primaries (at the point they enter the rear edge of the side pocket) on these carvings wouldn't line up with how they'd look if anatomically correct, but I think that's more of a function of trying to keep what they're depicting within the shape of their block. Overall. they make it work magnificently. Of course that is the key with any good working bird - did you pull off the essence with your depiction regardless of anatomical perfection. If not, those things will stand out as glaring errors. If so, not so much.
Charlie Joiner:
View attachment Joiner.jpg

What would be unlikely is the angle at which you depict the speculum feathers radiating on the Can hen you have posted above. There wouldn't be such a severe downward angle to that part of the secondaries with the wing folded and primaries crossed. The flow of the your neck joint into the breast is also awkward, and the breast itself looks pinched and undersized in proportion to the rest of the bird.
 
Bob ~

Great examples from some true Greats! I love them all but that Charlie Joiner really grabs my eye.

I am re-posting a diagram I drew a few months ago to help a carver on this site. It reinforces your discussion and (I hope) provides a useful message: Whether you are drawing a 2D pattern or onto the decoy itself, it's helpful the lay out the entire wing(s). Because birds' postures vary so much, you can decide whether they cross or relax or droop. (As a matter of personal style - for about 35 years now - I usually carve my wooden birds with the tips meeting on the centerline, one lapped over the other.) You can also decide how much (if any) of the speculum to show, etc. And, some of these drakes have some pretty fancy tertials, too.


Wing%20Feather%20Groups_zpskx45rfm0.jpg


Another trick is to save some wings from the season - then lay them right onto the carved bird.


All the best,

SJS

 
I started saving the whole skin. It has really helped in understanding how the feathers work compared to your pattern. Some day I will clean it up and make a study mount and some wing and tail displays.

IMG_1277_zpss5ngzdm5.jpg
[/URL]

IMG_1294_zpsefwjuotc.jpg
[/URL]
IMG_1293_zpsmfmcp8ca.jpg
[/URL]


IMG_1292_zpsvcm0qhd9.jpg
[/URL]
 
The other decoys you post all have the outside edge of the primaries flowing back at an angle to their wingtips, toward the top mid-line of the body, not running parallel the water line. To have them run parallel the water line they would exit lower, with their tips nearly intersecting with the horizontal plane of the tail feathers. Plus the primary field is far broader than the reference decoys, as well as an actual canvasback's. I ask that you to keep in mind I have never offered criticism of your birds prior this. I know how you strive per Joe's influence, "to only carve what is there"!

Thanks for the critique and tips on that balsa hen can. I had to cut away a section of breast that was far too soft and dry rotted, the principal reason I never completed this decoy with the others I made earlier, it isn't symmetric, due largely to having to piece it together from remnants from the remains of the life raft the balsa pieces came from. This is the hen photo I used for reference on head and neck placement:


Didn't take your post as criticism, Rick. Just answered the question you posed best I could.

Not sure what your reference to the flow of primaries on "my other birds" refers to, but you seem to have a far broader grasp of the anatomy regarding primaries & secondaries than necessitated your question.
 
Good morning, Bob~

That Hen sure looks nice and warm with her down "cloak"....

Question: Do you hollow your cork birds? If so, how thick do you leave the walls ? And, do you use epoxy or polyurethane (Gorilla) to glue the cork to the wood ?

I've been using epoxy on my tail inserts with good results but have not tried polyurethane.

All the best,

SJS

 
[Size 4] Morning Steve,

I haven't felt the need to hollow the cork birds due to the type of hunting I do with them here. It's usually out of the TDB boat blind and I carry them in pocket bags I've rigged to hang from the shelves & gunnels. Have always used Tite-Bond II for all the glue ups on both bottom and tail boards, and have never had an issue with separation of any sort, as I am sealing the birds well. In fact when Tite-Bond III came out, I couldn't see any advantage to changing. I do run a dowel peg up through the bottom board through the tail as well.

When I peg the head and tail, I am coating the dowel rod with epoxy.

View attachment Caspercans.jpg
 
Good morning, Bob~

I see from the photo that your birds are not "self-righting"......

(Actually, I was struck by how you, too, use the cork "cut-offs" as handy supports. I use them as padding when I am hollowing my wooden birds on the drill press.)

All the best,

SJS

 
Back
Top