Advice on sneakbox - AA Broadbill or MLB Wigeon

With no help to turn the boat over I picked at a few things that were bothering me.

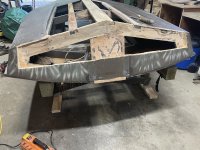
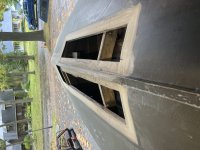
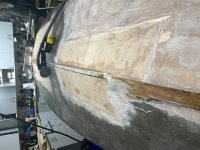
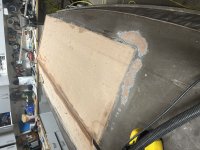
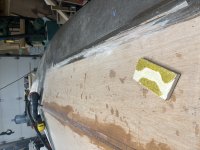
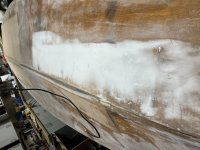
1: Rub Rails - there are a couple of sections of the rub rails where there are gaps between the rail and the hull. Using a heat gun and putty knife, I was able to release a section of the rail. I thought the rail was separating from the hull, but it was a bad fairing job. With a bit of sanding it fits tight to the hull now. I'll epoxy it in place later.
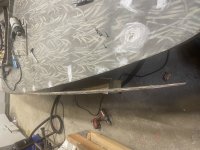
IMG_2367.jpeg
IMG_2370.jpeg

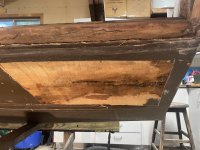
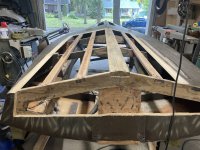
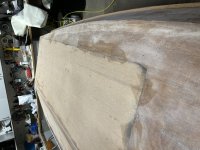
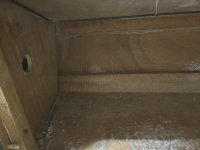
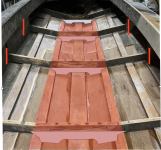
2: I took to sanding the inside of the hull. I've bared large sections and the water damage appears to be restricted just to the areas I'd discovered previously. nothing new :). Those blocks between the battens in the front of the boat were located at butt joints between the sheets of plywood. I did find the in the plans. They were nailed and bedding in that black rubber like compound. I failed to keep the water out and I removed them.
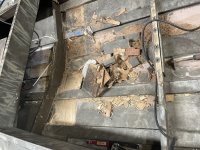
IMG_2360.jpeg

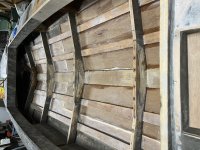
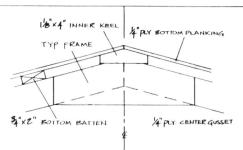
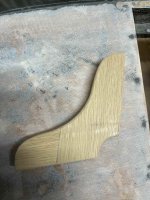
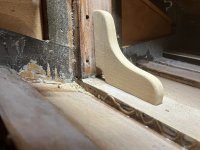
3: The frame are made off 5 pieces. Three pieces that form the frame and 2 plywood gussets. The looked like places that could hols water so I removed them. Small areas of one Rame has a little water damage and all were damp under that black rubber company. With the plywood and rubber removed, and sanded they look in good shape.
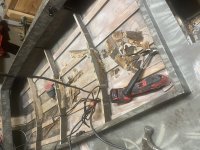
IMG_2371.jpeg

I'm not sure what kind of wood was used. The battens and rub rails have a pinkish/red tinge; I'm guessing mahogany. The frames, rub rails, and I think the inner keel are all oak. They seem to be in great shape despite being a bit damp and I'm guessing white oak.

Lots more sanding to go.
 
Scott

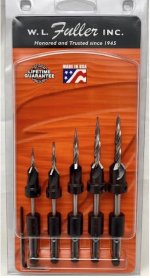
Those pictures tell me a whole lot more about the condition. The boat has a TON of life left. It seems like you have a pretty good handle on the damage area now and I don't see anything that can't be dealt with. If you were closer I'd say bring it to my shop and we will knock it out. For good measure you might consider countersinking some #8 or #10 bronze screws (Jamestown Distributors supplies them) in the rub rail and epoxy over the heads. That will both clamp them while the epoxy cures and give a bit more holding strength. If you use traditional wood screws (I would) be sure to predrill with the appropriate tapered drill bit like a Fuller.

Fuller.jpg
 
Last edited:
Hey Eric,

The rub rails were bedded in that black rubber compound, counter sunk and screwed. I don't know what kind of filer they used on the screws, I sanded off the paint in it was a white filler. It was hardened but not epoxy -- I used a small drill bit to make a hole in the filler, they were Robinson head screws and I just tapped the screw driver with a hammer and the all came out easily. They were 1 1/4 : ss screws.

For those Frearson head screws - do you need a specific screwdriver?

Would be nice to drop by your shop ... as I mentioned a couple of days ago I sought out a local boat builder. He's retired and his website is still running but updated (https://www.vexcel.ca/). He's a wealth of information and welcomed me to the shop anytime.

Anyway, I'm still learning...
Thanks
'Scott


IMG_2368.jpeg
 
I've not been able to flip the hull yet, but with a block and tackle I was able to get it up on one side so I can access the bottom. Bottom looks good. I have a couple of questions.

  • I mentioned before I was thinking about double up the floor by added 1/4" plywood filler strips between the battens. This would bring the hull thickness to 1/2". It would stiffen the hull a lot and make those 1:8 scarf joints in the plywood patches less important. Except for a bit if extra weight, I cannot see any negatives. Does anyone have any thoughts?
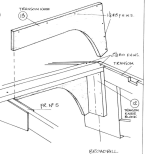
  • I've attached a screen grab that shows the attachment of the transom knees to the transom. The knees were screwed to either side of the inner keel and the transom knee block. In one of the early pictures I posted it shows the pump mounted between the knees. I did not like this design as the pump could not access all the water either side of the knees. When I replace the knees, I'm thinking of a single knee in mounted in the middle of the transom with a limber ole at the back. I have a couple of nice pieces of 2" white oak that I could for the knee. Thoughts?
  • On the same issue, the water also gets dammed on the outboard side of the battens. The battens look like they are let into the transom and I imagine they provide some strength to the hull. I'm also thinking about cutting mortise in the battens near the transom to allow water to drain. If I added another layer of plywood to the bottom, this would leave 1/4" of the batten intact. I was thinking of adding some small braces at each batten to attach the batten to the transom to make up for any strength lost by mortising the batten. Is this a stupid idea?
  • Finally, is it necessary to remove all the paint, or do I just need to roughen it up before applying epoxy for the patches?
Thanks
Scott
Screenshot 2024-10-06 at 12.21.29.png
 
Scott

I wonder if the black and white compounds you are finding are 3M 5200 or Sikaflex. In either case they are sandable after cured so you should be able to remove it where needed.

Frearson do need a Frearson, aka Reed Prince, driver. New impact bits are easily found online. The last time I looked for a screwdriver of that config nobody made it, so I turned to ebay for a used one. I just checked and there are several "Reed Prince" screwdrivers there now.

I'd definitely take up the boatbuilder on his offer to help. You might only need to stop by his place with some pictures from your phone to get good pointers from him.

  • I mentioned before I was thinking about double up the floor by added 1/4" plywood filler strips between the battens. This would bring the hull thickness to 1/2". It would stiffen the hull a lot and make those 1:8 scarf joints in the plywood patches less important. Except for a bit if extra weight, I cannot see any negatives. Does anyone have any thoughts?
This sounds reasonable to be. I don't think the weight added will be of any significance and it will be stronger. Be sure to seal the gluing surfaces thoroughly with epoxy and them use thickened epoxy and some weight to keep out any voids between the layers.

  • I've attached a screen grab that shows the attachment of the transom knees to the transom. The knees were screwed to either side of the inner keel and the transom knee block. In one of the early pictures I posted it shows the pump mounted between the knees. I did not like this design as the pump could not access all the water either side of the knees. When I replace the knees, I'm thinking of a single knee in mounted in the middle of the transom with a limber ole at the back. I have a couple of nice pieces of 2" white oak that I could for the knee. Thoughts?
I like that idea. I would epoxy and glass the knee in with a nice fillet and three layers of 6 oz 4" tape. The larger the bonding area the better. Good prep should result in a strong bond. I might use a #12 screw or two counterbored and sunk into the keel and also into the transom. I would do this in two steps. Epoxy paint all surfaces, use some thickened epoxy to bed the pre-bored knee into, and sink the screws. Then I'd go back and build the filles and glass. Some folks think white oak is incompatible with epoxy because it expands/contracts and can break the bond. I've never seen it and doubt that would be an issue on a chunk like a knee.

  • On the same issue, the water also gets dammed on the outboard side of the battens. The battens look like they are let into the transom and I imagine they provide some strength to the hull. I'm also thinking about cutting mortise in the battens near the transom to allow water to drain. If I added another layer of plywood to the bottom, this would leave 1/4" of the batten intact. I was thinking of adding some small braces at each batten to attach the batten to the transom to make up for any strength lost by mortising the batten. Is this a stupid idea?
I think I envision what you are describing. I might make sure the drain plug is at the bottom of the transom in the lowest spot. For any water that hangs up on the battens I'd sponge it up if it didn't evaporate on the trailer ride home. In my boat I use so much camo small passageways would get clogged. That would be my concern. If you think you won't have that problem you can mortise a passageway but make certain you seal the heck out of it because water will get in there. This is one of those times where keeping the boat clean and dry goes a long way towards avoiding issues.

  • Finally, is it necessary to remove all the paint, or do I just need to roughen it up before applying epoxy for the patches?
Affirmitive. Epoxy bond strength is greater than paint bond strength. I always go down to good clean wood and build back up with glass and epoxy. If I go over paint it would typically be on the outer edge of the repair area where I'm feathering the repair into the existing hull.
 
Thanks Eric -- that's really helpful.

Yesterday I took to the hull. I had plans to make nice surgical removals of the affected areas of plywood with a router and a patterning bit. It was a good plan but in the end I hacked up the hull with a hammer & chisel and one of those multi-tools. What did they do before multi-tools?

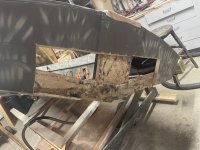
I cased the moisture removing areas well past any sign of water. I took of more that I'd had wanted, I had hoped that I could keep the sections to be replaced to under 4' as I'm about to get pieces of 4'x3' pieces if marine plywood sent by courier. Larger has to come by freight and get expensive. In the photo I've removed a section of the outer keel and the plywood on the port side, and have started on the starboard side -- lots of delaminated plywood.

.
The only additional problem I found is the transom. It transom consists of several layers. The frame is white oak and in good condition. The outside layer is 3/4" plywood and it was wet. So far I have just removed plywood to get to good dry areas. Youncan stir see some moisture in the plywood on the starboard side in this picture.
IMG_2382.jpeg

A friend dropped by and we flipped the boat. I continued to chase moisture in the transom. I'm in good wood now, but I think I should replace all the 3/4" plywood on the transom.

IMG_2386.jpeg

My thought was to remove as much bad bits as I cloud find, then reassess and see if it was worth saving the boat. All the framing and at the inner keel is sound and I will carry on -- of to get some epoxy.

Thanks again
Scott
 

Attachments

  • IMG_2381.jpeg
    IMG_2381.jpeg
    3 MB · Views: 7
I'm slowly picking away at the hull. I managed to source some local epoxy and not so local marine plywood. There was more water damage than I originally found. When I started to make the scarf joints on the plywood it was still damp in places and I had to enlarge the holes quite a but. Eric, you thought that black sealant was 3M 5200. What ever it was it is pretty tenacious and very hard to remove. I went thought a few multi-tool saw blades before I discovered their scraper blades -- these worked really well for removing the sealant and ok for hardened epoxy. Anyway, I have the scarf joints mad on the hull now and will hopefully work on fitting the plywood tomorrow. I plan to copy the shape of the transom today and maybe get all the 3/4 plywood off.

IMG_2392.jpeg
IMG_2395.jpeg
 
Scott

If it was tough as hell to get off, then yes, it is likely 3M 5200. You are making fabulous progress, and I can tell are serious about doing it right. I think the boat will see water this season after all. I see a table saw and a jointer in your shop. I didn't know you were a woodworker until now but am not surprised. You are making it look easy, and I know it isn't for many.
 
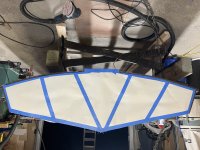
I would not say I'm a woodworker. In the last 10 years of my career I collected a few tools: a General 14" bandsaw, I rebuilt a Unisaw and a Makita 2030 jointer/planer thinking I would need something to do. Unfortunately my garage is not big enough for the boat and tools and I had to put everything on wheels and push them the side. I've mostly been building cabinets and wooden countertops. I tell my wife I can make really expensive sawdust. I say I'm a Google Scholar ... you can figure out how to do just about anything nowadays with Google and forums like this. Not sure of the proper way to do this. I created a pattern for the transom. I think I will make one of cardboard first to check the fit before I commit to making some expensive sawdust from that 3/4" marine plywood.IMG_2397.jpeg
 
It's been a while since I posted. I'm still slowly working on the hull and have a few questions and I hope someone can provide some advice. I managed to get 4 panels fitted in the hull. I'm afraid my scarf joints were not really pretty. I tried making a couple of jigs to cut the scarfs. The first one used my track saw and the second one my router. Both worked great on the short sides of the plywood, but not so good on the long edges. I was unable to completely take out the bow in the plywood -- in the end I used the jig to ruff it out and took the rest down with the hand plane. IMG_0006.jpegIMG_0005.jpegIMG_0007.jpeg

I'm sanding and fairing the hull now and they look a lot better. Not sure what I'm going to see when I tune the hull over -- I'm guessing I'll have some cleanup to do. I'm using a really slow harder with the resin. This was recommended by a local boat builder as it gives you a lot of time to work with the epoxy. I think this was great advice, but it's now -15°C outside and my garage is about 12° making it really slow. The epoxy drys hard, but the surface is tacky making sanding really difficult. From what I've read, this can be a problem with slow hardeners and too my oxygen. I've tried covering the epoxy with plastic and this seems to have solved the problems. Tomorrow I will turn the hull over and install the knee brace on the transom before I put the fibreglass the hull and transom.

I've been slow to put the fibreglass on as I'm not quite sure what to do a the edges. Should the are glass just cover the plywood patches, or can glass I over top of original glass. What I am not sure of is how to make transition between the new and old areas and keeping the hull fair. I'm guessing that I can feather the new glass edges with the sander, but I'm not sure about this.

On a completely unrelated topic, I'm wondering what to do for flotation. I'm not a fan of using 2-part foams - the foam in a couple of my aluminum boats became saturated with water adding ~150 lbs to the boat. I'm thinking about adding 1.5" rigid foam to the bottom side of most of the decking, maybe some big foam blocks under the deck at the stern. Maybe some foam under some of floor boards. These are just my thoughts and I'd appreciate any advice.

I will have other questions as I get the hull finished and start working on the decks.

Thanks and hope every one is enjoying the holidays.

Scott
 
Scott

I figured cold temps were slowing you down. I'm not surprised you can't sand. Last winter when I was making repairs it took a week for a good hard cure and it is a lot warmer here than there. You can either get some heat in your shop or just wait it out. Regardless, you've made a ton of progress and should be feeling pretty good about it.

As for the fiberglass, yes, you want to glass beyond the repair area, say 4" or more, and over old glass in the untouched areas. It's best to sand the paint off so the bond is that of epoxy versus paint. I know the last thing you want to think about is more sanding but that is what so much repair work is, filling, sanding, filling, sanding... You will find when you flip her over the same to hold. Any rough areas can be worked down or built up. When its done you want it sealed completely so a final flow coat or two of epoxy and a light sanding before primer and paint. The temps in your shop are going to make this project drag out. Some folks do that anyway so it might be an excuse you can use for your rate of progress :)

As for flotation pretty much everyone has abandoned two-part in favor of closed cell foam like what pool noodles are made of. Some folks use construction foam (the pink or blue stuff that comes in sheets) cutting and shaping to fit where desired. For the greatest safety margin you want foam in the bow and the rear corners. Three point flotation is the safest configuration. A lot of folks and even some manufacturers put it under the floor but I really don't like that. If that is your only physical choice I get it, but a swamped boat with a low center of buoyancy far below the center of gravity wants to capsize. Your broadbill may be so wide and the vertical distance between the two is relatively small so it won't capsize, but I mention it for the sake of others who apply flotation under the floor in different designs. Not a good idea when shit hits the fan and a life depends on the boat remaining upright.

 
Thanks Eric - I was not too sure how to transition between the new and old fibreglass. The boat had some floatation - there is a large enclosed compartment in the bow filled with pieces of rigid foam, and 2 compartments mid-ships on either side of the boat filled with a combination of 2-part foam and more pieces of rigid foam. I was planning to remove the flotation on either side of the boat was it is the perfect spot to store decoys. I was planning to install flotation at the transom -- your advice confirms that.

I did expose a small section. of the the bow flotation when I removed that section of the hull. It looked be in good shape, but it was humid in there. Te bulkhead does not look water tight and I'm assuming a bit of water got in there in the past. It's perfectly dry now, but is the only part I have not addressed. Not sure how to do it without removing the foredeck. I'm going to leave it for now. I think I will also install maybe 1 or 1.5" rigid foam under the decking - this will give some floating and it will be and on then sides of the boat which should increase stability if the boat is swamped.

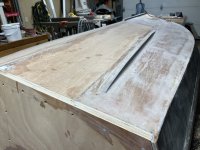
The hull is almost completely stripped and faired now. We just flipped her over so I can replace the knee brace on the transom before glassing the hull. I just recieved a small shipment of Wetlander bottom coat in charcoal and drab olive topside paint from Wearlon. I found reference to the Wearlon products somewhere on the forum -- if it is as slippery as they advertise I will also treat the bottoms of my canoes with this stuff.

Very good advice on flotation - lots of lives lost in the fishing industry due too stability issues. I'm still thinking about it for the floor boards - maybe good to fill it with water in the summer and see how stable it is flooded.

take care and merry Christmas
Scott

IMG_0012.jpegIMG_0013.jpegIMG_0014.jpegIMG_0015.jpeg
 
Scott

The repairs are looking great. This thread will be one referred to by many folks in the coming years as an example of how to make substantial hull repairs to plywood boats. You definitely have an aptitude for boat work.

Merry Christmas to you and your family.
 
If I were to start again, I would have taken that old boat builder's advice and build a new one. I really liked to have been building one of Devlin's smaller duck boats. That's said, I'm really enjoying the work.

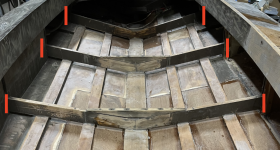
I initially thought I'd add another layer of 1/4" plywood between the stringers. When I was thinking about that I was planning to butt join the plywood patchers, although not really pretty, the scarfs worked well. I'm now thinking of leaving out the plywood adding a layer of glass to the bottom. I would have preferred to have the clean interior of a stitch and glue. The boat was built with frames and stringers. The frames are 2 1/4" high and they sit on 3/4" stringers. This raises up the floor more than 4" over the hull at the keel. I'm not sure the frames are necessary.

IMG_0033.jpeg

There is a chine log (I think that's what it is called) that join the sides to the hull. The next picture shows that chine long and a large plywood gusset that ties the frame together under the side deck.

IMG_0031.jpeg

I thinking I could cut off those frames where they meet that plywood gusset, and run glass filets along either side of the chine log. Regardless what I do with the frames, I'm thinking I will run fillets down either side of the stringers. I'd do this mainly so water cannot sit in that space and it would have the added effect of strengthening the hull.

I'm guessing this might not be a good idea, but I have to think with the inner keel and 4 battens all fitted with glass fillets that it would be as strong, if not stronger than a stitch and glue. This idea is really growing on me - I need someone to tell me not to do it.

Scott

1735255025361.png
 
Scott

I think putting fillets along the edges of the stringers and floor joint is a fine idea. It will seal the area off from water intrusion and if you follow through with glassing the floor that radius will make it easier to glass. Glassing hard corners isn't easy nor recommended. I think you can get away with a light weight cloth like 4 oz. for this application. Buy yourself some pastry bags and after you mix your epoxy and filler spoon it in the bag. You can then cut the tip off and squeeze consistent epoxy lines down the stringer edge. After that go back and make a radius with a tongue depressor or other suitable shaped squeegee. Once you get the hang of it the task won't be that bad.
1735313328056.png

I did not hear any comments about cutting off the frames at the side-decks and removing them so I'm assuming it might not be a good idea. I'm still thinking if glass reenforced fillets were run along the chines and stingers it would as strong - if not stronger than a stitch and glue.

Thoughts?
 
Scott

That picture clarifies your intentions. It's really hard to say if that would compromise the hull or not with certainty. I don't think I'd be comfortable doing it. Over the years I've seen several hull cracks from stress, my boats and others, and every one of them was due to inadequate rigidity from port to starboard. When pounding waves boats want to open and close port to starboard and that creates cracks running fore and aft. In fact I've never seen cracks running port to starboard, always fore and aft. This to me is a real indicator you need the structures that tie left to right, like the ones you propose cutting. Further, damage is most likely to occur where strong rigid structures stop and empty into nothing more than plywood. Stress concentrates at these points and can cause the plies to delam or even crack. I made that mistake with the first boat I built and I had to go back and rework things.

If you want to gain some space the frames look tall enough to cut down, maybe an inch, and still be up to the task. We haven't discussed the floorboard, but if you bond it in place it adds an incredible amount of rigidity to the hull. Some folks hate that idea due to the problems it creates if you need to work beneath it. I've not suffered through that experience, but I do know my boat became incredibly rigid after bonding the floor and glassing it to the hull the entire perimeter. On that thought I can see dark circles where your floor was fastened down. I've seen that grow into rot on some boats, especially ones left out year round. Healthy use of 3m 5200 to bed your floor can eliminate that, but you are bonding the floor.

Hope this gives you some food for thought. I've no doubt your solution will work well. I've yet to see a misstep.
 
I kind'a knew your answer. I'm still tempted - if they fail it would be a good reason to build a new one ;-) I don't like the idea of attaching the floorboards as mud, hulls etc. tend to cumulate there and they are hard to clear. But it does suggest a compromise that might make the hull ridged port to starboard. If I removed the frames I was thinking of only have the floorboards run between the battens either side of the keel. If I did this the floor would be ~2" off the bottom an just run done the centre of the boat.

Maybe I'd leave the front 2 frames in place (under the front deck) and add small frames/bulkheads at each frame (grey in picture) and fix the floor to the top of the bulkheads and the stringers on each side (red).

1735318528607.png


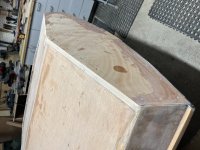
I just finished up a new knee brace for the transom. It's made of pieces of 1.5" x 3" white oak that are epoxied together.


IMG_0036.jpegIMG_0037.jpg
 
Back
Top