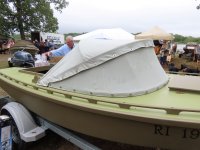
Bud Miles #82

Jamu

New member
Well, it's been a minute since I last posted (life!) and since this site started my obsession with sneakboxes some 20-25 years ago, I owed a post on a recent build.

For the past 15 or so years, I have been hunting from a boat designed by Bud Miles and built with his permission by another builder. It's been a great boat and through that time I had a hankering to build one if the opportunity came up. Fast forward to a couple years ago when Dave Clark (a friend, builder and who knew I wanted to build one) called to say that Bud had given him the rights to carry on building the boats, along with his original strong back, jersey cedar and last set of ribs, made by Bud. Dave offered to let me build it and I jumped. The materials sat idle through last fall in my shed until I had the opportunity and in February, once the seasons had closed, I started in.
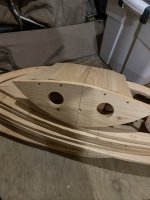
B4C420EC-0A93-40BE-9D07-134B5DF9F96A_1_105_c.jpeg
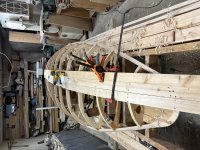
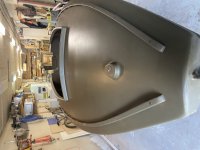
The build started with Bud's ribs, which still had all of his centerlines and markings, including his initials and "#82" burned into the stern.
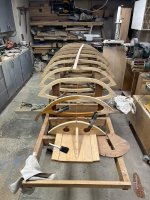
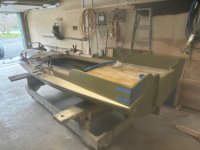
The ribs were clamped to his strong back with the sheer line sighted for fair and confirmed with batons. I work in a small shop (which was a train wreck during the build). Everything is on rollers so I can access tools and the strong back was set on a rolling platform built for boat work). E97A917F-5EE5-4E2F-A17C-88C18C6C9FA8_1_105_c.jpeg
The strong back came with a number of Bud's jigs. Much time was spent puzzling over them to figure out what was to be used when and where
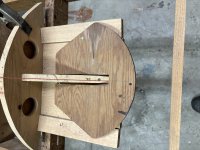
IMG_1322.jpeg

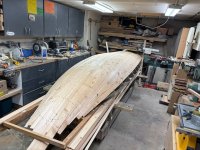
Planking the boat...
IMG_1344.jpeg
ready to flip...
IMG_1346.jpeg
flipped
IMG_1353.jpeg
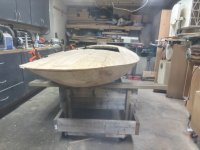
decking on the topside
IMG_1356.jpeg
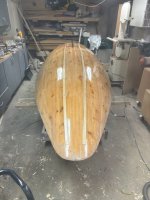
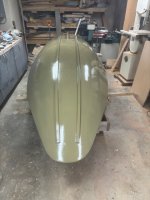
after a LOT of fairing with the longboard, the hull is glassed with 12 oz cloth and epoxy resin and ice runners and skeg added
IMG_1370.jpeg
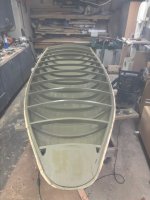
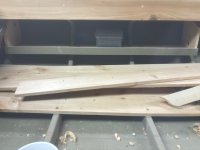
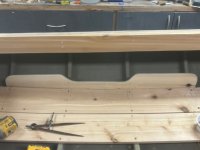
Interior is set up for right handed shooter...shelf to port and upright to starboard for keeping longer items from spilling into the center
IMG_1372.jpegIMG_1374.jpeg
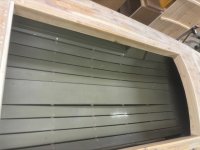
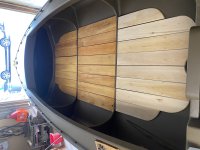
floorboards added and painted
IMG_1388.jpeg
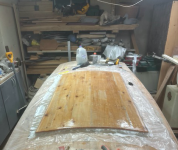
hatch cover was built such that the planks rest right on top of the gunnels for a low profile hatch
Screen Shot 2024-10-07 at 3.31.18 PM.png
three coats of paint with 220 between coats

IMG_1396.jpeg
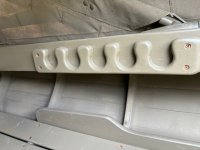
decoy racks added and coaming for canvas bent into place
IMG_1414.jpeg
hardware added...

IMG_1418.jpeg
IMG_1420.jpeg

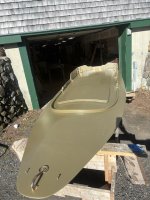
first trip out of the shop
IMG_1426.jpeg

Done!

IMG_0095.jpeg
IMG_0096.jpeg

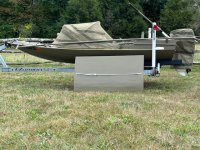
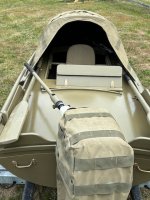
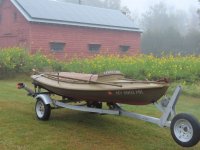
For those that have seen Dave Clark's work, it will be no surprise that he did the canvas work, which is excellent. He designed the dodger to be hunted up full (as pictured), half up (by rotating the aft hoop toward the bow), or fully down. Much credit goes to Dave for all of his help and advice through the process (which was extensive), not to mention his permission to build it. The boat is yet to hit the water (hope it floats) and I'm looking forward to spending a lot of days ahead in it.
 
Jamus

She's gorgeous. Thank you for coming back and sharing this with us. Your timing is great because we've really been adding a lot of Barnegat Bay Information to the Resources section. Bud's design always got high praises for looks and performance under power. I'm sure this boat will give many years of enjoyment.
 
WOW!!!
That is one beautiful boat!! Thanks for sharing!
And welcome back!
 
Jamus

She's gorgeous. Thank you for coming back and sharing this with us. Your timing is great because we've really been adding a lot of Barnegat Bay Information to the Resources section. Bud's design always got high praises for looks and performance under power. I'm sure this boat will give many years of enjoyment.
Thank you Eric. It was a fun build and an enjoyable way to spend evenings. Looking forward to using it this year. Thank you also for the new resources. There’s another building there somewhere. Trust alls well with you. Been following your old tool restorations and they are all looking tremendous.
 
Well, it's been a minute since I last posted (life!) and since this site started my obsession with sneakboxes some 20-25 years ago, I owed a post on a recent build.

For the past 15 or so years, I have been hunting from a boat designed by Bud Miles and built with his permission by another builder. It's been a great boat and through that time I had a hankering to build one if the opportunity came up. Fast forward to a couple years ago when Dave Clark (a friend, builder and who knew I wanted to build one) called to say that Bud had given him the rights to carry on building the boats, along with his original strong back, jersey cedar and last set of ribs, made by Bud. Dave offered to let me build it and I jumped. The materials sat idle through last fall in my shed until I had the opportunity and in February, once the seasons had closed, I started in.

View attachment 59301
The build started with Bud's ribs, which still had all of his centerlines and markings, including his initials and "#82" burned into the stern.
The ribs were clamped to his strong back with the sheer line sighted for fair and confirmed with batons. I work in a small shop (which was a train wreck during the build). Everything is on rollers so I can access tools and the strong back was set on a rolling platform built for boat work). View attachment 59337
The strong back came with a number of Bud's jigs. Much time was spent puzzling over them to figure out what was to be used when and where
View attachment 59303

Planking the boat...
View attachment 59305
ready to flip...
View attachment 59343
flipped
View attachment 59344
decking on the topside
View attachment 59345
after a LOT of fairing with the longboard, the hull is glassed with 12 oz cloth and epoxy resin and ice runners and skeg added
View attachment 59346
Interior is set up for right handed shooter...shelf to port and upright to starboard for keeping longer items from spilling into the center
View attachment 59347View attachment 59348
floorboards added and painted
View attachment 59349
hatch cover was built such that the planks rest right on top of the gunnels for a low profile hatch
View attachment 59350
three coats of paint with 220 between coats
View attachment 59351
decoy racks added and coaming for canvas bent into place
View attachment 59352
hardware added...

View attachment 59354
View attachment 59355

first trip out of the shop
View attachment 59356

Done!

View attachment 59359
View attachment 59360

For those that have seen Dave Clark's work, it will be no surprise that he did the canvas work, which is excellent. He designed the dodger to be hunted up full (as pictured), half up (by rotating the aft hoop toward the bow), or fully down. Much credit goes to Dave for all of his help and advice through the process (which was extensive), not to mention his permission to build it. The boat is yet to hit the water (hope it floats) and I'm looking forward to spending a lot of days ahead in it.
Jamus~

Gorgeous vessel, excellent workmanship - congratulations!

I have lots of questions - but just one for now: In your last slide, you show the "flap board" mounted on its base a few inches off-center. Does the gap on the port side allow for you to rest your gun pointed safely astern whilst waiting for those big Black Ducks to drop in?

All the best,

SJS
Hello Steve. You are exactly correct; that is a slot for the gun. I went to a flapper board a couple years ago from a rolled mat across the cockpit and in the initial iteration never quite found a ready and safe place for the gun that I liked. I tried this configuration and it worked slick. It’s now S.O.P. The base of the flapper btw is sized to stow on the back deck, open flat between the cockpit gunnel and decoy rack. No real loss of space since decoys and gear can be stacked on top.

Fire away with questions! You may note the bailed wire stay on the port bow for the push pole. I got this idea from one of your posts years ago and it’s worked like a charm on three boats and counting.

Thanks
Jamus
 
I ran into a photo limit on the last post so adding a few other pics on various details
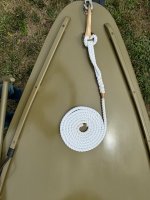
IMG_0098.jpeg
Painter. eye spliced and whipped ends. The bow handle has a 2.5" ring on it to serve as a fairlead for the anchor line
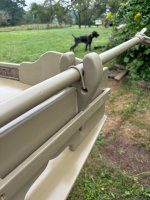
IMG_0102.jpeg
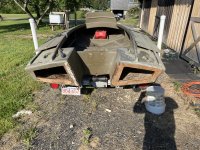
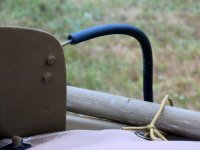
keeper for the forward end of the push pole. 4 gauge copper wire keeps it upright and in shape. A patented Sanford innovation...
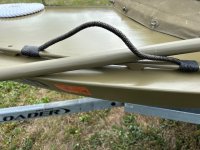
IMG_0033.jpeg
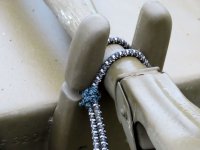
keeper for the other end of the pole. they have a habit of escaping on me so I added bungee to keep it in place
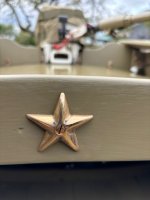
IMG_0105.jpeg
good fortune star, because every duck hunter needs good fortune
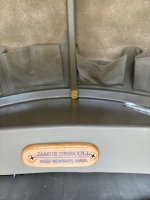
IMG_0107.jpeg
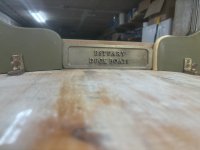
makers mark, cut from a brand I use for decoys. The canvas upright was footed in leather to keep from marring the deck
IMG_0109.jpeg
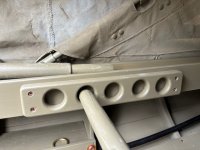
copper swing arms keep the gas hose out of the way and easily accessibleIMG_0111.jpegIMG_0112.jpeg
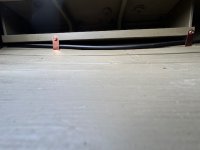
rack system for backrest pole. The ones with the open ends have short lengths of steel inserted to prevent splitting.
 
Jamus

Stick around. You'll see some more restorations in the coming year. I've got a Newman tenoner and Whirlwind edge sander vying for my attention, and I have a project coming where I need them to be working.

Question on your boat's ribs. Are the top and bottom pieces butt joined with glue? Or perhaps is there a spline, dowel, screw, etc. holding them together. Curious what is done in that area. I like the bow shots as they give a good view of how the bow is constructed. Thanks for showing that.

Also, I see hook in the hull just in front of the transom. That must have been Bud's means of getting her to plane with an outboard. I've seen pictures of Hank's under power, and it appeared like Bud got it right.
Oh those do sound like exciting restorations. I’m in!
Regarding the ribs. Buds were sawn in three pieces and then glued. Two on the hull side and one on the deck. The bottom pieces were glued and screwed just to port of the centerline, I presume to allow clean wood in the ribs for bilge drain holes. The second joints are at the shear line where the ribs tie into the harps. Also glued and screwed. This is how my older boat was done too, although those were mahogany ribs and these were pine.
Regarding the hook, you have a keen eye and accurate memory. Yes the boat has a hook between stations 9-12 whose purpose is to force the boat over onto plane. Pic shows the sweep as it was being planked. View attachment IMG_1337.jpeg
 
Jamus

Thanks for the clear explanations and the picture. Your post is full of great reference material. You still have your Black Brant II?
 
Jamus

Thanks for the clear explanations and the picture. Your post is full of great reference material. You still have your Black Brant II?
Hi Eric. You are most welcome and happy to be able to provide back to the forum that has provided me so much over the years. I do indeed have the BBIi and took it through a major overhaul the other year. I’ll get some pics together and create a post short story is that after 20 years the sponsons had sucked up water from ambient air and needed to be dug out and replaced since I had the hood up so to speak I replaced the floor boards, altered the interior storage, built a removable battery box that powers nav lights, interior lights and charges phones and built a new hatch cover. Of course the boat got all the usual inspections should now be good for another 20 years IMG_1143.jpegIMG_1126.jpegIMG_1141.jpeg
 
Jamus

We must have built and refurbished our BBIIs about the same time. Mine was built in 2002 and refurbed over last winter. I'm looking forward to using it again and hated not having it last season. Please do share any pictures or info on your boat's condition after two decades. When refurbishing mine I didn't detect any water in the flotation compartments. Hope I didn't overlook it. If I were to find any I'd probably go into those compartments as you did. I suspect after you finished nobody could tell you'd been in them.
Mine was built in 2000 so yes on the same timetable. When I built it I had added a couple 1/8 holes in each compartment to deal with possible air expansion under heat. Mine were fairly soaked at the lower levels of foam with some very early (and saveable) rot so I got it in time. I spoke with Sam about it and he said it’s a common issue with poured foam. He’s since gone to other means of positive floatation to prevent this. I’ll certainly dig up some pics and post them. I’m a new thread.
 
Thanks for the info. When I flipped my hull last fall I listened really hard for water and looked for signs. I completely sealed them when I built the boat and there were no signs of any leaks over time. I don't think water got in there, but I'd certainly hate it if it did. I won't use that type of foam again, that's for sure. I've seen too many cases like yours.
 
That's really cool. I bought one from Bud in 2000 and really enjoyed it for the 8 years I was the owner. Nice to hear that Dave is going to continue the tradition.

Ed
 
That's really cool. I bought one from Bud in 2000 and really enjoyed it for the 8 years I was the owner. Nice to hear that Dave is going to continue the tradition.

Ed
Thanks and I can’t wait to see the first one Dave builds.
 
Hello Steve. You are exactly correct; that is a slot for the gun. I went to a flapper board a couple years ago from a rolled mat across the cockpit and in the initial iteration never quite found a ready and safe place for the gun that I liked. I tried this configuration and it worked slick. It’s now S.O.P. The base of the flapper btw is sized to stow on the back deck, open flat between the cockpit gunnel and decoy rack. No real loss of space since decoys and gear can be stacked on top.

Fire away with questions! You may note the bailed wire stay on the port bow for the push pole. I got this idea from one of your posts years ago and it’s worked like a charm on three boats and counting.

Thanks
Jamus
Jamus~

I am flattered - and very satisfied - that you've adopted one of my "brainchildren". When Marty Arrow, past president of the South Shore Waterfowlers Ass'n and moving force behind their Duckboat Show (which inspired NJ Waterfowlers' now-much-larger show in Tuckerton) , the primary purpose was for gunners to share their "solutions" in an annual show-and tell.

Of course, I especially admire anyone with your rope work skills. I served my earlier bails with tarred nylon decoy line but have since adopted 12 inches of fuel line....still over heavy galvanized wire.

sm 1 CAIRD - bail for pushpole.JPG

And, my aft chocks have gotten a shock cord "keeper" in recent iterations - after losing a pole or two over the years, dragged away unseen by my wake at speed. (Although I did have one returned to my door thanks to branding such "loose" gear.)

sm 2 CAIRD pushpole chock with keeper.JPG

Here's the JAMES CAIRD on her way to Tuckerton. You'll note I always locate my bail-and-chock on the starboard side - so I can grab it and stow it whilst under way and standing at the helm - being a right-handed fellow.

sm 3 CAIRD - to Tuckerton - stbd bow quater.JPG

In the spirit of Marty Arrow I am always looking for ideas from others. I plan to use Dave's 2-piece dodger concept on a vessel in my current queue.

sm 4 Clark Dodger - 2-piece.JPG

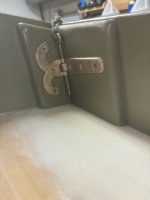
I also noticed your stool rack hinge with the removable, tethered pin. I got that same idea from a friend many years ago - at the SSWA Duckboat Show - and have used it on flapper boards for several South Bay Duckboats. Let the sharing continue!

All the best,

SJS
 
@Jamu and @Eric Patterson since both of you are not going to use the pour foam again, what would be your next choice.

I have always thought that using empty thicker plastic bottles with caps on tight, in areas that usually need foam. Not sure how well that would work as far as bottle deterioration or other issues, but it seems like it would not allow for water absorption into the floatation material (bottles). Also would allow for easy removal and reuse if you were to open the area up for any reason. They only bad thing I can think of is rattle noises if they are not totally secured in the area.
 
Last edited:
Back
Top