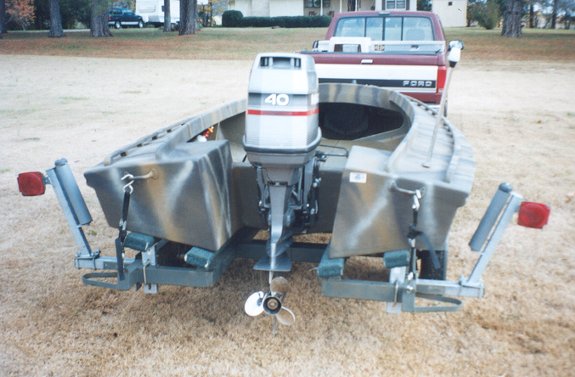
With the grass rails in place the next step was to prime the interior and decking with the Ditzler. The same procedures covered in the "Painting the Hull" were used. After the interior and decking received two coats of Ditzler I rolled on two coats of Parker's hunter green duck boat paint. While I was painting my trailer was at the welder for modifications. I sold my jon boat but kept the trailer since it was a good quality one and could easily be modified. The welders cut out a section in the back of the trailer to match the motor well. I installed another set of bunk boards since the hull of the Scaup is wider than my jon boat was.


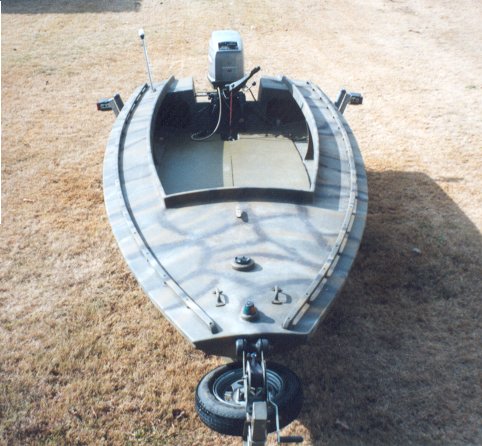
After the paint dried I installed the rest of the hardware. This included two deck grab handles, a front cleat, the gas tank and fill, two transom handles, and two drain plugs (transom and storage bulkhead). All hardware was bedded in 3M 5200 (marine sealing adhesive) and screwed or bolted with silicon bronze or stainless steel fasteners. The only exception was the gas tank fill was not bedded in the 3M 5200 so that it could be removed in the future. The holes drilled for the drain plugs were sealed in epoxy prior to installing the plugs.
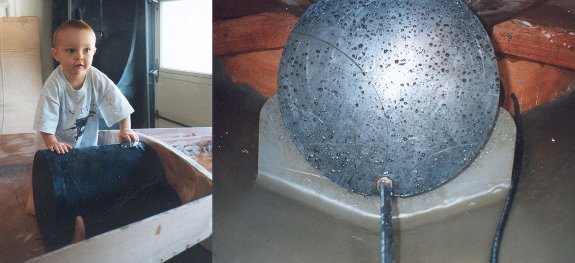
The pictures below show the custom made gas tank I use. A friend and hunting buddy made me a gas tank from polyethylene pipe. He used a 12" inside diameter pipe and capped both ends. The end of the tank that sits against the flotation bulkhead has two "tabs" that bolts run through into 3/8" threaded brass inserts. The threaded brass inserts allow me to remove the tank without needing to get in the flotation compartment which is sealed. The fit of the tank is very tight. Without increasing the deck height I would have been restricted to a 10" pipe, thereby increasing to length considerably to maintain the seven gallon capacity. My son Andrew is inspecting the design.

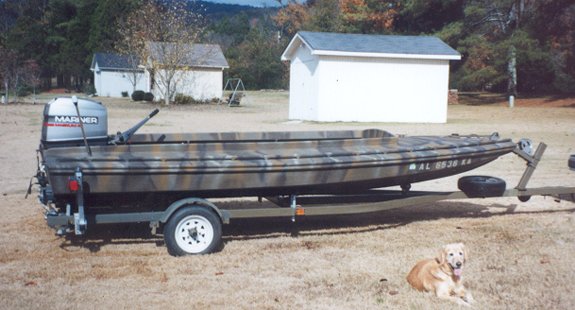
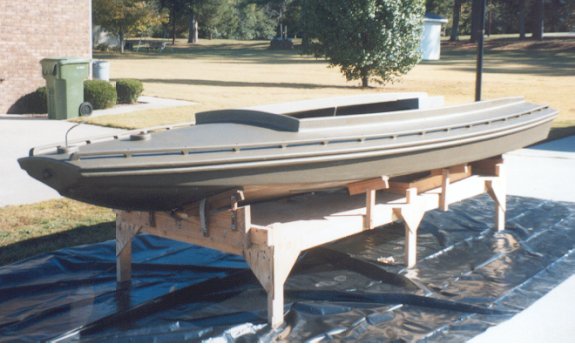
I debated a long time about the camo pattern I wanted to use on the boat and the colors. I probably spent more time thinking about it than it actually took to do. After making stencils from plastic for sale signs and testing on cardboard I came to the conclusion I could get the desired effect by free-handing it. Besides, the boat was going to be covered completely with natural camo so the paint job wasn't too critical. In the end I was pleased with the way it turned out.
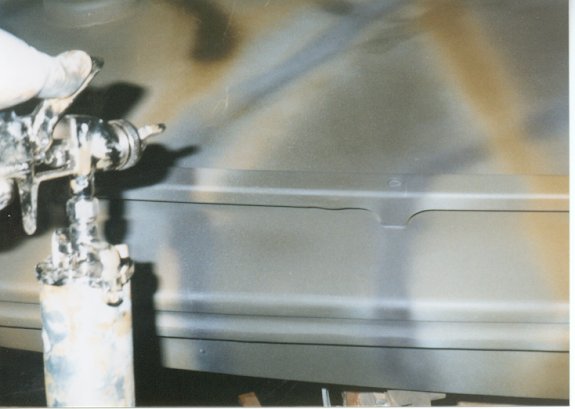
The paints/colors I used were from Parker's and a local hardware store. The base coat was the hunter green I rolled on. For the camo portion I selected Parker's dead marsh grass duck boat paint, and their black duck body decoy paint (color 34). In addition to these colors I picked up some camo spray paint from a local hardware store. I applied the paint with a sprayer to eliminate hard lines between colors and allow blending. A small auto detail sprayer that works off an air compressor was perfect for the job. I had never used one before but quickly fell in love with the control and ease of use and highly recommend one of these sprayers.
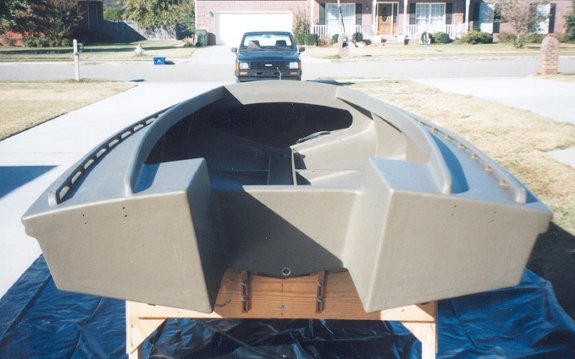
The first color I applied was the black duck body. Let me add that this particular color is one of the very best all-round camo colors available. I spoke with the people at Parker's and they assured me that their decoy paints were as durable as their duck boat paints. Using the sprayer loaded with this paint, thinned slightly, I began sectioning the boat and painting areas that were several square feet in size. I picked parts of the boat that defined the overall shape and painted them with the black duck body paint which is a dark rich brown. The effect I was going after was to break up the outline of the boat by creating shadows and hiding the true outline. Next I used the remainder of the colors to create vertical random stripes and to define the regions between the base coat and the black duck body color.

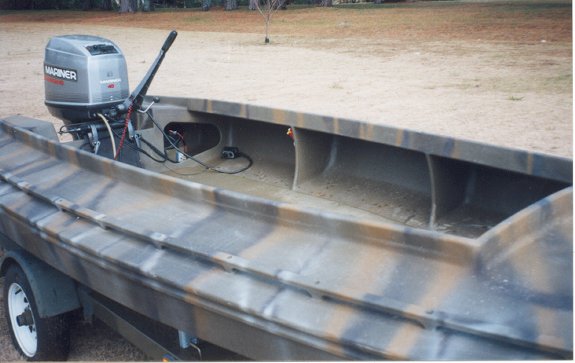
The floorboard was installed after the paint job was done. I actually built the floorboard weeks earlier. The plans didn't give lofting points for the floorboard but by this time the whole thing was pretty easy to figure out. If there's one thing to be said for building a boat it's about half way through you will have learned most of what you need to go the rest of the way.
The cockpit of the Scaup is nine feet long. I used 1/2" thick plywood for the floor board and butt-joined a one foot piece onto a standard 4'x8' sheet. No need for a scarf joint because the floorboard has plenty of support provided by the trough and the timbers. To arrive at the dimensions of the floorboard I measured the width of the cockpit at five positions. These included the front, the rear, and three equally spaced places in-between. The actual width was determined by placing a piece of scrap wood the same thickness as the floorboard on top of the trough. Then I used a stick and placed it perpendicular to the trough on top of the scrap piece. I trimmed the stick until it barely touched the bottom of the boat on both sides. This is the width of the floorboard at that location. I did this for all five locations.
The next step was to draw a centerline down the plywood floorboard piece and mark on it the positions where the width measurements were taken in the boat. At each one of these positions I measured half the corresponding width and marked it on both sides of the centerline. When all points were marked I had essentially created my own lofting points. From there I used my batten to bend a curve and connect the points. This was done on both sides of the centerline. With my jigsaw I cut along the lines. Next I beveled with my hand planer the long sides of the floorboard so that they would meet flush with the bottom of the boat. The angle of the bottom of the boat with the floorboard created bevels that were close to being scarf joints. To add strength I sheathed both sides of the floorboard with 4 ounce fiberglass cloth. This strengthened the edges considerably and really sealed up the floorboard nicely. The floorboard is attached with eight stainless steel screws screwed into the floor timbers. To keep the floorboard from chaffing the hull where they contact I put a layer of 2" wide foam tape around the edges.
One of the features in Jeff Smith's Black Brant that I really liked and thought was a great idea was the use of neoprene foam on the floor. I bought four rolls of Army surplus GI bed mats. These are 1/2" olive drab neoprene sheets. Perfect for the floor of a duck boat. Using rubber contact cement I glued them to the floorboard and trimmed with a utility knife. After hunting out of the boat for a season I am convinced that there is no better flooring system. The neoprene foam is gentle on the knees and makes things very quiet.
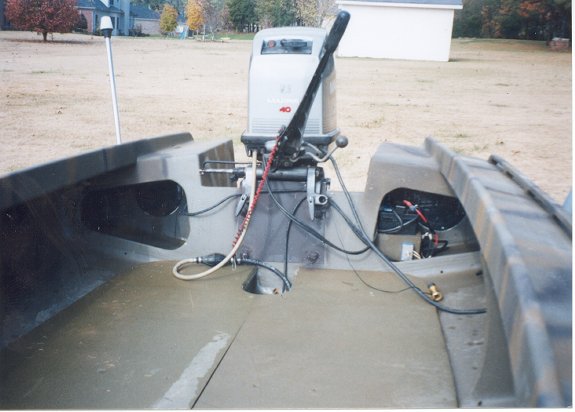
The last hardware to be installed was the electrical system. I added a small marine battery and wired the boat with running lights. The following pages are pictures of the completed boat. The final section will cover the total cost and man-hours, maiden launching, motor adjustments, performance, Cordura camo compartment covers, and my first hunting season with the boat.


After the paint dried I installed the rest of the hardware. This included two deck grab handles, a front cleat, the gas tank and fill, two transom handles, and two drain plugs (transom and storage bulkhead). All hardware was bedded in 3M 5200 (marine sealing adhesive) and screwed or bolted with silicon bronze or stainless steel fasteners. The only exception was the gas tank fill was not bedded in the 3M 5200 so that it could be removed in the future. The holes drilled for the drain plugs were sealed in epoxy prior to installing the plugs.
The pictures below show the custom made gas tank I use. A friend and hunting buddy made me a gas tank from polyethylene pipe. He used a 12" inside diameter pipe and capped both ends. The end of the tank that sits against the flotation bulkhead has two "tabs" that bolts run through into 3/8" threaded brass inserts. The threaded brass inserts allow me to remove the tank without needing to get in the flotation compartment which is sealed. The fit of the tank is very tight. Without increasing the deck height I would have been restricted to a 10" pipe, thereby increasing to length considerably to maintain the seven gallon capacity. My son Andrew is inspecting the design.
I debated a long time about the camo pattern I wanted to use on the boat and the colors. I probably spent more time thinking about it than it actually took to do. After making stencils from plastic for sale signs and testing on cardboard I came to the conclusion I could get the desired effect by free-handing it. Besides, the boat was going to be covered completely with natural camo so the paint job wasn't too critical. In the end I was pleased with the way it turned out.
The paints/colors I used were from Parker's and a local hardware store. The base coat was the hunter green I rolled on. For the camo portion I selected Parker's dead marsh grass duck boat paint, and their black duck body decoy paint (color 34). In addition to these colors I picked up some camo spray paint from a local hardware store. I applied the paint with a sprayer to eliminate hard lines between colors and allow blending. A small auto detail sprayer that works off an air compressor was perfect for the job. I had never used one before but quickly fell in love with the control and ease of use and highly recommend one of these sprayers.
The first color I applied was the black duck body. Let me add that this particular color is one of the very best all-round camo colors available. I spoke with the people at Parker's and they assured me that their decoy paints were as durable as their duck boat paints. Using the sprayer loaded with this paint, thinned slightly, I began sectioning the boat and painting areas that were several square feet in size. I picked parts of the boat that defined the overall shape and painted them with the black duck body paint which is a dark rich brown. The effect I was going after was to break up the outline of the boat by creating shadows and hiding the true outline. Next I used the remainder of the colors to create vertical random stripes and to define the regions between the base coat and the black duck body color.
The floorboard was installed after the paint job was done. I actually built the floorboard weeks earlier. The plans didn't give lofting points for the floorboard but by this time the whole thing was pretty easy to figure out. If there's one thing to be said for building a boat it's about half way through you will have learned most of what you need to go the rest of the way.
The cockpit of the Scaup is nine feet long. I used 1/2" thick plywood for the floor board and butt-joined a one foot piece onto a standard 4'x8' sheet. No need for a scarf joint because the floorboard has plenty of support provided by the trough and the timbers. To arrive at the dimensions of the floorboard I measured the width of the cockpit at five positions. These included the front, the rear, and three equally spaced places in-between. The actual width was determined by placing a piece of scrap wood the same thickness as the floorboard on top of the trough. Then I used a stick and placed it perpendicular to the trough on top of the scrap piece. I trimmed the stick until it barely touched the bottom of the boat on both sides. This is the width of the floorboard at that location. I did this for all five locations.
The next step was to draw a centerline down the plywood floorboard piece and mark on it the positions where the width measurements were taken in the boat. At each one of these positions I measured half the corresponding width and marked it on both sides of the centerline. When all points were marked I had essentially created my own lofting points. From there I used my batten to bend a curve and connect the points. This was done on both sides of the centerline. With my jigsaw I cut along the lines. Next I beveled with my hand planer the long sides of the floorboard so that they would meet flush with the bottom of the boat. The angle of the bottom of the boat with the floorboard created bevels that were close to being scarf joints. To add strength I sheathed both sides of the floorboard with 4 ounce fiberglass cloth. This strengthened the edges considerably and really sealed up the floorboard nicely. The floorboard is attached with eight stainless steel screws screwed into the floor timbers. To keep the floorboard from chaffing the hull where they contact I put a layer of 2" wide foam tape around the edges.
One of the features in Jeff Smith's Black Brant that I really liked and thought was a great idea was the use of neoprene foam on the floor. I bought four rolls of Army surplus GI bed mats. These are 1/2" olive drab neoprene sheets. Perfect for the floor of a duck boat. Using rubber contact cement I glued them to the floorboard and trimmed with a utility knife. After hunting out of the boat for a season I am convinced that there is no better flooring system. The neoprene foam is gentle on the knees and makes things very quiet.
The last hardware to be installed was the electrical system. I added a small marine battery and wired the boat with running lights. The following pages are pictures of the completed boat. The final section will cover the total cost and man-hours, maiden launching, motor adjustments, performance, Cordura camo compartment covers, and my first hunting season with the boat.