
After the bottom panels and side pieces were cut they were prepared for stitching. This consisted of three steps. First, a router with a 45 degree chamfer bit was used to bevel an edge down the keel line. This bevel was cut on the top side of the bottom panels and was 3/16" deep, half the thickness of the plywood. The purpose of this bevel is to allow the bottom panels to open without interference from the edges and create a better fit.
The second step was to bevel an edge on both bottom panels at the chine (where the bottom meets the side). Because the sides of the boat are not 90 degrees to the bottom, it is necessary to bevel an edge on the bottom panel chines. This is done so that the side pieces will sit approximately flush to the bottom pieces. I did this by using a router with a guide and a 14 degree dovetail bit.
The third step was to drill 1/8" stitching holes. The wire stitches run through these holes. Using a cabinet maker's scribe I marked a line 1/2" from the keel line on one of the the bottom panels. I then laid both panels on top of each other and lined them up. Next I drilled holes every 6" along my scribe line. At the front of the boat I drilled every 3" for added strength in high curvature areas. By stacking the panels on top of each other I was assured my stitches would line up, thereby keeping the bottom panels perfectly in line with each other. This process was repeated with the side pieces at the chine.
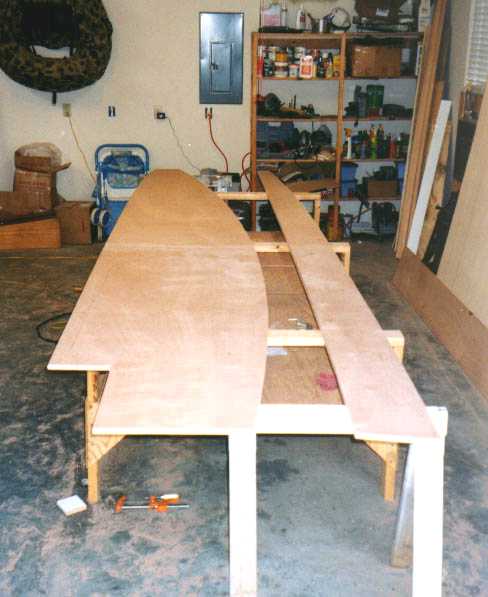
Below are the bottom panels and side pieces ready for stitching.

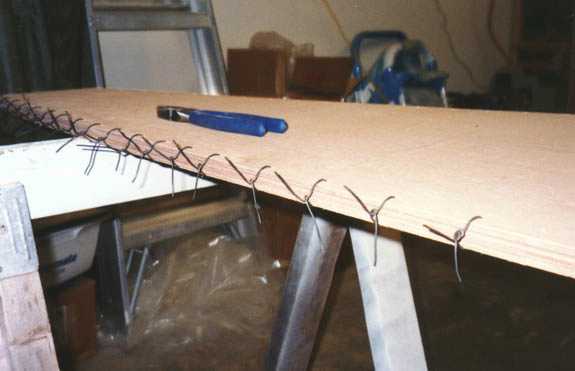
Before I started stitching I made a stitching kit. It consisted of approximately 150 pieces of 6" 16 gauge bailing wire I cut. After the stitching kit was ready I placed both bottom panels on sawhorses and lined then up with each other. With the wire stitches I proceeded to stitch the bottom panels together.

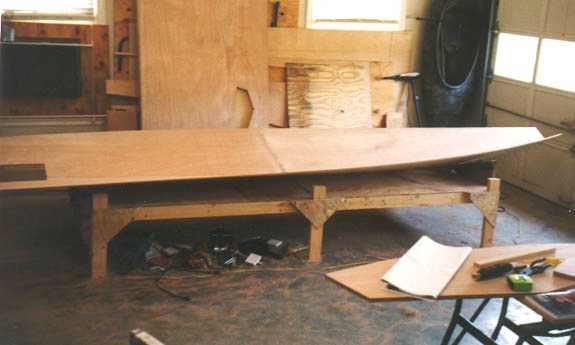
After all stitches had been made in the bottom panels I placed the panels in the cradle and opened them like a book. After a little creaking and squeaking she opened all the way. I then tightened all stitches that were not already taught.

The next step was to stitch the side pieces on. This is definitely a two-man job. My good buddy Jeff Smith stitched the side pieces to the bottom as I supported and positioned them for him. During this step Jeff would position the side piece, drill a hole in the bottom panel that aligned with the hole already in the side piece and then stitch. This process was repeated until both side pieces were attached to the bottom of the boat. For the first time I was able to get an idea of what she was going the actually look like. Exciting!
The second step was to bevel an edge on both bottom panels at the chine (where the bottom meets the side). Because the sides of the boat are not 90 degrees to the bottom, it is necessary to bevel an edge on the bottom panel chines. This is done so that the side pieces will sit approximately flush to the bottom pieces. I did this by using a router with a guide and a 14 degree dovetail bit.
The third step was to drill 1/8" stitching holes. The wire stitches run through these holes. Using a cabinet maker's scribe I marked a line 1/2" from the keel line on one of the the bottom panels. I then laid both panels on top of each other and lined them up. Next I drilled holes every 6" along my scribe line. At the front of the boat I drilled every 3" for added strength in high curvature areas. By stacking the panels on top of each other I was assured my stitches would line up, thereby keeping the bottom panels perfectly in line with each other. This process was repeated with the side pieces at the chine.
Below are the bottom panels and side pieces ready for stitching.
Before I started stitching I made a stitching kit. It consisted of approximately 150 pieces of 6" 16 gauge bailing wire I cut. After the stitching kit was ready I placed both bottom panels on sawhorses and lined then up with each other. With the wire stitches I proceeded to stitch the bottom panels together.
After all stitches had been made in the bottom panels I placed the panels in the cradle and opened them like a book. After a little creaking and squeaking she opened all the way. I then tightened all stitches that were not already taught.
The next step was to stitch the side pieces on. This is definitely a two-man job. My good buddy Jeff Smith stitched the side pieces to the bottom as I supported and positioned them for him. During this step Jeff would position the side piece, drill a hole in the bottom panel that aligned with the hole already in the side piece and then stitch. This process was repeated until both side pieces were attached to the bottom of the boat. For the first time I was able to get an idea of what she was going the actually look like. Exciting!