Steve Sanford
Well-known member
Good morning, All~
Member Ed L. is contemplating a sit-up blind for one of his gunning vessels - and asked me for some details. I cannot recall how much of the process I posted here previously - I did the work in late-2022 - but a search revealed just snippets. So, rather than a true step-by-step, I am presenting here most of the key points. I believe they would help anyone considering a similar project. I am happy to provide more photos and information as requested.
As an Old School fellow, I am not good with these contemporary names. The boat is a Wrangler - or is it Duck Wrangler? I'm sure member Anthony Babich knows the make and background. Having been through every inch of her, I will say it is a very well-built vessel.
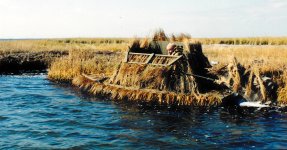
I am starting this post backwards - with the completed result - which took Best-in-Show at the 2023 LIDCA Duckboat Contest run by Anthony. The winner-owner is Scott Amberman. Scott added all the salt hay (Spartina patens).
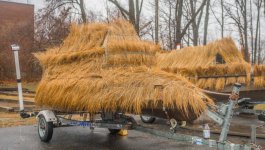
Here is the completed boat on the day Scott hauled her home - from Washington County here in dairy country down to Nassau County on Long Island's south shore. Scott is sitting on a "spackle bucket" (or equivalent) - with flaps down - the way one might cross the bay or run out to pick up downed birds.

Here is the "gunning mode": both solid weather flap and open-frame shooting flap up.
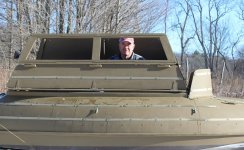
Access is via the stern deck and through a panel with a folding frame attached.
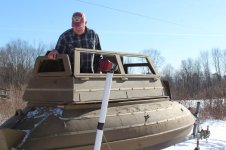
This shows the forward panel - and the XL Spray Shield. Note, too, that I used polypropylene webbing instead of traditional wooden thatch rails.
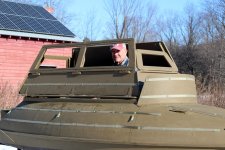
The webbing uses less thatch - an important consideration for both time and weight. Scott used a "fid" (probably just a screw driver) to pry up the webbing when inserting the hay.
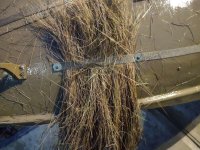
(Please ignore the extra photo....)
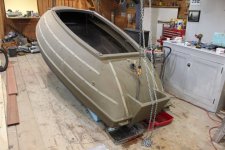
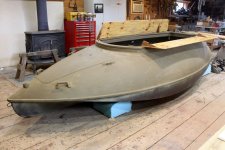
Back to the beginning.... Note that the cockpit opening has some nice curves. Sweet to the eye but incompatible with hinged panels.
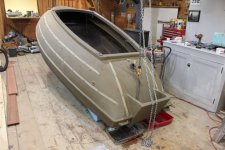
So, I first made an adapter frame - or base - that sits on the original coamings. I made it from 2 layers of half-inch AC plywood. The needed rectangle is out beyond the coamings.
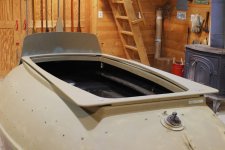
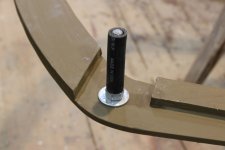
It is held in place by 4 pins that sit in sockets that were part of the original boat - presumably for securing framing for some canvas work. A bit of heater hose keeps the carriage-bolt "pins" from chafing and making noise.
The lower flaps are solid - AC plywood again - sealed and 'glassed. The Mahogany chocks hold them up at the desired, inward angle.
The slot in the chock takes a loop of shock cord that holds them upright.
When down, the lower flaps are level - and so can hold decoys when rigging.
The upper flaps are open frames. Scott wanted to shoot from either port or starboard - depending upon the gunning location. So, the "weather boards" can be moved from side to side as desired. They are vinyl panels and each secured with nylon turnbuttons. They could be made of canvas, light plywood, fibreglass or even aluminum.
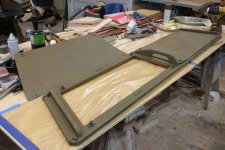
Here is the completed blind - standing on its 4 locator pins. It drops into the 4 sockets in the coaming - and is lashed down to small cleats in each corner (the forward 2 seen here).
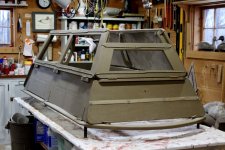
Bundles of thatch are lashed to the shooting frames via rows of heavy braided nylon line - not shock cord.
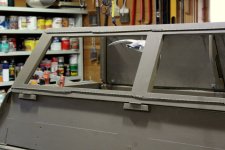
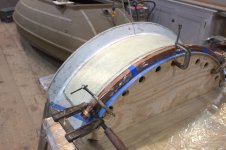
Finally, here is my XL Spray Shield on its mold. This one is getting laminated Mahogany thatch rails instead of the webbing used on Scott's Wrangler.
So, I hope this information is useful to Scott and others.
One last thought. When I built my first such "sit-up blind", we hunted with the shooting flap down most of the time. We would raise is slowly whenever we saw likely birds - and shot either sitting or standing, dropping the flap in the process.
All the best,
SJS
Member Ed L. is contemplating a sit-up blind for one of his gunning vessels - and asked me for some details. I cannot recall how much of the process I posted here previously - I did the work in late-2022 - but a search revealed just snippets. So, rather than a true step-by-step, I am presenting here most of the key points. I believe they would help anyone considering a similar project. I am happy to provide more photos and information as requested.
As an Old School fellow, I am not good with these contemporary names. The boat is a Wrangler - or is it Duck Wrangler? I'm sure member Anthony Babich knows the make and background. Having been through every inch of her, I will say it is a very well-built vessel.
I am starting this post backwards - with the completed result - which took Best-in-Show at the 2023 LIDCA Duckboat Contest run by Anthony. The winner-owner is Scott Amberman. Scott added all the salt hay (Spartina patens).

Here is the completed boat on the day Scott hauled her home - from Washington County here in dairy country down to Nassau County on Long Island's south shore. Scott is sitting on a "spackle bucket" (or equivalent) - with flaps down - the way one might cross the bay or run out to pick up downed birds.

Here is the "gunning mode": both solid weather flap and open-frame shooting flap up.

Access is via the stern deck and through a panel with a folding frame attached.

This shows the forward panel - and the XL Spray Shield. Note, too, that I used polypropylene webbing instead of traditional wooden thatch rails.

The webbing uses less thatch - an important consideration for both time and weight. Scott used a "fid" (probably just a screw driver) to pry up the webbing when inserting the hay.

(Please ignore the extra photo....)

Back to the beginning.... Note that the cockpit opening has some nice curves. Sweet to the eye but incompatible with hinged panels.

So, I first made an adapter frame - or base - that sits on the original coamings. I made it from 2 layers of half-inch AC plywood. The needed rectangle is out beyond the coamings.

It is held in place by 4 pins that sit in sockets that were part of the original boat - presumably for securing framing for some canvas work. A bit of heater hose keeps the carriage-bolt "pins" from chafing and making noise.

The lower flaps are solid - AC plywood again - sealed and 'glassed. The Mahogany chocks hold them up at the desired, inward angle.

The slot in the chock takes a loop of shock cord that holds them upright.

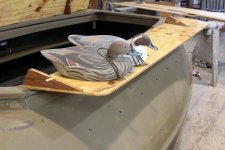
When down, the lower flaps are level - and so can hold decoys when rigging.

The upper flaps are open frames. Scott wanted to shoot from either port or starboard - depending upon the gunning location. So, the "weather boards" can be moved from side to side as desired. They are vinyl panels and each secured with nylon turnbuttons. They could be made of canvas, light plywood, fibreglass or even aluminum.

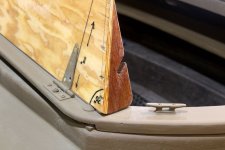
Here is the completed blind - standing on its 4 locator pins. It drops into the 4 sockets in the coaming - and is lashed down to small cleats in each corner (the forward 2 seen here).

Bundles of thatch are lashed to the shooting frames via rows of heavy braided nylon line - not shock cord.

Finally, here is my XL Spray Shield on its mold. This one is getting laminated Mahogany thatch rails instead of the webbing used on Scott's Wrangler.

So, I hope this information is useful to Scott and others.
One last thought. When I built my first such "sit-up blind", we hunted with the shooting flap down most of the time. We would raise is slowly whenever we saw likely birds - and shot either sitting or standing, dropping the flap in the process.

All the best,
SJS
Last edited:
