BBSB Rehab Help

ChadW

Member
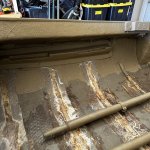
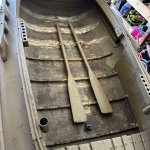
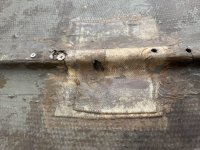
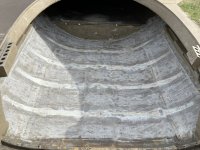
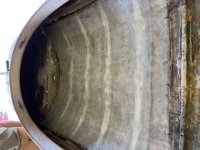
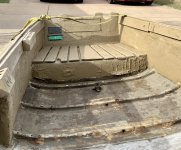
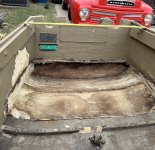
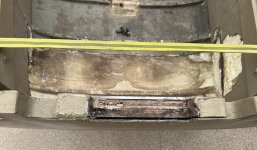
Sorry for the confusion, I had a lot of problems posting. See below: looking to rehab the bottom of this old sneakbox. We've already started tearing the horizontal supports out, as they are broken and unrepairable. The previous repair attempts, by previous owners, have failed and we would like to do it right this go round.

Any advice/direction would be appreciated.
 
Last edited:
Good morning, Chad~


Not sure what you are testing - but the word "test" got through.


Look forward to your rehab question.


All the best,


SJS
 
This is Chad and mine question


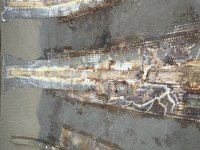
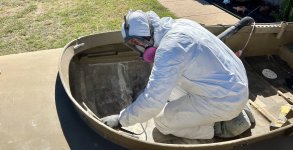
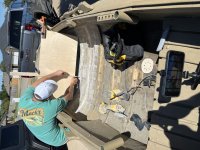
I bought a 1965 Madoc BBSB from gentleman, possibly a member here. We took her for a run today and the floor was flexing a lot. Once we got home we pulled the floor boats off, and found a mess. The perpendicular stringers/supports are glass over foam. Most of the screws holding the boards down have pulled free. Several layers of subsequent repair glass was broken in several places. We started tearing broken non-effective supports out. The original hull appears to be single layer of heavy mat. Very soft and flexes easily.

Questions are

What is the best way to address this repair?

Interior/Exterior glass? what type? Weight?
Any Special "thickners" interior diab foam etc.?

Glass in stringers, keelsons, strakes?
MY preference is parallal but original is perpendicular. The drain hole drilled through the original stiffeners was definetly a weak spot. I'd rather not replicate.

It's a cool boat that contains a lot of authenticity but she needs a lot of updates/repairs to remain in service.

I built a glass over wood boat with 2pt epoxy/glass, so I'm not a total noob, but haven't attempted a repair like this one.

Any Advice? I will post pictures as soon as i can get it to work properly.

Thanks
 
Thomas Riley said:
This is Chad and mine question


Questions are

What is the best way to address this repair?


Wow, what a mess. The screws are a tell tale sign a previous owner didn't know what they were doing. Grind out the bad and replace the damaged components. You might even use a sawzall to get those "ribs" out of there. Not hard to do, but dirty work. The right tool for the job will help immensely. A sander/polisher and 3M Stikit Disc Pad, 05568, 8 in, with 80 grit discs will be the fastest and most controllable means to remove the bad glass and prep the hull for new glass.

Interior/Exterior glass? what type? Weight?
Any Special "thickners" interior diab foam etc.?


I'd use wood (mahogany or even marine ply) for the new ribs. Epoxy them to the hull and glass them with thickened epoxy (wood flour) fillets using biaxial tape. Probably two layers of 12oz is good, three better, with each layer being wider. 4" and 6" tape. A lot of ways you can do this but the idea is to build rigidity. Even better use the ribs and epoxy a 1/2" floorboard to them. Bevel the edges of the ply to meet the hull. It is a shallow angle. A block plane and some work will get you there. Glass the ply floor with 6 oz woven cloth on both sides. Thickened epoxy around the perimeter and on top of the ribs will secure it. The ribs need to let water flow down the keel so drill holes and seal religiously. Counter bore screws in the floorboard into the ribs and epoxy seal them. You will then tie everything together for a very strong rigid hull. Use thickened epoxy to make the plywood perimeter flow into the hull. The more time you spend on the bevel the better it will look and require less epoxy work.

Glass in stringers, keelsons, strakes?
MY preference is parallal but original is perpendicular. The drain hole drilled through the original stiffeners was definitely a weak spot. I'd rather not replicate.


Hell no to the parallel to the keel. You want the supports to run port to starboard, like they originally were. See my above suggestions. If you bond the floor you accomplish strength in every direction. Boats are more prone to flex and crack due to inadequate port to starboard rigidity. Every time you slam a wave the hull wants to "open" more then snap back. That causes the cracks to run parallel to the keel and there is a lot of room for them to grow. I've never seen a crack run port to starboard. Never.

Eric
 
Last edited:
I will echo Eric's first comment.

What a mess! Is the situation just as bad up under the front deck, that area will be an even bigger bugger to address.

You may need to support the hull with at least a couple of adjustable cradles so one can maintain the hull shape while the repairs are being made. Otherwise, you may end up with a twisted hull.
 
Best tool for cleaning up/removing the mess is a multi-tool. Can run the blade along the floor and minimize a lot of sanding/grinding.

Does the hull have keelsons or a keel? I would want something running fore to aft either under the hull or inside. Then add some cross ribs. As others have said, solid wood or plywood can be used, but the real strength is in the box beam of the fiberglass that encapsulates the material you use. I would look at some Azek synthetic decking. Rip it as a trapezoid shape will make it easier to glass over, but round the top edges also.

Plan a floor that is not screwed to the ribs. It was likely afixed to add some stiffness, but that compromised the seal and led to the cracking/failed ribs.

Any place I screw through fiberglass into a substrate that can rot, and is prone to have standing water, I drill pilot holes where I want them, then over drill the holes, and fill them with thickened epoxy. Then when I finally install the screws, they are into epoxy only, not the wood or plywood etc.
 
Thanks for the input!

Eric, I believe I remember a build thread, perhaps a bluebill, that had the same floor construction method you mention above. if we were to go that route, should we add a layer of two the bottom of the boat? The original bottom is a single layer of heavy cloth. Maybe add a couple layers of chopped strand before adding the stringers? Also, what thickness and height above floor for ply stringers? I suspect good plywood will be easier to source than boat grade hardwood.

huntindave, good idea on the cradle. We only removed about half the ribs so far. We could replace them before removing any more and that would help ensure shape retention, I think..

Dave, we were fortunate that the repairs weren't done very well. For the most part, a claw hammer and chisel was all that was needed to pull these stringers up. It wasn't easy but wasn't overly hard. There isn't anything on the bottom of the boat, no keelsons, keel, runners, etc.. she's totally slick. Under power she handles like a wildcat; the slightest tiller movement in either directing results in a fast, "bucking bronco" style course change. I wondered if adding something to the bottom of the boat would alleviate some of these handling characteristics. I know these old boats weren't meat for power, or at least much power. The closest experience I have to this style of boat is my Chuck Huff, and it handles like a dream by comparison. This BBSB is a totally different animals under power.

.
 
Last edited:
Chad

If you feel the hull is flimsy then adding a layer of, say six, or even ten, ounce woven cloth will strengthen it some without adding too much weight. Another option is 45/45 twelve-ounce stitched cloth. That stuff soaks up a lot of epoxy so it will add more weight. You will need to sand the paint down, otherwise the new layer's bond will only be as good as the paint's bond to the original glass. I think what you are really after is making the hull rigid and that requires some structure like I described in my first post. For the height of the ribs I'd go 2", at least, and 3" ideal. You start cutting into your cockpit volume if you go too tall and your body will stick out more when hunting. Hard for me to say just how tall you can go, but you'll figure it out. What you can do to keep the floor lower is have each rib rise up from the floorboard. You have to cut the plywood bottom for each rib to rise up out of, but that isn't hard to do if you are careful about laying the ribs out on an even and square grid. You want to glass and epoxy so that the ribs and floor is one structure. Make certain everything is sealed thoroughly in epoxy. The last thing you want is a rib rotting and then having to tear everything out to make a repair. This is a permanent solution, but only if you seal the hell out of it.

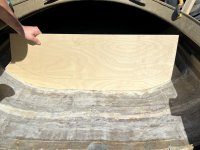
I did notice the bottom is curved. You may want to make the floor terminate into the hulls curve, or you may want to have it bend with the hull some. If you make the floor wide you'll need to bend it. You can make the plywood bend by cutting kerfs every few inches, or closer, lengthwise in the areas that need to bend. The more kerfs, the tighter the radius you can bend to. Looks like your curvature increases towards the chines so you'll want more kerf cuts on the outsides of the floorboard. The cuts will go most of the way through the plywood. After the floor is in place, kerfs up, you'll fill the kerfs with thickened epoxy and glass over the top. I'd probably glass the bottom, cut kerfs, install, fill the kerfs, sand smooth, and then glass and sand/fill as needed to make it look nice.

Good luck and we want pictures.

Eric
 
Last edited:
Awesome, thanks for the input. It took me a moment to digest what you were saying about the floor boards but I'm on board now, not sure which direction we'll go but we have the entire project to think about it.

I'm sure I'll have more questions as we move along.. for now:

The current plan is add a base layer of glass (I'm tossed between Eric's suggested 45/45 12oz, 1708 or 1808, read good stuff on all of them) and then go over that with new stringers as suggested above.
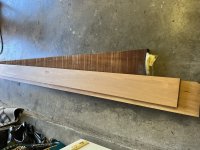
Still debating on Ply vs hardwood for stringers. I found a local source for rough sawn, kiln dried, African Mahogany @ $7.00bf for 4/4. Wondering if 6/4 would be better, but will most likely go with ply.

Do you see any issues with working in sections? So far we've removed the forward three stringers. I'm hesitant to remove the rearward stringers because I don't want to lose the hull shape.
The plan would be to lay the floor reinforcement in the forward section and then add the new forward stringers as suggested above. (fillets, biaxial tape)
Next would be removing the aft four stringers and repeating the floor reinforcement and stringer replacement. Of course there would be some overlap, between stringers, of the forward and rearward bottom reinforcement.
I feel rather confident the hull will retain shape because there is a glassed/foam filled seat on the stern and a glassed bulkhead/storage compartment in the bow holding the shape while we work the middle in sections.

We would also like to address the drain plug. Ideally, we'll cover it up and add it to the transom. That means we'll be cutting all the foam out of the stern and probably opening another can of worms at the transom. Right now it appears solid and without issue. I'm happy to keep on believing that, but we'll most likely cut the foam out and inspect it. (and add a drain plug)

Please feel free to chime in with any advice/criticism and we'll post pics along the way.
 
Last edited:
One step forward and one step back..

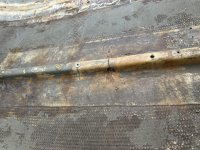
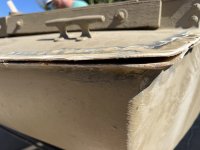
We started doing what we could while waiting on glass and epoxy. Pulling the edge banding off revealed some hull separation near the transom. We'll clean and reattach with thickened epoxy. The rest of the hull seam looks decent.. lots of rivets. We will add more rivets along with grass rails. That should tie it back together for another few years of service.


IMG_3754.jpeg
 
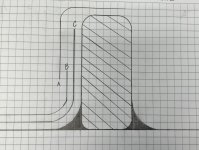
Any advice on the sequence/order of the tape?

Starting against the stringer, which first, second, third?

Thanks for any help/advice!
IMG_3784.jpeg
 
Today's progress..

-cleaned and ground front section of boat bottom
-acetone bath/scrub
-2 layers of 1708 glass
-remove floatation foam at transom
-discover water soaked/rotten transom

Tomorrow we mill the mahogany hardwood and start building stringers.

-spirits are still high.. keep on keeping on.


IMG_3795.jpegIMG_3797.jpegIMG_3796.jpegIMG_3801.jpeg
 
Chad

You are making great progress. Given the other issues you've run into the transom rot isn't a surprise. I have no doubt you'll be able to fix it. It will take some work to tear out the old, but you have a chance to build it back better than original and when you're done it is very satisfying.

Keep up the good work.

Eric
 
Thanks Eric!

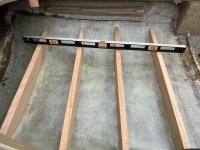
I got the 6/4 mahogany stringers roughed in, but dang, they look like overkill. I planed them down to 1.25" and the still look huge in that little boat. We went "simple" on the floor. He will lose about 2" of cockpit height over doing it the "hard way." He still has more height than my boat and he's happy with it.

Edit: I predrilled the drain holes oversize. Will fill with thickened epoxy and drill smaller hole later.

Also, on the transom, we are considering one of the liquid options. Not necessarily because it would be easier but because it's composite and will last forever. The way the exterior hull wraps around the plywood transom layers makes an easy mold for pouring a transom in.
IMG_3805.jpegIMG_3806.jpegIMG_3807.jpeg
 
Last edited:
Back
Top