Boston Whaler 13 Resto-Mod

Tom Barb

Active member
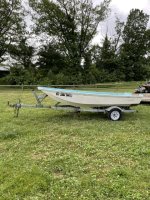
A couple years ago I acquired this 1969 Boston whaler in a trade. I always liked them and thought it would be a good platform for an all around boat, if that is such a thing. When I was a kid, my father would take us fishing in my grandfathers 13 in the South Jersey backwaters. So it just seemed fitting I do the same.

I used it a few times before any of the work started with my tiller Suzuki 15. This made me realize I wanted a console in this boat. So a lot of planning, mock ups, and thinking, here is what I came up with.

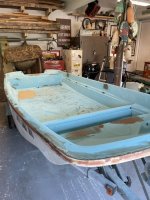
Here?s a couple before pics.

The day I brought it home.
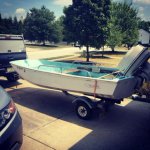

7690919E-0ACE-4292-83E0-1A3097B4645A.jpeg


A couple small marine surveyors checking out the new ride. They approved.
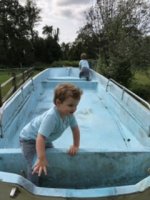

5CD0BD2B-1264-49BE-B384-64DB6FE08570.jpeg

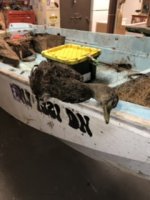
Rigged for an afternoon black duck hunt.
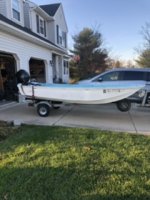

9709B2F6-FBC5-4808-AE23-E634CC13C0F7.jpeg

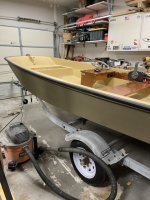
The fruit of my labor.


F5B338AC-7071-45E9-B1F7-26CC851B0742.jpeg


More to follow
 
Last edited:
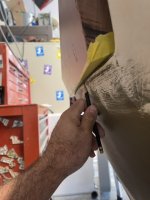
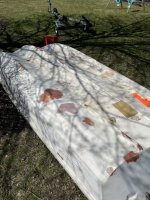
I started by identifying and soft spots. Delamination from the foam core. I drilled a grid pattern, filled with gorilla glue, and epoxied the holes.


F296AF01-41D1-472F-BC03-1C14529AF7C5.jpeg


EBEF0E19-9391-4175-B3CC-78FE1DFDBED9.jpeg

And any bad chips, imperfections, etc got some fairing compound. But I did not go crazy. This will be a duck boat after all.


28050EAD-E935-4D54-BC1E-9EF8377FC278.jpeg

Threw it back in a new to me, larger trailer.


E8DEC90A-D91A-44A7-97EC-B2098A5DCAF5.jpeg
 
Can't go wrong with a 13 Whaler Tom. You can do everything you want in the bay or in the back, or even on the Delaware R. Totally worth it.
 
Tom

Does the foam in a Whaler ever get waterlogged? Never heard of it being an issue but it occurred to me since the boat has a lot of foam in the hull. Keep up the good work.

Eric
 
We had a similar whaler hull at work that became waterlogged
Hull must have weighed twice than specified dry weight.
So yeah. It happens
 
Greg, one word response to your question is, yes the foam doe waterlog as well as impacting the deck layer's ability to support weight. Most restorations of waterlogged hulls involve deck removal to access the wet and rotted foam to be removed and replaced. Some folks argue that a waterlogged hull is just heavier, opting to ignore the impact(s) of that additional weight on handling characteristics as well as load weights. Add-in the impacts of repeated freeze-thaw cycles at high latitudes damaging the laminate over time.
 
Tom, you can't beat a 13' boston whaler. I've had 3-4. Duck boat, crabbing and fishing. I decked over the foward deck with 1/2" marine plywood for a casting platform. I put a large homemade hatch in the deck for preservers, anchor etc. Works great crabbing and fly casting.
 
Eric, yes as others stated it can be a problem. With these smaller hulls you can do a feel test and try snd lift it. I?m sure being a 69, it had a little water intrusion around the drain holes. But for the most part, upon any of my inspections in the holes I drilled and filled it was pretty dry. I don?t have an exact weight compared to what a completely dry hull would be, but I was able to flip the boat on my own so I don?t believe water intrusion to be a major factor in my hull specifically.

Another way is to see how it sits in the water. Mine sat nice and high.
 
They,re surely neat little skiffs . Buddy of mine has had one for at least 30 years, garage kept so nice shape. Can remember when he first got it me trout fishing off bow watching waves come and think boat would swamp as they were higher than bow. At last second bow would lift and simply ride over. Just don,t put anyone up front riding fast in really rough seas as hull will beat the snot out them. Restored they get a little pricey around here.
 
Sounds like you got a good one.
If you can pick it up and flip it by itself, it cant have much if any water in the foam!
 
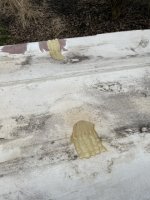
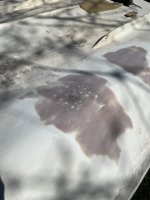
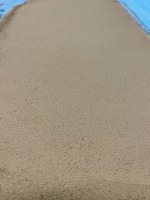
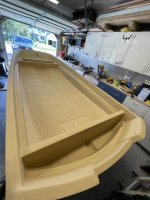
Next up was the interior. I sanded all the old non skid and did a sample of a product called Soft Sand Rubber Particles. The product states it is compatible with most marine paints but oil based wasn?t listed. Planning to use Lou Tisch?s FME, I did a sample section.


64B55D30-DDD4-4ECE-9720-C4C33DFE6E20.jpeg

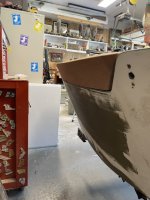
Fairing continued after removal of the old rub rail, and hitting any gel coat chips, old holes, etc.


2660ED1E-C9C9-4F26-85E8-3755DF8C3B48.jpeg

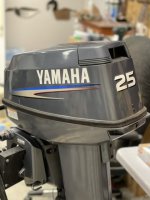
In the meantime, I picked up an absolutely mint 2009 Yamaha 25 2 stroke to hang off the back.


0757C705-6184-42A1-969C-3500551E30A7.jpeg
 
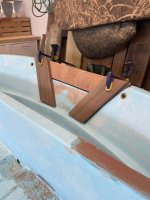
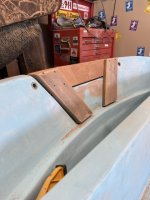
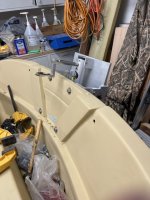
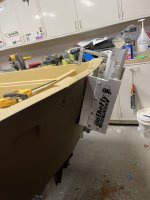
Because I wanted to run a jack plate, and I bought a long shaft motor, I had to fill in the transom notch. The classics pre 1972 I believe, had 15? transoms. I decided to make my own rather than buy one from the few companies offering them. They?re pricey and as waterfowlers, we like to diy. I had some sapele leftover from a job that I planned to make all my parts for this build from.

Laminating 3 1? pieces together to build up enough to follow the pesky curve of the transom.


B76E2934-F641-47A1-A553-ADD1C1AAAF36.jpeg

Sitting in place, I traced the curve onto the piece fore, and aft.


A0CA8264-08FF-4467-8B2C-D6312F854BCA.jpeg


DEE4535E-AA15-4DCC-BB4F-2FC00BE444E9.jpeg

Mock up of vertical supports


7135A103-E721-4387-B425-58E9B468F721.jpeg

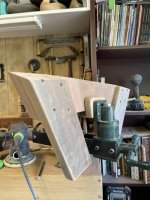
After epoxying together, Some creative ?carving? with multiple sanders and grits to get a desired shape.


93BBED8B-AAA4-48EC-BE4B-C5E29A52C7EB.jpeg

Final piece resting in place.


96716070-9215-4483-87AA-09A86AEB52E2.jpeg


BD504DB4-C6AF-4168-9FF5-7592C2498F6B.jpeg

Like everything else on this boat, it is not ?perfect? but after bedding in thickened epoxy, lagging vertically into the top of the transom, and bolting through the jackplate and transom, it is solid as a rock. Unfortunately I forgot to take pics of the bedding process.
 
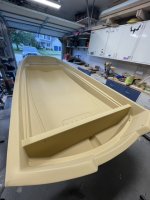
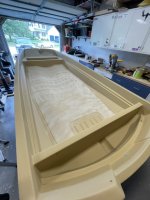
Once the transom riser was installed, the fairing was done, and lots and lots of sanding, I could finish painting the rest of the interior. The interior got a total of 3 coats. First prime coat, then I painted where the soft sand would go, then sprinkle on liberally, once dry, sweep excess off for re use, a good vacuum, and 2 more coats on top. Note for anyone looking to do this. Buy more than you think you need. I was scrounging toward the end trying to stretch it. I should have had another bottle on hand. The finished product is fine, but I would have liked a little more coverage.


ED5D0B26-B500-479A-B16A-F2E97B908FAD.jpeg


730D627B-05D6-4BDC-BC18-BE5B98E35DE9.jpeg


4BBD64DE-C6E3-4677-973D-7B892811BC10.jpeg

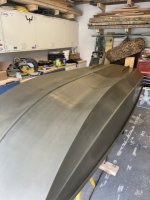
Once interior was painted, it was time to flip and paint the bottom.


F4720E9A-E96F-4657-89C3-0A25B6295572.jpeg

The bottom got around 4 coats. Will explain the extra coat in then next post
 
Last edited:
I have used a 13' Whaler as a duck boat for a few years. I went to it when my grandsons wanted to hunt. I didn't want to put kids in a sneakbox. From a standpoint of safety they cannot be beat. I added an Avery Quickset Blind. Grassed it hides the boat well.

Joe
 
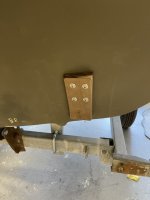
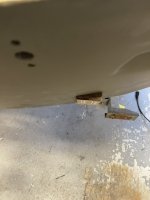
Once the bottom was painted I was ready to load back onto the trailer. The trailer received new bunks and carpet and bunk brackets while the boat was upside down. In my typical impatient fashion, I decided to try and load it with just myself and a good friend. Thinking I could put the front onto the bunks and winch up onto the trailer with my friend at the stern helping guide it and lifting the back?.

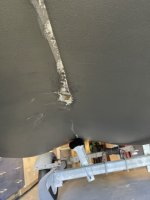
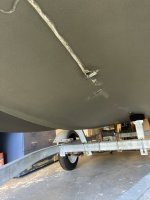
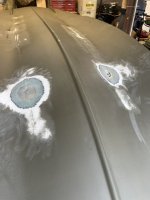
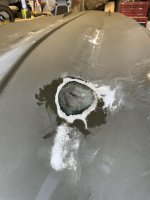
Bad move. Don?t ask me how I didn?t realize but the bunks dug right into hull causing 2 holes and ruining the new bunks in the process. Bonehead move. Back onto the horses.


EB569BD8-5301-44F8-B79C-1CCDB0AAFCA6.jpeg


C12FA600-7800-4992-98CB-FE222FE7C90F.jpeg

Once flipped again, I sanded out the holes, filled the void in foam with fairing compound, and each hole got 3 layers of 1708 and epoxy. Faired them all out and repainted the entire hull.


39E4F7F1-4D02-489E-AECF-87B2606E4754.jpeg


A2564C5D-71EA-4088-B4A4-E42B4660A4A9.jpeg

After the boat was flipped again, I installed the transom riser, painted that, and installed the new On The Fly jackplate.


877C97E6-C609-48C9-A7B9-A43F23B28EB0.jpeg


E86AB68A-CBC1-447B-9224-3809442989CA.jpeg
 
Awesome Joe, I bought a beaver tail blind for this one but have not installed. I will post when I do.
 
http://www.duckboats.net/cgi-bin/forum/gforum.cgi?post=338350;do=post_view_flat


this is the link to my Whaler project
 
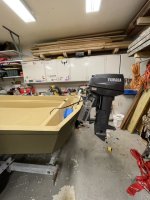
Time to hang the new motor.


2246DAE0-048A-414E-9A72-043581A1411B.jpeg

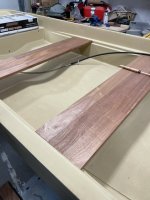
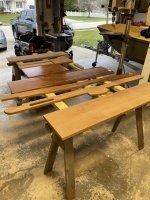
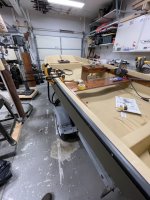
Interior started. Everything was 1? thick sapele. All I had was 4? wide cutoffs so a lot of glue ups and a new dewalt thickness planer was my friend.


EF0445D6-5FB9-4574-8546-FFBE54103FFC.jpeg


407BECAB-CC3E-405B-8965-9CB50A62F5BA.jpeg

I used Total Boat Halcyon marine varnish for this project. Highly recommend it. Water based so working inside with the doors closed and heat on was fine. Very happy with the finished product.

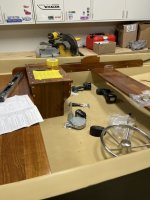
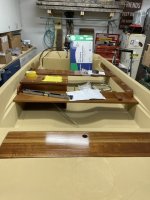
Interior starting to go in.


E44BDF0B-01B0-4ABE-8E06-4B70DAF5D42A.jpeg


B671D4FD-66F0-419A-875D-303BD0C383FE.jpeg

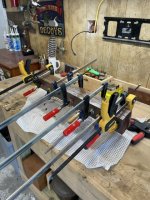
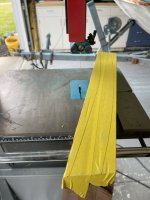
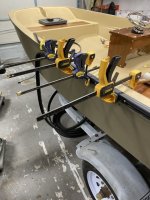
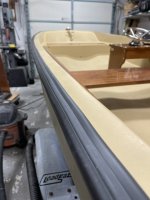
Installing the new rub rail. This was by far the hardest thing I had to do. Boston Whaler reccomends 3 people when installing. I did it alone with lots of clamps. It was pricey but in my opinion well worth it. Quality is great and I think it makes the boat.


A3976D9A-C51B-43CF-9D4C-8607A1DA19CA.jpeg


885D377E-0A0D-44B0-BB9B-E89382C9D310.jpeg
 
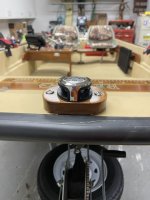
Next up was electric. I ran 2 strips of red LEDs under the main bench. They got mounted in grooves I dadoed into the bench when I made it. I also mounted 2 courtesy lights on the console for those early morning pre flight rides.


6B26BACE-D13F-4E84-8B5F-AF1BB392DAFC.jpeg

The wires for the bow navigation light got run inside the rub rail, so once that was on I could install the rub rail insert. I had to mount the light on a custom block, so that when the anchor is deployed, the rope will not rip off the plastic light housing.


3EFBB931-1AEB-4F20-AFD2-3B4BD59AE209.jpeg


30746DA3-C775-42A0-BBD0-D08A1B9BCDD3.jpeg067CE4C5-1755-4033-8C1C-4394098B8191.jpeg

Because of the curve of the transom, I had to make a wedge to mount the transducer correctly. It?s a SI/DI so I wanted it to be correct. I made this from a scrap of ipe i had laying around. Bedded in RTV silicone and screwed.


D6C89245-0A6F-48F8-BD33-A4FBF7200A42.jpeg


6421D7AE-A587-4A7C-80B9-E694A134D038.jpeg

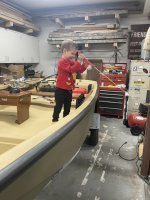
1/2 of my quality control team conducting some testing.


C190DC2B-9E13-401B-9DC9-43EAFBA4DF5A.jpeg
 
Back
Top