Dave Parks
Well-known member
Mac showed up early this morning and we got the netting on the flight pen up within a couple of hours. Here are some pic's as the job went along.
This stuff is tough, 232# breaking strength, 2" mesh netting with 10 year warrenty. (it should for it's $500 cost). The netting in a roll 150' X 50', so I will have plenty left over for the other pen tops. The flight pen here is 120' X 30'. Posts are spaced at 10' apart.
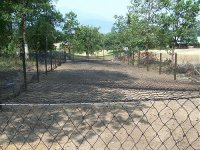
Once we got the netting rolled out and over-lapped on the far end of the FP, we went down one side over-lapping the NZ wireabout a foot and started attaching the hog rings throught the netting and onto the NZ wire every 8" or so. Once this was done we did the opposite side pulling it over until we had the excess on the ground on the outside and just the right drop in the middle where the support posts will go. Here Mac is attaching hog rings.
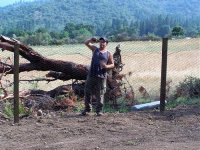
At the far end (where the brooder/feed building will go) we cut off the excess length as well as the excess width on the left.
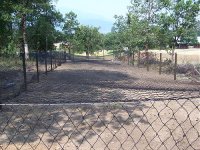
It's a little out of focus, but you can see how the ring attaches to the netting & NZ wire. Next step will be to attach the 72" chicken wire, pull it tight with the ATV and hog ring it to the netting and the NZ wire at the same time. Then we will weave a special high strength carbon cable through the chicken wire, netting and NZ wire to give it all extra strength along the NZ wire to handle the snow loading in the winter time. Which is not much of a problem here in this area. Inside the pen will be three 8' posts placed about 30' feet apart with a freezbe nailed to their tops that will support the netting in the middle of the pen and give the pen more height. These poles are also used to shake off any snow load that may get on it during the winter months. Pen should be ready for the birds by this coming weekend.
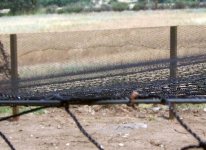
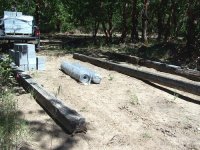
BTW here's some old 12'X12"X24' barn timbers that I have been saving for this occasion. I pulled them into place here at the cabin site with the ATV, that thing earns it's keep everyday!
These will be placed on the big granite foundation rocks and used as the base to build the cabin on. I'll nail on some 2'X8" treated wood right on top of these timbers and build teh floor atop them. The timbers will help make the cabin look "Old Timey" for us Old Timers!
I'm not looking forward to un-loading another 2,370 pounds of those concrete blocks tomorrow, but with Judy handing them down to me from up in the truck, it sure makes it easier on my...........my advice........always marry a strong squaw!
Dave
This stuff is tough, 232# breaking strength, 2" mesh netting with 10 year warrenty. (it should for it's $500 cost). The netting in a roll 150' X 50', so I will have plenty left over for the other pen tops. The flight pen here is 120' X 30'. Posts are spaced at 10' apart.

Once we got the netting rolled out and over-lapped on the far end of the FP, we went down one side over-lapping the NZ wireabout a foot and started attaching the hog rings throught the netting and onto the NZ wire every 8" or so. Once this was done we did the opposite side pulling it over until we had the excess on the ground on the outside and just the right drop in the middle where the support posts will go. Here Mac is attaching hog rings.

At the far end (where the brooder/feed building will go) we cut off the excess length as well as the excess width on the left.

It's a little out of focus, but you can see how the ring attaches to the netting & NZ wire. Next step will be to attach the 72" chicken wire, pull it tight with the ATV and hog ring it to the netting and the NZ wire at the same time. Then we will weave a special high strength carbon cable through the chicken wire, netting and NZ wire to give it all extra strength along the NZ wire to handle the snow loading in the winter time. Which is not much of a problem here in this area. Inside the pen will be three 8' posts placed about 30' feet apart with a freezbe nailed to their tops that will support the netting in the middle of the pen and give the pen more height. These poles are also used to shake off any snow load that may get on it during the winter months. Pen should be ready for the birds by this coming weekend.

BTW here's some old 12'X12"X24' barn timbers that I have been saving for this occasion. I pulled them into place here at the cabin site with the ATV, that thing earns it's keep everyday!
These will be placed on the big granite foundation rocks and used as the base to build the cabin on. I'll nail on some 2'X8" treated wood right on top of these timbers and build teh floor atop them. The timbers will help make the cabin look "Old Timey" for us Old Timers!

I'm not looking forward to un-loading another 2,370 pounds of those concrete blocks tomorrow, but with Judy handing them down to me from up in the truck, it sure makes it easier on my...........my advice........always marry a strong squaw!
Dave

