
I'd been wanting to build one ever since the pics were posted during the winter. So....
In the finest traditions of Capt. Harold Money (The Shootinist' Gentleman), the camp guide Old Horace, and Nash Buckingham, here is my prototype gunning box. Made from cedar. I thought about this box at a nice gunning club during the early part of the 1900's, and figured maybe the guide or caretaker would paint a label on the box. The guest shooters could fill it up with their possibles, ready for the morning hunt.
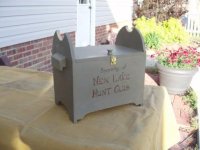
I used a single cedar plank (11.5" x 10') from Home Depot to construct the entire box, with brass hardware. I planed the board to 1/2" true width on the two sides with the cradle, 3/8" width on the other sides and bottom. The bottom of the box sits about an inch off the floor, figuring the boat or blind might have some water in it. I may take some beeswax and try to seal the bottom seams, even though they are glued pretty tight. (maybe look more authentic?) Inside dimensions: 12.5 L x 8.5 W x 8.5 D.
I considered the opening lid, and thought about putting it on the side rather than top. Maybe next time. I thought about the handle, considered a strap vs something collapsible, and chose the two side handles rather than a top one. A top handle would work and would not overstress the hardware I think. But my thought process there went along the lines of "The shootin'st gentleman did not carry his shell box through the marsh, but rather it was put into a boat and everything was rowed to the blind." I love to think about Horace rowing that boat to the blind, and eyeing that bottle of brooklyn handicap the whole way out.
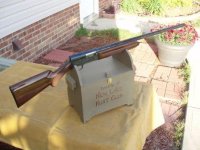
Inside the box is room enough for three boxes of shells, sandwiches, binoculars, and of course the old "Brooklyn Handicap." (or a thermos of coffee)
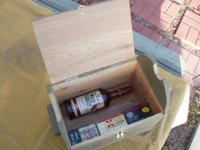
I did not paint the interior because I figured the old timers would not waste paint. I also left one side of the board unplaned....I just liked the rough look of the wood on the inside.
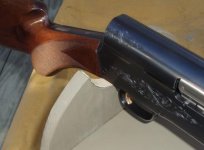
I used the leather from an old shoe to pad the notches where the shotgun will rest. Depending upon which way you put the gun in the cradle, the barrel will point slightly up, or slightly down. Probably not much application in today's world, considering safety in the blind, but a stable rest anyhow.
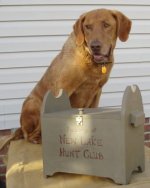
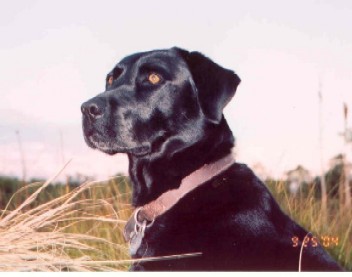
Old Traveller seemed to approved.
There is no real NEW LAKE HUNT CLUB to my knowledge, but New Lake is a real place here in Eastern NC, not too far from the famous Lake Mattamuskeet.
Hope you like it..Have a great day.
In the finest traditions of Capt. Harold Money (The Shootinist' Gentleman), the camp guide Old Horace, and Nash Buckingham, here is my prototype gunning box. Made from cedar. I thought about this box at a nice gunning club during the early part of the 1900's, and figured maybe the guide or caretaker would paint a label on the box. The guest shooters could fill it up with their possibles, ready for the morning hunt.
I used a single cedar plank (11.5" x 10') from Home Depot to construct the entire box, with brass hardware. I planed the board to 1/2" true width on the two sides with the cradle, 3/8" width on the other sides and bottom. The bottom of the box sits about an inch off the floor, figuring the boat or blind might have some water in it. I may take some beeswax and try to seal the bottom seams, even though they are glued pretty tight. (maybe look more authentic?) Inside dimensions: 12.5 L x 8.5 W x 8.5 D.
I considered the opening lid, and thought about putting it on the side rather than top. Maybe next time. I thought about the handle, considered a strap vs something collapsible, and chose the two side handles rather than a top one. A top handle would work and would not overstress the hardware I think. But my thought process there went along the lines of "The shootin'st gentleman did not carry his shell box through the marsh, but rather it was put into a boat and everything was rowed to the blind." I love to think about Horace rowing that boat to the blind, and eyeing that bottle of brooklyn handicap the whole way out.
Inside the box is room enough for three boxes of shells, sandwiches, binoculars, and of course the old "Brooklyn Handicap." (or a thermos of coffee)
I did not paint the interior because I figured the old timers would not waste paint. I also left one side of the board unplaned....I just liked the rough look of the wood on the inside.
I used the leather from an old shoe to pad the notches where the shotgun will rest. Depending upon which way you put the gun in the cradle, the barrel will point slightly up, or slightly down. Probably not much application in today's world, considering safety in the blind, but a stable rest anyhow.
Old Traveller seemed to approved.
There is no real NEW LAKE HUNT CLUB to my knowledge, but New Lake is a real place here in Eastern NC, not too far from the famous Lake Mattamuskeet.
Hope you like it..Have a great day.