HenryHawthorne
Member
I greatly appreciate all the advice and guidance in my information-seeking thread:
New Build Thread
I've decided on a Devlin Snow Goose build, and will do my best to document it here. Lots of great information and pictures offered in the thread above - I may link specific posts here when they are pertinent.
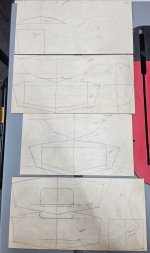
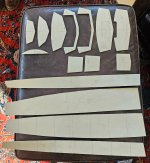
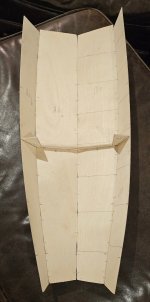
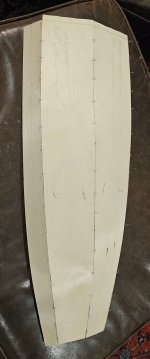
I've ordered and am awaiting paper plans, and will then start gathering plywood and other materials - so it will be a while before the actual build starts. But Devlin was kind enough to send me a pdf version, as well, so I can start work on a model. I want to get a better handle on scale so I can noodle on a few ideas/mods, and this will also give me some insight into process. I'm building the model at 1/8 scale.
And, so it begins...

I'm expecting plenty of stops and starts on this project, but with any luck will have a boat ready for water in the Fall. We'll see.
New Build Thread
I've decided on a Devlin Snow Goose build, and will do my best to document it here. Lots of great information and pictures offered in the thread above - I may link specific posts here when they are pertinent.
I've ordered and am awaiting paper plans, and will then start gathering plywood and other materials - so it will be a while before the actual build starts. But Devlin was kind enough to send me a pdf version, as well, so I can start work on a model. I want to get a better handle on scale so I can noodle on a few ideas/mods, and this will also give me some insight into process. I'm building the model at 1/8 scale.
And, so it begins...
I'm expecting plenty of stops and starts on this project, but with any luck will have a boat ready for water in the Fall. We'll see.
") .
.