You are using an out of date browser. It may not display this or other websites correctly.
You should upgrade or use an alternative browser.
You should upgrade or use an alternative browser.
How to Repair Burlap Decoy
- Thread starter Cody Foster
- Start date
roy brewington
Well-known member
Simply sand area a bit to include area around damaged area . Apply mastic and burlap. Fill the weave on the burlap good with mastic. Let dry completely, prime & paint. This is assuming you don,t have to build up foam to proper contour in damaged area. Can,t really tell from pic.
Steve Sanford
Well-known member
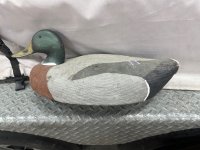
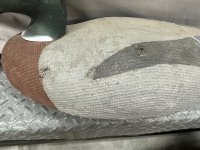
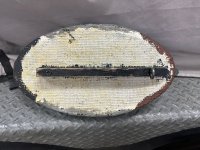
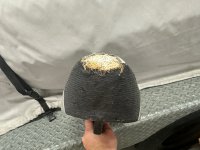
Cody~I have this decoy, which appears to be a Restle body, with some dents through the burlap and missing burlap.
What is the best/easiest way to repair this so I can put it back in service this season?
I don’t have any experience with burlap. The few foam decoys I have rehabbed were restle coated. View attachment 66677View attachment 66678View attachment 66679View attachment 66680
Roy is right on the money. Use open-weave burlap and tile mastic. I have not burlapped lots of birds (I actually hope I have done my last....) - but I have always wet the burlap before embedding it in the mastic. I force the mastic into the weave with both a chip brush and my gloved hands.
Elsewhere on the body you could fill the small dings with Bondo or a good exterior "spackle".
Since you a rehabbing this decoy, I suggest you dress up his paint a little bit. The proportions of the major paint areas are a bit off, to my eye. So, I would "move" some of the colors around thus:
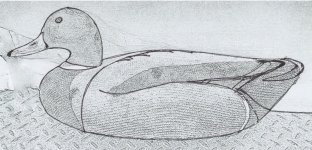
Hope this helps!
SJS
A molded decoy like yours and the damage you show could be fixed with a small amount of apoxie sculpt. You can get it on amazon and it wouldn't take a lot for just one decoy. It's a two part epoxy putty that sticks to just about anything and can be smoothed out with a little water and even sanded after it cures a day or so.
That old method of burlapping was likely a reasonable way to get a texture on the surface of the decoy, but it's also a way for wear to introduce water into the burlap and speed up the wear. My approach is quite a bit different, no burlap texture will show through what amounts to several thin coats of tile adhesive till the surface is smooth. Then a few coats of oil based enamel as a sealer, it soaks into the tile adhesive surface. At that point, I can either just paint it with oil based enamels or in my usual manner I like to strengthen it with a coating of flocking, then paint.
This past winter I had a friend send me a half dozen of several hundred decoys I've made for him that something had decided to kill. Why the unknown critter decided on just one bag of decoys out of dozens we will never know. Why mostly head shot kills on these six is still a mystery, but I'm thinking maybe a weasel or squirrels in the decoy shed. At any rate the repair was more extensive than what you are dealing with and since they are all flocked it added some more finishing issues.
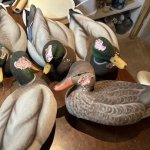
I don't want to add weight to the repair, so I leveled out the holes with gorilla glue and scraps of foam that I used to carve these types of foamers.
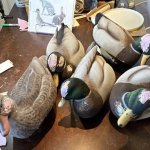
Once that surface is smoothed I added a thin layer of apoxie sculpt to blend it back into the burlapped decoy's head and sand it smooth.
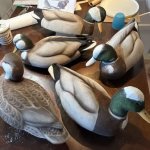
The color is kind of off in this picture, I have a new camera now, but these are the rehabbed decoys after flocking and paint. In order to get a good blend between the patches and the original head, I flocked the patched, then sanded the whole head to even up the surface, flocked the head again so it would be uniform and painted with oil based enamels to finish it off. The only other extensive repair I've done on this type of decoy was a couple that a retriever decided to take a bug chunk out of, it looked like a shark attack, it was repaired the same way.

That old method of burlapping was likely a reasonable way to get a texture on the surface of the decoy, but it's also a way for wear to introduce water into the burlap and speed up the wear. My approach is quite a bit different, no burlap texture will show through what amounts to several thin coats of tile adhesive till the surface is smooth. Then a few coats of oil based enamel as a sealer, it soaks into the tile adhesive surface. At that point, I can either just paint it with oil based enamels or in my usual manner I like to strengthen it with a coating of flocking, then paint.
This past winter I had a friend send me a half dozen of several hundred decoys I've made for him that something had decided to kill. Why the unknown critter decided on just one bag of decoys out of dozens we will never know. Why mostly head shot kills on these six is still a mystery, but I'm thinking maybe a weasel or squirrels in the decoy shed. At any rate the repair was more extensive than what you are dealing with and since they are all flocked it added some more finishing issues.

I don't want to add weight to the repair, so I leveled out the holes with gorilla glue and scraps of foam that I used to carve these types of foamers.

Once that surface is smoothed I added a thin layer of apoxie sculpt to blend it back into the burlapped decoy's head and sand it smooth.

The color is kind of off in this picture, I have a new camera now, but these are the rehabbed decoys after flocking and paint. In order to get a good blend between the patches and the original head, I flocked the patched, then sanded the whole head to even up the surface, flocked the head again so it would be uniform and painted with oil based enamels to finish it off. The only other extensive repair I've done on this type of decoy was a couple that a retriever decided to take a bug chunk out of, it looked like a shark attack, it was repaired the same way.


