TDB 14 Classic - "Easy" Fix

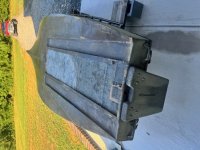
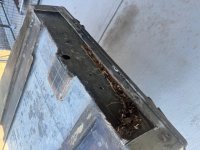
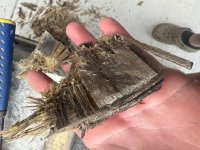
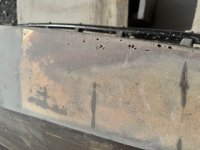
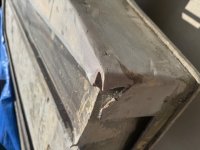
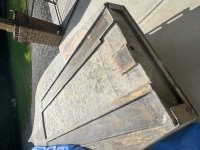
A little "progress" over the weekend. Man this balsa core sure is bonded well to the glass. I need to remove the balsa that is exposed in this picture and I plan to stop there. Any further repairs to the balsa core near the bow can be done from the floor side in the cockpit if needed.

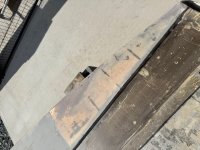
Unfortunately I found several seams in the fiberglass floor that have cracked over the years. It looks like instead of glassing the boat floor from bow to stern they glassed it from port to starboard. There was very little overlap in these joints so some of them have gave way over the years. This is likely yet another possible point of water intrusion

I plan on marking each place there is a crack in the glass and fixing them all once I get the core replaced and the hull flipped back over. I will probably end up re-glassing the entire floor in the cockpit.

I had previously said that the floor fiberglass and the hull fiberglass appeared to be the same thickness, but now that I have popped through the floor fiberglass I can see it's very thin. It's just a layer of woven cloth directly on the core and then a layer of CSM on top of that on the floor side. That's it.

Now that I've gotten this deep into it I can tell that these older TDB's were very poorly constructed. Very thin glass and a multitude of points for possible water intrusion.
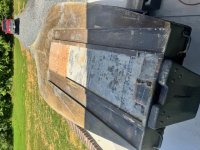
IMG_5757.jpg
 
Good morning, Noah~

Interesting to watch your Voyage of Discovery....

I was especially surprised to read: It's just a layer of woven cloth directly on the core and then a layer of CSM on top of that on the floor side. That's it. That order seems completely upside down. I like CSM for its ability to stick to things - and cloth for a smooth surface. I would have put the CSM on the core, then embdded the cloth into the wetted CSM. Go figure!

All the best,

SJS
 
Steve, what I suspect is that the balsa core material that TDB used had a Scrim cloth on the backside (floor side) holding it together. They simply shot their chopper gun over this with chopped strand to create a CSM layer over the scrim cloth. Very very thin overall glass layer on the floor side
 
Steve, what I suspect is that the balsa core material that TDB used had a Scrim cloth on the backside (floor side) holding it together. They simply shot their chopper gun over this with chopped strand to create a CSM layer over the scrim cloth. Very very thin overall glass layer on the floor side
That is all hand laid no chopper gun back then but you are correct the Scrim is on the backside floor. The flooring was made to flex slightly underway to ease the stress while the balsa at the time was meant to be the actual support for that floor. The 17's are built differently with marine ply and fused to the floor itself which 30+ years later has proven to last much longer.

I would remove that all like you have and use Nidaboard with woven woven matting. Unless you're keeping the boat for another 20+ years you're digging into a complete floor / hull rebuild further than that. It's VERY thin 1/4 maybe? I'd go that route seal her back up tie in the matting to those channels you mentioned, sand exterior apply a finish coat & send it!

Great work bud unfortunately back then this was a practical way to make em! Thankfully all synthetic's nowadays so these ole 2025 classics in the next 50 years will be easier for the next generation if the birds exist then! :LOL:

I wish I could talk to the fella that hand laid that CSM in the floor with little to no overlap and give him a piece of my mind :LOL:

All jokes, mostly. We sure have came a long way in materials and construction methods in the last 30+ years, and I understand at that point in time this was the best way to do things.

I talked to Tom earlier about a couple things with the boat. As always he is a pleasure to talk to and a wealth of knowledge on the TDB's.

He made a good point that the glass won't take to that inside corner of the channels in the hull. I will build some fillets with epoxy in that inside corner to be sure the glass conforms to that more gentle slope.

He also encouraged me to tackle the transom replacement while I had it flipped like this and glass everything back at one time. Basically, the plan is going to be to leave about 3 inches of material on three sides, the port, starboard, and the top side where the seam between the hull and the deck are. On the bottom side I will cut it out all the way to the floor which I've already torn out. This will allow me to slide my new coosa transom in as one solid piece from bottom to top.

One good piece of info that came from our conversation was on the subject of sealing the seam between the hull and deck around the rest of the hull. It's common to see guys blame this seam on the water intrusion issues and wet flotation foam. Tom let me know that this is purely misinformation and this seam cannot leak. It is fiberglassed on the inside of the deck at that seam.
 
A little progress update. The balsa core floor demo is complete! Man I won't miss that a bit.

Finished that up early Saturday morning and decided to go ahead and remove the motor board and tear into the transom.

This transom felt rock solid, but as I tore it apart I could see that it was completely dilapidated. The plywood core was soaking wet and all of it was rotted. Started chipping away at removing that wet plywood and go it about halfway done.

I will finish the demo of that old plywood this week and start ordering materials to get this thing back in tip top shape.

I'm going to have to get creative with clamps when it comes time to replace this transom board and floor core. Most of the floor I can just weight down, but the margins I left for a scarf are going to be tricky. May end up drilling some relief holes and injecting some epoxy in those holes with a caulk gun.

Floor demo complete:

IMG_5789.jpg

Motor board removed and transom fiberglass removed to expose rotted plywood:

IMG_5792.jpg

Current status of the transom demo:

IMG_5795.jpg
 
Noah~

re clamping your transom replacement: I have used self-tapping screws (usually panheads) for such projects.

Space them regularly every few inches and use fender washers if needed. You might want to put a layer of plastic on first - to prevent washers from getting stuck by the epoxy.

After the full cure, back them out and fill each hole with thickened epoxy. After fairing, enclose with outer skin of 'glass as planned.

If you do not want to perforate your board(s) - you can use ratchet straps and wooden wedges to distribute the necessary clamping pressure.

All the best,

SJS
 
Similar to Steve, years ago, 2009 I think, when I refurbished my BBSB, I bought some SS square drive. buggle head screws in several lengths. I use these as "clamps" in all my glue ups. After everything cures, I pull them and fill with thickened epoxy. Been using the same screws for 16 yrs now! The real advantage of screws over clamps is dry fitting is done and then alignment is perfect, and less messy.
 
John, it was built in 1993. The fella I bought it from bought it brand new. I have the original pink purchase receipt at home. I think he paid somewhere in the neighborhood of $2500-$3000 for it brand new.

Edit: I have it here at work actually. I was wrong on all counts. Boat was $4520 brand new and was purchased from Pogo Inc. in Street, Maryland June 2nd, 1993. I'm sure that included the boat and trailer, not sure if that included the motor or not.

I also have the Manufacturer's Statement of Origin when the boat was transferred to the Dealer. Boat was transferred to dealer December 17th, 1992, so I think it's safe to say the boat was actually built in 1992, not 1993. It has William O. Clark's ink signature here at the bottom with the Rock School House Road, Bristol, Maine stamp.
 
Last edited:
Between other obligations on the weekends and the rain we have gotten about every afternoon for the past week, I haven't touched the boat since I posted the last update.

I did place a US Composites order yesterday though, so I will have all materials needed on hand soon.
 
Got an update........the lid on the can of worms continues to be peeled back further.

Saturday afternoon I finished the transom demo, which I thought would be the end of demo on this project. As I chipped out around the edges, I went to pry back on the last section and the fiberglass cracked and a good sized chunk busted off.

I've got a pretty good feel for the strength of this lamination of fiberglass with how much I have demo'ed, and the force I applied was nowhere near what should have caused a crack, so I started investigating with my angle grinder.

I had previously noticed that the bottom of the hull on the port side near the transom was a bit out of level. I just attributed this to rough manufacturing and figured I would fix it when I was fairing the hull after I completed the patch.

The more I looked at it, the more suspicious it became, so I put on a 40 grit flap disc and went to work.

What I uncovered appears to be an old patch job in the bottom of the hull. What's strange is that I spoke with the previous owner, who bought the boat new, and he never did any work in this area.

The patch had no fiberglass over it, only epoxy. I sanded it to "close to fair" and doing so got me into the balsa used for the patch. The top of the core material (balsa) is fair with the fiberglass of the hull. Any fiberglass applied here would cause a hump and a hook in the aft end of the hull.

The more I work on this old TDB the more I realize that there could have been much better specimens for my efforts. This old boat continues to throw curveballs that require quite a bit of time, effort, and money to fix. The way I see it I've got three options to correct this old patch area:

1) Continue to grind down the area, build back up with fiberglass.
2) Demo the entire patch area to remove the old balsa core. Replace core and reglass.
3) Grind to perfectly fair. Finish center hull patch and transom, Reglass entire bottom of hull to tie everything together.

The last piece of transom plywood removed:

IMG_5856.jpg

The patched area in the hull:

IMG_5857.jpg
IMG_5858.jpg
IMG_5859.jpg

Overall current status:

IMG_5860.jpg
 
You have a lot of time invested in this, but I'd be suspicious that other currently hidden problems will show themselves later on. I don't think you've applied much in the way of glass or resin yet? So maybe cost is primarily sweat equity up to this point. I might be thinking of abandoning ship. Maybe it's premature to suggest the landfill, if you continue I wish you best of luck and look forward to seeing the finished product.
 
That latest damage discovery looks like a repair job for concrete ramp damage or trailer mishap. The previous owner's statements do no align with that, as you noted. That's a pretty big area for no glass. I've seen small epoxy-only patches but given the size of that area I'd feel better had it been glassed.

Keep moving forward. You'll get there.
This is exactly what is was thinking: that corner hit the ground or something hit it hard.
The previous owner either wasn’t the original owner or wasn’t completely honest with you. Or both.
At this point keep plugging away unless you find additional significant damage.
 
SJ, I have purchased pretty much all the materials needed to do the rebuild. I have all of the resin and fiberglass sitting here in the garage ready to go. I have the sheet of Coosa staring at me too. I've also been chipping away at rebuilding the trailer. The bunks were trash and anything not galvanized was rusted to oblivion. I have pretty much planned my duck hunting adventures this season around this boat being ready, so I've got to get to work!

Eric, Carl, or any others, any insight on how to repair this patch? Try to grind down/scarf and then reglass? Or just say heck with it and glass the whole bottom of the boat?
I will have to defer to others, since 2003, all my experience has been with aluminum boats!
 
Back
Top