BBSB Pond Box Build

SJ Fairbank

Well-known member
Supporter
Next project is a pond box adapted from the 1942 Field & Stream/Megargee sheerside BBSB plans. It's been in my mind for a few years, but other projects kept jumping to the front of the line. These plans hold a special place in my family history, as my grandfather built his first as soon as he got ahold of the plans. I believe he built it while my dad was in the Navy during WWII, but those who could confirm it are long gone. We hunted the boat in various capacities until it was lost to water damage 40 years ago when the roof of the shed in which it was stored failed and we didn't notice until too late. In the 70's and 80's I built a total of four boats based on the plans, from a variety of materials. Being that I enjoy building more than having wood boats, they were hunted a few times then given to buddies.

The concept is a 9' feather edge box, scaled from the aforementioned plans. The following studies are close to what I intend to build, but I always tinker until the last second. For instance in the build study it appears to my eye that there's a hook in the sheer near the bow, I'm gonna play with that. Everything is being drawn in AutoCad so it's easy to manipulate.

The procedure was first to recreate the boat Megargee took measurements from. A couple of assumptions have to be made: 1. He didn't change measurements to smooth the lines when drawing. 2. The original was a feather edge (he doesn't say that, but says he added the sheer side for ease of construction) 3. The original was built entirely on a 48" radius frame.

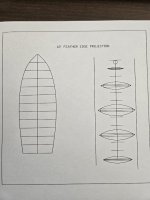
This photo is what the boat would have looked like in plan, and how the molds at stations A-E would appear in section. Note that the sheers are shown to scale as vertical lines in the sections, the deck radius' passes through those points to where they would mate as a feather edge. It is almost 6" wider than the plan boat, 54" vs 48" at maximum beam.
20250814_105956.jpg

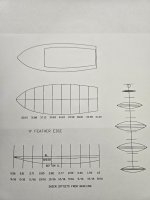
The design procedure was then to scale it down to 75%. Several thing then come into focus: 1. The deck radius is now 36" vs 48" in the original. 2. The boat needs to be restationed and mold dimensions and offsets calculated. I won't bore you with the tedium, but here's what pops out.
20250814_110035.jpg
 
Last edited:
That first post was getting large and I was afraid I'd lose it to a big thumb. Easier to follow up with more posts.

So a couple of questions to ponder.

I'm leaning toward maintaining the 36" radius for the bottom, since it affords some depth. Depth is at a premium since the box won't be fully decked, see the above post for the cockpit coaming line. I forgot to mention that I intend to use canvas for grassing over the entire cockpit, similar to the pond boxes Steve Sanford designed. Using a 48" radius would substantially reduce the depth, to less than 6" which I think is a bit low. I also want enough room under the canvas for my furry friend, so the foredeck is 3' long minimum. I might increase the radius of the deck to 48" or more for aesthetics and headroom. Then again, Gunner always sits in my lap anyway.

The big what if, is what type of planking? Unless someone provides a rock solid reason not to, I am almost certain to try cedar strip planking overlaid with fiberglass as done on canoes and kayaks. What I know is it will be a PITA at the feather edge, beyond that I'm looking forward to the challenge.
 
Last edited:
SJ,

Is the featheredge able to be solid like a harpin and the planks inlaid? What type of water depth will you be hunting?

Rick Lathrop
 
Is the featheredge able to be solid like a harpin and the planks inlaid? What type of water depth will you be hunting?
Regarding the featheredge, the answer is maybe. I'm thinking about it, other solutions include using a wider strip for the outermost plank or placing a 1/2"sheer as a fastener for a short/narrow strip. I guess the 1/2" sheer would be close to what you're suggesting. Another might be to run cross planks atop and conforming to the molds for additional support. The problem stems from needing to plank from the keel out, instead of from the gunwales in such as is customary on a canoe or kayak. I doubt a strip would take the compound curve required to start at the gunwale. As with most things in boatbuilding, more than one way to skin the cat.

The craft is intended to be towed to the spot, then pulled up in the marsh. Probably too small to row any distance over open water although it will have a roughly 40" beam.
 
Thinking about it more, maybe cutting a triangular strip out of 3/4" or 1" thick stock would work. An appropriate adjustment to the end of the molds could be made to accommodate it running around the ends, supporting the edges of the planks.

Speaking of the harpin, that may be the greater challenge to get right. They usually are.
 
I pulled this image from Hank Garvey's BBSB build. It looks easier to achieve than the above idea I had since the chine log angles would change over the length of the hull unless your design maintains the same deck to hull angle front to rear. The way Hank did it allows one to hand plane their way to a nice fit.
 

Attachments

  • HanksBBSBsheer.jpg
    HanksBBSBsheer.jpg
    144.9 KB · Views: 21
That looks like a good way to do it. The angle between the deck and bottom is constant as the radius is always the same. I'm headed to the shed to figure it out.
 
That first post was getting large and I was afraid I'd lose it to a big thumb. Easier to follow up with more posts.

So a couple of questions to ponder.

I'm leaning toward maintaining the 36" radius for the bottom, since it affords some depth. Depth is at a premium since the box won't be fully decked, see the above post for the cockpit coaming line. I forgot to mention that I intend to use canvas for grassing over the entire cockpit, similar to the pond boxes Steve Sanford designed. Using a 48" radius would substantially reduce the depth, to less than 6" which I think is a bit low. I also want enough room under the canvas for my furry friend, so the foredeck is 3' long minimum. I might increase the radius of the deck to 48" or more for aesthetics and headroom. Then again, Gunner always sits in my lap anyway.

The big what if, is what type of planking? Unless someone provides a rock solid reason not to, I am almost certain to try cedar strip planking overlaid with fiberglass as done on canoes and kayaks. What I know is it will be a PITA at the feather edge, beyond that I'm looking forward to the challenge.
SJ~

I just wanted to let you know how much I am enjoying this. The thought process of any project is sublime. My Dad called it "doping it out." And, he agreed that it's the best part/most fun.

All the best,

SJS
 
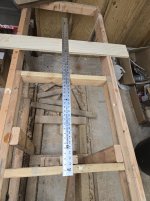
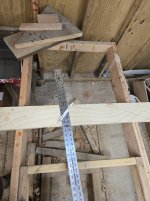
I decided to lay out the molds, but not cut yet. On past boat builds I've had good luck using a 4x4 as a strongback using 3/4" plywood as molds. The 4x4 provides straight, solid support which resists twisting of the molds. I need to pick up a 10'er for this boat.

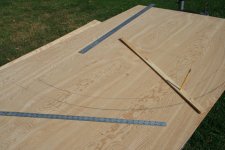
First step is to make a template, in this case a 36" radius which can be copied for each station's mold. I'm not set up to saw on a beam compass, so bandsawing by eye will have to do.

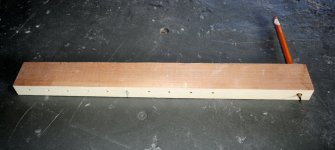
For the mold template I set up a simple beam compass using my 48" straight edge. It has a hole conveniently drilled at about the 1" mark, so we add an inch to the desired radius and trace out an arc. The template should have a chord line sufficient to trace an arc equivalent to the largest mold.


20250811_165341.jpg20250811_165624.jpg

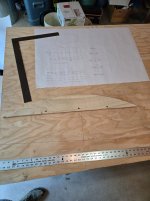
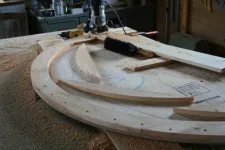
The next step is to cut it out there's a picture of it in the next photo. Simple and easy, but admittedly not perfect.

To lay out a mold for boat such as I'm building, trace an arc long enough that the mold length (boat beam) can be accommodated. Using your straight edge, draw a line ( a chord) intersecting the arc at the mold length. Then flip the template and make a mirror image on top. Mark a centerline perpendicular to the chord for alignment of the mold on your strongback. Be sure to identify which mold it is or you'll drive yourself nuts later on. Stations 1, 2 and 9 will be permanent, probably made from cedar like the rest of the boat.

Here's the first mold, the largest, laid out.

20250815_180304.jpg

I finished the others but I'm still shopping for lumber. I don't think I'll cut until I'm sure what I'll use. Right now the lead contender is King's Ransom Cedar, more commonly known as Western Red Cedar. $$$$:oops:
 
SJ~
Just one thought - for your audience at this point: A router with a straight-cutting bit and a quick wooden "beam compass" can be used for cutting out radii with precision.
Here is one I use for smalle4r radii.
sm 5. Shop-made beam compass..jpg

For cutting the radius, I screw my router base to a 1x6 (or comparable piece of plywood).

sm 10 - Fantail shape is laid out with a beam compass.jpg

Here I am making the fantail frame (harpin?) for White-Wing:

20-a-much-more-precise-job-than-a-jigsaw-or-band-saw-now-i-do-it-again-on-the-bottom.webp

The process is described more fully in: https://stevenjaysanford.com/white-wing-2-man-scooter/

All the best,

SJS
 
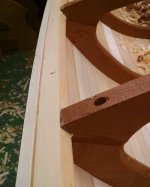
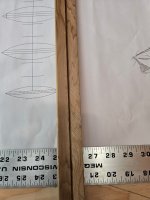
I'm still in the planning stage. The photo shows the type of strips used for canoes, they're 1/4" thick bead and cove. There are two shown, they came from 3/4" cedar boards ripped down to 1/4" thick strips. The strips are then run through a shaper with the appropriate bits to cut the beads and coves. Accounting for the saw kerf you can expect slightly over 3 strips per inch of board width. I hope to obtain somewhat thicker boards, 5/4" minimum but perhaps 1 3/4" or 2". That would cut down substantially on the number of strips and therefore the time to prepare and affix them.

20250820_112930.jpg

Also considering 3/8" strips which requires ripping more boards but increases strength. Stepping in and out of this boat while hunting in waders is not a delicate entry like getting into a canoe in shorts in the summer. I'm thinking I'd rather add wood thickness rather than a second full layer of fiberglass cloth.

I could buy ready to build cedar canoe strips, my primary objection is that some or all of the strips come shorter than the overall boat length. The shipping on whatever full length strips I could order is nuts. I'd really prefer to build with full length strips so it's likely to be DIY.
 
SJ,

Have you checked shipping with Chesapeake Light Craft in Annapolis? Shipping may not be as bad since you are in Connecticut.

Rick
I didn't check shipping because the strips they sell are less than 9' long. I don't want to have to splice. I know it's common in canoe building to splice, but it bothers me to build a 9' boat without full length strips.

There is a place in Buffalo that sells up to 20' strips. It's a 400 mile drive for me, if I decide to buy strips I'll probably do that rather than ship.

Right now I'm leaning toward ripping my own strips, slightly wider and thicker than traditional canoe strips. Thinking 5/4 x 5/16-3/8" with a nailer of the same material wrapped along the top of the mold similar to some canoes. I believe it will be more structurally sound for stepping in and out of in heavy clothes.
 
SJ

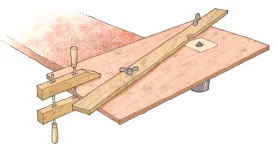
I'd rip my own because I enjoy these tasks and having control over the final stock. You can buy router bit sets for such fun and a router table set-up for this operation can be made from scrap plywood sitting on a workbench or saw horses. Add a fence, made from scrap too, and a few feather boards and you are off to the races. Picture below, compliments of Fine Woodworking, shows how simple it can be.


Attachments

  • routertable.webp
    routertable.webp
    21.2 KB · Views: 2
Last edited:
Back
Top