All Things Flocking

Don Mintz

Active member
I got to thinking there was enough interest in flocking that it might be helpful to have a dedicated conversation for questions and insights. While I was flocking this morning, which is nearly an everyday thing, I decided to do a little color combining of paint and flocking in an effort to figure out a good base for a mallard hen. Here is what I found today. At some point we should probably put together a color chart in an organized manner, but that is way above my pay grade.

I started out with a modified almond rustoleum. I put a bit of brown in it do darken it slightly and move it away from the yellow side of the spectrum, I probably need to come up with a firm measured mixture, but it's not more than three percent brown.


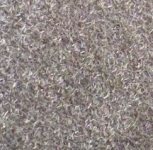
Modified Almond/bisque tan flocking. Mallard hen head, black duck head, wigeon flank and chest.
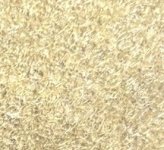
bisquetanovermodifiedalmond.jpg

Modified Almond/goose grey flocking. Pintail hen head, chest and flank.
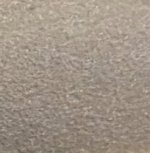
greyovermodifiedalmond.jpg

Modified Almond/feather brown flocking.
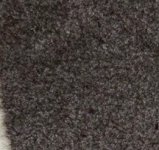
brownovermodifiedalmond.jpg

Modified Almond/black flocking
blackovermodifiedalmond.jpg

leather brown/goose grey flocking
feathergreyoverbrown.jpg

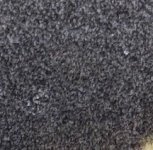
smoke grey/goose grey flocking. Pintail chest, flank, femoral tract.
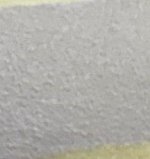
greyovergrey.jpg

lightened smoke grey/ feather brown flocking.
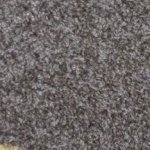
brownovergreypaint.jpg

I'll be likely flocking brown later today and put up some combinations when I complete that. Feel free to offer up any color combinations, this could be a great resource for a variety of species. On the other hand, I'm going smallmouth fishing, so brown will have to wait.
 
Last edited:
I missed this. I expect the flock to arrive any day now. I'll be experimenting next week. Thanks for the test strips, it's very informative to learn how the flock responds to the base color.
 
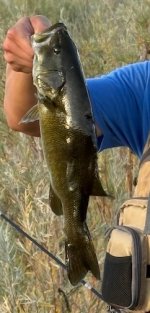
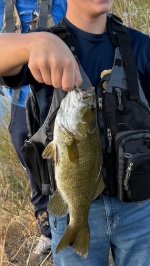
Here's another swatch, but also evidence that we really did go smallmouth fishing. Caleb used to be a fly fishing guide on the Henry's Fork, he's really good with kids and we got to take a family from Church out for their first experience with smallmouth bass. Everyone did great and the boys caught a couple nice ones.

jed.jpgwesley.jpg

Now for the swatch

Leather Brown paint/ Feather brown flocking. Base for black duck, mallard drake chest, pintail drake head, goldeneye hen head,
tempImage55vIXB.png
 

Attachments

  • tempImagexq4gsG.png
    tempImagexq4gsG.png
    49.2 KB · Views: 3
Excited to see this thread. My project calendar will be full the next few months on the boat, but your/Caleb's and William's work are inspiring me to consider some decoy efforts in the future. Will be following along.
 
Feel free to ask any questions along the way. I think we've seen it all and tried it all at this point, but learn something new regularly. We should also include some of the tips we've brought up on other threads just to keep them all in one place.

Here's a couple to get your started.

A place to flock, you want very little air movement. Working outside will cost you a lot of flocking material. I have a fairly light exhaust flow in my paint booth. It's an inline furnace fan hooked into the doggy door that came with the house. It's about a perfect size and perfect airflow to move the airborne fibers and allow the rest to fall back into the catch tub.

Type of paint as glue. I've tried the water based glue that is sold in some kits and it's not good for decoys, maybe jewelry boxes. I've used the solvent based glue from other flocking companies and it wasn't great. Far and away the best is just plain old gloss oil based enamel like rustoleum or Ace Hardware brand oil based enamel, probably from the same manufacturer. I use a lot of different colors to flock with and also use the same paint through my airbrush and I like remaining compatible between glue and paint.

get your flocking through Flocking Unlimited, it's the best I've found and it does make a difference. I can do most anything with 5 colors, black, feather brown, goose grey(medium gray), white, and bisque tan. A pound of flocking goes a long way when it's properly recovered.
 
Another question I get a lot is what type of decoys work best for flocking.

Plastics are very inconsistent. If the decoy has paint issues in the first place you will need to scratch up the surface and remove any loose paint. We did a lot of sandblasting to leave the surface of plastic decoys rough to obtain mechanical adhesion. primers can help, but that doesn't necessarily mean you are improving adhesion. I had the plastic from a decoy that comes from a major factory in China that several decoy companies use and had it tested. What was advertised as virgin plastic tested at 75% regrind/recycled. That's probably why so many decoys paint adhesion is so inconsistent. Probably the best thing to do is avoid decoys that already show issues with flaking.

The new issue would be flexible decoys. They are poor candidates for flocking and paint for that matter. There are brands of decoys we just won't work with. However There is a paint that might be worth trying on flexible decoys from smooth on called maker pro paint. https://www.reynoldsam.com/product/maker-pro-paint. I can't imagine it would be good for flocking and in fact is that same water based urethane that failed in my first flocking attempt.
 
Thanks for being so liberal with your knowledge Don. I have not been carving any decoys for a while but when I have time to get back into it, I am for sure going to add flocking to the process.
 
Thanks for being so liberal with your knowledge Don. I have not been carving any decoys for a while but when I have time to get back into it, I am for sure going to add flocking to the process.
I second that. When I finish the current boat, it's on to flocking.
 
When I started fully flocking decoys there was no one to ask, much less anyone willing to give up any secrets. The only thing you saw was black or green flocking on heads of geese and mallards. Being able to start with at least the right supplies and a few how to do it tips would have really helped.

Yes, there are days when flocking probably doesn't matter, weather conditions, light conditions etc can even the odds some, but guessing which days don't matter and which days it will matter is something I'm not willing to bet on. I can always count on the fact my decoys aren't the problem.

Factory flocking in my opinion is getting worse and worse. Much of what we deal with is more like a powder, I'm assuming the water based urethane for glue and applied with the electrostatic process. The decoys we recently received were worn down to plastic over the entire flocked head.

Double flocking is a must. With my own decoys, I do a single coat over the entire decoy, I like to use a color that is neither light nor dark, generally gray over gray. That's my base, color doesn't matter on first coat, but over that, I'll section out color breaks for instance a mallard drake will start with a grey base, then brown chest, then black head, rump and tail, then a second coat of grey over the flank and back, giving two coats over the entire bird. Think of it this way, it's like on a small scale, mixing fiberglass fibers over the top of a liquid fiberglass, then adding another layer of liquid fiberglass and putting more fiberglass fibers over that.
 
As I understand it, the plan is to place two layers of paint (adhesive) and flock to get the basic color patterns on the decoy. Then you and your son add detail with an airbrush. I see that you prefer to use the Rustoleum through the airbrush. A couple of questions, as my airbrush experience is limited.
What type of brush are you using? Gravity, siphon, single/double action?

With the oil paint can the 1/5 hp compressors atomize the oil, or is a bigger compressor required?

Can you clean the brush easily with paint thinner, or is it a huge chore?
 
The first question, it's one layer of paint and flocking over the entire decoy. It doesn't have to match any particular color, it's just the base. Gloss gives you some more time to get the flocking on it which is important as it takes time to cover the whole decoy. Adhesion on that first coat usually isn't totally covering, but it does give you a base that will hold the paint on the second coat. Once that first layer dries over night, you'll be able to blow off some excess that didn't stick. I shake it off as best I can over the tub.

Painting the second layer of rustoleum over the first layer of flocking will take more paint, you want thorough coverage, but not sloppy thick. You will get better adhesion with the second layer of flocking. You will find that after it's dry on the second coat very little will shake off or blow off.

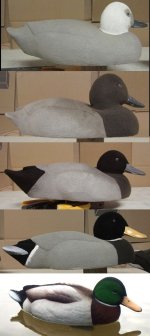
That second coat is where you put on colors you want in your second coat. I'll snag a couple photos from my other posts so they are here for reference. First is the progression of flocking stages. The only step you might not see in the photos is a second application of grey.

91099661_1489939917845700_7295514432048726016_n.jpg

A paasche VL with a #5 tip is what I use for about everything. It's a double action siphon feed. It's a real workhorse for painting decoys. Midwest Airbrush is a great place for all things airbrush, great prices and service. The paasche is reasonably priced and parts are readily available and easy to take apart and reassemble. https://www.midwestairbrush.com/collections/pavldoacai

I use a California tool compressor. https://www.amazon.com/dp/B00WM1VPKE?ref_=ppx_hzsearch_conn_dt_b_fed_asin_title_1&th=1

I've used a small airbrush compressor, but it wasn't great however you just need a steady flow of air at 30 to 40 lbs.

I clean my brush with lacquer thinner and thin paint with 100% mineral spirits. William is a lot better about cleaning his brush than I am he could probably give you better information on that. Probably the biggest issue is keeping paint bottle and tubes clean, it's something I have to do nearly every time I paint. The same is true with about any paint. I always wear a cartridge respirator and work in an exhaust booth.
 
I will piggy back a little off Don's post. I dont paint nearly as much or as often due to my crazy 60 hour work week schedules. So often times my brushes can get snotted up and require liberal cleaning. There is nothing better than airbrushing with a clean gun and one that just works. A few things to note... The rustoleum paint was designed to be an exterior metal paint. The entire gun is metal with air running through it, so its important to keep it clean because this paint will want to stick to the insides of the gun and cause issues.

1) One thing that REALLY helps is taking the front cap off the gun and running it with an exposed needle. That front protective cap is a nuisance.

2) The needle location when putting the gun together is important I have found. You can jam it all the way forward or you can float it back just a hair and this helps a ton with paint coming out of the gun. It will make sense when you take apart your gun and put it back together many times. I can make a short video of what I mean by this if I need to. This also allows lower amount of air pressure from the compressor to achieve the results you want out of the gun.

3) I always soak my gun. I have done this over the course of 2 years now and I dont see any issues in the slightest. If you are using your guns daily (like Don), its not as much of an issue. If you are using them monthly, like me, then you dont want them sitting out with the possibility of paint drying. So I have found nice containers that hold all the pieces of my gun just soaking in mineral spirits. I just take everything out, give it a little wipe down, and put it all together before I get to spraying. It takes about 3 minutes to put a gun together and about 1 minute to tear one down. My guns act new every time I put them together and start spraying. I say guns, because I will set up 2 or 3 at a time and it just makes the process quicker for working with multiple colors and not having to clean between colors and load up a new color in a gun.

4) I use mineral spirits to mix the paint and get it to about a milk consistency in the paint bottle. I dont know what Don mixes, but I do about 80/20 mix. 20% mineral spirits and the rest paint. I dont measure it out, just eyeball it when filling my paint bottles. But I have found this is a pretty good mix to keep the spray going good.

5) If you arent spraying every day, dont spend lots of money on airbrush bottles. I view them as disposable unfortunately. The issue is the breather hole plugs up if left out for about 3-4 days and the straw that sucks up the paint just gums up and doesnt feed the gun well. You can do little tricks to clean all this to store them, but they never seem to be great. I just buy 20 at a time on amazon of the cheap bottles and when im done with them, I toss them. Wish that wasnt the case, but no sense in fighting a little bottle when you have 18 birds on the bench to paint in a day.

6) 30-40 PSI is kind of the sweet spot I find as well when spraying. Its a feel thing and if you start getting spray in areas you dont want, turn it down a bit. Also, one nice trick to fine lining and getting nice detail is lower air pressure. You just have to play with it and you will develop the skill

7) Double action airbrush gun is the only way to go. I couldnt imagine trying to get detail or make repetitive motions without the ability to control the spray at my fingertip.

8) Practice on a board in front of you before laying it down on a decoy. I still to this day practice a technique on a the side wall of my airbrush box before I go to putting it on the bird. I bet that one section of my paint box has 300 layers of paint on it at this point. So, for example, when Im adding the texture to the chest, before I go for it on the bird, I practice for about 20 seconds and get the feel for the gun and the paint and once I see what I like, then I go for it.

9) Make sure you get a metal siphon cup when you get started. You want to run about 2-3 fill ups of mineral spirits through your gun in between colors. I bought some generic condiment bottles off amazon and just keep mineral spirits in one. This lets me fill the cup up when its mounted to the gun and I can just keep a nice spray going through the gun until the color clears. Then I put my new color to the gun and spray until it starts coming out nicely.

I run a harbor freight fortress 4 gallon compressor. I was running a little briggs walmart bought compressor when I started. It worked fine, but when the motor kicked on, it would make me jump so bad due to how loud it was. This fortress is quiet when it kicks on and when detail is important, last thing you want to be doing is jumping out of your skin when laying down a fine line on a decoy. I was going to go with a california tool but I was going to have to pay an outrageous amount for shipping when I was looking for one. I took a chance on this harbor freight, and its been a gem! I have literally 0 issues with it and its been running fairly regularly for 2 years now.

When it comes to flocking, I do exactly what don does. First coat is gray paint with gray flocking. The entire bird. The second coat is the build up of colors and when you want to start thinking about the color you want. So this is when you will do black paint and black flocking on the head and rump to get that rich black color (for example). This is the reason for the star of the "All things flocking" thread and come up with color combos to get different results (Brown paint with feather brown vs gray paint with feather brown as another example).

The overall idea is you are building up just a lot of material of flocking and it stays on the bird forever. I havent got flocking to fail since going to this double flocked method. The first coat feels nice and soft and what you imagine flocking to feel like on store bought decoys. The second coat dries and almost creates a rougher feel. Some relate it to a sandpaper feel but its not that rough, its just kind of dense and maybe has a bit of a rough feel to it. The idea is that you have layers of material and then when you airbrush, you just seal it all up and dont give it a reason to start failing.
 
Last edited:
Thank you both. As always very informative. A lot of ideas to digest before making my first mess.
Just go for it. Honestly, the level of expertise that runs around this forums with boats, it wouldnt shock me if 90% of the artistic minds here could run a brush as good as me. Don on the other hand... well.... hes an absolute genius with one. I still have light years to go to get anywhere near his artistic ability with an airbrush gun. Just remember, even if it isnt the absolute best, the fact that its flocked will cut away all sheen on those early frosty mornings when the sun is coming up. Instead of that white mirror effect, they will always cast a dark black silhouette and thats much more realistic for birds on the water at a distance.
 
I guess I will pivot off that previous post as well. What lead me on this journey years ago was a few reasons.

1) the first time I ever saw some of dons birds was when I was 16 and one of my friends had some redone by him. The wigeon I stared at that morning just blew me away. If I could even get close to what I looked at that morning, I wanted them for my spread.

2) I saw the effectiveness of flocking when my buddy did all blacks on his goose silos. From a distance, I could barely see the GHG full bodies we had in the spread, compared to the black flocked silo that had the craziest drawing power on geese from a distance.

3) I will never forget when we moved spots one morning. A few flocks flew right past us, they wanted to be on the other side of the lake. Decide to make a quick decision and move so we get all the decoys set and my buddy forgot his jacket at the first spot we started. I ran back with the boat to get it and on the way back, 400-500 yards away, it blew my mind what the decoy spread looked like. Just white sheen across the 5 dozen decoys we had sprawled out on that big body of water. It made me question how many birds were flaring off the spread before they even came close to calling distance.

4) I am HELL on decoys. I just am, not the nicest by any means and everything flocked I bought was just a plastic decoy by the end of the season. When I stumbled onto dons way of doing it, I had to try it. I had literally no luck with any of the bought flocked stuff I had, but I knew how effective it was. Glad I did, I will never go back and boy, was I purposely more hell on the decoys I used last season and theres not a touch of flocking rubbed off on those. They just dont sport the cool poses and custom design, so ill offload them to a young up and comer at some point.
 
I got started on flocking some custom eiders a few days ago and put a second coat on the entire hen with the modified almond mix and some bisque tan. It's much easier to airbrush dark over a lighter base than light over a darker base. Since first coats don't matter all that much and I did the same color for both decoys on the first coat. the second coat of black on the drake is just the main black area and I'll flock the white flocking over white enamel for the rest of the chest and head areas. The rest of area will be hand painted with flat white, including the femoral tract. You just can't get white to be white on a flocked surface, so I put a couple coats of flat white on it. Even with two coat, the rough light diffusing surface will still prevent shine.

IMG_5222.jpg
 
Back
Top