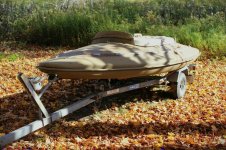
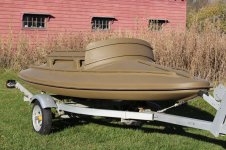
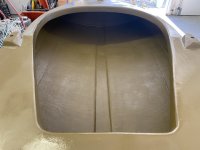
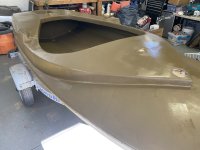
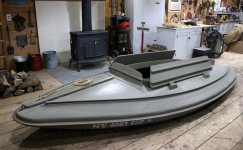
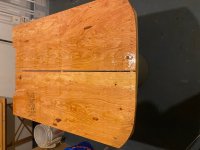
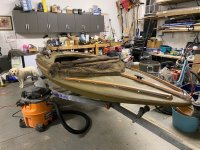
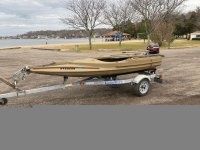
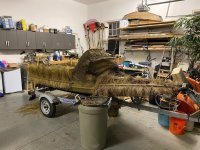
1982 Aeromarine Restoration

David~


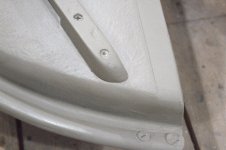
Yes, I figured out your drains after looking more closely at your photos. I put a pair of garboard drains in this 100-year-old gunning skiff - one on either side of the keel. They are at the low point of the hull when it is on its storage rack.
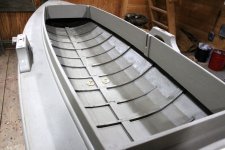

TD 01 Interior with bilge drains.JPG


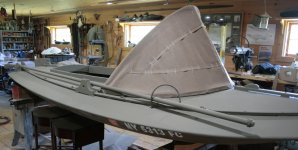
Instead of flap boards, I use a "lap cover" on any vessel where I lie on my back to hide. For my Sneakbox, it is thatched up. It is held across its foot by snaps on the aft coaming. The forward end is supported by a rod across the cockpit that rests in open-top chocks.
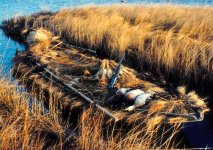

SJS Sneakbox - Moriches Bay early 90s.jpg


The rod and canvas pop up out of the way when I sit up to shoot. It rolls up onto the after deck when I need to operate the boat.
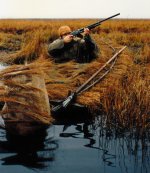

Sneakbox - SJS on Thatch ca 1990 - shortened.jpg


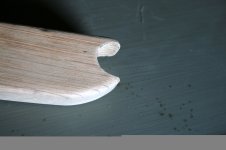
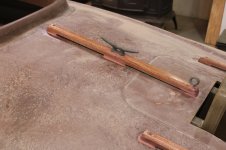
Here is one of my original chocks. Today I would make it from PVC "lumber".
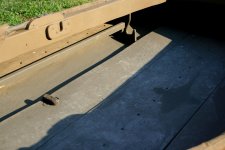

B Floorboards, turnbuttons, shelf, lap cover chocks - small.jpg


Here is the rod held in a canvas sleeve.
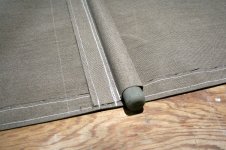

Lap 08.jpg


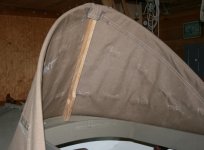
The canvas is taut when in place. About 12 inches of "free" canvas lays on my chest.
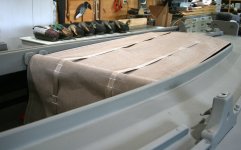


Lap 10a.jpg


Thatch is lashed to 2 rows of webbing. The foot is snapped to the aft coaming.
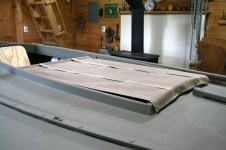


Lap 13.jpg


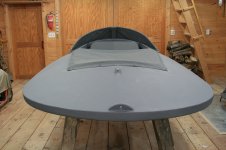
Here is another vessel - a 2-man "scooter" for open bay gunning - with a similar lap canvas. Instead of the rod-and-chocks, this uses just loops of shock cord in each corner, held by thumb cleats.


Canvas 14.jpg


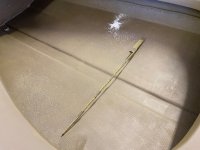
Here's the duck's eye view.


Canvas 16.jpg


Hope this helps!


SJS


Steve,

Love the way you had that sneakbox set up. Simple and effective. Thank you for the tips and photos.

I'm debating if I will hunt with the spray shield up or down. Main concern is having a hide for the dog.
 
David~


My solution - not yet implemented - will be to use both a spray dodger and a spray shield. The dodger is really for keeping me dry when I cross the bay in a blow. The spray shield is for hiding. I am going to put one of the old South Basy spray shields I have kicking around behind my dodger. The dodger will settle onto the deck when gunning, but the shield will hide my head and keep the wind off my neck.


D 28.jpg


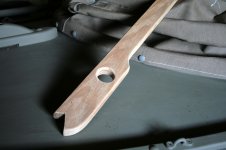
FYI: I prop the dodger up with a strut that wedges into place:


D 25.jpg


The upper end fits onto the conduit bow.


D 22.jpg


The lower is shaped to fit snugly. The finger hole allows me to pull it up to drop the dodger.


D 21.jpg


Here's the stock spray shield on a South Bay. Doesn't keep a lot of Great South Bay out of the vessel but provides a nice hide for a gunner on his back.


Tuffin South Bay - at rest in the meadow.jpg


Decisions....decisions.....


All the best,


SJS


Good morning, David~


re Cleats: I have used both galvanized and nylon. Either work well. I see no need for the expense of s/s - especially because galvanized takes paint so nicely. Bronze will always be the best - but now very expensive and just hard to find. They weather to a nice duckboat-friendly patina and need no paint.


I always put a cleat on the foredeck and one on the after deck. Both are backed up belowdecks with a generous (3" x 6") piece of half-inch plywood and usually a fender washer as well. I want to be able to lift the boat by either cleat if needed.


In addition, I often put smaller cleats amidships - so I can secure a light line to bog stakes - which I use to keep the boat in place rather than an anchor.


I make my central thatch rails wider than the lateral rails - so I can mount cleats through them.


On the foredeck, I place it where I can reach it from the cockpit. Note that there is also a heavy eye strap right on the bow - to which I would splice a painter (half-inch line 8 or 10 feet long).


Portrait 4.JPG


On the afterdeck, I also include an eyebolt for a safety chain to the outboard.


Thatch Rails - afterdeck.JPG


All the best,


SJS


Thanks again for all the info, Steve. I had purchased some stainless hardware, but now I?m thinking about switching to brass to get that beautiful weathered look.

I put the first top coat on yesterday. In hindsight, I think I should have used a paint stripping agent to get more of the 40 years worth of paint off. I sanded like a madman, but now see some imperfections. Oh well, it will all be covered in salt hay.

Hoping to get the deck in and/or rip some grass rails this weekend.


58B18EF1-3C05-41E2-A4B6-9B1D770E93C0.jpeg8F2AF08C-0094-407B-A4DF-74FE80A45012.jpeg
 
David~


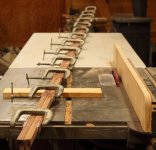
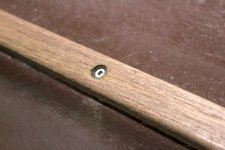
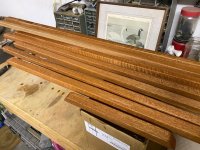
Here's some info re thatch rails. I make mine from Mahogany and glue on - with Gorilla Glue - 3/16" thick spacers. Most spacers (except ends) are 2" long. I clamp them up a pair at a time - back to back.


MSS 10A sm Thatch Rails 01.JPG


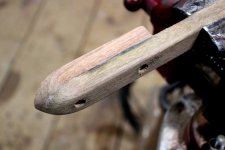
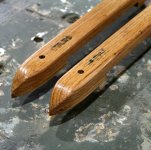
The ends get longer (3") spacers and get shaped.


MSS 11 - Rail ends.JPG


I bore and countersink the screw holes.


MSS 12 - Countersink.JPG


As mentioned previously, I seal with Spar Varnish before painting. I usually paint just the undersides before insyallation - then put 2 coats on after installation and the 3M 5200 sets up. (the rails in the photo below are refurbished, original White Oak rails.)


Rails - streamlining.jpg


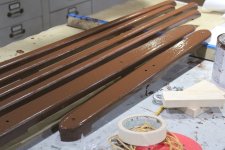
Here's the batch drying on the bench.


MSS 11 - Shannon thatch rails - primed.JPG


The faired ends prevent fouling of lines, et cetera.


sm MSS 02 Rails - aft end finished.jpg


Here's the complete set on a South Bay.


sm MSS 01.JPG


Some brass - not bronze but OK since they're above the waterline - cleats:


https://www.westmarine.com/whitecap-6-1-2inch-polished-brass-hollow-base-cleat-17283110.html?&utm_medium=cpc&utm_source=google&utm_campaign=PMax:%20GSC%3eSmart_Shopping%3eAnchor%20&%20Docking&gclid=CjwKCAiAvK2bBhB8EiwAZUbP1OrT312LClAeHBjB4dhzP8uQhn-NsIqDzaRvnVrqgb-7w5794z3guRoCOIAQAvD_BwE


I'm guessing you have the oarlock sockets?


https://www.westmarine.com/whitecap-bronze-top-mount-oarlock-socket-17286873.html?&utm_medium=cpc&utm_source=google&utm_campaign=PMax:%20GSC%3eSmart_Shopping%3eBoats%20&%20Motors&gclid=CjwKCAiAvK2bBhB8EiwAZUbP1NWAbmMfxko3QXPeEywAp5oYQRXLBGay6YHiujPQOlHLvOPmoYLt8RoCDnAQAvD_BwE


All the best,


SJS


David~


Vessel looks fine!


I like the materials and workmanship on duckboats to be "yacht-quality with a workboat finish". Flat paints hide lots of imperfections!


You are on the right track!


SJS
 
Steve,

I've been going back and forth on a few things. Big thanks to yourself and Bill Ferrar for all of the advise.

I made up my grass rails and sealed them with the spar varnish. Also put a second coat of top paint on the boat last night.

I really like how you have the cleats and eye bolt on top of the grass rail, so I am going to mimic that. Since I don't have access to the underside of the foam filled compartments, I found SS Toggles for the cleats and eye bolts. I am going to put one eye bolt on the stern for an engine safety harness and one on the bow for the trailer winch to attach too.

Question: For the deck joists, what type of wood do you like? I am debating whether or not I need to glass in the joists. I don't think that was ever done to this boat. Plywood will most likely be used for the deck material. The slotted look is beautiful, but I'm concerned with the dogs paws getting stuck. After all the boat is really for her.

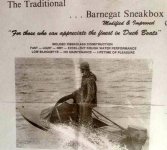
PS - adding vintage Aeromarine photo for historical purposes


IMG_3564.jpgIMG_3562.jpgPryor Sneakbox - Bill Ferraro EDITED.jpg
 
Good morning, David~


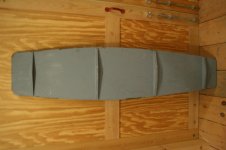
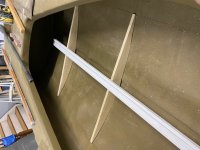
I would not fasten the frames to the hull. Instead, I would fasten them to the plywood - as in my "Sunfish conversion" floorboards I depicted in my October 4 post. Because these boats have lots of shape (deadrise) in their hull sections, the floorboards will likely stay put without anything to hold them in place - especially once you and your dog are standing on them.


One question: Will you be able to get a 1-piece floorboard in and out of the cockpit opening?


IMG_4349.JPG


I seal the plywood - top and bottom - with 2 coats of straight epoxy.


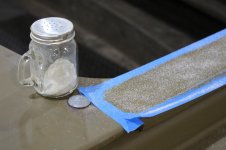
For both you and your dog, I would add anti-skid onto your first coat of paint. (I'm putting it on the top of the aft coaming on my current project - a Duck Wrangler.) I "salt" the anti-skid onto the wet paint - then paint a second coat over it after it has cured.


Wrangler - anti-skid sand.JPG


And - being the OCD me - I mask off a 1-inch border all around the floorboard to give it a more finished look.


Masking for anti-skid.jpg


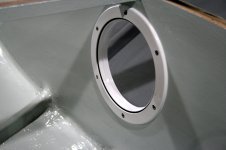
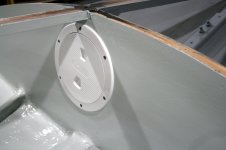
One other thought: I'm sure your s/s toggles will be fine. However, I would install Beckson deck plates in your bulkhead so you can inspect (foam in "sealed" chambers can get waterlogged over time) and get into your flotation chambers if needed. I will installing a set in a South Bay later this week.


Beckson 2.jpg


The plates are watertight - but easy to open.


Beckson 3.jpg


All the best,


SJS


Dave: FYI the photo that you posted of the flyer for the sneak box shows Tom Pryers son John driving the boat...
They also had one of John wearing hip boots and the boat filled with water....

Steve: Several years ago I asked John why they fiber glassed the plywood rather than duck board that was removable.
He said it helped with the structure having ribs and a solid floor in addition a lot of people were running 25 hp way over the rated hp but the boat could handle it.

The floor board is only 48'' x 31 1/2'' so it could come out of the boat.
 
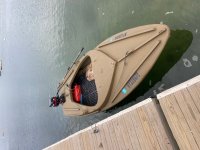
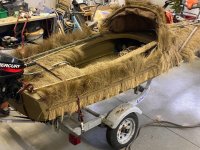
Well I think that I am pretty much "finished." Time to grass it up and clean/organize the garage.

I ended up going with the removable floor boards. Notched the stern end to keep the fuel tank centered. In hindsight that was probably not necessary. The joists scribed to the hull seem to distribute my weight well. At just over 20 mph and in some chop, the boat felt rock solid.

Now to figure out how to hunt this thing. I think hunting with the dodger in the half up position would be best. Just have to figure out how to secure it there while still being able to put the dodger in the full up position while hunting. Since I am using the existing dodger that didn't have grass straps, I zip tied some strapping and then netting to it. I guess I'll have to tie grass off to this in small sections.

A dozen duck floaters fit perfectly in the bow, so storage shouldn't really be an issue.

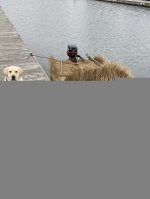
The dog came with me for the sea trial and she took well to the boat. Threw her a dokken and the low gunnels make launching from the boat a breeze for her. Looking forward to the season opening and getting birdy.

Thanks again to everyone chiming in and helping me with the restoration.


IMG_3636.jpgIMG_3679.jpgIMG_3620.jpgIMG_3695 (1).jpgIMG_3710.jpg69205420934__437BA187-B3B1-4EF4-9E72-AFD05F0EA3D8.jpg
 
David~


Great job throughout!


I understand your dilemma re hiding. On my Sneakbox, I always put the dodger down - but pulled enough up to break up my outline and fend off the wind. I made a length of thatched-up strapping (really buckram - used in drapes). I just stuck it in place when hunkering down to hide. It worked well-enough - but I always wanted something that was secured in place.


I thought of The Solution a year or so ago but have not yet implemented it. My plan is to put a thatched-up, rigid spray shield between the coaming and the dodger. I have collected a few original small spray shields from South sand plan to re-purpose one.


I will be restoring a Sneakbox this Winter and will show what I'm talking about then.


In the meantime,


Happy Hunting!


SJS


Got out for the first hunt and shot some puddlers. Engine stalled out (bad fuel line) and then the pull start chord broke, so my hunting buddy towed me into the spot with his South Bay. I neglected to check either of those parts and will be carrying an extra started chord from now on. Also didn?t realize the gray fuel lines have an inner liner that seems to degrade quickly, or so I have been told. Switching to black lines in the future. The boat paddles well with the oars.
Twelfth and the cockpit
I secured the dodger in the half up position. I can still hold onto it while running the boat and it?s one less thing to worry about while hunting. Maybe I?ll have a day where I need the full dodger in the future.

The boat hid very well and had plenty of birds decoying. I was holding camo mesh over myself and the cockpit, which worked well however, after the dogs first retrieve everything was soaked. Luckily it wasn?t too cold. Thinking about installing 10? x 26? flap boards to cover the cockpit better. They would stay just aft of the park locks, so I could still use those in an emergency or if I need to warm up.
CE5C8EE7-45C7-4E18-B2B0-BC58C791CEB2.jpeg
 
Good morning, David~


Congratulations on a fine hunt! Glad you had a partner along for the tow - but not surprised that your vessel rows well.


re covering the cockpit: I still think a Lap Canvas is the way to go for your boat (as compared with flap boards). It keeps much more heat in the cockpit and rolls quickly onto the afterdeck when you need to operate the boat. Also, a lap cover gives you a safe way to hold your gun - across the coamings - when hiding.


I will be making one in January for a Sneakbox restoration -- and will post the (simple) process.


All the best,


SJS


Looking for some advice on how to improve my hide in this boat. I have been hunting a layout blind forever, so I am used to being completely concealed. Steve recommended a canvas lap cover, which I think is a great idea and will complete in the off season. I still feel like adding some type of flap board would help with concealing myself and the dog. After making up two 11" x 32" flap boards sealed in epoxy with a single grass rail, they seemed very heavy and will stick out past the edge of the boat when down, likely taking a beating when at the dock. Any suggestions given the above as well as the rather unique cockpit shape? Maybe I'm overthinking it.

Thanks in advance.

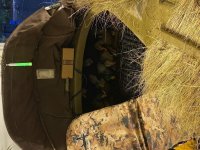
Photos of a ducks view and hidden in the marsh:


IMG_4121.jpgIMG_3807.jpg
 
David~


Great photo of your rig out on the marsh. I was just down on LI but my friend's Covid precluded gunning.


Got a photo of your motor cover? I'll be sewing one up tomorrow.


All the best!


SJS

 
Back
Top