Arthur Armstrong Broadbill project

John Gaughan

New member
Hey guys I picked this up a few weeks ago and have hunted out of it as well. I’m told it’s a 1990 and the boat is in good condition. My plan is to remove the top cap and add some supports for the front deck as it has sagged over time. Has anyone removed their top cap on this style? It looks like it was glassed and riveted together some I’m hesitant to cut/pry them apart. IMG_5568.jpegIMG_5617.jpegBottom and top cap
 

Attachments

  • IMG_5615.jpeg
    IMG_5615.jpeg
    581.2 KB · Views: 22
  • IMG_5616.jpeg
    IMG_5616.jpeg
    330.5 KB · Views: 22
  • IMG_5618.jpeg
    IMG_5618.jpeg
    296 KB · Views: 22
Hey guys I picked this up a few weeks ago and have hunted out of it as well. I’m told it’s a 1990 and the boat is in good condition. My plan is to remove the top cap and add some supports for the front deck as it has sagged over time. Has anyone removed their top cap on this style? It looks like it was glassed and riveted together some I’m hesitant to cut/pry them apart. View attachment 72257View attachment 72260Bottom and top cap
On my Blackjack top cap was simply riveted on and gunnel molding supplied the water seal. Of course over time as rubber hardened and cracked seal became suspect and is why those hulls were prone to getting leakage in corner flotation bxs. That and loosening handles on stern. If you remove to work on front deck run a bead of sealant between 2 half's. when reassembling. I had to eventually drill holes in bottom of rear corner bxs and drain once I discovered water retention. Installed live well drain plugs in those holes.
 
Thanks All! Drilling the rivets wont be an issue. The top cap and the bottom look to be glassed together and are very thin so cutting it will be difficult. Looking to see if anyone else has done this with this style hull?

My idea is to add a wood “bridge” support that I may glass in. While I have to top off I may redo the foam in floor as well. Need some warmer weather to come before we get into the good stuff.
 
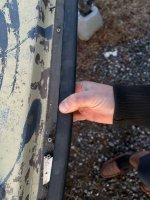
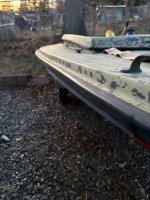
I did this last summer. Getting the top off was easy (only took an hour or two) I drilled out the rivets and was able to get the all but one of the screws out. I used a multi-tool with a caulking removal blade to cut through the places where the original caulking was still holding (not a lot) It did a nice job of cutting the caulk without cutting the fiberglass. My transom was completely rotted so I replaced it with Coosa board. My boat also has the front deck sag and there is really not a good way to fix it short of putting in supports. The floatation foam is really what provides the support and if the deck is sagging, the foam is most likely cracked. The fiberglass on the top lip and at the top of the side of the hull had deformed because of the sag, this was an issue when putting it back together.

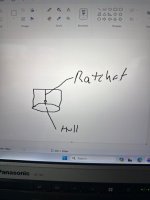
My advice IF your transom is solid, would be to not take it apart and to use a bottle jack (with supports) to lift the deck, then put supports in at the front of the floor. I would also flip the boat over and seal under the lip all the way around. The challenge with putting supports in is that the floatation foam covers a good bit of the top so being able to place the supports where they are needed can be a challenge.

there is a thread with what I did on here but feel free to IM me if you want to talk about it.
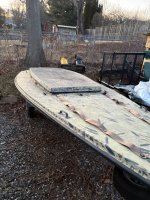
 
Also, it looks like your boat is put together differently than mine. Mine just a has a lip going down and the screws/rivets go in from outside in not from the top down.
 
Thanks All! Drilling the rivets wont be an issue. The top cap and the bottom look to be glassed together and are very thin so cutting it will be difficult. Looking to see if anyone else has done this with this style hull?

My idea is to add a wood “bridge” support that I may glass in. While I have to top off I may redo the foam in floor as well. Need some warmer weather to come before we get into the good stuff.
Hard to tell from the photos, but could you maybe either build a little truss over bow. Then take a eyebolt w butterfly/toggle anchor and put it where the sag is, then drill w a hole saw a couple spots and just use ratchet strap, pull up eye bolt, pour foam and then glass the few holes left behind? Obviously the toggle anchor is gonna be there forever but it seems it would be way less work if everything else seems dry and good to go

See attached collectible artwork😂

Tony
 

Attachments

  • image.jpg
    image.jpg
    240.2 KB · Views: 2
Back
Top