BBIII update

Thanks guys. Custom cut and lots of peanut butter. I probably won't get to it till later on this week but I'll let you know how it goes.

Have I mentioned how great this site is? What a informative, funny and thoughtful group. Not necessarily in that order though!
 
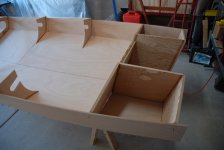
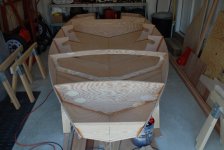
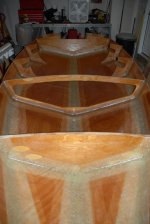
Its been a while since the last update. Sorry for that, just busy filleting, filleting, and filleting. All done with the inside of the boat as far as the filleting goes. I still need to sand and fair everything on the inside but I think I am going to move to the bottom of the boat for a change of pace for now. Here is the progress this far...

Bulkheads cut out and tacked in place. I re-cut a new bow piece to get a better fit.
DSC_0080e.jpg
DSC_0083e.jpg

Peanut butter mix in place.
DSC_0107e.jpg

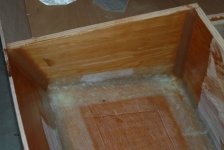
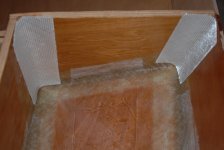
6" biax tape in place. I decided not to use a wet out box. Not enough room in the garage for that.
DSC_0108e.jpg

I cut 6" strips from my roll of 6oz cloth and used two on each seam overlaping them in the middle about 1-1.5".
DSC_0114e.jpg
 
Continuing on...

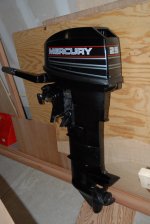
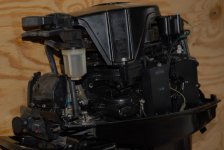
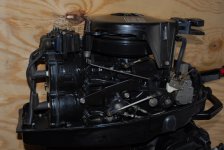
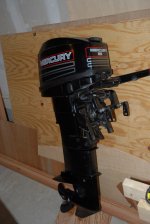
I sold my motorcycle to get this. The bike needed a lot of work anyway. It was advertised on Craigslist as a short shaft but when I got it home (didn't even measure before I bought it. Lesson learned. First time buying an out board.) I discovered that it is in fact a long shaft. Thought I would have to modify my transom or trade/sell the motor for a short shaft. Well, my brother the Coast Guard mechanic noticed that the mid section of the drive shaft housing didn't exactly match everything else. He suggested I take it apart and see if there was a long shaft kit put on it. Sure enough there was! Yippy! No modification or trading to do. Kit was pretty easy to remove. Just extensions of the shift shaft, the water tube and the drive shaft. Remove the mid section and put it all back together and presto wammo I have a short shaft! Motor is in great condition too. Never saw salt water and runs like a champ. Pretty clean for a 1995 model. Wish it was a 30hp but it will be mainly just me and my 130lb brother hunting out of it so I think that the 25 should be enough for now.

DSC_0120e.jpg
DSC_0124e.jpg
DSC_0126e.jpg
DSC_0128e.jpg
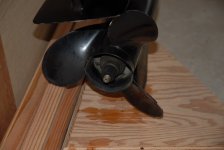
The prop doesn't even look very used.
DSC_0130e.jpg

Compression test on it showed only a 5lb difference between the cylinders. While I have the lower unit off I am replacing the impeller and all the seals to the pump. It was peeing just fine but thought why not. An ounce of prevention...
 
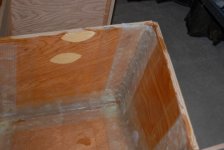
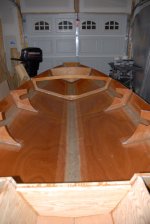
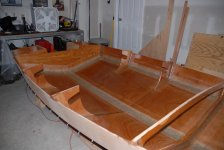
After all the filleting and motor work here is where I stand for now. All corners have been filleted and the entire cockpit and storage area got a couple of coats of epoxy. I did not use the biax tape on the inside bulkheads. I only used it on the keel and chine seams and the transom. I used a double layer of 6oz on all the others. Ready to do the flip and start on the bottom. Not looking forward to removing the stitches but its not filleting!

DSC_0132e.jpg

DSC_0133e.jpg

DSC_0134e.jpg

More to come after the flip!
 
James,

Keep the pictures coming they really help to keep the rest of us going. I am a long way behind you but starting this week I will be working to catch up.

The pictures really help me a lot to see how its all going together and help me figure out how I want to aproach my build.

Couple questions came to mind when I was reading through the thread. With the biax tape why did you decide on it was it specified somewhere that i missed or did you just feel there would be to much stress at those locations and went with it? Did you cut it yourself and if so are you using biax anywhere else on the boat?

I noticed the cut outs in the knees. Are you plans for agun to tuck into it or oars? Again just thinking ahead to mine. I plan to put them in just not sure if I will end up using them and what for. Most likely I would use them for oars to store away but I wonder if they will cause problems with other storage.

Again thanks for the pictures they really help.

Brandon
 
Brandon - glad to know that you're getting started. Answers to your questions. There wasn't any were specified that you should use the biax. Just as you said, I thought they would be high stress areas and wanted to beef them up. I got the tape from US Composites. It doesn't have a "finished" edge as it doesn't unravel as easy as the cloth. I got the 6" wide tape in the 25yd roll. I did however just order another 25' roll. I'm planning on putting it on the outside seams as well as the outside vertical edges of the transom and I didn't have enough after completing the inside.

As for the notches in the knees, I put them in there to hold a gun or a push pole and maybe some fishing poles during the off season. I wasn't sure if I even wanted them due to the same storage issue you speak of. I figured, however, put them in and if I use them then great, I have them. If not then it doesn't take anything away. It also ads a little character I think.

Anyway, I'm glad that you are getting started. Its an enjoyable experience. As said on other threads, just keep it an enjoyable experience and take your time. Don't make it a job, keep it an enjoyable experience. Update us with your progress!
 
Jim,
Now you can put the parts you took out on Craig's List as a long shaft conversion kit for a Merc. 25 horse. I think you will like the shift on the tiller, they are just kinda tough to work on to get all the linkages syncronized but sweet to run. Good Luick.
 
Here is where I am now. I am ready to sheath the exterior this weekend.

View attachment DSC_0137e.jpg
Tools of the wire pulling trade

View attachment DSC_0140e.jpg
Ready to pull the chine wires. Get them out of the way before tackling the keel wires.

View attachment DSC_0150e.jpg
I cut out the motor well and filled all the holes with epoxy.

View attachment DSC_0152e.jpg

View attachment DSC_0153e.jpg
I also trimmed all the edges on the bow and chines getting it ready for tape.

View attachment DSC_0137e.jpg
View attachment DSC_0140e.jpg
View attachment DSC_0150e.jpg
View attachment DSC_0152e.jpg
View attachment DSC_0153e.jpg
 
Last edited:
Moving on now....

View attachment DSC_0154e.jpg
Shaped chines.

View attachment DSC_0167e.jpg
Ready for the tape.

View attachment DSC_0171e.jpg
All taped up and a layer of epoxy applied to entire surface. Its way to pretty to have to paint! Its a shame.

View attachment DSC_0176e.jpg
Ready for the layer of cloth. Using one layer of 6oz cloth. The biggest threat we have around here are oyster beds and the concrete launch ramp.

Getting my brother over here to help this Sat unless I can figure how to do it properly by my self. I am getting impatient!

View attachment DSC_0154e.jpg
View attachment DSC_0167e.jpg
View attachment DSC_0171e.jpg
View attachment DSC_0176e.jpg
 
James,

It really looks nice. I am trying my best to catch up to you guys but you keep moving along :)

I guess I should post up a few pictures of mine in the next few days. Still have some fillet work to do before I am ready to flip it over.

Tonight I am going to finish up the lamination on the transom.
 
James I really want to do what you did and tape my seams before I glass the hull. I have read that it can make things more difficult though. Please let us know if you have any issues with it or if it works well.

Thanks,
Brandon
 
Brandon,

If you tape the seams prior to sheathing the entire hull, it will be much easier to achieve a nice uniform finish. After you've taped the seams just be sure to sand the edges well. When you lay your final cloth over the hull and wet it out you won't notice the 'bump' from the edge of the tape.
 
"When you lay your final cloth over the hull and wet it out you won't notice the 'bump' from the edge of the tape"

Ryan, that doesn't make sense. There will be a bump... in fact it was a "wavy" bump in my case (waves were caused by the uneven, rounded curves where wood meets wood). I used biax as a tape first, then sheathed. It left well... a layer around the edges of the boat that I then had to fair with lots of epoxy and micro balloons...

A better idea would be to sheathe the hull... placing the 2 edges of the cloth (assuming 2 pieces of cloth are used on both starboard and port sides) right down the middle of the boat, then do the process again. The fairing will occur on the sides of the boat instead of one side of the hull.

Guys will say "this is a duckboat"... their right of course. But if you choose to be finicky, then you have to think this stuff through. When the cloth overlaps, you've created a layer say... on one side of the hull. That layer (assuming you are finicky) has to be faired smooth. So... in the end, one side of the hull is now slightly thicker than the opposing side? That equals better performance on the water.

Remember, sheathing is for abrasion resistance, not hull strength. Fillets provide the hull strength.

Food for thought. Plus, I'm frequently wrong.

A.
 
Back
Top