
Huntindave McCann
Well-known member
As some of you may know, I hunt and do a lot of my fishing from my BBIII. It is a great boat for this and serves me well, except. Except my local rivers are shallow and strewn with boulders, hard gravel beds, sand and underwater snags. I'm just beating up my motors.
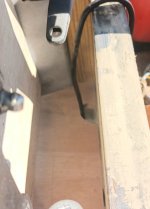
In an effort to reduce my draft as much as possible, I decided to install a static jack plate to raise the motor up a couple inches. This required that I remove the current "motor well backup guard". Without a waterline level shield, thrust from reversing the engine, will cause water to overflow into the cockpit. At any rate, the old splash guard had to go and a new one, cut and fitted in it's place.
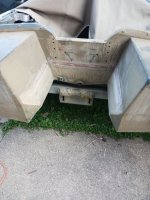
The jack plate was mounted and height set, after many sea trails to determine optimum height.
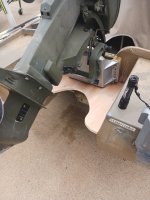
Even tho the backwash guard is shown, it first required a template be developed, to fit the compound taper of the transom and the sidewalls.
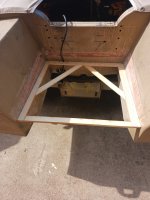
Then came the matter of dealing with the sonar cable. I needed a mouse hole in the plywood large enough to allow the cable end to pass thru.
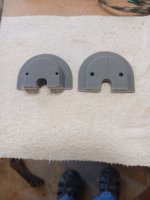
Then, I needed a grommet, dimensioned to fit against the 17 degree angle of the transom, while closing the mouse hole down to the size of the cable.
Perfect application to draw a custom grommet in my software, send the file to the printer and spit one out. Blind pilot holes in the upper half and thru holes in the lower half means no exposed screws on the top side.
As installed;
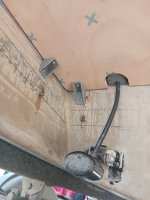
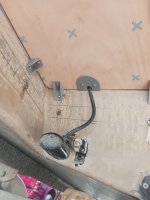
You might also observe the shelf brackets temporarily holding the plywood. Yep those are NOT 90 degrees, so custom 78 degree for the sidewalls and 112 degree for the transom brackets. My 3D printer sure is getting a workout.
In an effort to reduce my draft as much as possible, I decided to install a static jack plate to raise the motor up a couple inches. This required that I remove the current "motor well backup guard". Without a waterline level shield, thrust from reversing the engine, will cause water to overflow into the cockpit. At any rate, the old splash guard had to go and a new one, cut and fitted in it's place.
The jack plate was mounted and height set, after many sea trails to determine optimum height.
Even tho the backwash guard is shown, it first required a template be developed, to fit the compound taper of the transom and the sidewalls.
Then came the matter of dealing with the sonar cable. I needed a mouse hole in the plywood large enough to allow the cable end to pass thru.
Then, I needed a grommet, dimensioned to fit against the 17 degree angle of the transom, while closing the mouse hole down to the size of the cable.
Perfect application to draw a custom grommet in my software, send the file to the printer and spit one out. Blind pilot holes in the upper half and thru holes in the lower half means no exposed screws on the top side.
As installed;
You might also observe the shelf brackets temporarily holding the plywood. Yep those are NOT 90 degrees, so custom 78 degree for the sidewalls and 112 degree for the transom brackets. My 3D printer sure is getting a workout.
Last edited: