This is an awesome project! thanks for sharing.
You are using an out of date browser. It may not display this or other websites correctly.
You should upgrade or use an alternative browser.
You should upgrade or use an alternative browser.
Foam teal project
- Thread starter bob welsh
- Start date
Mark W
Well-known member
Nic project. My question, and not trying to be a jerk - how far do you have to carry all these decoys? On opening weekend, we walk in about 1 mile. Three of us hunt one spot and each can only carry about 6 plastic decoys in and out. More than that, and it is too much. I even went out and bought foam shell floaters and blow up teal dekes as these are much easier to carry in and out.
We have learned, and as you probably know, going in is easier as going out we have 18 ducks to haul as well.
Mark
We have learned, and as you probably know, going in is easier as going out we have 18 ducks to haul as well.
Mark
bob welsh
Well-known member
After posting the pic of myself in that marsh, I could see somebody saying "how's that old timer going to carry all those blocks." Since this is a duck boat site ,I have many craft at my disposal. Water level is about a foot deep and a hard bottom. The Lund Ricer or my 18 ft pirogue is going to haul the gear.
I was thinking of texas rigging using 3 ft lines and 4 ounce weights.
I was thinking of texas rigging using 3 ft lines and 4 ounce weights.
bob welsh
Well-known member
Still waiting on the 3d heads so i cut a couple out of wood to play with paint schemes. First i used nylon cable clamps with a plastic washer with a deck screw coming from the bottom into the head bed in gorilla glue. Black rustoleum flat base coat. Alkyd paint finish coat and tube oil. Drying in front of shop heater. Conceptual paint pattern. probably use less detail based on the coarse texture of the surface.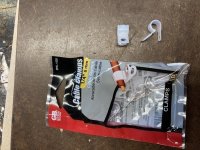



Brandon Yuchasz
Well-known member
Bob,
I have used those cable clamps quite a bit at work. The white ones became brittle in just a couple years. We use the black ones now that are suppose to be more durable but I have not had them in use long enough to know yet. Hope that can save you some free floating blocks down the road.
I have used those cable clamps quite a bit at work. The white ones became brittle in just a couple years. We use the black ones now that are suppose to be more durable but I have not had them in use long enough to know yet. Hope that can save you some free floating blocks down the road.
Brandon Yuchasz
Well-known member
Bob,
We have used these for the last 10 years at work and they are out in the sun. They hold up. Maybe you could modify them?
https://smile.amazon.com/gp/product/B000E9ZKDY/ref=ppx_yo_dt_b_search_asin_title?ie=UTF8&psc=1
We have used these for the last 10 years at work and they are out in the sun. They hold up. Maybe you could modify them?
https://smile.amazon.com/gp/product/B000E9ZKDY/ref=ppx_yo_dt_b_search_asin_title?ie=UTF8&psc=1
Steve Sanford
Well-known member
Bob~
I'm really enjoying this thread - your R&D staff are going full bore. Can't wait to see your printed heads.
I may have missed this detail: All GWTs - or some Blue-wings, too?
All the best,
SJS
I'm really enjoying this thread - your R&D staff are going full bore. Can't wait to see your printed heads.
I may have missed this detail: All GWTs - or some Blue-wings, too?
All the best,
SJS
bob welsh
Well-known member
Steve, I have the Top Men of DHBP working on this project now TOP MEN!!! I was down this road last summer when i repainted the big mallard rig and found that parts of it are like working on an assembly line and never seeing the finish line. I mixed it up yesterday and painted a couple prototypes. The hen is too mallard hen like in base color. i need to grey/brown the base coat a bit. The rough texture will limit detail on both.
I think the body pattern will work for both gwt and bwt and one of my head profiles will be interchangeable. I know the live birds are very different but i don't think it will matter much at 20 yards.
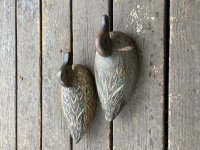
I think the body pattern will work for both gwt and bwt and one of my head profiles will be interchangeable. I know the live birds are very different but i don't think it will matter much at 20 yards.

Scott Farris
Well-known member
As normal I'm a day late, but Stainless cable clamps are available. Additionally did I miss the actual coating formula you're using? Glue, water and thin set, but roughly what proportion of titebond to water? I.e. how watery before adding the thin set? Definitely enjoying your project.
Scott
Scott
bob welsh
Well-known member
Thanks for the encouragement fellas. Getting alot done in this cold wet spring. I painted up a few more samples trying a new paint scheme. The printed heads are not finished yet so Im waiting for that step. Scott , I mixed the thinset with water according to the bag instruction then in another container mixed up some titebond 2 and a bit of water then poured it into a cottage cheese container and mixed it really well. It came out like a thin milkshake . Thanks for the tip on the clips. They are in the running but I ordered the ones Brandon mentioned yesterday. And you nailed it, A day late...
bob welsh
Well-known member
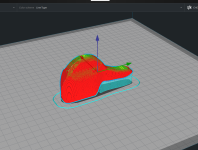
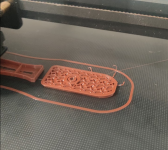
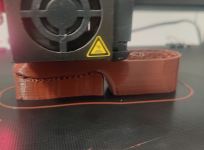
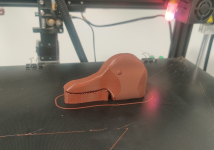
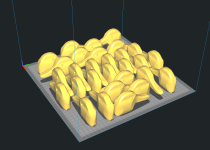
the top middle and far right shows the neck build up with the threaded hole for a 1/4 screw. the piece under the bill is just for support during the process and snaps off real easy. the heads in yellow are a mock up of how many he can fit on his table at one time.
Babies must have been switched in the maternity ward thats the only answer i have.
Babies must have been switched in the maternity ward thats the only answer i have.

