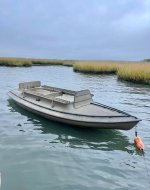
JAMES CAIRD - A Sneakbox Restoration - Ready-to-hunt!

Steve Sanford

Well-known member
Good morning, All~


I do not recall if I began this tale in earlier posts. I know I have included some snippets in the occasional Work Bench post. I built this vessel with a friend sometime in the early 90s - when we were both still on Long Island. He hunted it successfully for several seasons but then had to leave it behind for many years as his life took him hither and yon. He asked me to help him sell it a couple of years ago. I opted to buy it myself and put it back in shape. I will be bringing it to Tuckerton in a few weeks - but still lots to do!


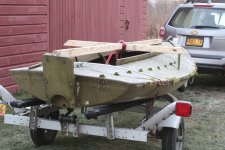
I hauled it North in November 2020 - knowing it would not get my attentions for awhile....
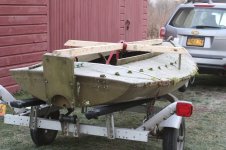

CAIRD - 1 Intake 02 - Zamp frame.JPG


We had cut the hull down from a Beetle Swan - a small sailboat. I do not know what year our vessel was - but have recently learned that the Beetle Swan was among the very first mass-produced fibreglass boats. Sweet lines - and perfect for gunning. Although she lacks the true Barnegat's spoon bow - she is otherwise very similar below the waterline.
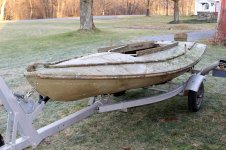


CAIRD - Intake - From bow quarter.JPG


She is beamy and seakindly and enjoys very shoal draft. She is semi-planing - so rows and poles very nicely.


CAIRD - 1 Intake 02 - Zamp frame.JPG


We decked her over and put a dodger up forward.
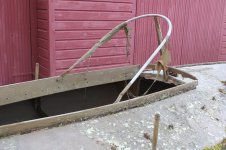

CAIRD - Intake - Dodger remnants.JPG


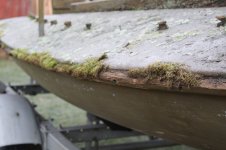
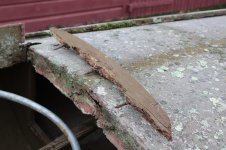
Once the storage tarp wore out, rot had its way with the wooden parts for a quarter century. My friend stored it in his Mom's back yard - so could not keep an eye on it.
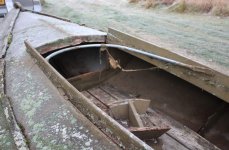


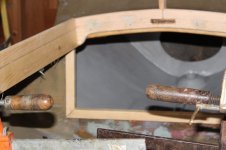
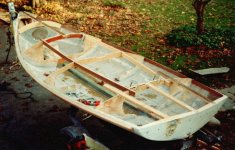
CAIRD - Intake - cockpit.JPG


This was one of the earliest motor boards I built. There is just a bit of rot on one lower corner of the treated SYP.
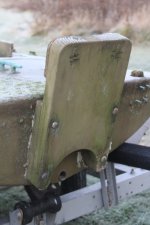

CAIRD Intake 04A - Motor Board.JPG


But, I used plywood for a clamp pad back then - and galvanized carriage bolts.
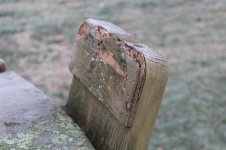


CAIRD Intake 04B - motor board clamp pad.JPG


The oarlock stanchions are galvanized steel pipe - 1/2-inch I. D. They are still sound - but will be rehabbed and reinstalled.
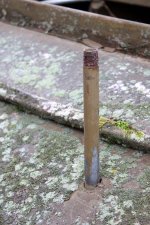


CAIRD Intake 07 - Oarlock stanchion.JPG


Some of the tougher jobs are from the interior rot. The slot in the knee holds the blade of an oar.
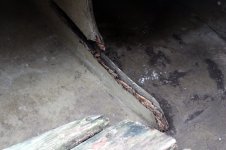


CAIRD - Intake - knee rot.JPG


Only one of the 4 plywood knees survived the fungus and bacteria. The U-shape cutout holds the loom of an oar; the flat spot was for a shelf - which never did get built.


CAIRD - Intake - sound knee.JPG


More to come.....


SJS


CAIRD - 1 Intake 02 - Zamp frame.JPG
 
Last edited:
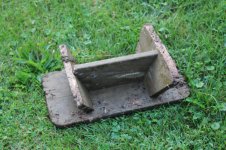
Part II


The rubrails and thatch rails had been made from some nice vertical grain Douglasfir. The fasteners were bronze machine screws - still affordable back then.


CAIRD - Intake - rubrail and thatch rail stbd.JPG


The rot made its way into some structural pieces - so replacement was needed in numerous instances.


CAIRD - Intake aft coaming.JPG


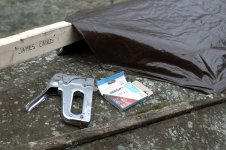
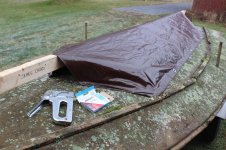
My goal in November 2020 was to remove whatever came off readily - and then prepare her for long-term storage. I made a strong but low backbone. Fans of Ernest Shackleton will appreciate this vessel's name.


JAMES CAIRD - Winter cover detail.jpg


I stapled down a new tarp - trying to keep rain, snow and leavers out - but understanding that some small creatures may find a home within.


CAIRD - Storage - with tarp.JPG


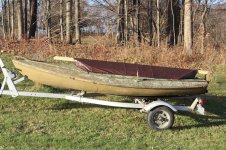
One needs a bit of vision to appreciate her sweet sheer line - and see a bright future....


NYM 09 James Caird.JPG


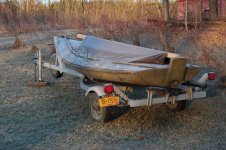
She patiently endured 3 winters before coming into my shop earlier this Spring.


CAIRD - Storage - 2020 - 2023.JPG


Much tedious "demolition" occurred once inside.....


Stay tuned.


SJS


Part III - Some "recovery"....


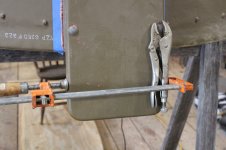
Here's the new motor board going on. The Vise-Grips are my helper - to keep the 3/8" s/s carriage bolts from spinning whilst I tighten the Nylocks inside.


CAIRD - Motor board install 1.JPG


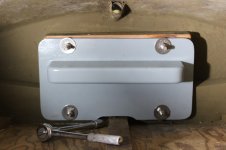
My usual backer board with bumper - to protect the gas tank from protruding bolt-ends.


CAIRD - Backer Board and Bumper.JPG


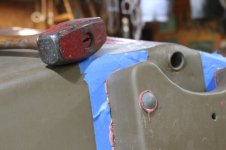
The last bit is persuaded by my 3-pound sledge. I am always careful to paint the threads on the bolts with the 3M 5200 before they enter the holes.


CAIRD - Motor Board install 2.JPG


I use another helper for the other side of the board.


CAIRD - Motor Board install 3.JPG


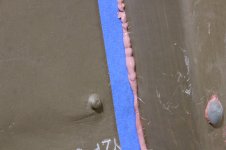
I always make certain of ample squeeze-out after drawing the 4 bolts nice and snug.


CAIRD Motor Board install 3 - squeeze out.JPG


The wiped 5200 has cured for about 3 days now - so will get some paint later today.


sm CAIRD - Motor Board install 4 - 5200 wiped and curing.jpg


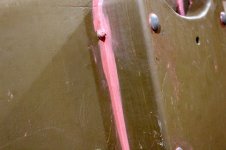
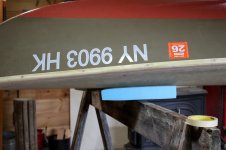
She has "new" numbers (don't tell anyone but my friend never did register her properly....) and registration - and new rubrails - milled from a carefully-selected SYP decking board. The bottom paint is simply reddish oil enamel - mixed to approximate the red copper anti-fouling paint every workboat had when I was young. No need for anti-fouling on a trailered vessel - especially one used only in colder months. BTW: Those pieces of blue dock foam have become my preferred "blocking" when a boat is on the horses.


sm CAIRD - Numbers and Registration.jpg


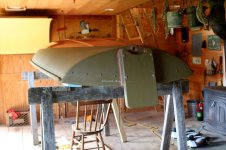
Lots of work from the comfort of my chair with the vessel upside down and on my tallest pair of horses. I'll be flipping her later today for some 'glass work around the cockpit. I show the interior work in a later post. The rubrails have received their first coat of Parkers Marsh Grass.


CAIRD - interior structural work.JPG


Wish me luck between now and September 22!


SJS


Steve,

Great looking boat and workmanship. Interesting history on the Beetle Swan. I think small catboats, sneakboxes and melonseeds have similar lines.

Quick search on Beetle Swan came up with a good page if people want to see what you started from.

https://acbs.org/tangerine/

Rick
 
Good morning, Richard~


Thanks for the great info!


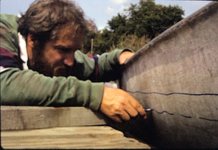
When we built this boat we began by deciding how low to cut her down. WE floated her empty but with 3 or so cement blocks in her for ballast. We lay on the boatyard's work float and very slowly spun her around, marking a couple of potential "freeboards" with a big felt pen. Later, we taped on a fair batten to get a sweet sheer.


The sad part of this tale is that I had photographed every step of the process - much as I do now. However, this was pre-digital camera + laptops + interwebs. So, I used slide film and in fact put together a full slide show to present to various public gunning groups. When I left Long Island (I worked for NYSDEC in their Stony Brook HQ), I left the carousel with the other slide shows I had put together in my role as regional waterfowl biologist. In the ensuing years, all such slide shows must have been deemed obsolete - because all have been discarded over the decades. This program - as well as one about super-gunning Hen Mallards in Saskatchewan and banding Brant on Baffin Island now molder in a landfill somewhere.....


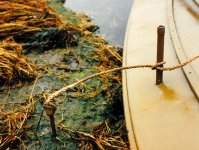
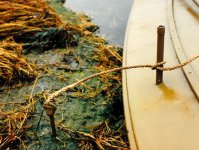
I had made a few slides into prints - but I need to ferret them out of my "collection". This one shows the oarlock stanchions doing double-duty - to secure the vessel to a "bog spike" (marsh stake).


MSF Sneakbox - oarlock stanchion and staub.jpg


And this show the now-defunct aft chock for the push pole.


MSF Sneakbox - pushpole chock.jpg


All the best,


SJS


Steve & Richard

I remember seeing this boat before. At the time I thought it had really nice lines. Following Richard's link I see what it looked like before it was cut down. I must say I never ever would have thought the Tangerine had it in her to make such a sweet looking sneakbox. My mind's eye doesn't have the ability to make the leap from a bit dopey shaped hull (with apologies to any Tangerine owners) to the very aesthetically pleasing boat Steve and his friend created. There must be a ton of old hulls out there that a similar transformation could occur that will never see such love because I don't think most folks even recognize the possibilities.

I love posts like this Steve. Inspiration for someone wanting to make.

Eric
 
Steve,
Seems like yesterday,
I was taking the Duck ID course. I was telling Mike about my Southbay and he was telling me about the boat you guys were rebuilding.
 
Good morning, Gregg~


Indeed! My friend and I sailed my WILLET - a 21-foot gaff sloop - around Bellport Bay for many seasons. We took turns "being" Shackleton and Worsley. Like them, we accomplished heroic feats of navigation and never lost a man......


All the best,


SJS

 
Excellent. South is one of the best books I ever read. I would recommend it for everyone. I can imagine your adventures sailing your sloop.
 
Very informative and interesting as always Steve, appreciate the time you take to post this stuff
 
Good morning, Joe~


Glad you are enjoying the process. In keeping with my long Labor Day tradition, I worked - on 2 different vessels - for about 14 hours yesterday. Progress is always slower than I anticipate or plan - but it's also , demanding and thoroughly enjoyable.


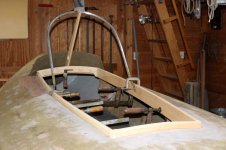
One major task was making and fitting new coamings. The cockpit itself required lots of structural repairs - followed by careful fairing of new 'glass onto existing all around the cockpit. It still needs an hour or so of finish sanding.


The new coamings are White Pine. I also cleaned and re-painted the forward hold. I typically use a gloss light grey paint for such areas. Ducks cannot see in their when I'm hiding - but I want to see what's in there when I need it: anchor, extra lines, toolbox, life vest, canvas cockpit cover, et cetera.


The 4 coaming pieces will be thoroughly soaked with wood preservative prior to sealing, painting and installing.


CAIRD - Coamings made and fitted.JPG


I made up 3 pieces of molding to trim the way into the forward hold - a finicky job! Sorry for the blurry photo. Each piece has been sealed and primed and will be installed sometime this week.


CAIRD - Fwd hold trim.JPG


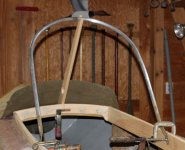
I also began to mock up the spray dodger - having salvaged the bow (thinwall conduit) we shaped about 3 decades ago.


CAIRD - Spray Dodger frame - fittting.JPG


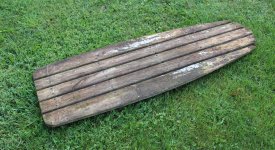
I pulled out the original floorboards (duck boards) and rowing bench - to dry a bit in the sun - but primarily to use as patterns when making replacements. I have not yet decided to use boards for the new set - or some plywood I have on hand.


CAIRD - Floorboard - rotted.JPG


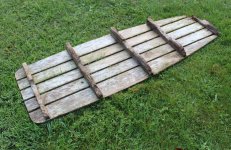
I wish the profiles of each cleat had not been digested by fungi and bacteria.... Lots of careful scribing is in my future.


CAIRD - Old Floorboards - rotted cleats.JPG


Each cleat was notched to accommodate the keelson.


CAIRD - Floorboard Cleat - cutout for keelson.JPG


The new rowing bench will likely get some nice foam padding. The bench serves as the backrest (really head and shoulders) when wedged between the floorboard and forward coaming.


CAIRD - Rowing Bench - rotted.JPG


The dimensions - and especially the bevels - can be readily recovered and replicated.


CAIRD - Rowing Bench - underside.JPG


All the best,


SJS


Good morning, All~


The JAMES CAIRD is done - all but the thatching. And - most exciting for me - my partner had the "missing photos" - key images from the original 1991 build that my old agency had tossed after I left our Stony Brook (LI) headquarters in the mid-90s. So, here's a bit more back story...and the denouement. In any event, I hope you enjoy this tale of rebirth. (And sorry for covering again some ground I presented earlier in this post.)

1 sm CAIRD - MSF at the helm - heading out.JPG


Mike Fishman and I built this duckboat back in 1991 - on Long Island. Mike lived in Brookhaven and I was in nearby East Patchogue. The boat was built between our 2 domiciles in the Fall. We began by measuring up an old Beetle Swan (a 'glass sailboat based on the famous Beetle Cat). Mike's amidships weight and the cement blocks on the stern were intended to approximate the trim of a completed 1-man "grassboat" with both gunner and outboard motor.


2 sm CAIRD - MSF and blocks for trim at Tookers IMG_4004.JPG


I lay on the work float at Tooker's Boatyard to mark a couple of water lines as we gently rotated the hull. These would guide our cutting the topsides down - to a sweet sheer struck with the traditional fair batten. (Before you ask, I was 38 at the time.)

3 sm CAIRD - SJS marking waterlines on Beetle Swan at Tookers.JPG

We framed her out with plywood bulkheads and Douglas fir longitudinals. She was later decked over with quarter-inch plywood and sheathed with 'glass.

4 sm 6 CAIRD - Framed oblique iCROPPED.jpg

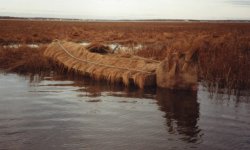
Once fully thatched with Salt Hay, she served Mike well whenever she secreted herself along the saltmarshes of Great South Bay.

6 sm 10 CAIRD - Thatched and hiding CROPPEDimg20230911_22213231.jpg

The JAMES CAIRD? Students of polar exploration will recognize the name of Sir Ernest Shackleton. While his early 20th century attempt at the South Pole failed - and the ship ENDURANCE was abandoned to the Antarctic ice - his voyage in the "ship's boat" JAMES CAIRD remains one of the greatest of all small boat feats of seamanship.

5 sm  JAMES CAIRD in heavy seas.jpg

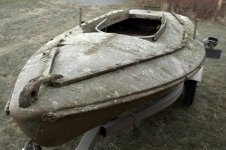
After serving Mike well for a number of Long Island duck seasons, though, the JAMES CAIRD remained in Brookhaven, unused and - after a while - unprotected from Those Darn Elements. Here is how she arrived at Pencil Brook Boatworks in 2020.

7 sm - Morning after from bow.jpg

After many months of "selective demolition" followed by reconstruction and then full restoration - and a bit of embellishment - the JAMES CAIRD is once again ready-to-hunt.

8 sm CAIRD - portrait stbd bow quarter.jpg

I had planned to bring her to Tuckerton, NJ last weekend - for the Old Time Barnegat Bay Decoy & Gunning Show. However, Ophelia intervened with the tropical storm's typical mix of rain, wind and tides. The Show was canceled for Saturday and I was just too old to drive through the dark and stormy wee hours of Sunday. I stayed hereabouts and finished sewing the Spray Dodger.

sm CAIRD - Spray Dodger in shop.jpg

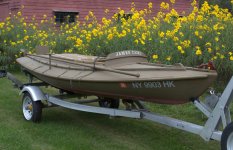
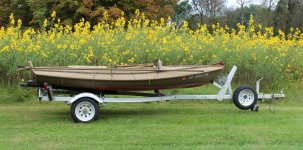
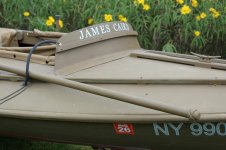
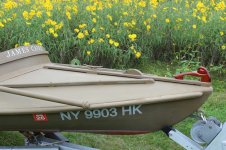
Here you can appreciate her sweet sheer - the line made where the hull meets the deck - and low profile. (Those are Maximillian Sunflowers in the "backdrop".)

8a sm CAIRD - Profile on trailer.jpg

From the stern quarter you can see her seaworthy rounded bottom sections and just a bit of crown in her decks.

8b sm CAIRD - over stern quarter with push pole chock and bail.jpg

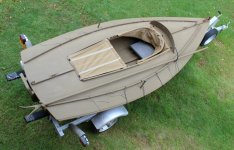
From the duck's eye view you can see she is exceptionally beamy - which provides both stability and safety.

10 sm CAIRD - Ducks eye viewIMG_3233.jpg

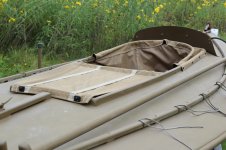
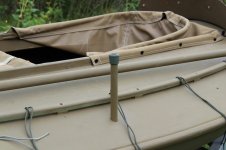
The Lap Cover hides the gunner's legs - when he is on his back, awaiting unsuspecting fowl (with his head on a padded rest). When he sits up to shoot, the rod that holds the leading edge of the Lap Cover pops up out of its chocks and out of the way. The Lap Cover is rolled onto the afterdeck when not hiding - as when operating the boat.

9 sm CAIRD - Cockpit with Lap Cover.jpg

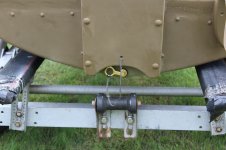
Attached by decoy line to the new motor board is the drain plug (a practice I learned the Hard Way...). I also keep a spare in the tool kit. From the deadrise (vee) at the stern, you can deduce that she is not fast under outboard power - but is very comfortable. She also rows and poles very nicely.

10a sm CAIRD - TNew motor board and drain plug.jpg

I have been carrying my push pole with this "system" since my first build, I believe. The chock at the transom holds the duckbill - and is lashed by a loop of shock cord when on the trailer or crossing the bay. Otherwise, it is easy to bend down slightly from standing at the helm to grab it or drop it back into the chock.

11 sm CAIRD - Push pole head in chock.jpg

Up forward, the dry end of the push pole is simply put through the large-ish bail - an easy target for the standing helmsman.

12 sm CAIRD - Bail for push pole handle A.jpg

Pipe oarlock stanchions have a long history on Long Island duck boats. Some are removable but these are bolted through quarter knees and sealed at the deck. The rubber caps - feet for kitchen stools - keep rain out when not in use.

13 sm CAIRD - Pipe oarlock stanchion.jpg

These stanchions do double-duty. They serve as hitching posts to hold the vessel next to the bog whilst gunning. A light line goes to "staubs" or "bog spikes" pushed into the marsh or mud.

sm MSF Sneakbox - oarlock stanchion and staub.jpg

On the foredeck are a strong cleat, a block for my removable navigation light, and my "hood ornament" - all attached to the central thatch rail - which needs be a bit wider than the lateral thatch rails.

14 sm CAIRD - Foredeck.jpg

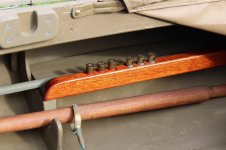
Inside the boat are: new floorboards (with anti-skid); a backrest/rowing bench; a pair of shelves. The "fiddle" on each shelf holds extra shells - 3 sockets for Goose loads and 3 sockets for Duck loads. The varnished Mahogany was an extravagance purely to please the eye. The chocks to the left in the photo support the lap cover's cross-bar.

15 sm - Sherlf with shell rack.jpg

Almost done - stay tuned!

SJS
 
Here is the last little bit (I had evidently reached the size limit....)


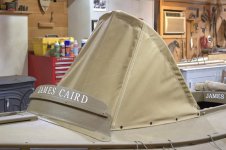
I use a canvas cockpit cover during the season - to keep out rain and snow - and prying eyes. I lash it to the thatch rails because closures like snaps or buttons do not allow for the changing dimensions caused by the Salt Hay. I got this idea the first time I visited the Pattersquash Gun Club (Bellport Bay) back in '78. I will probably make a hard ('glassed plywood) cover for off-season storage.


18 sm CAIRD - portrait cockpit cover lashed down.jpg


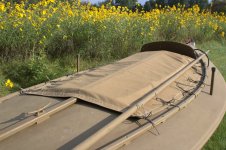
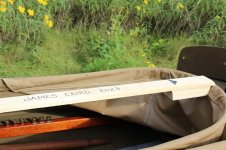
I quickly made up this ridge pole - to "tent" the canvas when bags of decoys et cetera are not inside to prop it up. On earlier gunning craft, I often used the push pole for this purpose.


17 sm CAIRD - Ridge Pole.jpg


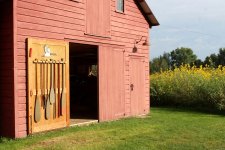
The shop did not stay empty for long. I am currently in the midst of restoring one customer's South Bay Duckboat - and scores of gunning decoys - and then more vessels....


19 sm - Shop awaits next vessel.jpg


I hope to bring the JAMES CAIRD to the South Shore Waterfowlers Ass'n Duckboat Show - at Cedar Beach Marina in Babylon on October 28. And, I will try once again to bring it to Tuckerton - in September 2024.

All the best,


SJS


Steve

That is one of the most beautiful posts ever. The background story, demise, relationship to history, restoration along with your stunning craftsmanship and attention to detail, all shown here with high quality photography displays what unique ability and talents you have. Have you topped your other projects? I don't know about everyone else, but your post reads to me like duckboat poetry. This is beautiful unparalleled work. Sir, I salute you.

Eric
 
Last edited:
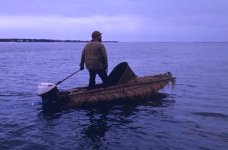
Steve, once again you did some amazing work here. This is one of the nicest rig's I've seen! Beautiful craftsmanship inside & out!
I hope you can bring it to the SSWA Show Next Month...
I can't help but also notice how those lines assimilate to my Baur Boat


04.jpg02.jpg01.jpg
 
Last edited:
Eric~


I am glad you enjoyed my post. I must say, I was especially inspired when I read your thoughts about the uncertain future of this site. And, I thoroughly enjoyed both the process and connections with many friends from the past. Both "rides" have been grand voyages.


All the best,


SJS

 
Back
Top