Steve Sanford
Well-known member
All~
In the May Workbench I posted a "teaser" showing the start of re-habbing 5 Bean's Coastal Mallards and Blacks for another duckboats member. At that point, only the head of the Hen Mallard was complete. Now all 5 are ready-to-hunt.
Here are the BEFORE conditions - generally much better than most of the rigs I have re-habbed.


There was a variety of keels.


This is a design I had not encountered previously......

All of the heads were loose - to one degree or another.

This bill repair was sound - just needed some cosmetic surgery to hide it.
Only one eye of 10 was missing.

The original Bean's had pins in the heads that fit into holes in the body - for different head positions. They had all been sawn off previously. Drilling the steel out out the soft wood would have been a challenge - so I did not replace them.

This is the only pin that would have been easy to replace.

I like to round the edges of the keels - and any keel weights - to minimize chafing on other decoys in the bag or boat.

All 4 edges were rounded on the router table with a 3/16 bit.

I recarved all 5 faces to move the line between the face and bill forward. I also re-shaped some of the bills.


This Hen got carved twice - because her forehead way way too full.

Only this Hen Mallard had the notched keel. Note also the big craters in the cork. Large voids such as these got filled with epoxy + cork dust.

This bobbed tail would be a challenge to repair fully....

So, I just faired it off - so it would always be stronger than any spliced-in repair.

I painted all the heads prior to assembly - much easier to handle them that way, especially when you want some detail in the paint.

All of the heads were set in an acrylic caulk. I use it to keep water out and to serve as an adhesive BUT one that will allow disassembly if it's ever needed for future repairs.

Each head got a longer screw. I used a larger (3/4-inch) s/s fender washer and a panhead s/s screw to present a less chafing profile than the original flathead galvanized screws.


After sealing the entire bird with spar varnish, I painted the bottoms with Pettit 3303 duckboat paint - a flat oil.


The topcoat was my usual Behr house paints - flat latex. For a few small areas - the Drake Mallard heads and the speculums, I mixed in some tube acrylics to get what I wanted.

Once the painting was done, I wanted to make a matched set of keel weights. I used a piece of White Oak and a 3/4-inch wide round-nosed router bit to plow 2 grooves about 1/2-inch deep and 4-1/2 inches long.

I worked some lanolin into the oak to minimize burning on the first pour. (An earlier post by George Williams suggested using Crisco - but I had none in the shop.)

I worked outside to dissipate the lead fumes. But, my safety precautions probably fell a bit shy of modern standards: I was wearing shorts and a T-shirt - and no gloves.....
I used small pieces of scrap and melted them with my Bernzomatic torch in a nice, stable s/s ladle my Dad made in the 1950s. The hollow (tubular) s/s T-handle does not get hot and the T gives nice control.


I let each pour of keel weights cool for at least 20 minutes before I flipped the mold over so they could drop right out.

I drilled pilot holes on the press and shaved the rough edges with a knife. I did not want to grind the lead and get the particles airborne.
These 4.5-inch long weights came in at 7 ounces.

I used 1.5-inch #14 boat nails to fasten the keel weights - a bit further aft than the BEFORE weights.

Now ALL 5 keel weights match.....

Before putting the mold away, I plowed a longer (8-inch) groove on the other side of the oak for future keel weights that should be about 12 ounces each.

The mold now hangs where I can find it next time I need it.

Here are the finished birds. First inside - under the lights:

Only the Hens show their speculums.


This grand old Drake got his Yellow Ochre (Behr Saffron Strands) bill and some White highlights on his cheeks.


After the formal portrait sessions, I added the edging to the primary groups on the 2 Drakes just to make each one "pop" a bit. While this feature will not bring any more ducks into the bag, it is one of those quick (30 seconds) paint details that is appreciated when the decoy is in hand.

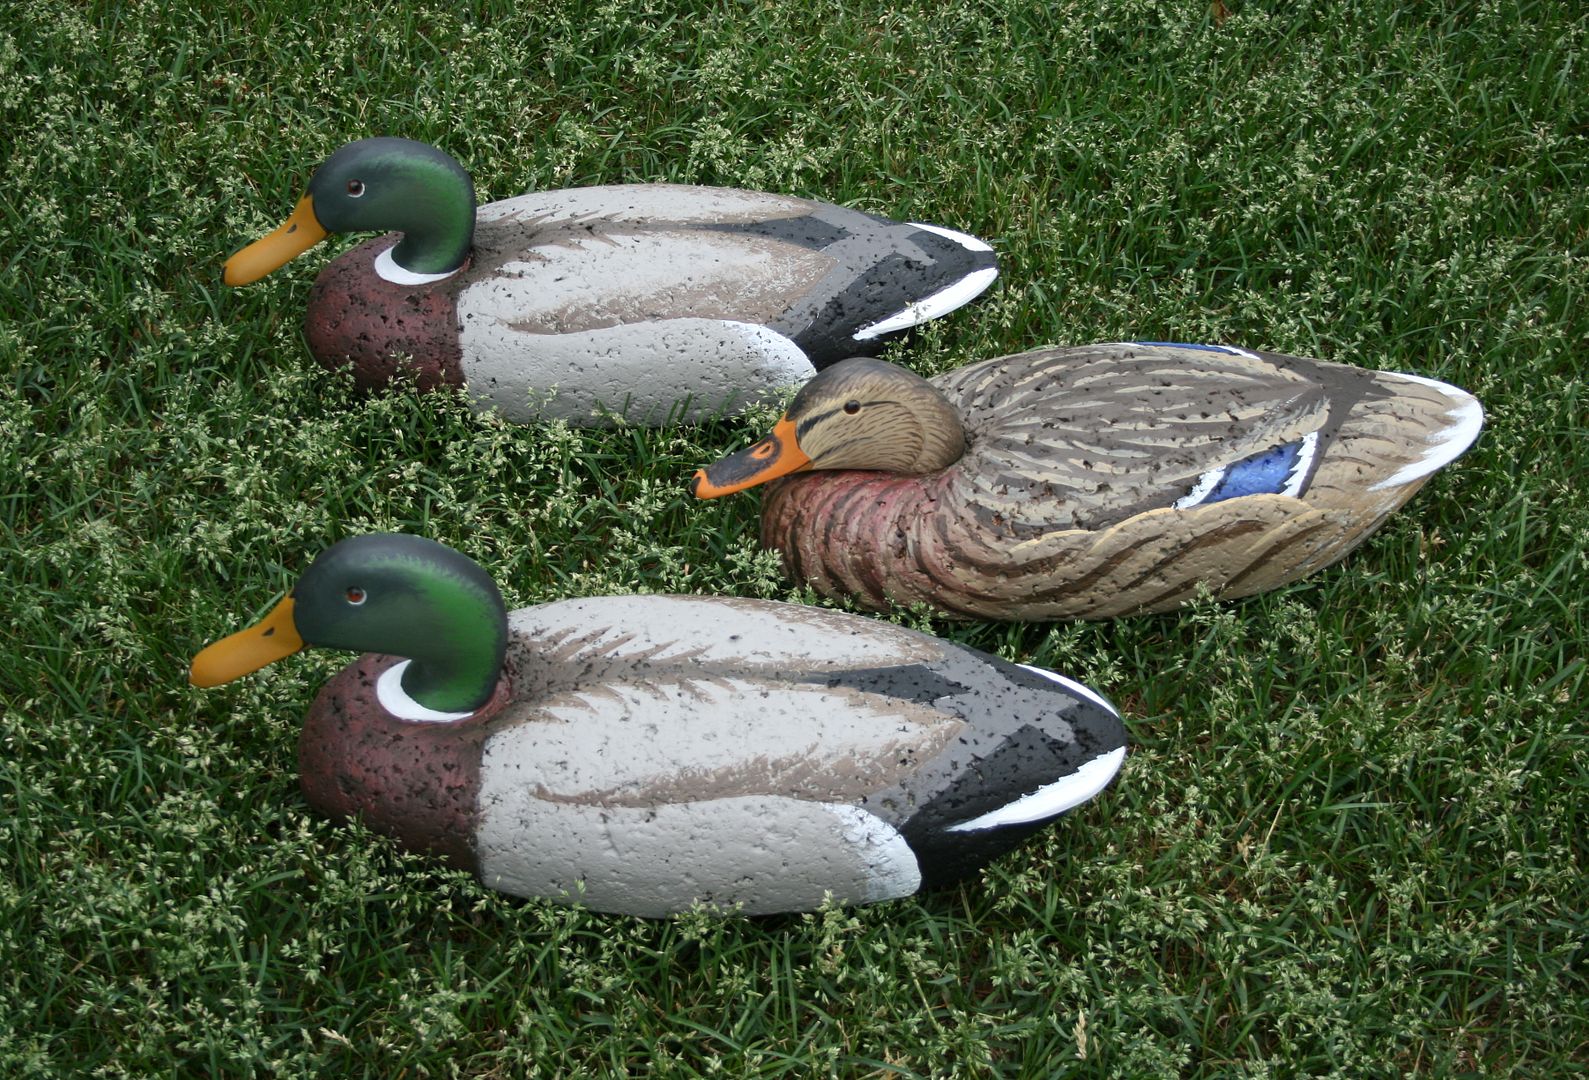
Now outside.

Now - back to the Sneakbox.....right after the lawn tractor transmission and the kitchen faucets.....
All the best,
SJS
In the May Workbench I posted a "teaser" showing the start of re-habbing 5 Bean's Coastal Mallards and Blacks for another duckboats member. At that point, only the head of the Hen Mallard was complete. Now all 5 are ready-to-hunt.
Here are the BEFORE conditions - generally much better than most of the rigs I have re-habbed.
There was a variety of keels.
This is a design I had not encountered previously......
All of the heads were loose - to one degree or another.
This bill repair was sound - just needed some cosmetic surgery to hide it.
Only one eye of 10 was missing.
The original Bean's had pins in the heads that fit into holes in the body - for different head positions. They had all been sawn off previously. Drilling the steel out out the soft wood would have been a challenge - so I did not replace them.
This is the only pin that would have been easy to replace.
I like to round the edges of the keels - and any keel weights - to minimize chafing on other decoys in the bag or boat.
All 4 edges were rounded on the router table with a 3/16 bit.
I recarved all 5 faces to move the line between the face and bill forward. I also re-shaped some of the bills.
This Hen got carved twice - because her forehead way way too full.
Only this Hen Mallard had the notched keel. Note also the big craters in the cork. Large voids such as these got filled with epoxy + cork dust.
This bobbed tail would be a challenge to repair fully....
So, I just faired it off - so it would always be stronger than any spliced-in repair.
I painted all the heads prior to assembly - much easier to handle them that way, especially when you want some detail in the paint.
All of the heads were set in an acrylic caulk. I use it to keep water out and to serve as an adhesive BUT one that will allow disassembly if it's ever needed for future repairs.
Each head got a longer screw. I used a larger (3/4-inch) s/s fender washer and a panhead s/s screw to present a less chafing profile than the original flathead galvanized screws.
After sealing the entire bird with spar varnish, I painted the bottoms with Pettit 3303 duckboat paint - a flat oil.
The topcoat was my usual Behr house paints - flat latex. For a few small areas - the Drake Mallard heads and the speculums, I mixed in some tube acrylics to get what I wanted.
Once the painting was done, I wanted to make a matched set of keel weights. I used a piece of White Oak and a 3/4-inch wide round-nosed router bit to plow 2 grooves about 1/2-inch deep and 4-1/2 inches long.
I worked some lanolin into the oak to minimize burning on the first pour. (An earlier post by George Williams suggested using Crisco - but I had none in the shop.)
I worked outside to dissipate the lead fumes. But, my safety precautions probably fell a bit shy of modern standards: I was wearing shorts and a T-shirt - and no gloves.....
I used small pieces of scrap and melted them with my Bernzomatic torch in a nice, stable s/s ladle my Dad made in the 1950s. The hollow (tubular) s/s T-handle does not get hot and the T gives nice control.
I let each pour of keel weights cool for at least 20 minutes before I flipped the mold over so they could drop right out.
I drilled pilot holes on the press and shaved the rough edges with a knife. I did not want to grind the lead and get the particles airborne.
These 4.5-inch long weights came in at 7 ounces.
I used 1.5-inch #14 boat nails to fasten the keel weights - a bit further aft than the BEFORE weights.
Now ALL 5 keel weights match.....
Before putting the mold away, I plowed a longer (8-inch) groove on the other side of the oak for future keel weights that should be about 12 ounces each.
The mold now hangs where I can find it next time I need it.
Here are the finished birds. First inside - under the lights:
Only the Hens show their speculums.
This grand old Drake got his Yellow Ochre (Behr Saffron Strands) bill and some White highlights on his cheeks.
After the formal portrait sessions, I added the edging to the primary groups on the 2 Drakes just to make each one "pop" a bit. While this feature will not bring any more ducks into the bag, it is one of those quick (30 seconds) paint details that is appreciated when the decoy is in hand.
Now outside.
Now - back to the Sneakbox.....right after the lawn tractor transmission and the kitchen faucets.....
All the best,
SJS