Steve Sanford
Well-known member
All~
A good friend recently noticed: "You've been noticeably quiet lately. Either you are killing ducks or up against it with your orders." Well, the truth is more the latter - although we gave a nice farewell - in the snow - to a bunch of Wood Ducks yesterday.
This South Bay Duckboat was the star of a long post last year: http://www.duckboats.net/...%20bay%20spa;#272548
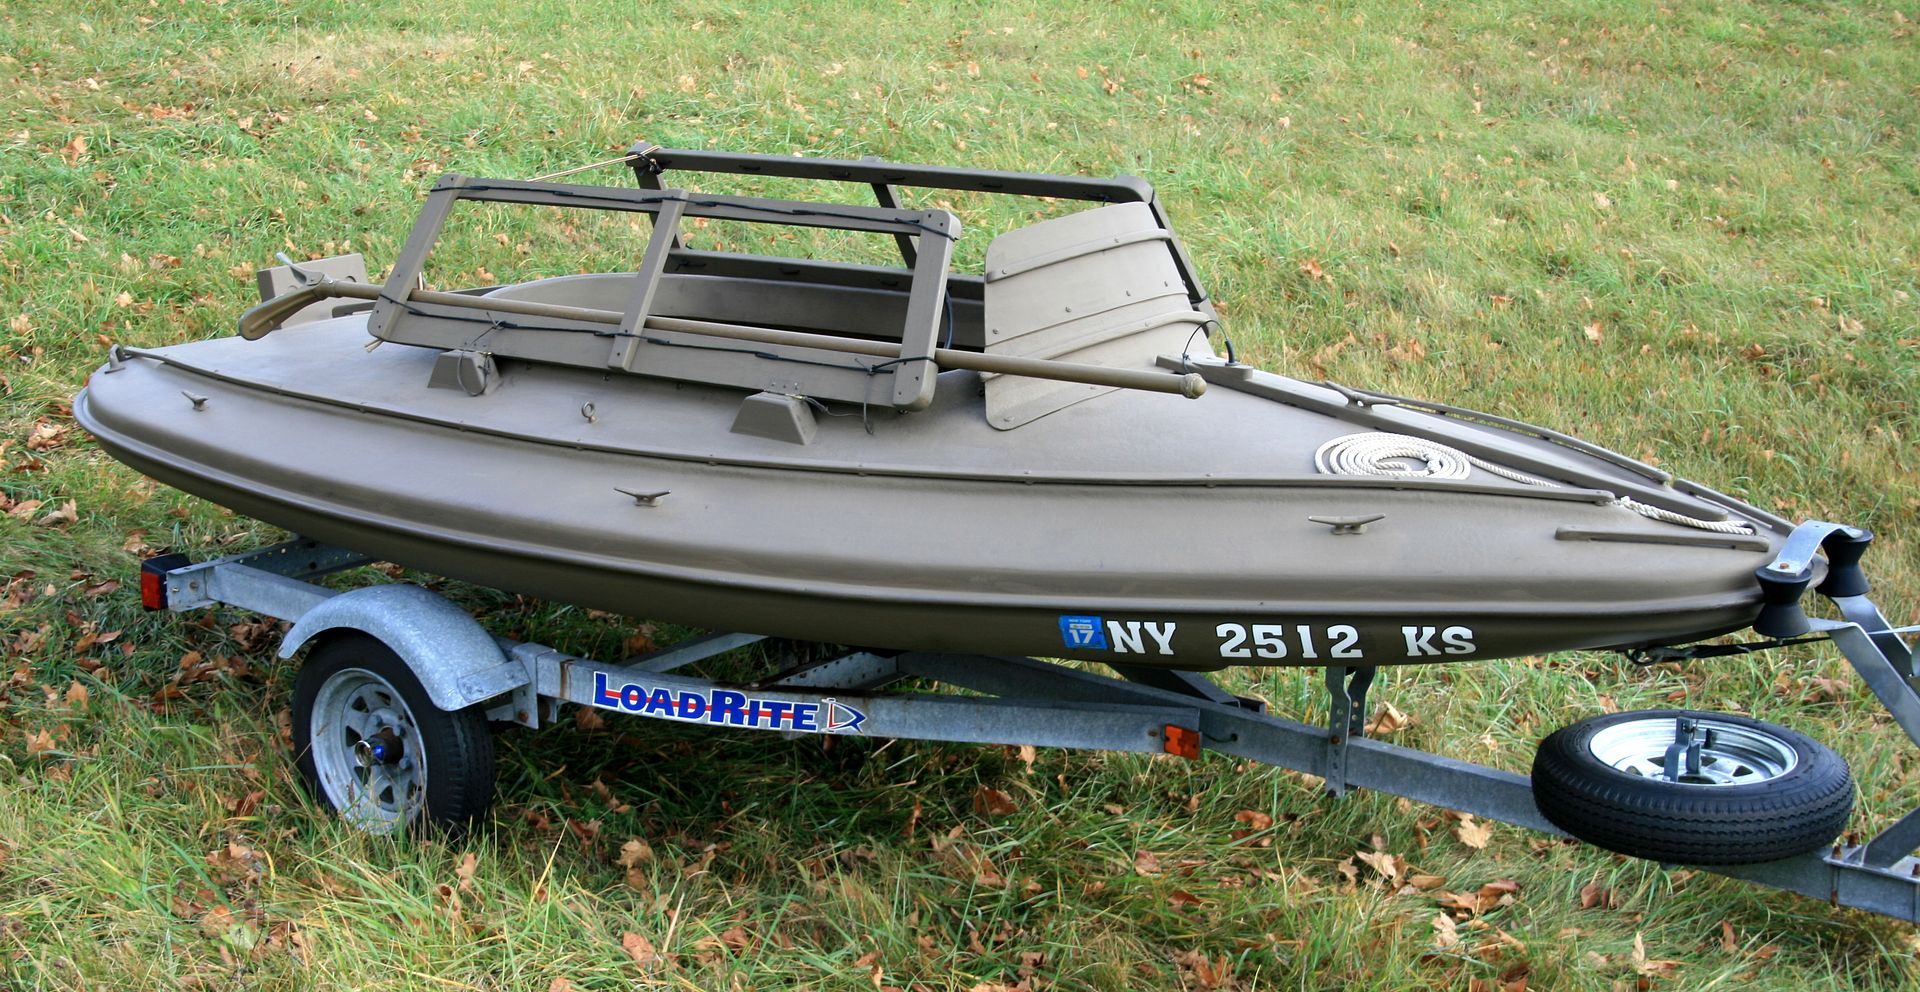

The vessel spent some time here at Pencil Brook Boatworks and has been getting my attention off-and-on since August. The big job was a Spray Dodger - the traditional "baby carriage hood" style with 2 bows - more complicated than the several single-bow Dodgers I have made over the years. This Dodger will both keep the helmsman drier when under way and also provide shelter when gunning in driving rain.
As usual, I got my materials and supplies from Sailrite - along with a new sewing machine earlier in the summer. I also watched their how-to video on building a Dodger (for a cruising sailboat) to learn how the pros do it. The best takeaway message for me was their use of a special patterning material (DuraSkrim) held in place by either double-sided tape or SeamStick (used instead of pins to hold fabric in place before sewing).
The Dodger was planned since last year - so I had taken the necessary measurements.
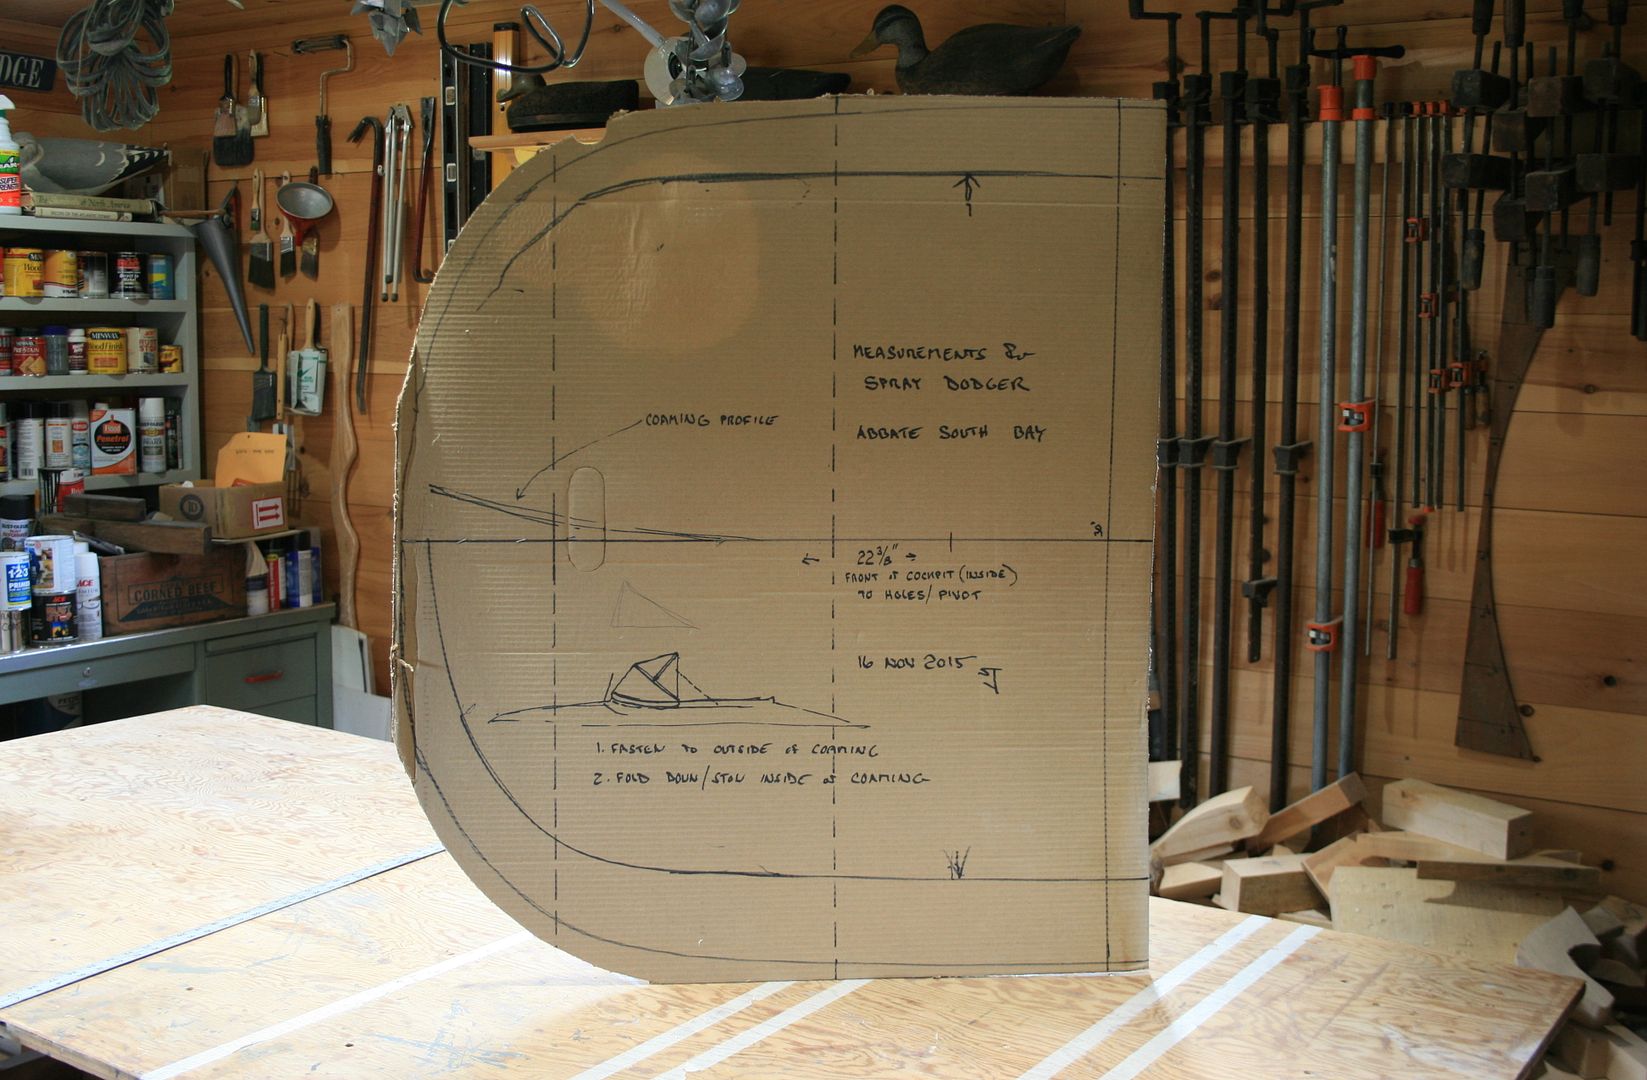

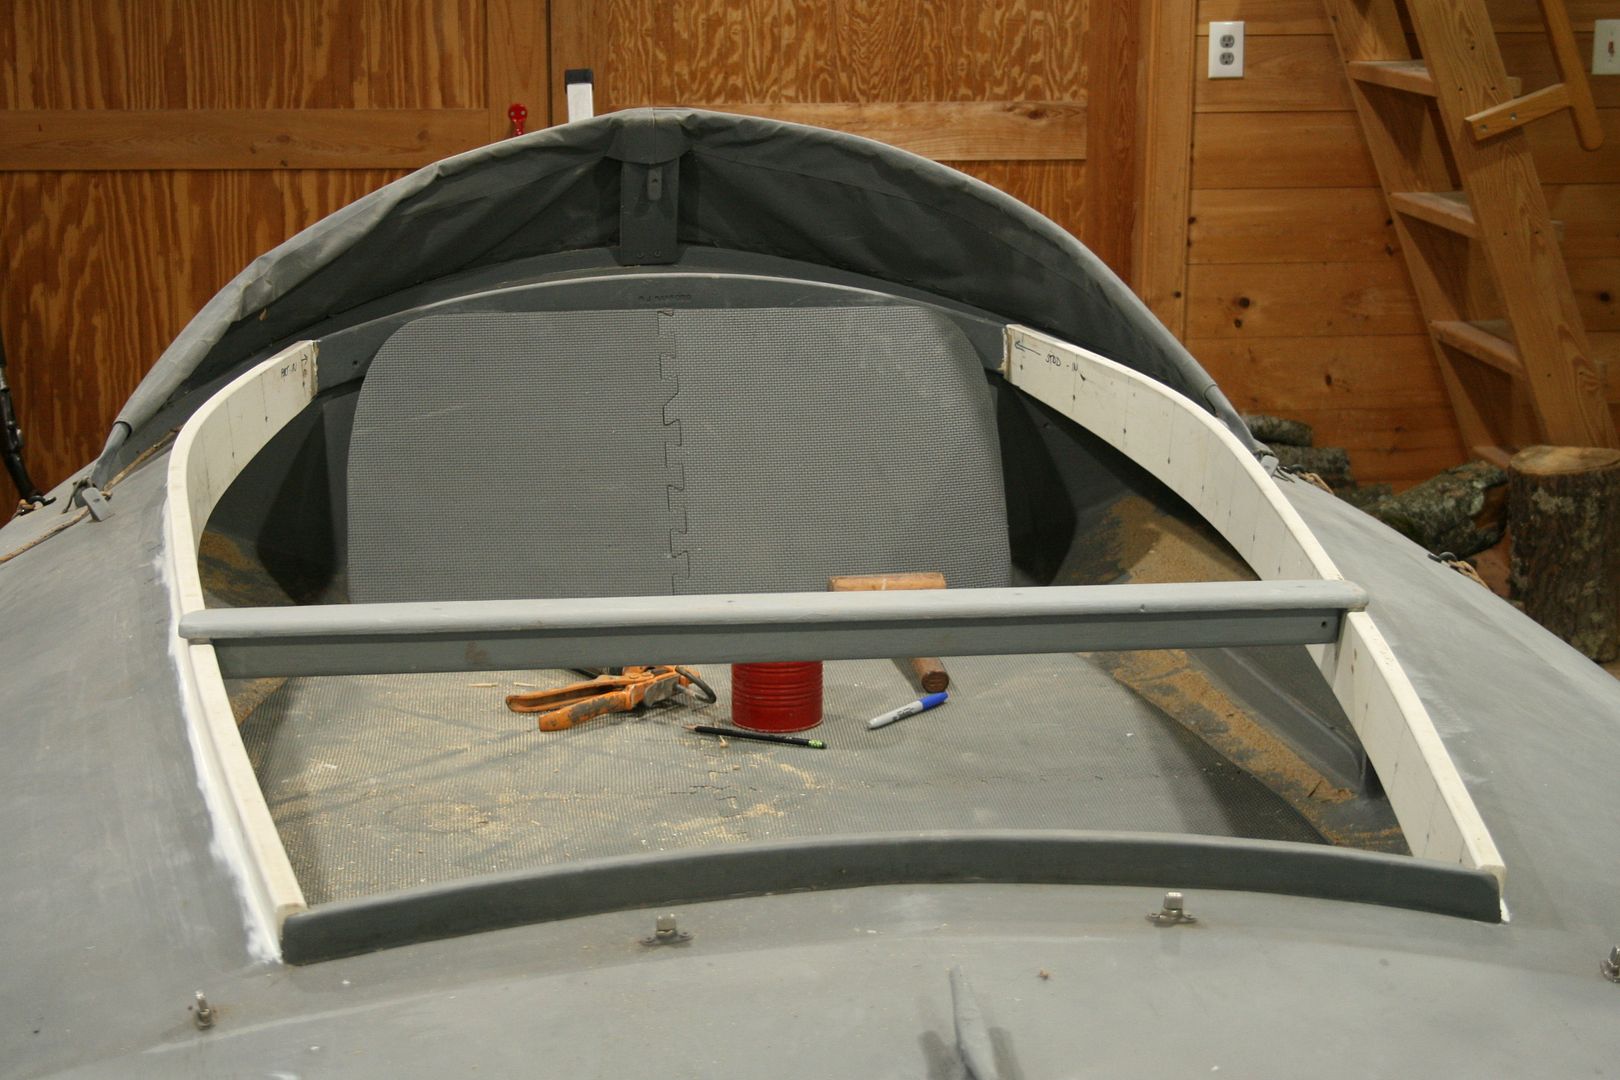
The bows needed to fit down inside the coaming when stowed so the hard cockpit cover would still fit.
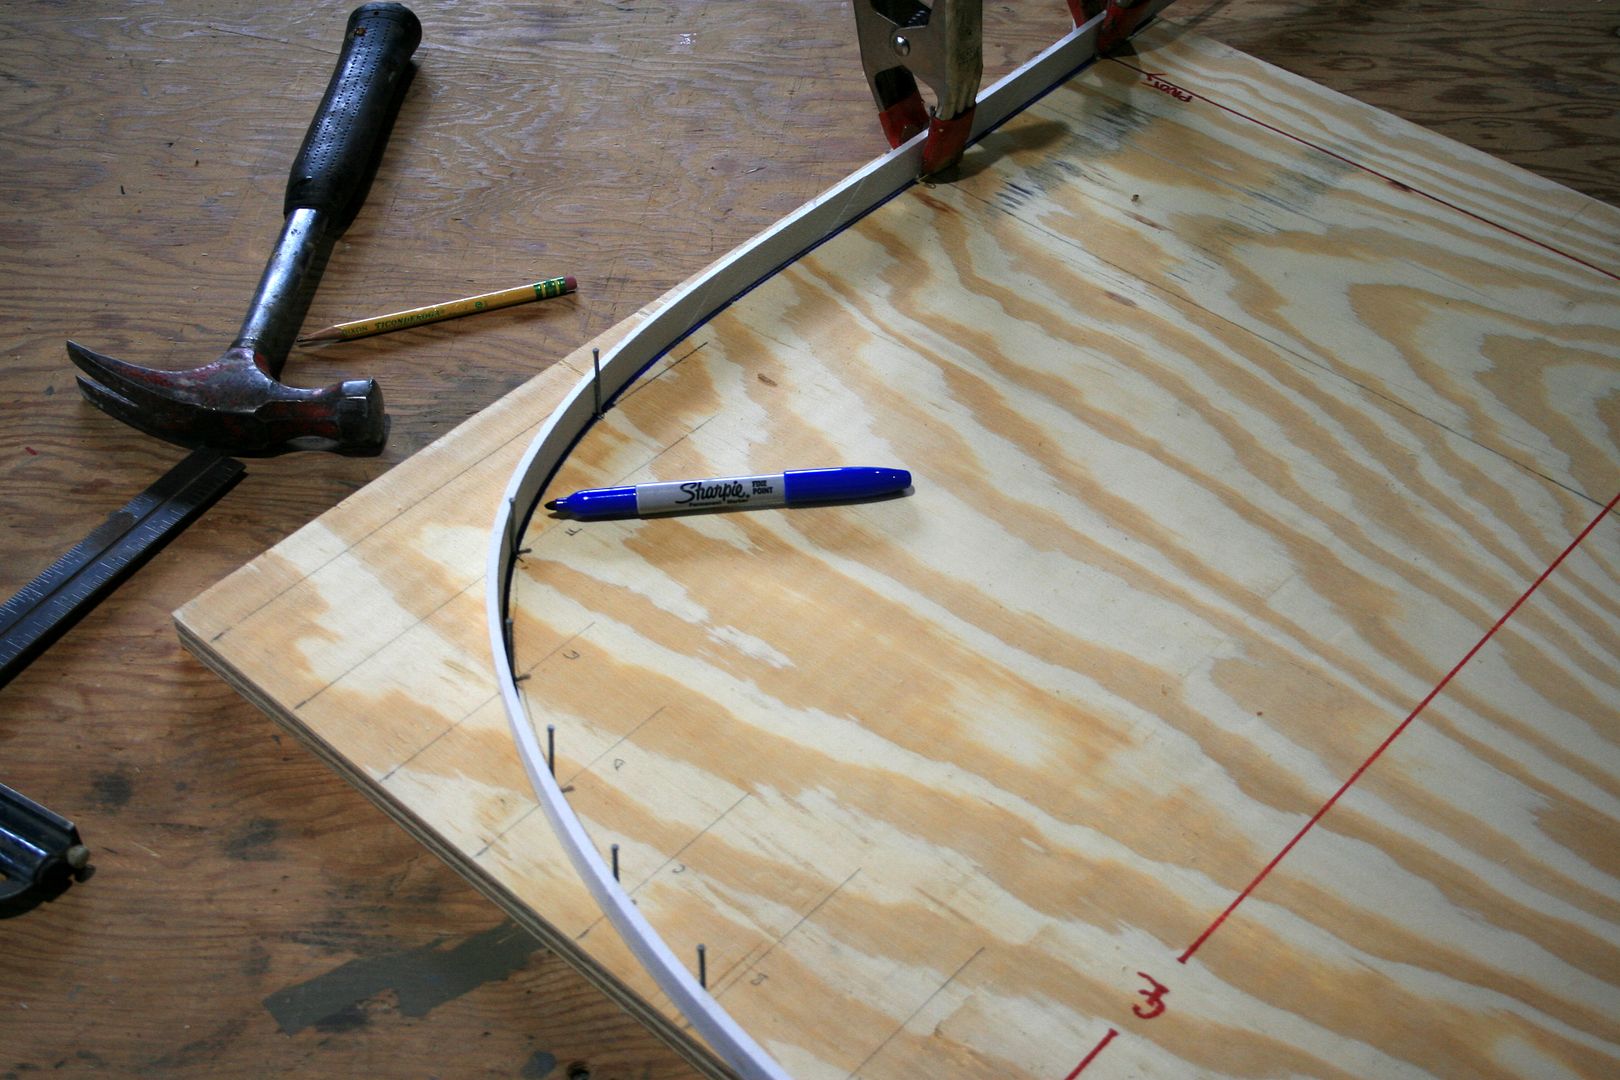
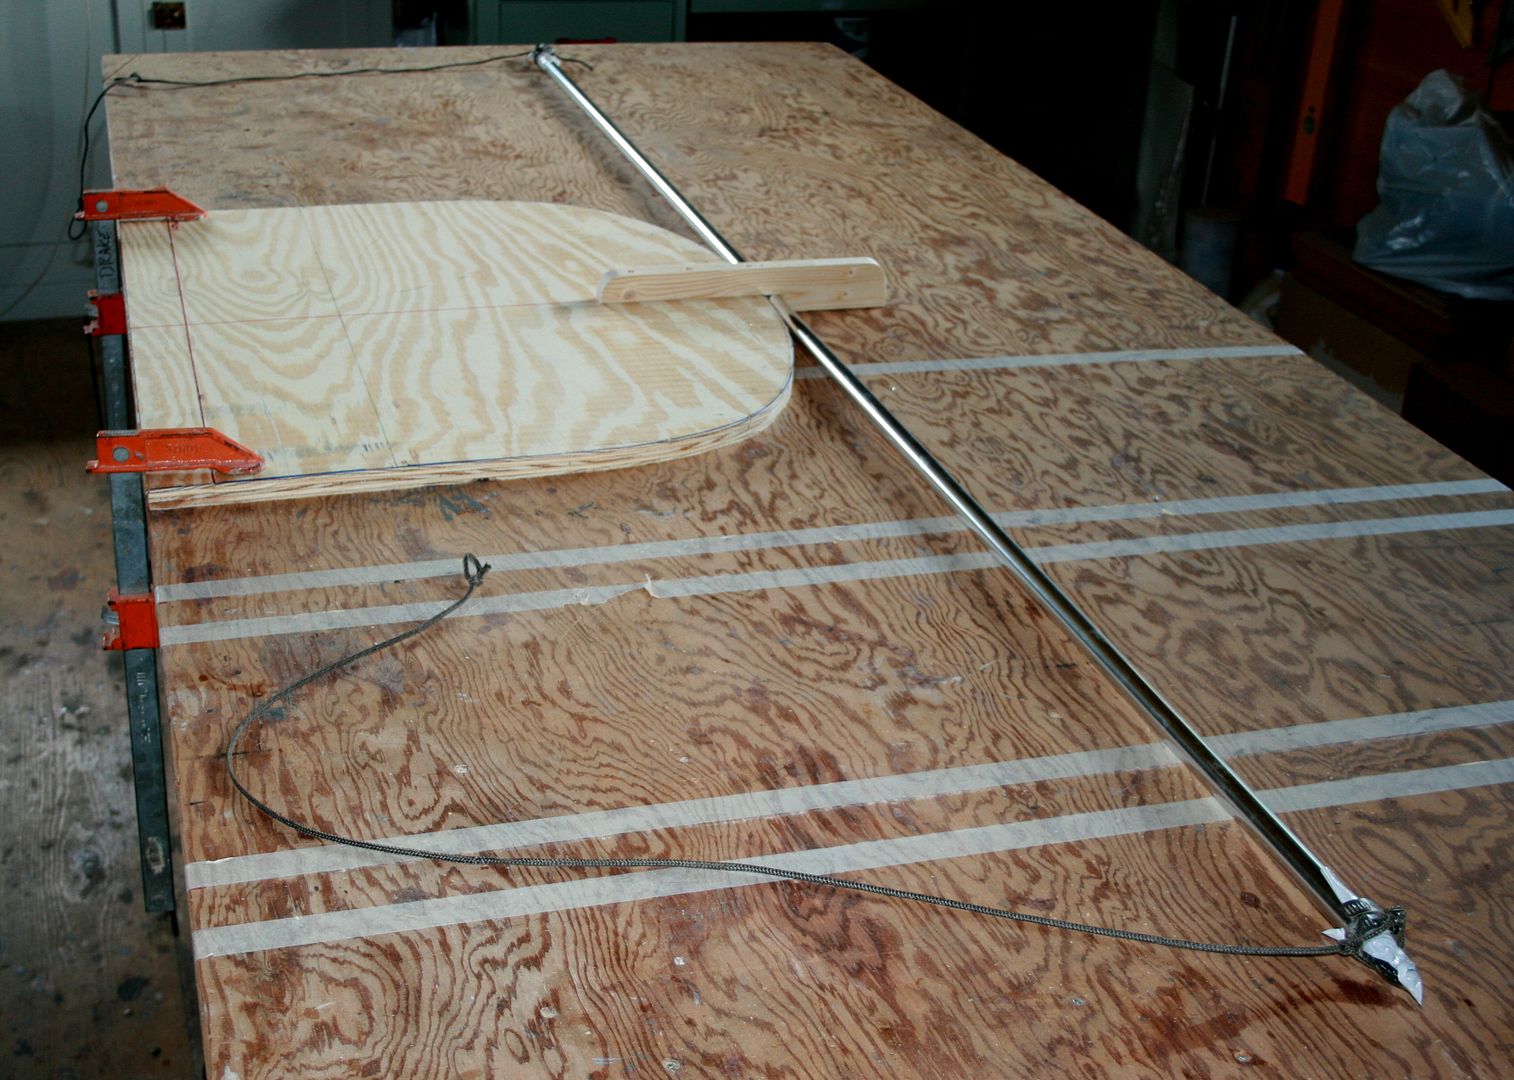
I made a bending jig from 3/4-inch ply. I used some thin PVC lumber and a bunch of finishing nails to draw a fair curve.
Instead of re-purposing ready materials, I got the bow stock (3/4-inch aluminum) and hardware from Sailrite. I used the end fittings to contain the sand I poured into the tubing so it would not kink when bent.

This cleat keeps the tubing from jumping out of the jig.

With the jig clamped to the bench, I used decoy line to pull in the ends until I could grab the tubing itself.

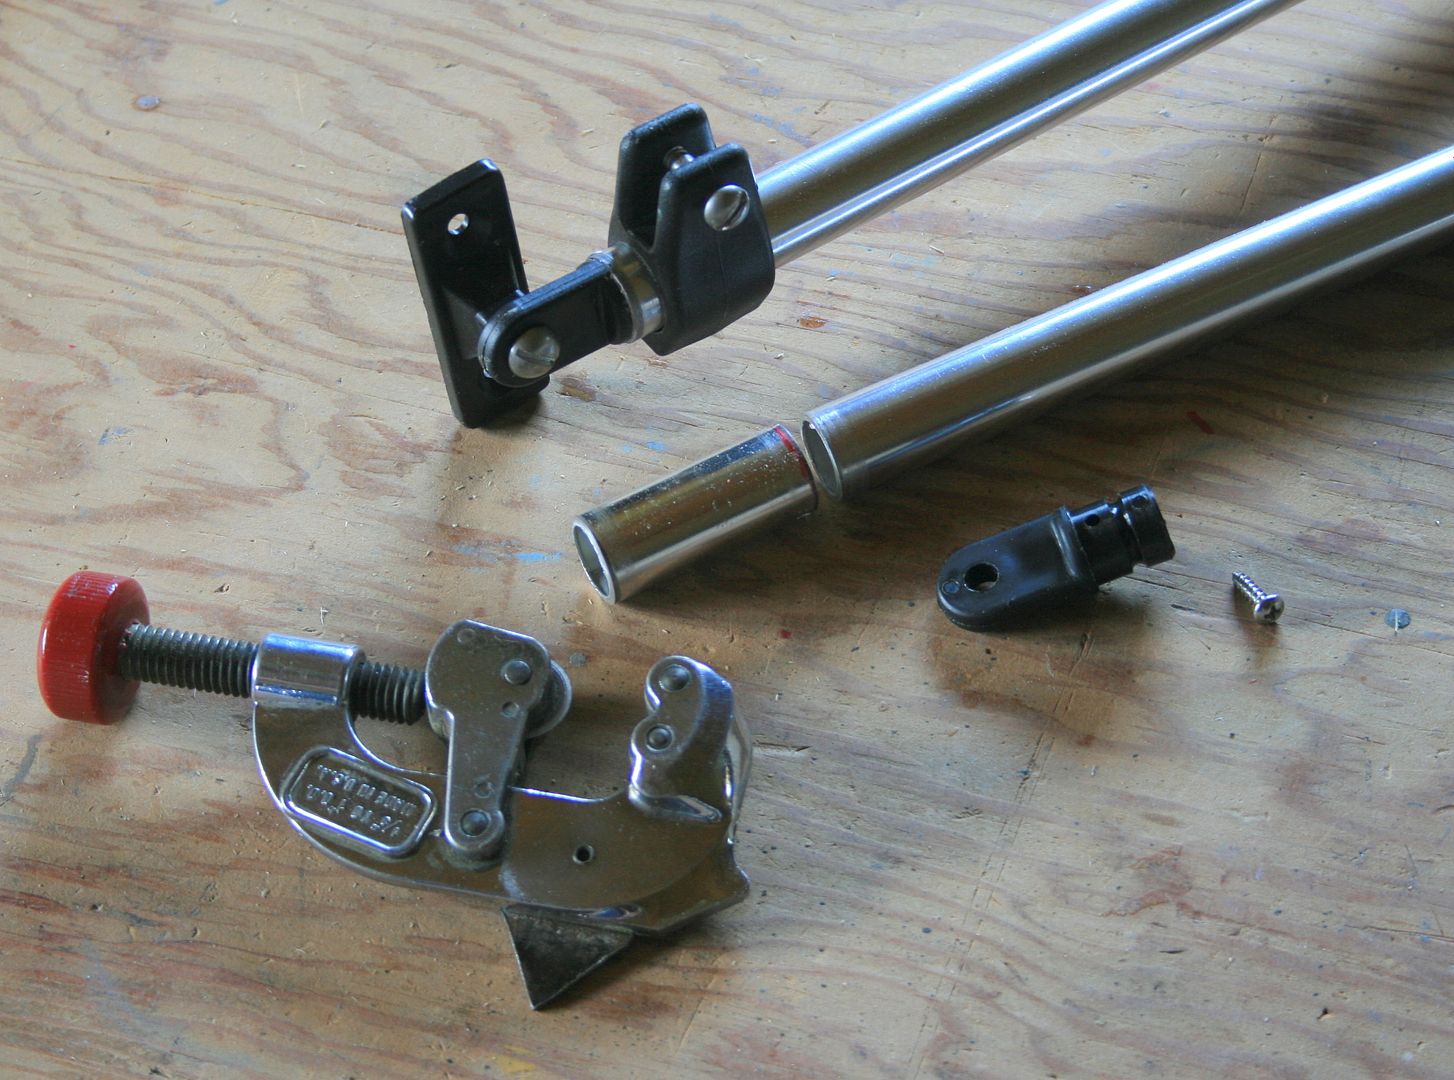
These fittings attached the main bow to the coamings and the secondary bow to the main bow.
This chock keeps the folded bows level. That's strapping tape on the screw - to help in making the pattern.
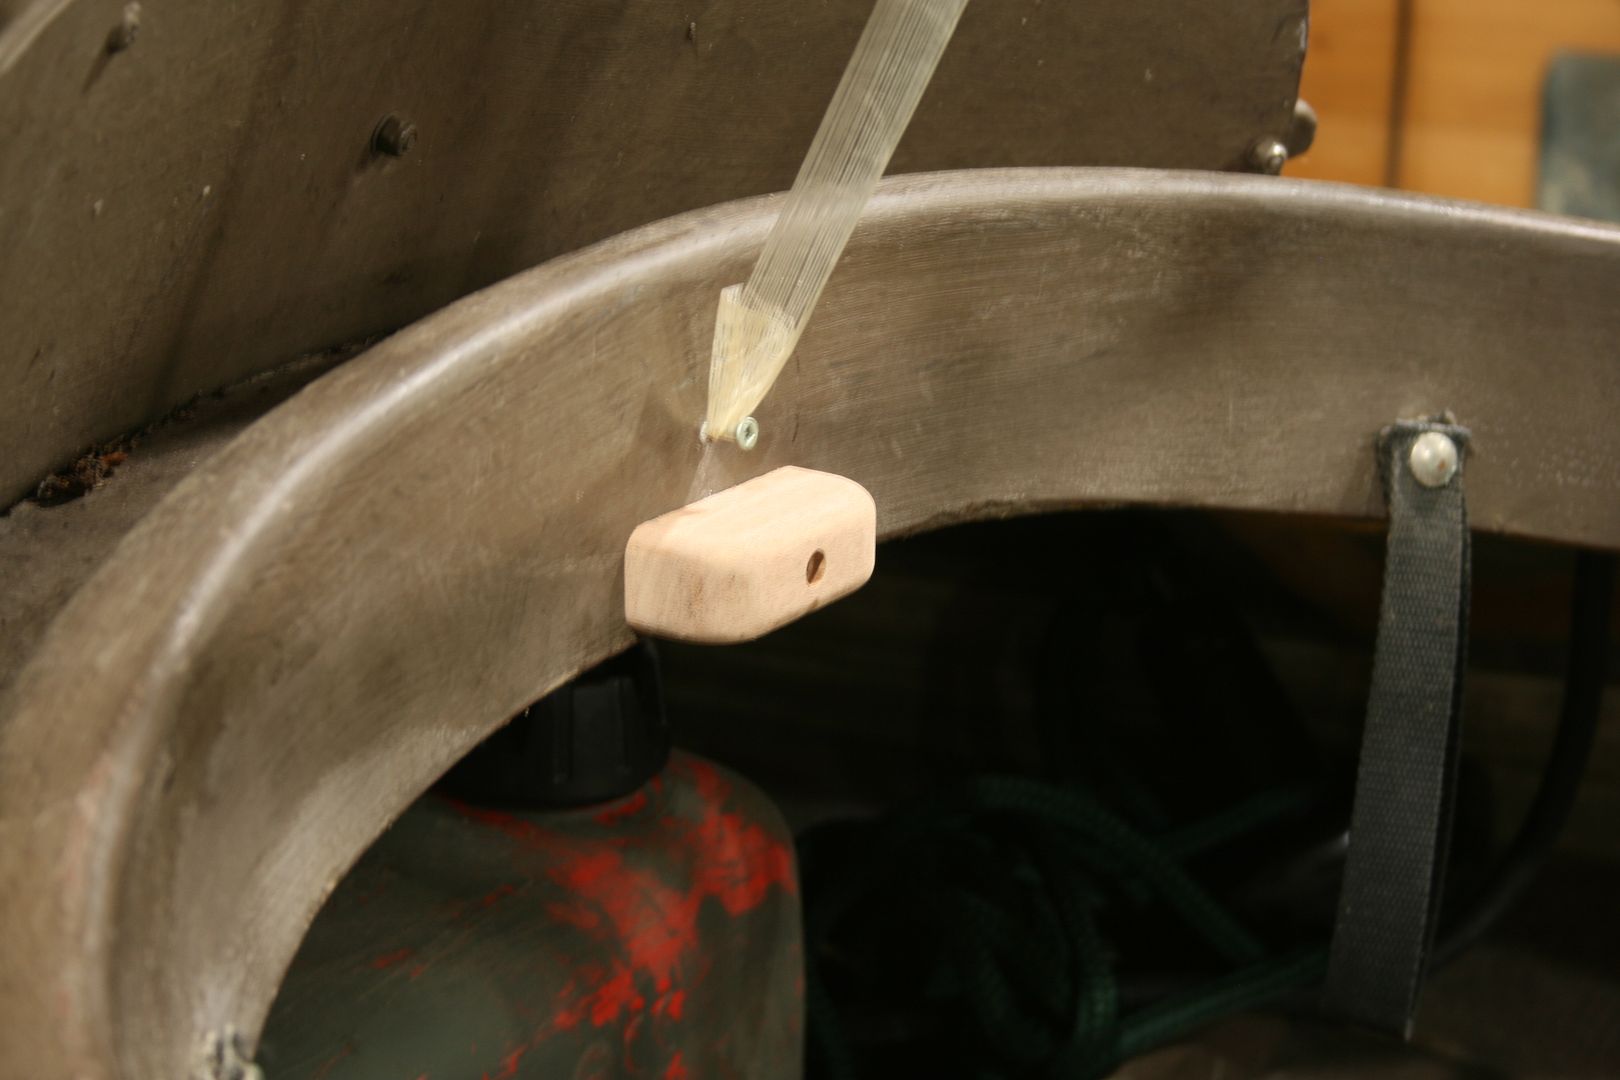
Here is how the bows will be rigged.

The strapping tape is pulled taut to the stern deck.

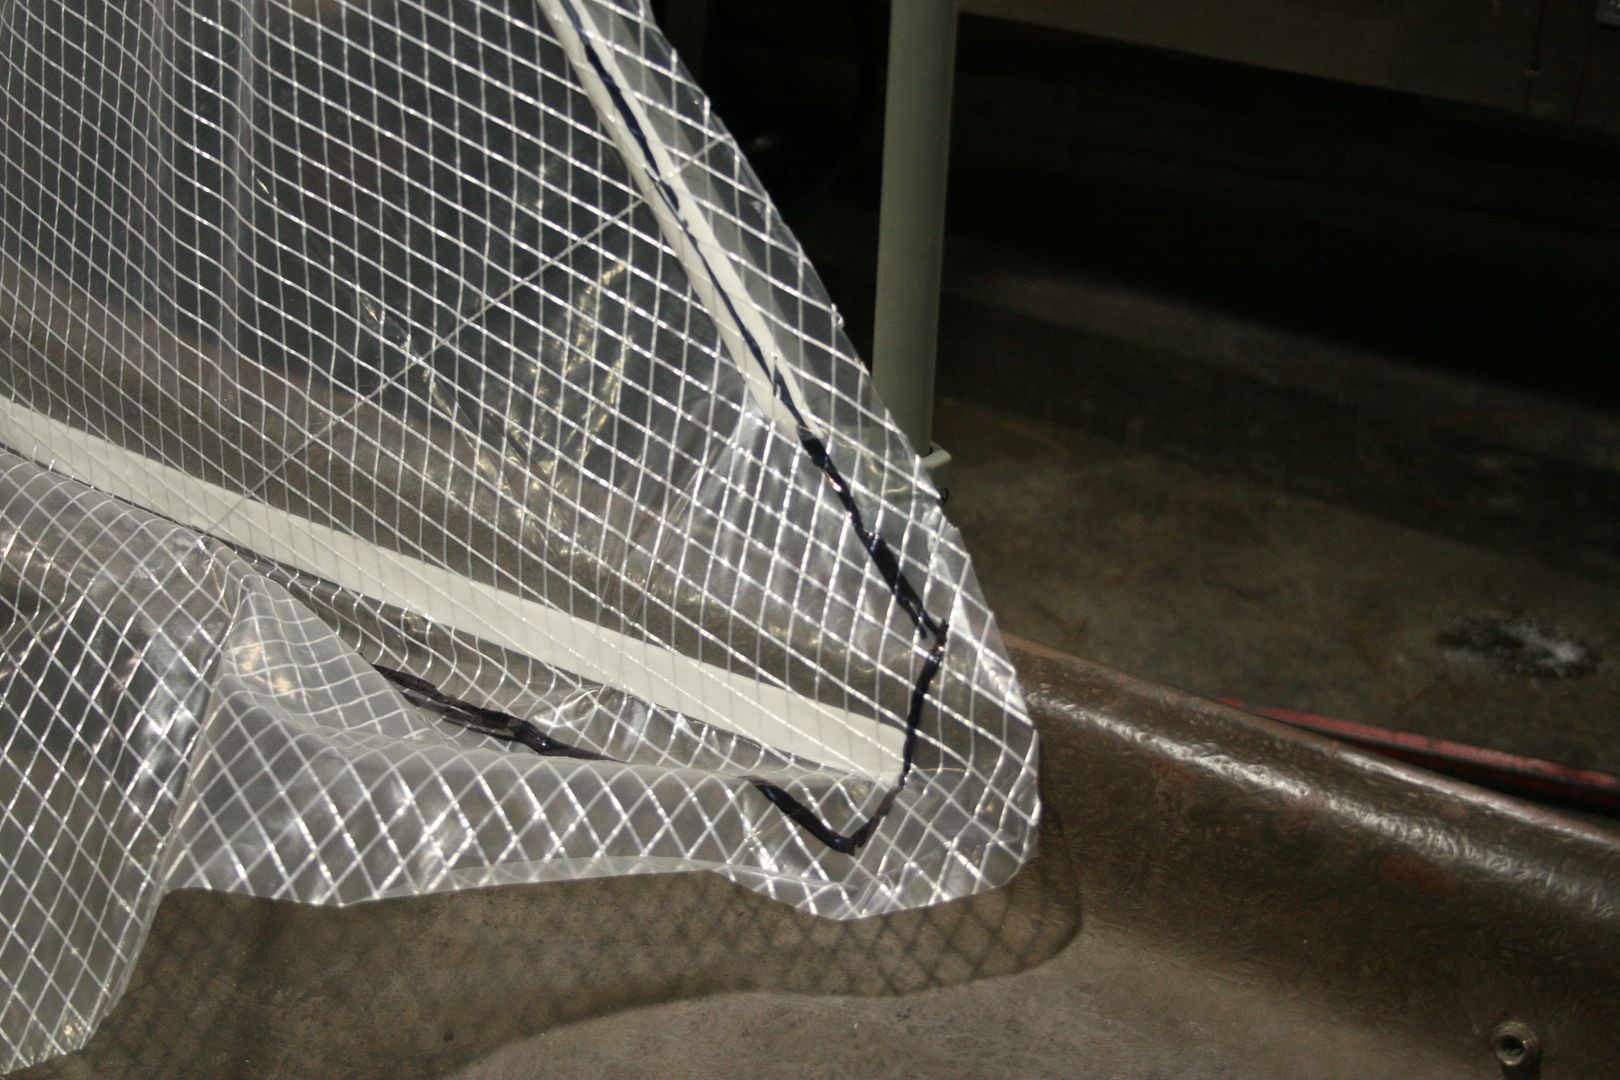
I first attached the DuraSkrim to the coamings and framework with double-sided tape. However, I soon found that it is too aggressive and hard to clean off when no longer needed. I switched to SeamStick - a milder form of DS tape.
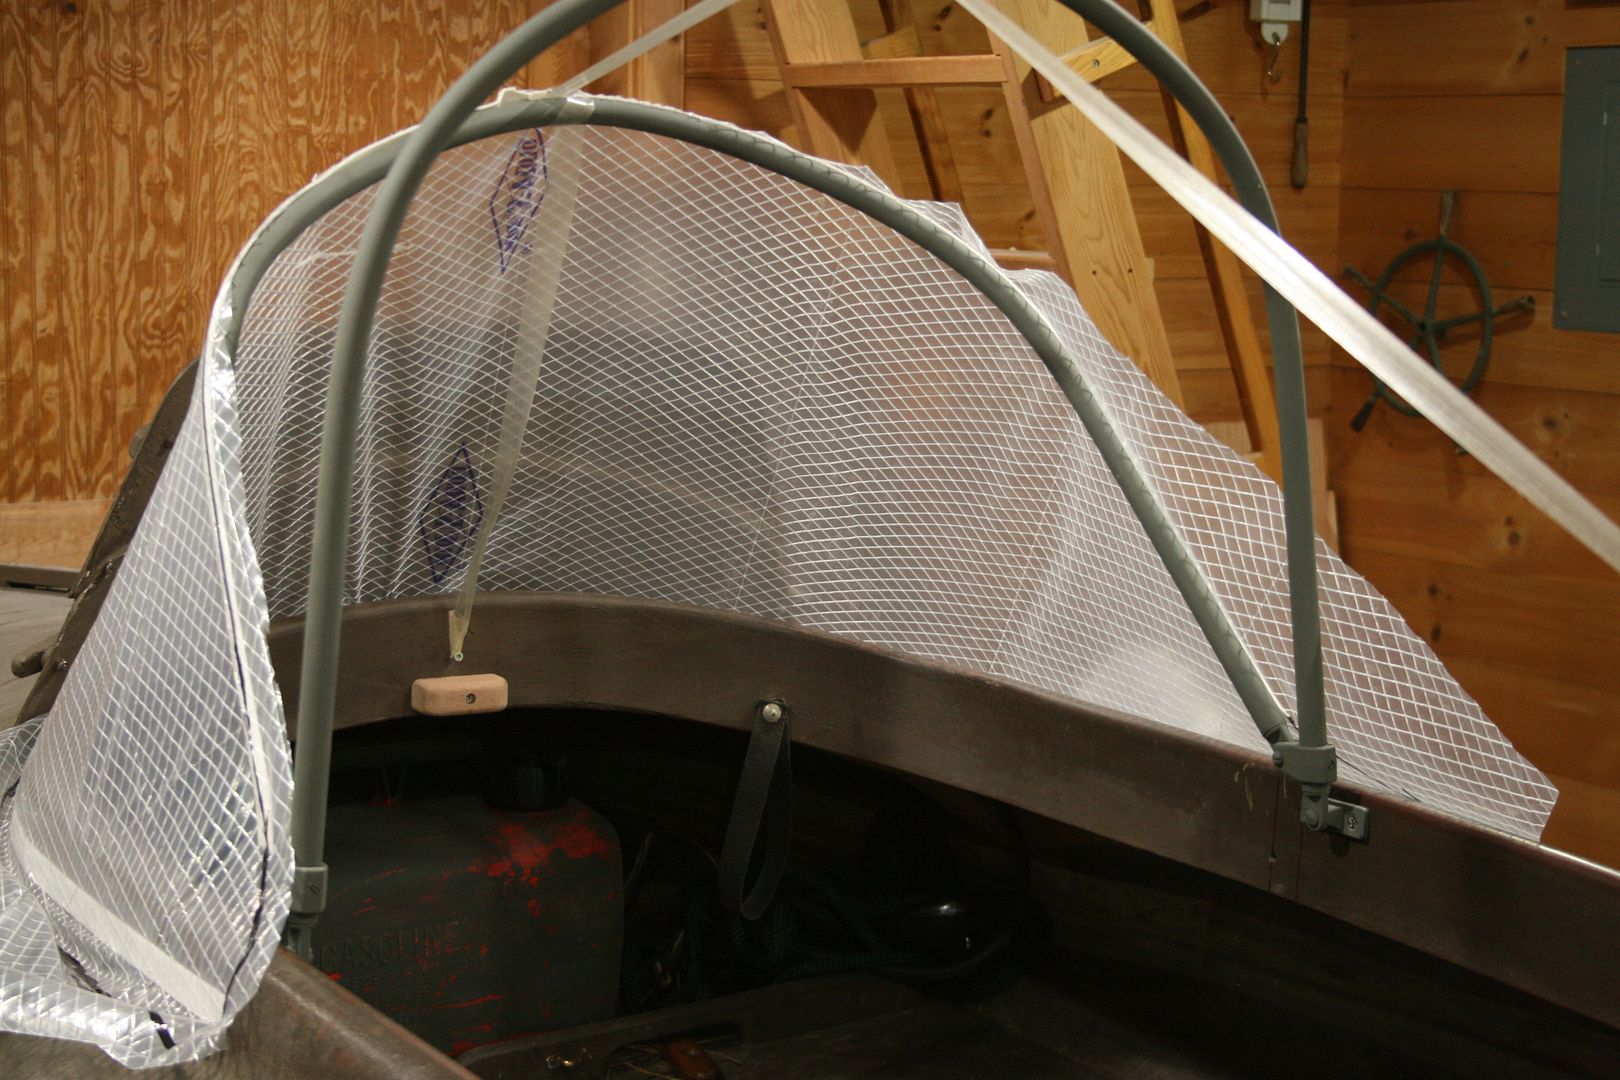
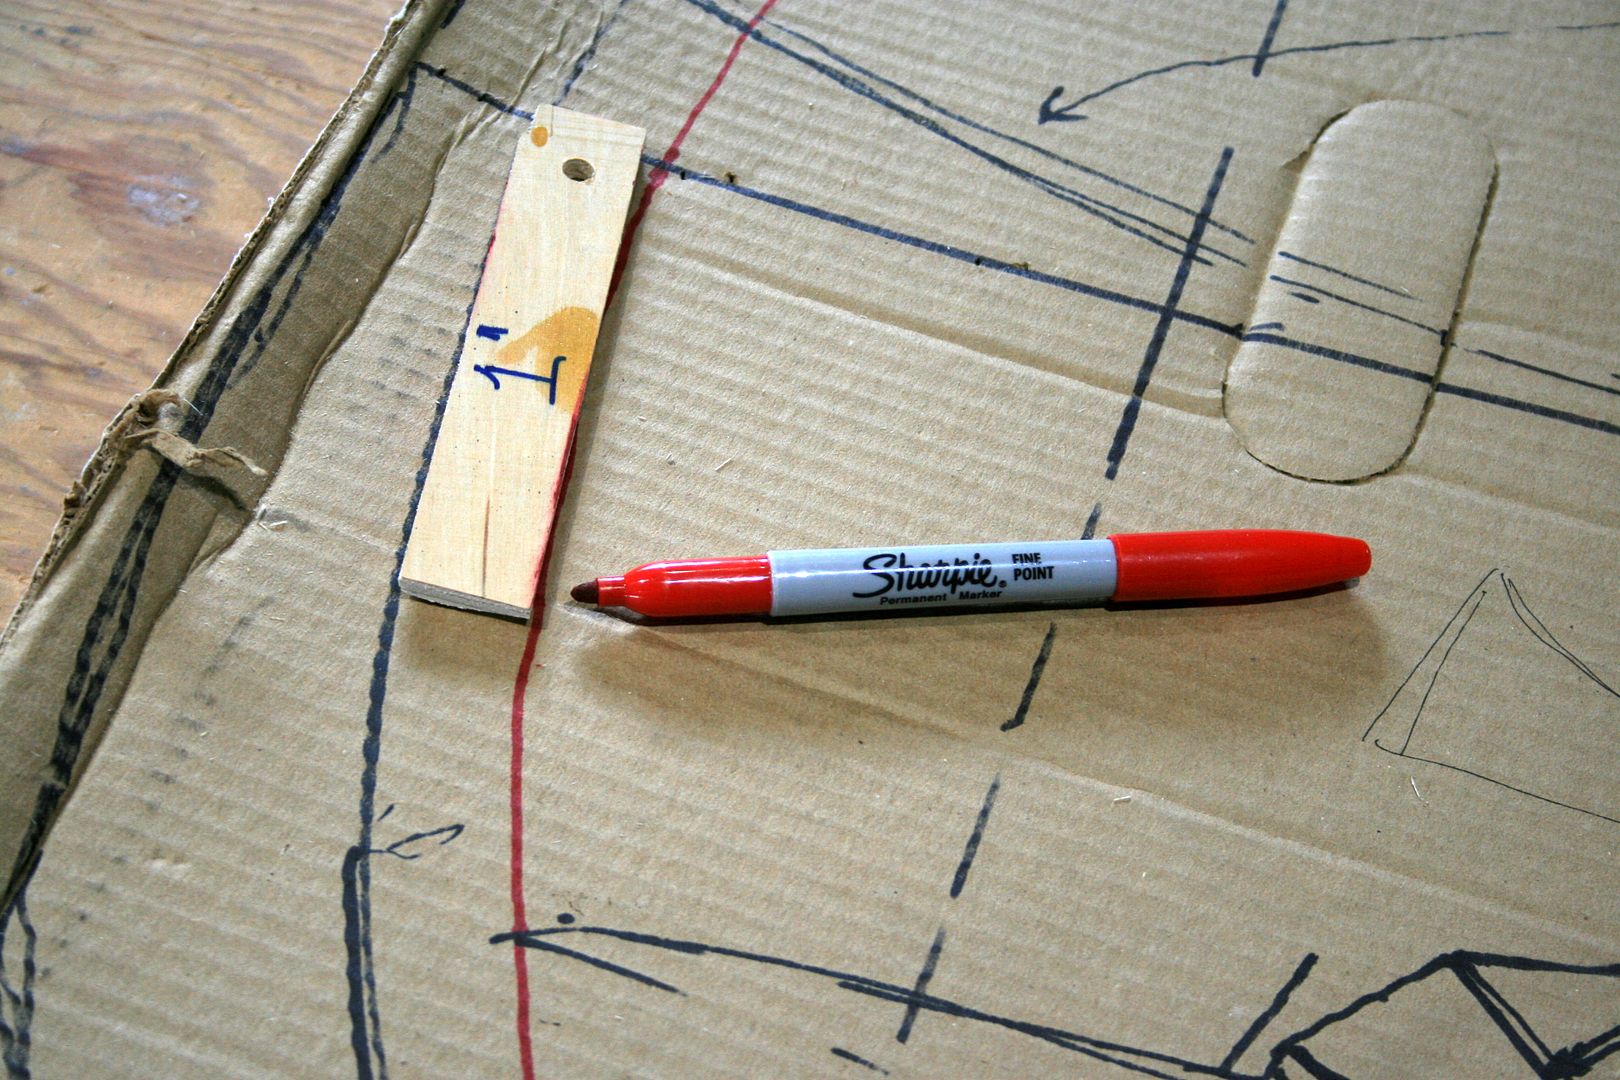
I marked the important margins on the DuraSkrim.
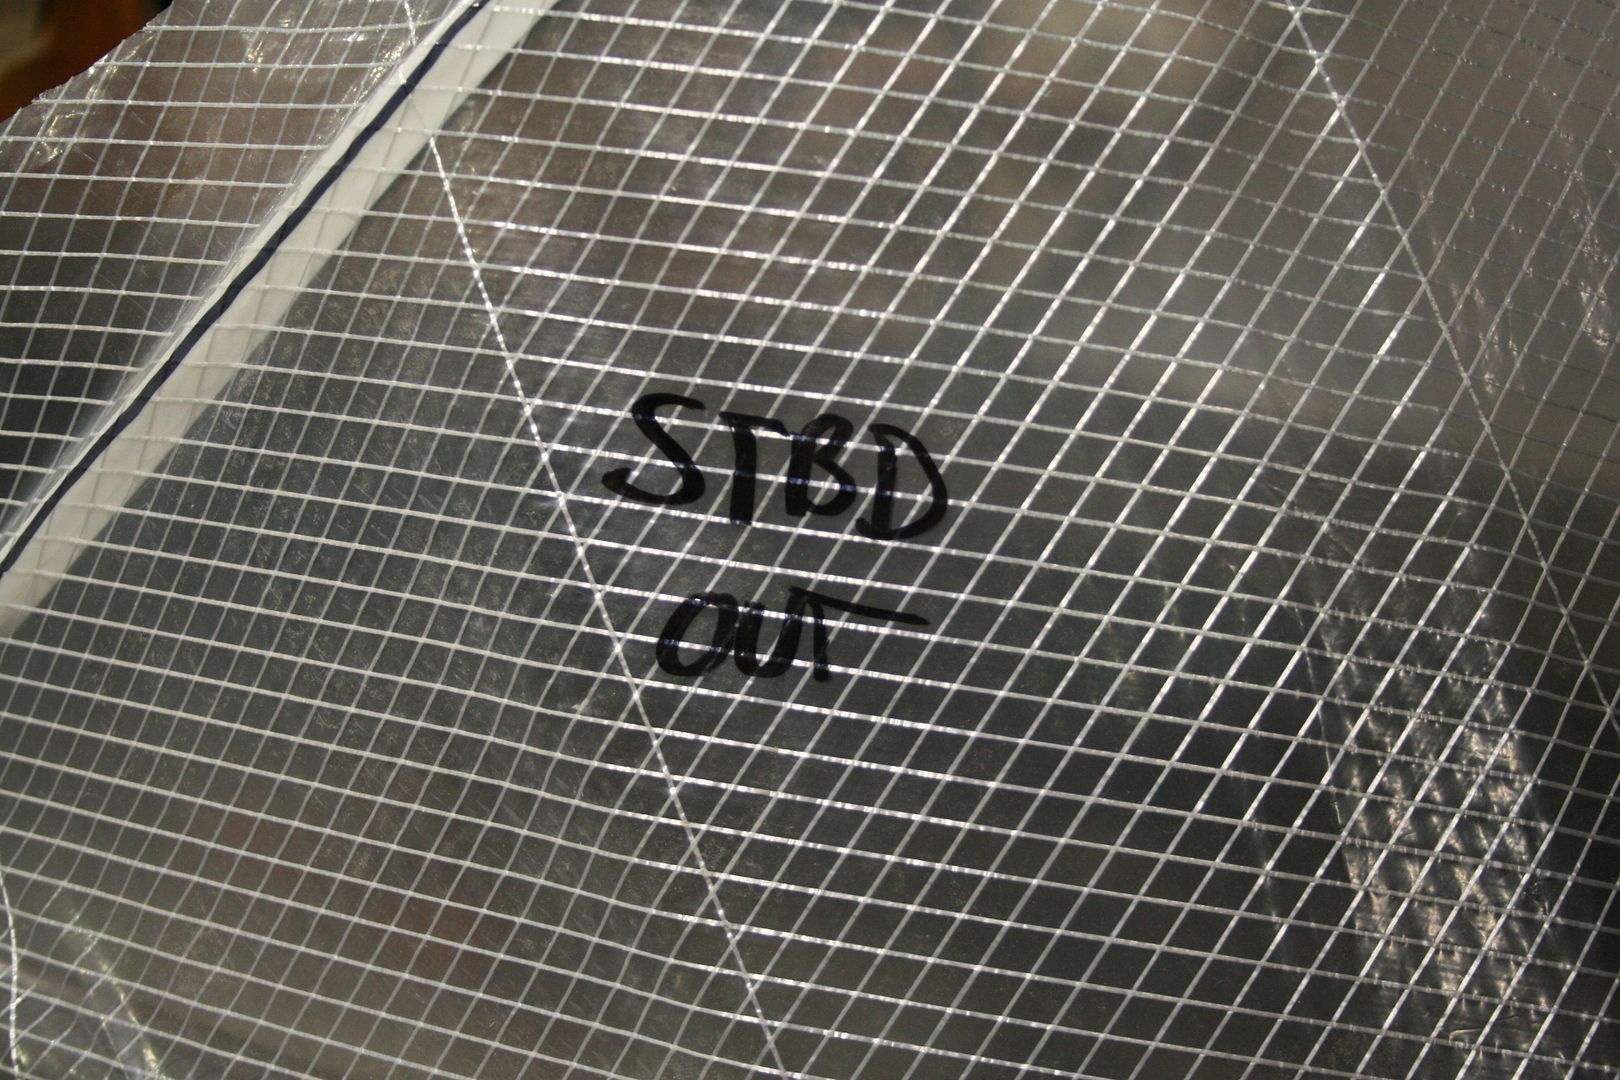
And I also made sure to keep notes on orientation, et cetera.
Here is the finished Dodger:

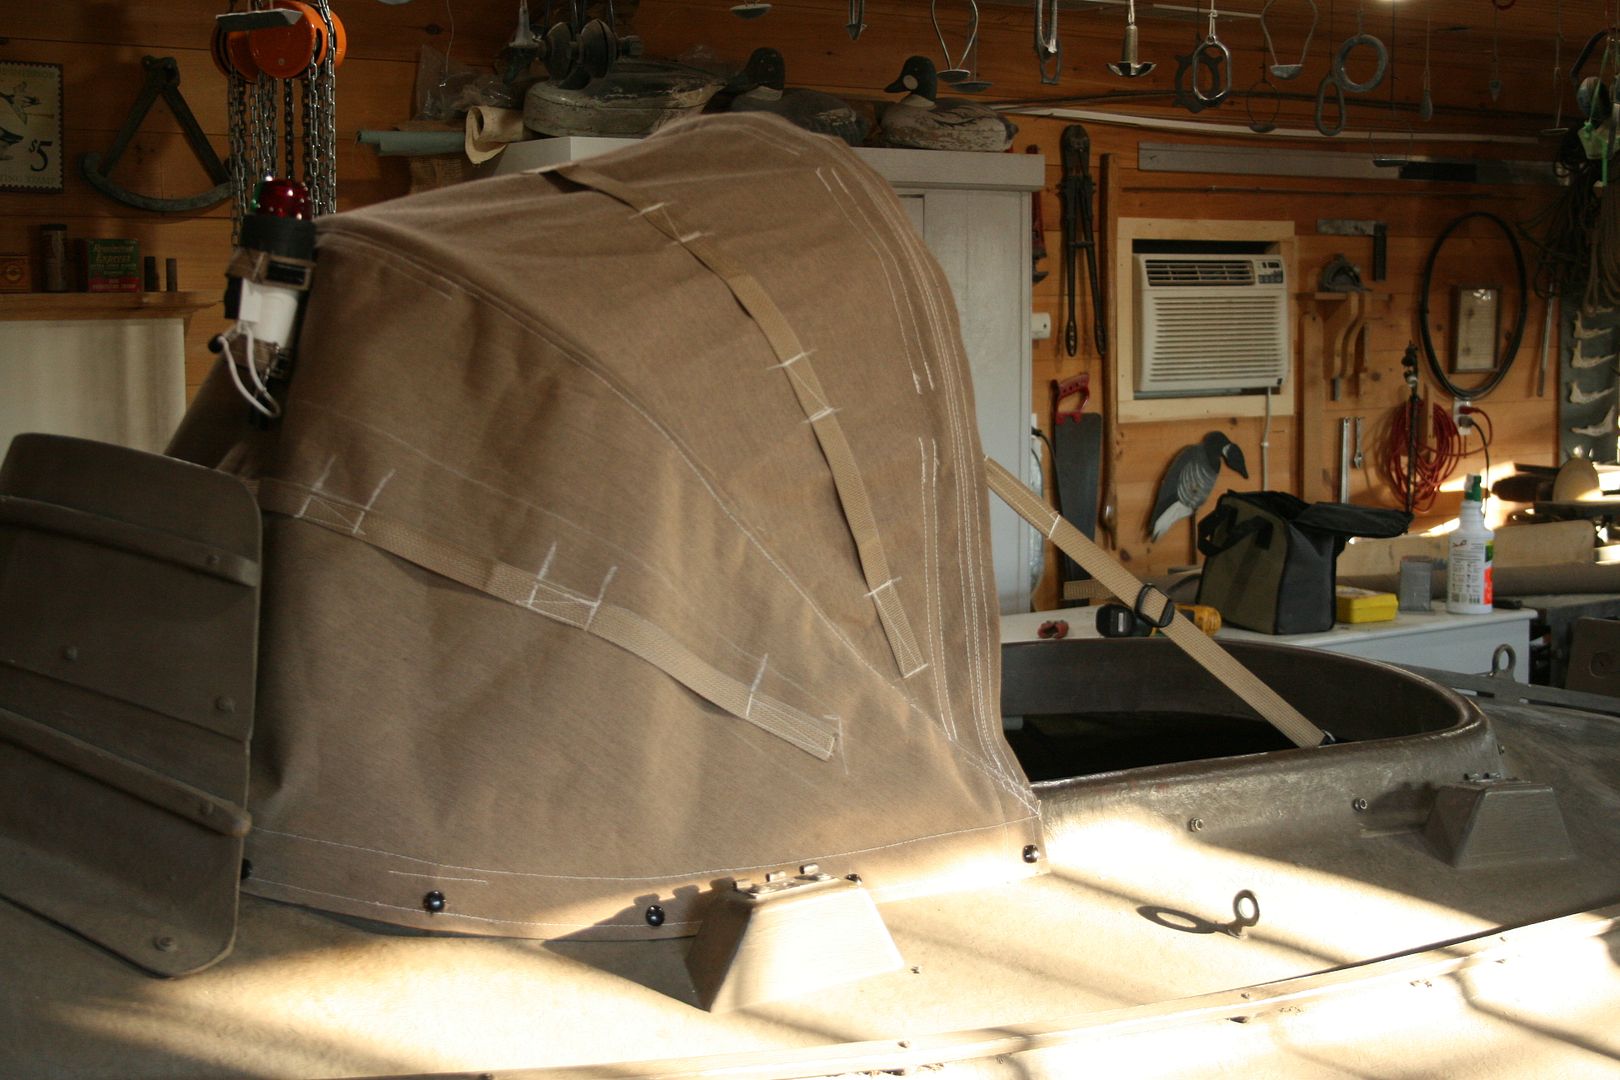
Because I would also be adding a Stool Rack on the foredeck - and thereby hiding the temporary nav light there - I sewed a pair of Velcro straps on the forward part of the Dodger to hold the light.

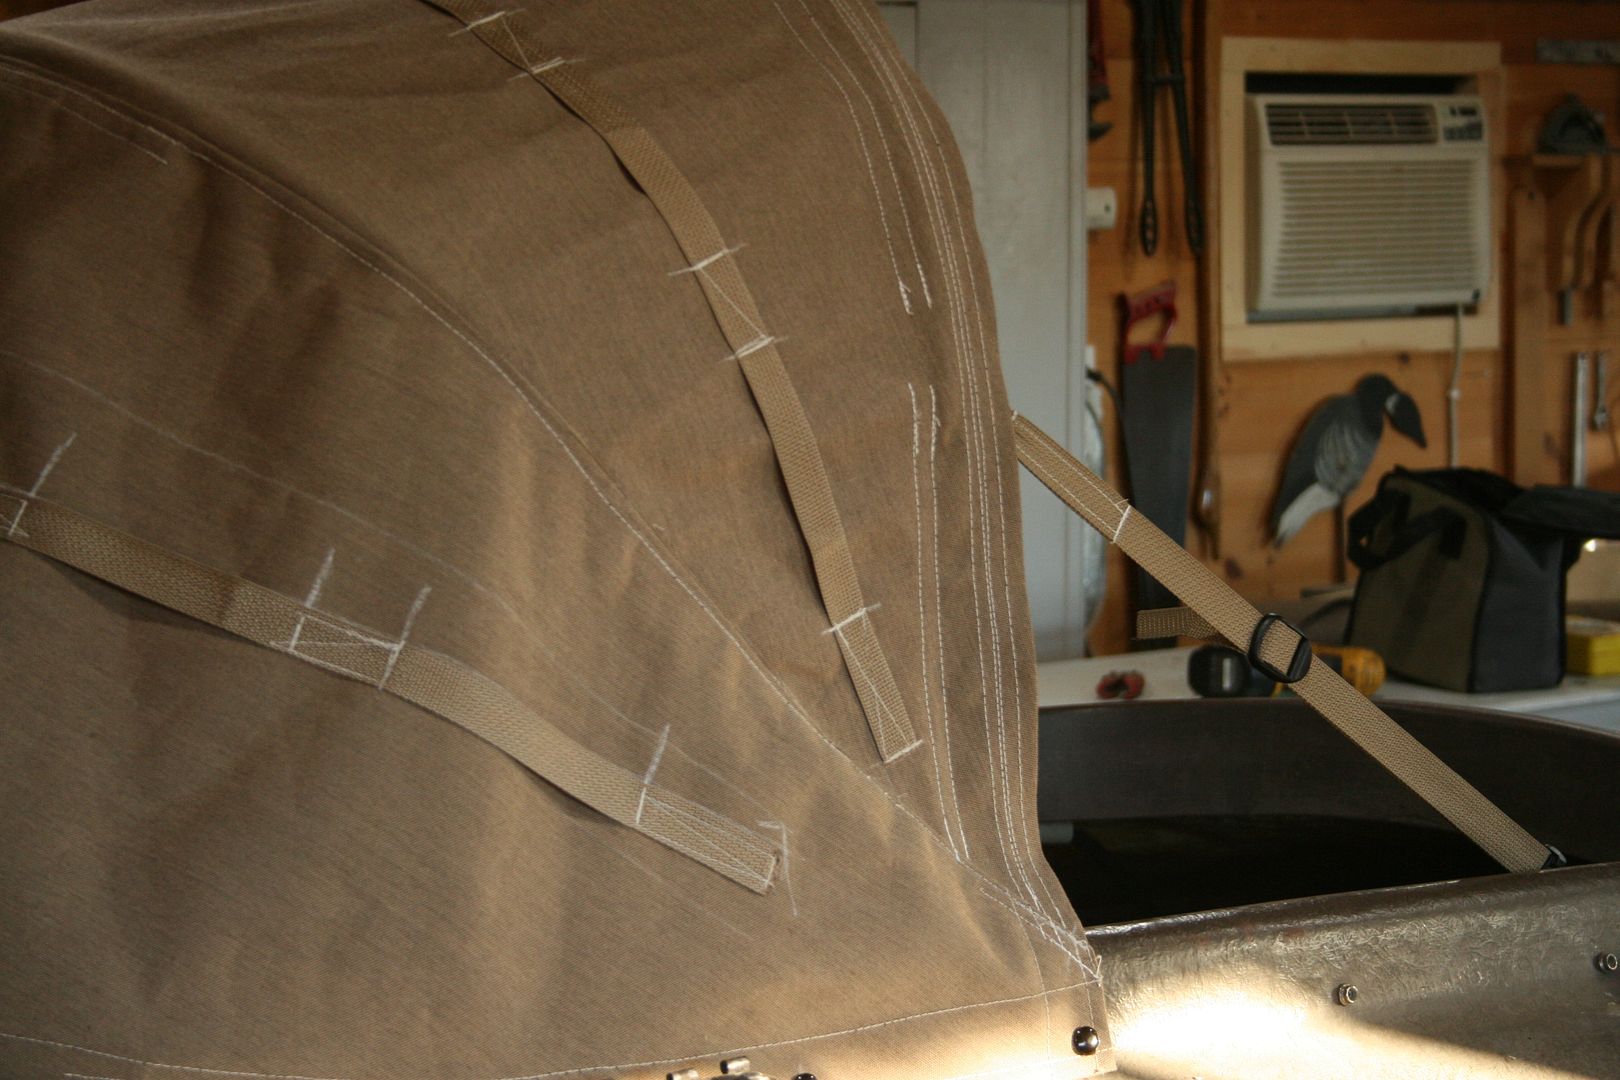
I also added some webbing to the Dodger so thatch could be stuffed in as needed when gunning with the Dodger up.
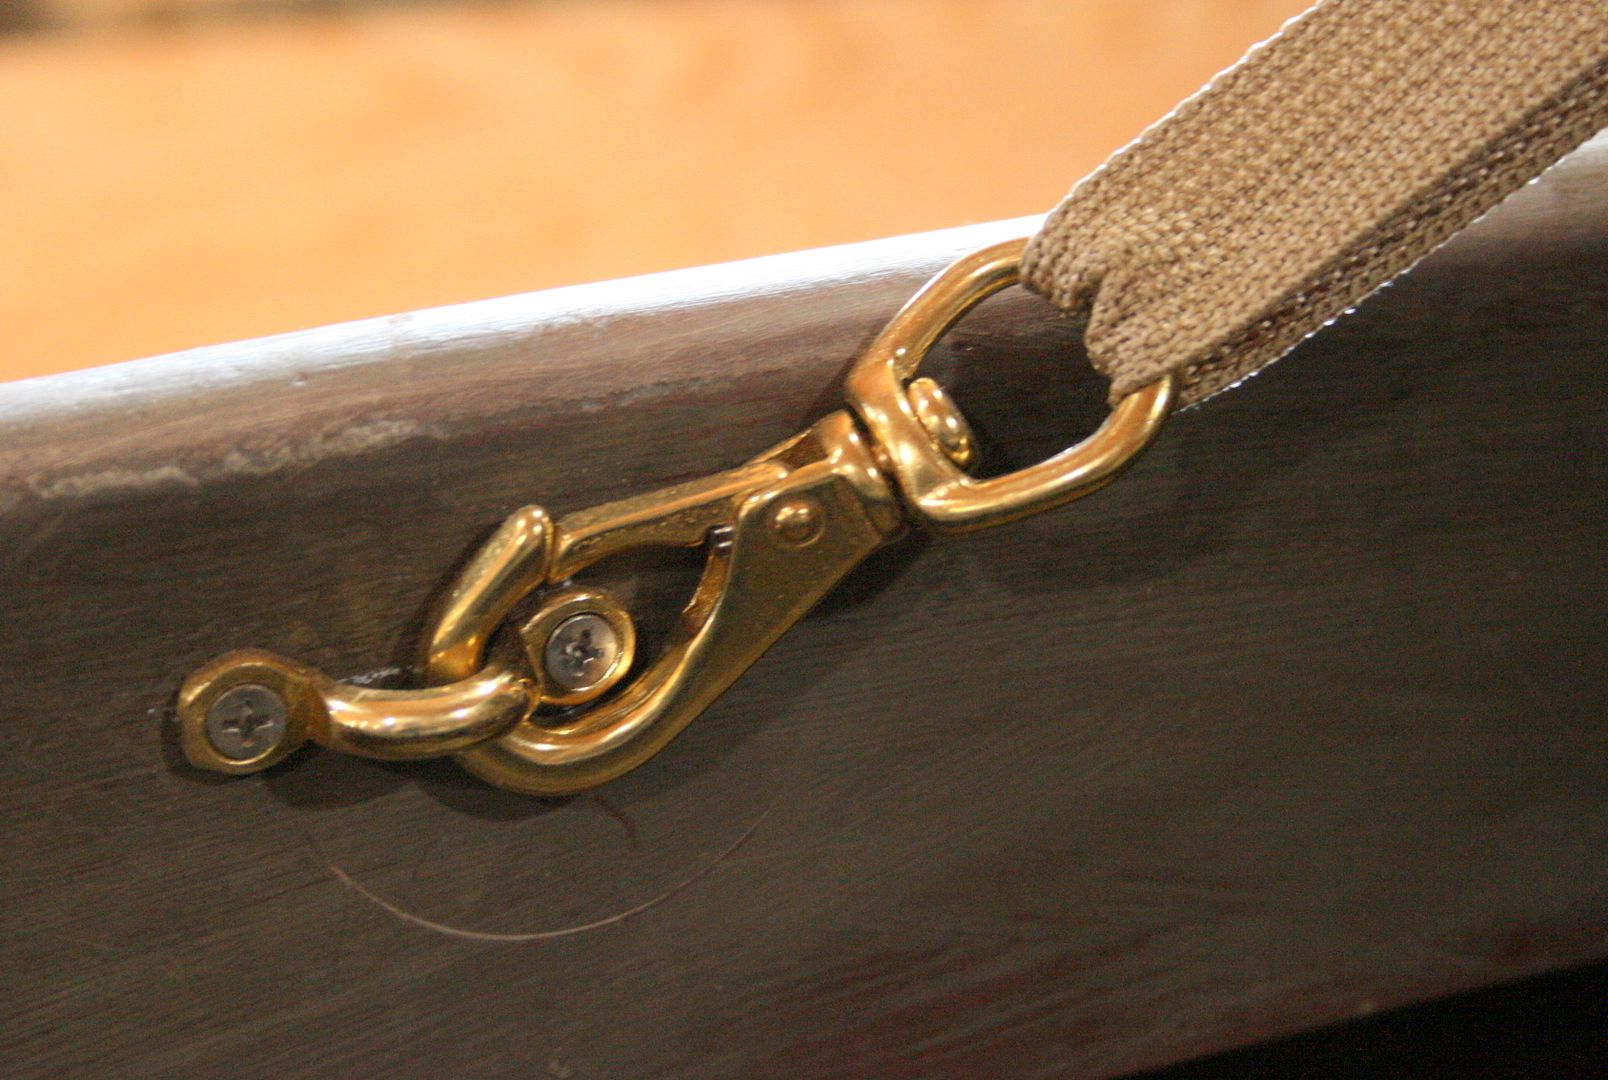
I first installed plastic swivel clips on the straps that hold the Dodger up. However, the little "keepers" made it almost impossible to remove the clip from the eye strap.

So, I "upgraded to brass swivels - which allow for easier unhooking.
Once I made to Dodger, it occurred to me that an "awning" to cover the rest of the cockpit might solve another problem. The owner keeps this South Bay at a dock during the gunning season. Whereas installing and removing the hard cockpit cover (hatch) is fairly easy when the boat is on a trailer, it is much more challenging dockside. I am hoping this will be easier to deploy when leaving the boat - and easier to enter when arriving in the early morning.

The zipper is opened from the port side - and started from the starboard side. ( I think I remember the owner to be right-handed.....). I added this pull (light tarred decoy line) to make grabbing the zipper easier in winter conditions.

A half zip and a few snaps and a gunner is welcomed inside in the early morning.

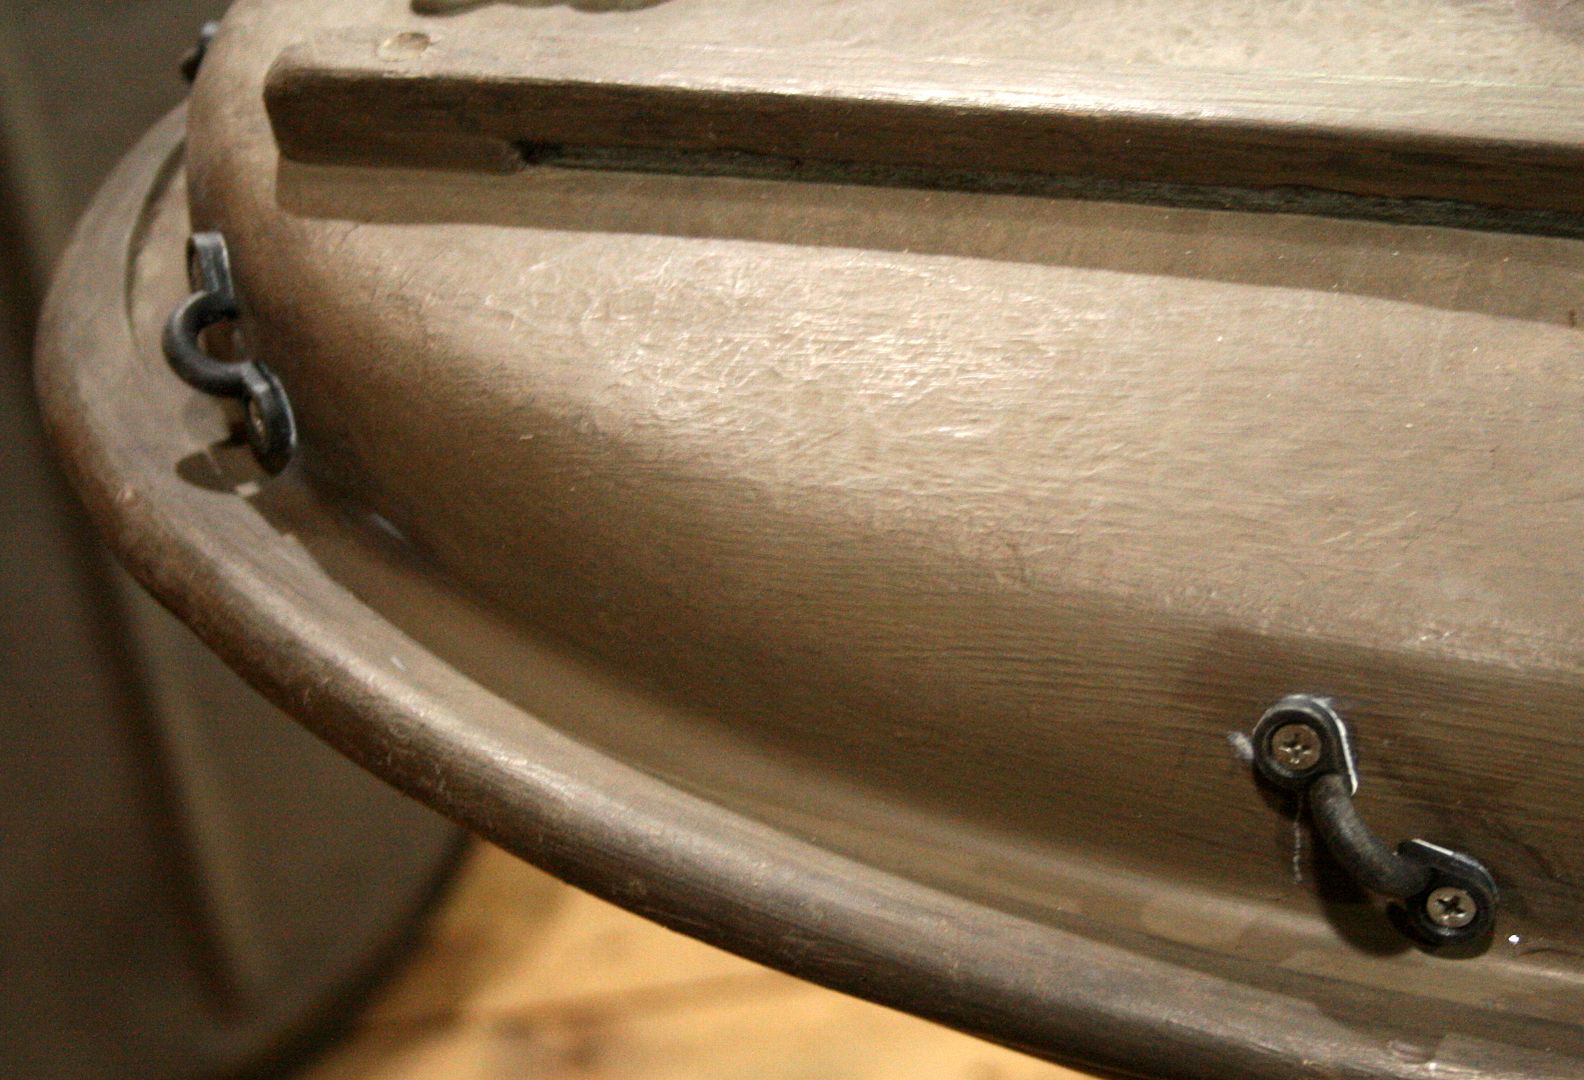
To completely cover the nose, a "cat's cradle" of eye straps and shock cord was installed.
Here it is ready for some Salt Hay.
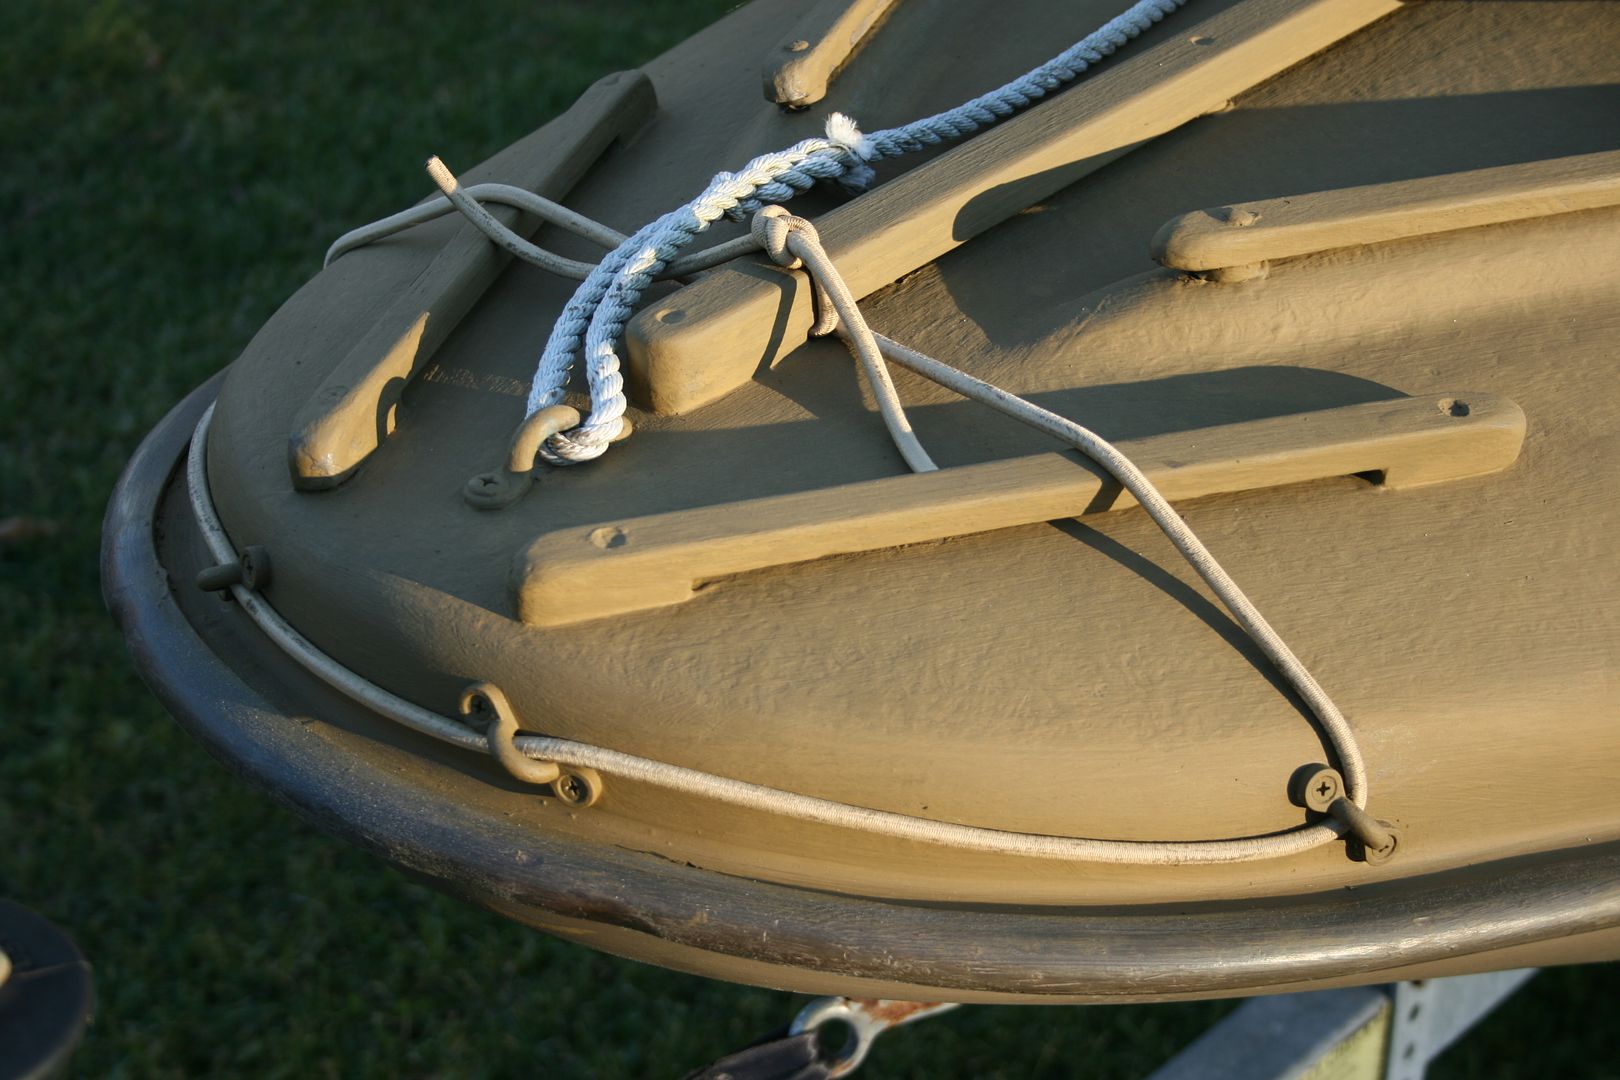
I cut the shock cord generously - and secured it with a reef knot (square knot to you non-sailors.....)

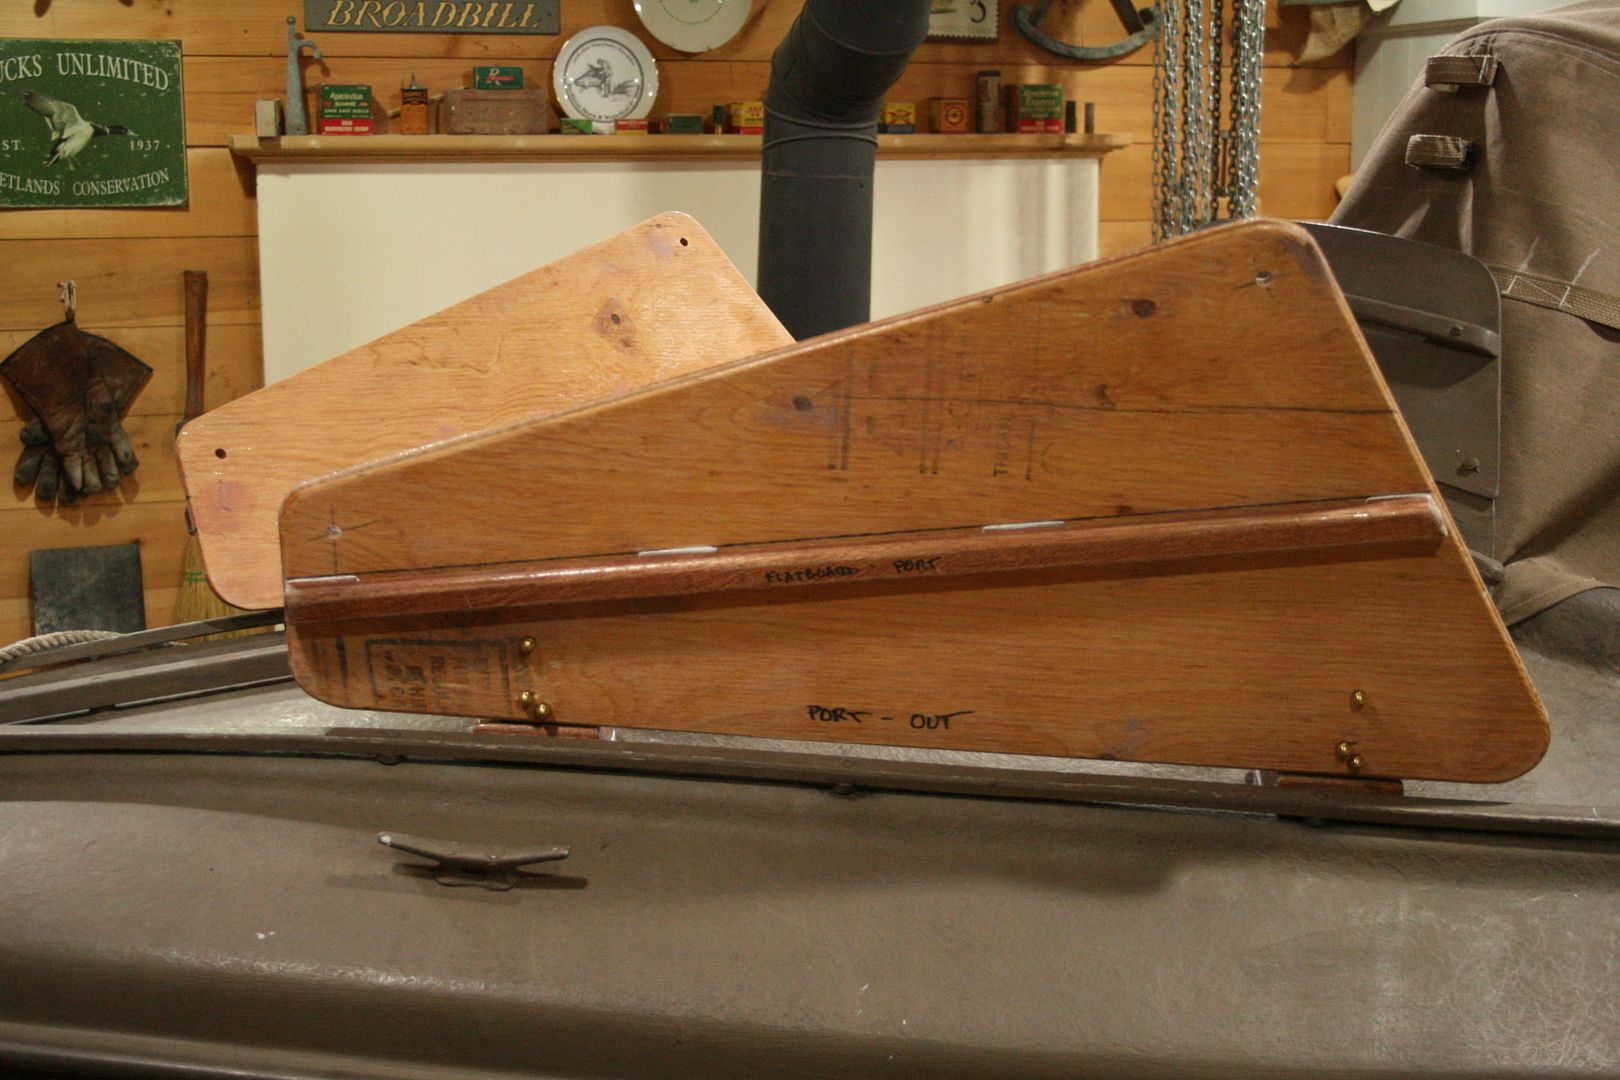
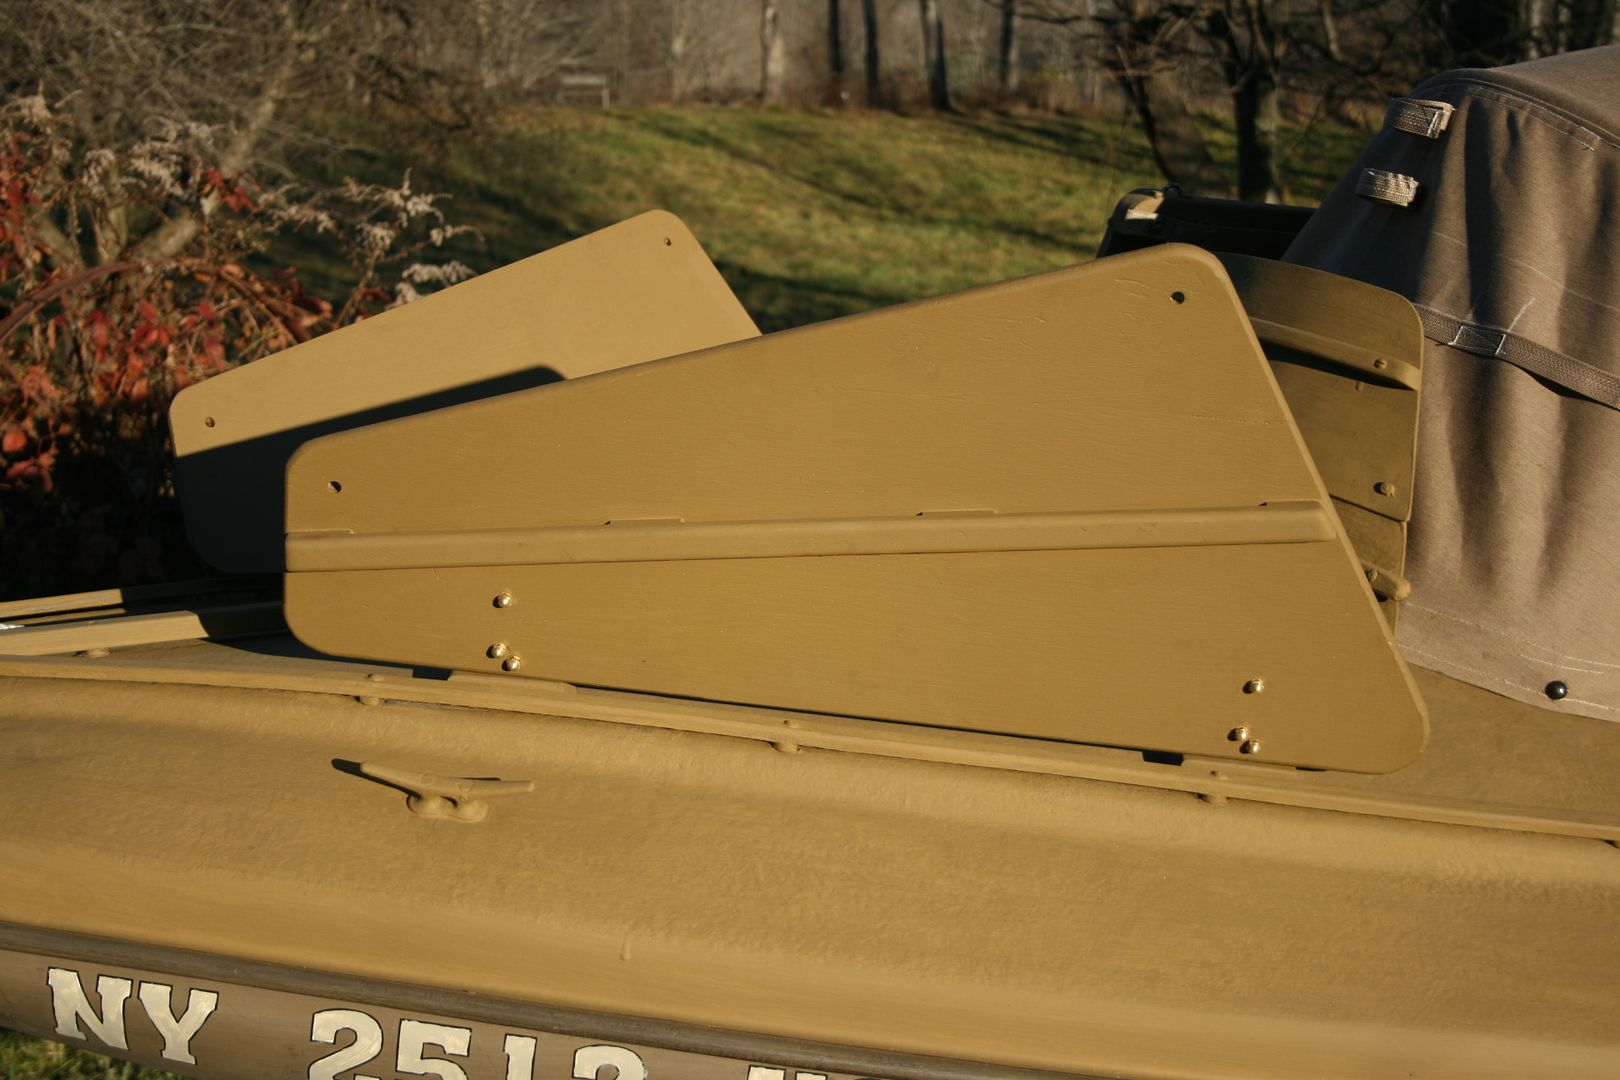
Here is the pair of "flap boards" that serve as a Stool Rack on the foredeck. They will be thatched up just like the rest of the boat.
Here they are - in the "up" position to carry stool (in bags).
Tee-hinges hold the boards to raised blocks that are bolted through the deck (and backed up with fender washers below).
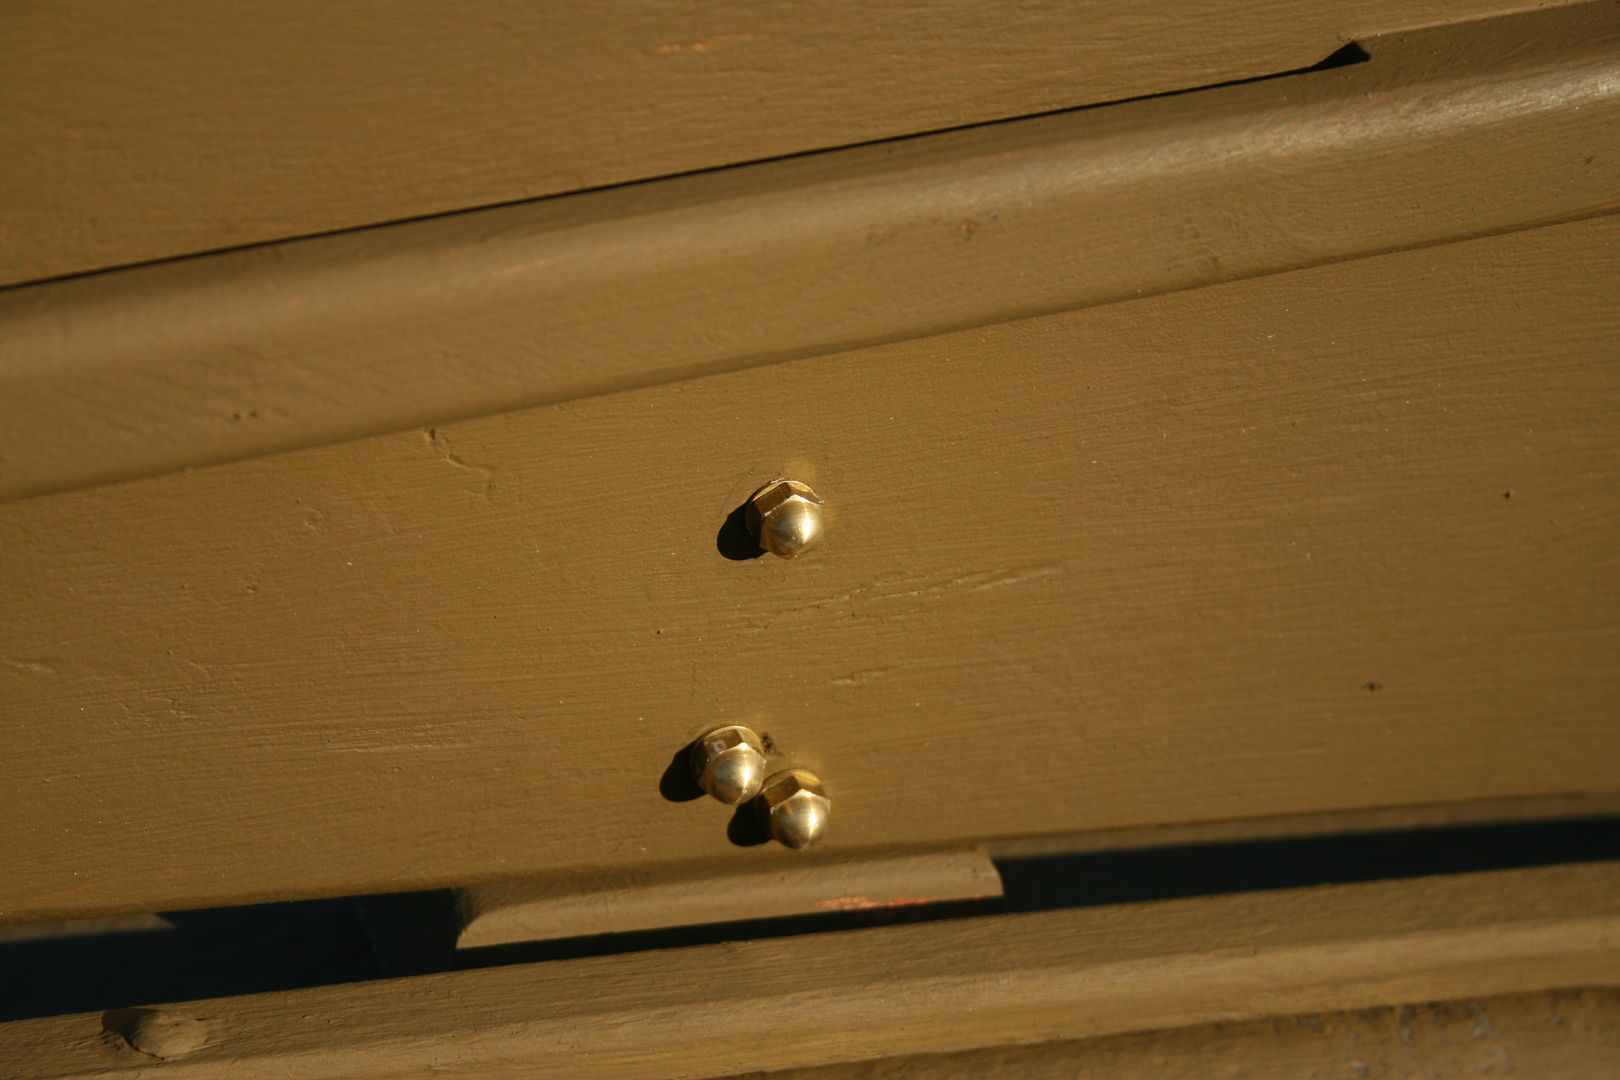
These round-head machine screws are all that projects into the decoy storage space.

Here they are down - as for gunning or trailering.

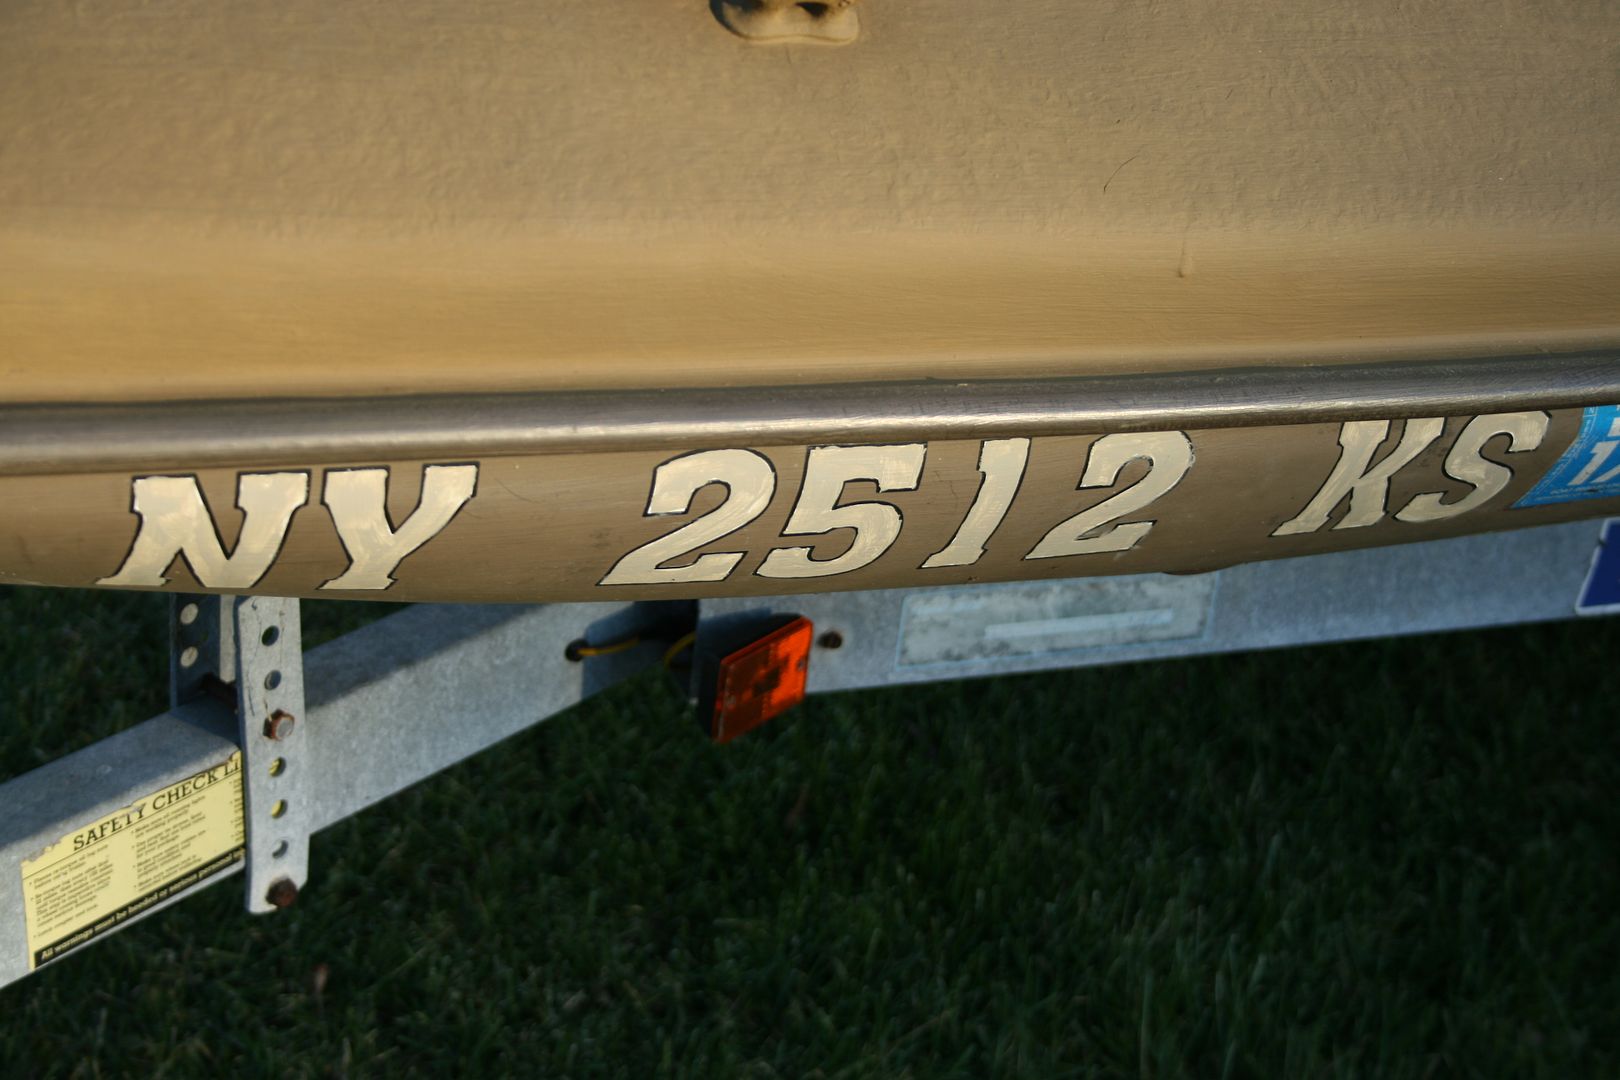
I toned down the white registration letters/numbers with some Behr Ashwood - the color I use for "Brant Sides".
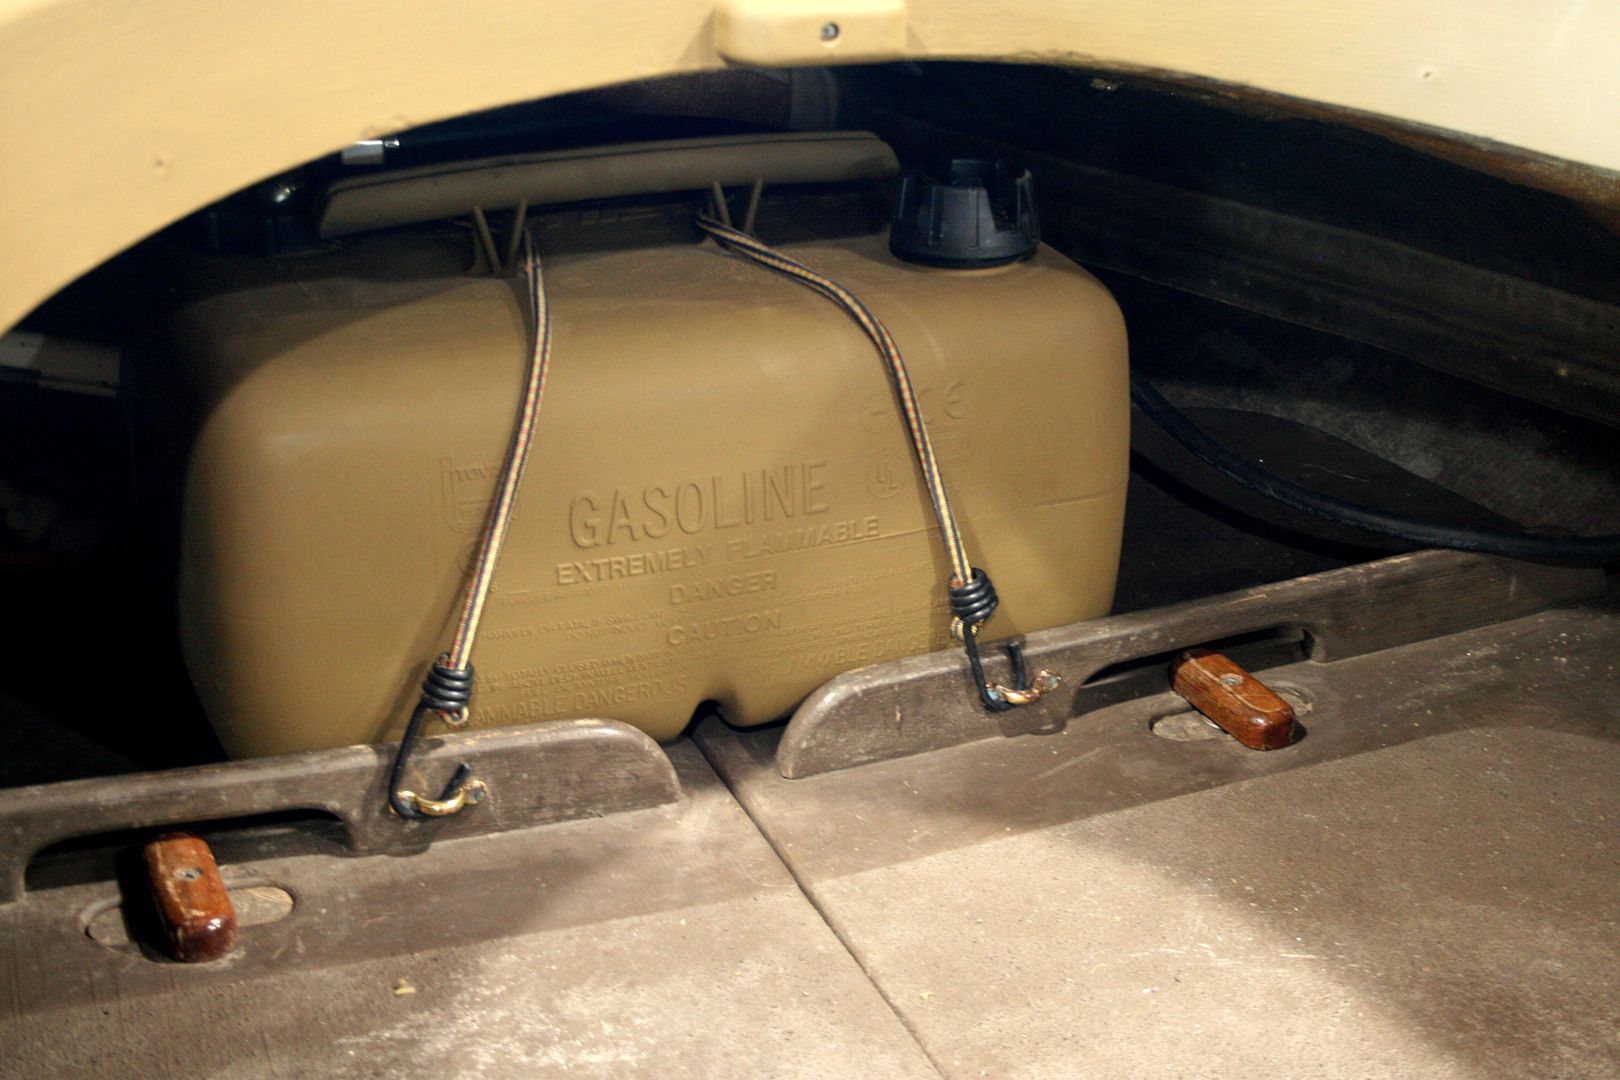
Inside the cockpit, I repainted the gas tank. I scrubbed the floorboards (and the interior of the hull) but did not re-paint them - mostly because use anytime soon would wear any new paint quickly.
I did re-paint the Storage Tray that fits under the stern deck. I used a gloss paint for the interior bottom so it would wear better than duckboat paint.
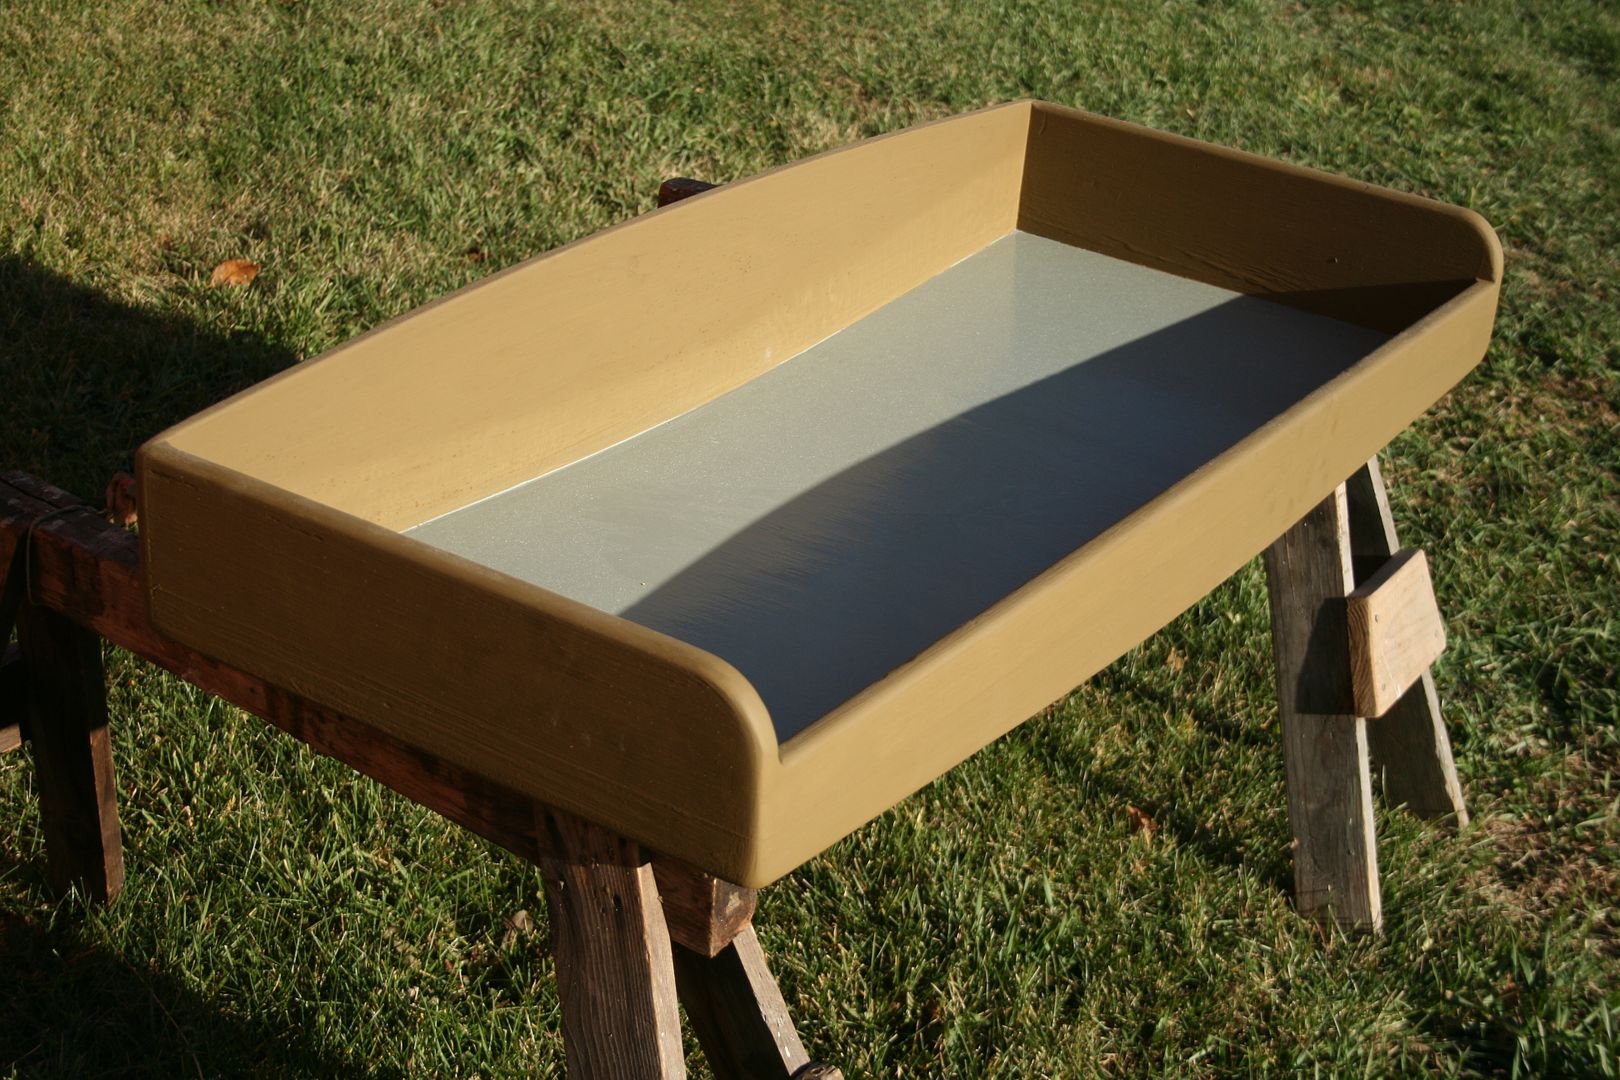
All the gear in the Tray received Full Valet Service. Everything was cleaned and bagged or lashed or coiled to a fare-thee-well - to stay organized - at least until the First Hunt.

The Flap Boards made last year were tall - about 14 inches. They provided a good hide and could hold decoys when setting or picking up the rig. They were tough for the retriever to negotiate, however. So 2 portside boards were made: one solid (my mistake) and one open-frame (so the retriever can see through it).
Because the board are removable - via loose hinge pins - matching the hinges was a challenge. I got some heavy, solid brass hinges that needed some fine tuning to match the existing hinges on the boat. My stationary disc sander did the job. (NOTE: How did I get to be 63 and not know that Brass and Aluminum should NOT be worked on a bench grinder ? - the grinding wheel can overheat and fly apart!)

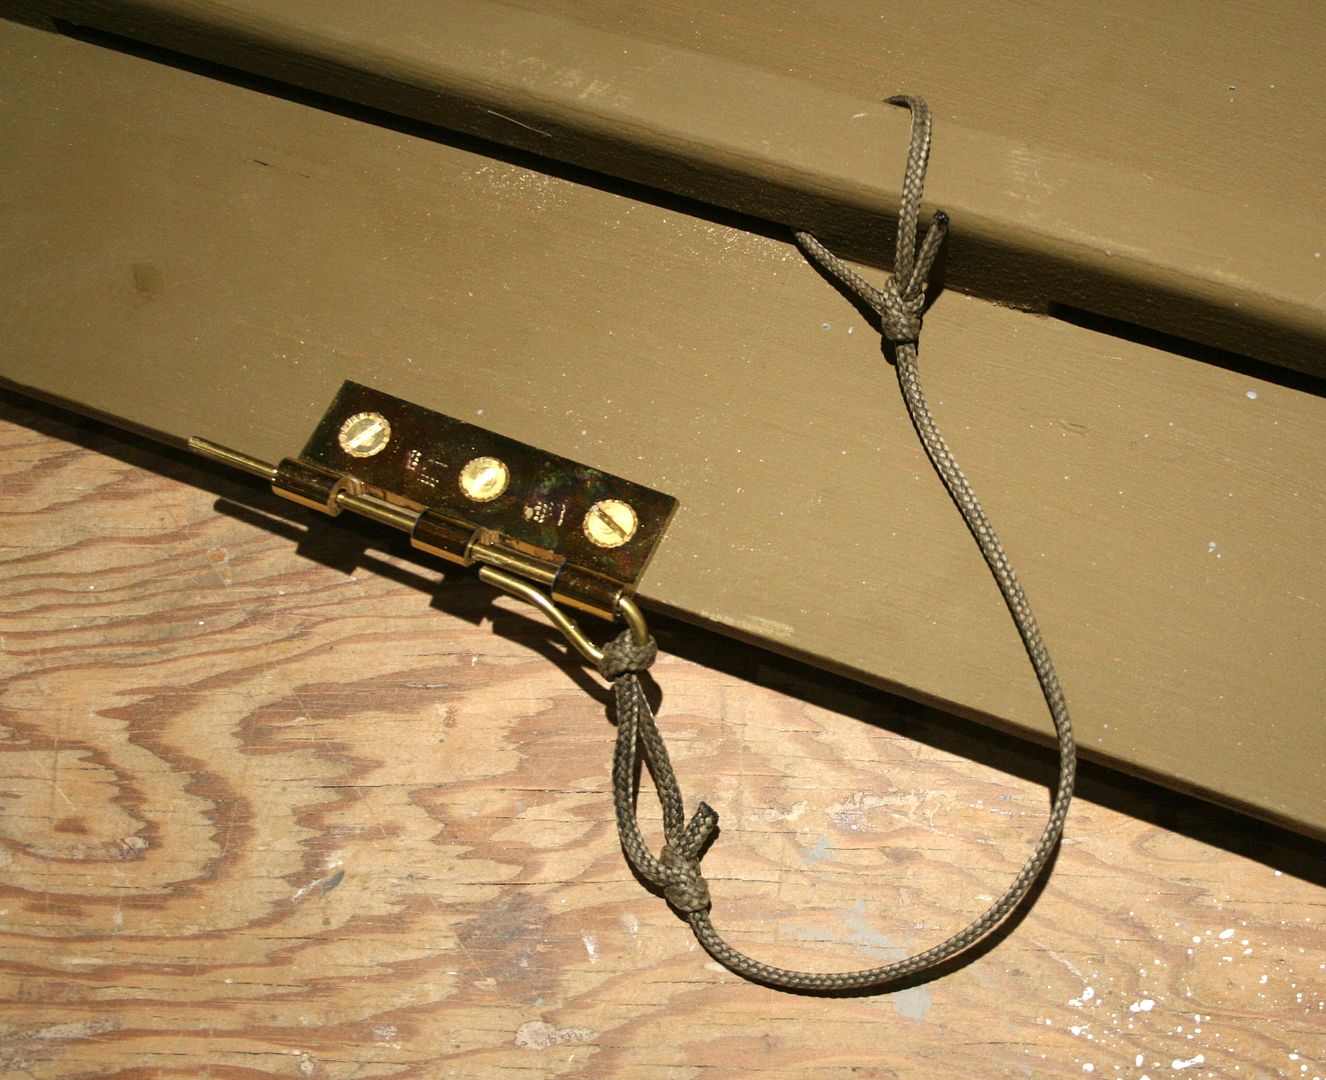
Four more brass hinge pins and lanyards were made up for the 2 new Flap Boards.

Ends of all lines were melted with my soldering iron.

Each hinge gets it pin lashed nearby.
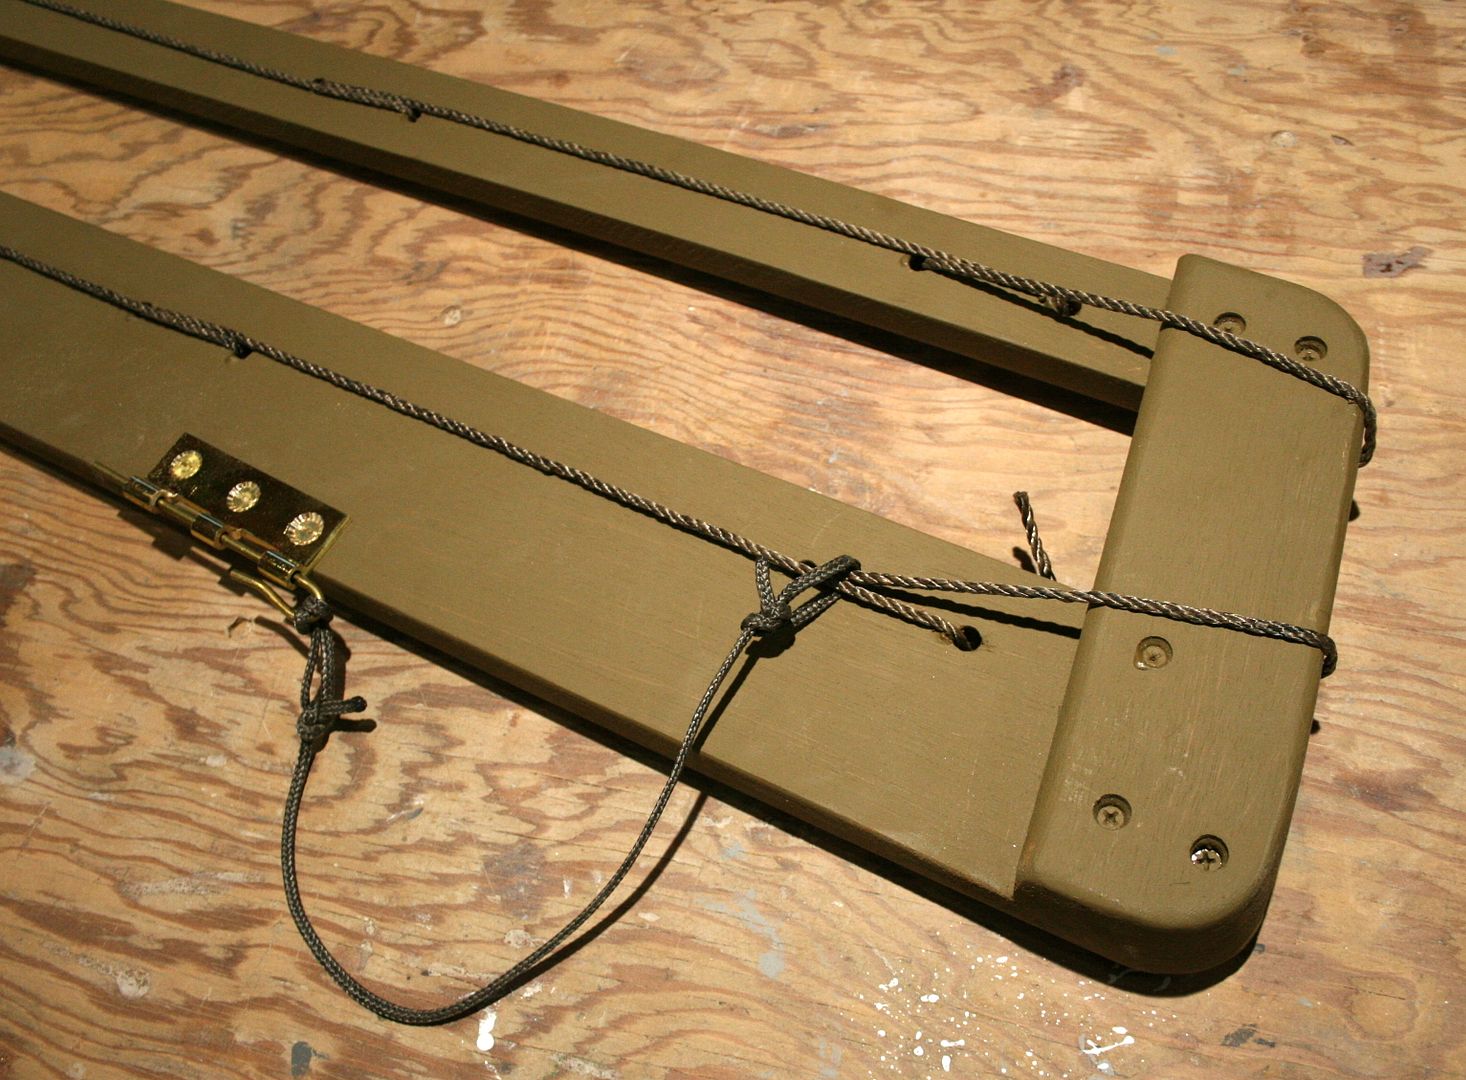
The open-frame Board has rows of heavy decoy line rove through a system of holes. Bundles of Salt Hay get lashed to these lines with twine.
I also installed 2 more Thatch Rails on the stern deck.

When I worked on the Motor Board in 2015, I bored 2 shallow "sockets" to hold the mounting pads on the outboard. However - being an OMC guy - I did not realize that Mercs need a slightly larger socket. So, I enlarged the 1-3/8" sockets to 1-1/2" using a clamped-on jig to guide the Forstner bit.

The enlarged sockets got 2 coats of epoxy and 2 coats of paint.
Everything started to come together around the Super Moon....

She sat for her portraits in some glorious 60-degree sunshine.
But now, White-Wing has taken her place inside - and gotten a wider cockpit and new coamings next to the stove.
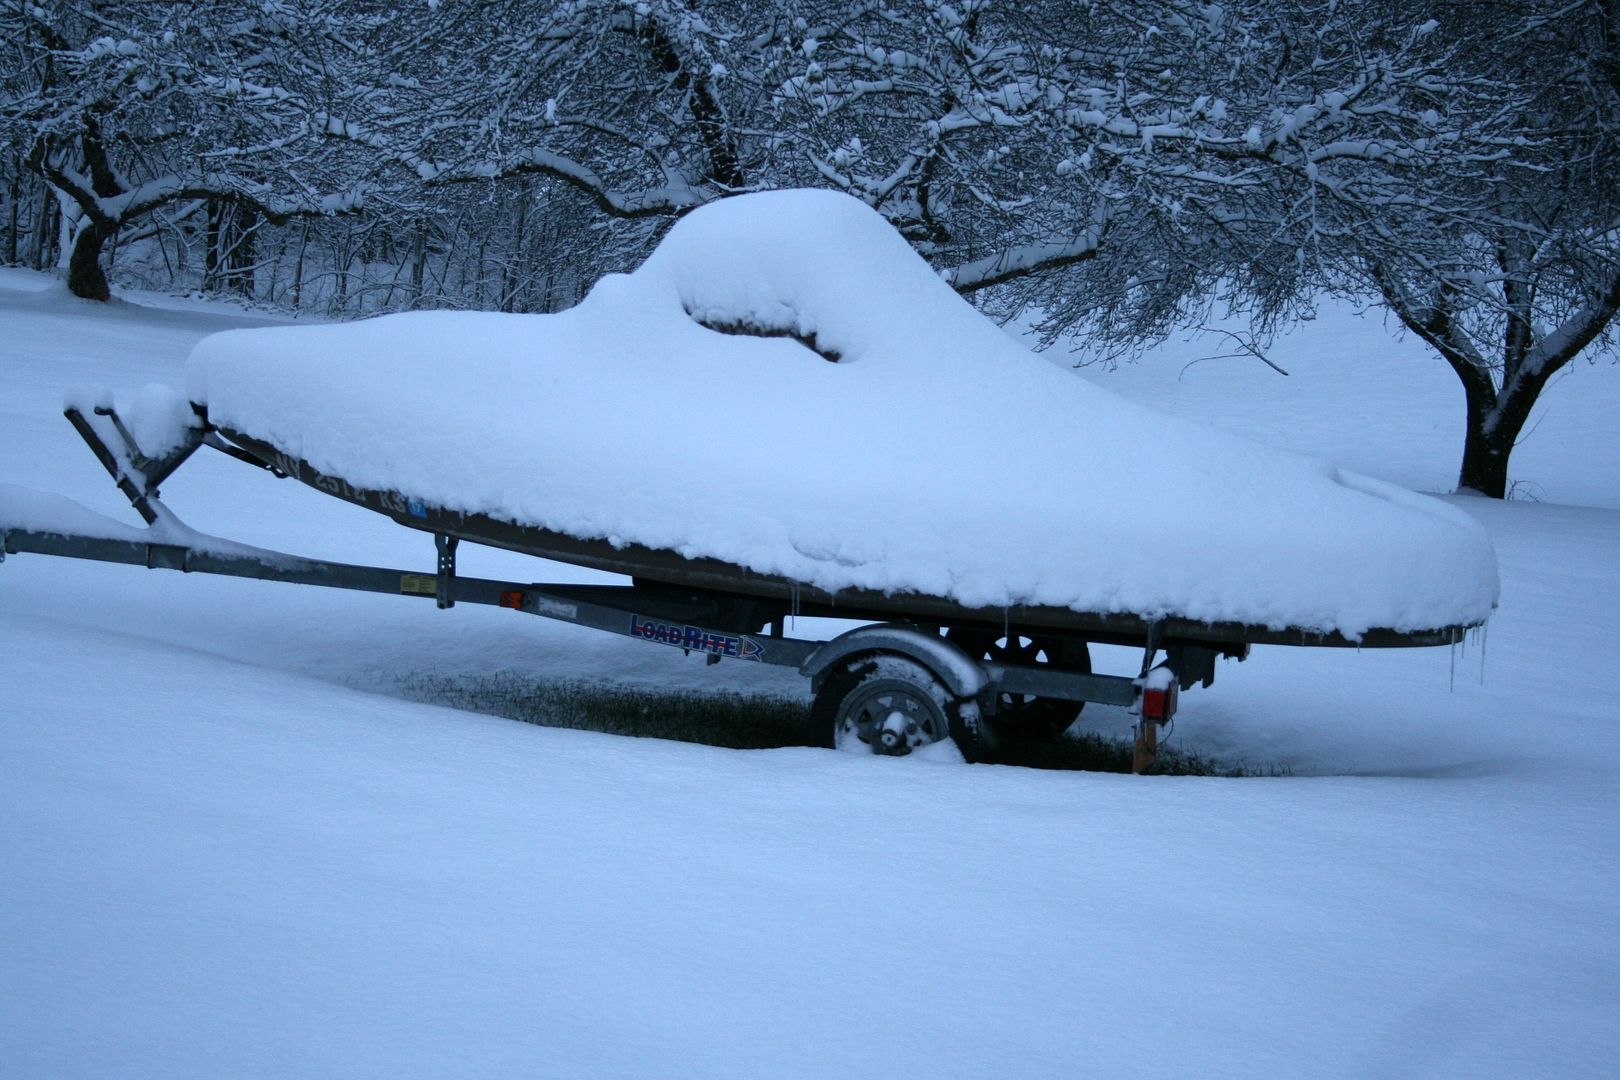
Sunday morning brought plenty of snow.

So South Bay now sits "out in the cold" - dreaming of her forthcoming journey southward......
All the best,
SJS
A good friend recently noticed: "You've been noticeably quiet lately. Either you are killing ducks or up against it with your orders." Well, the truth is more the latter - although we gave a nice farewell - in the snow - to a bunch of Wood Ducks yesterday.
This South Bay Duckboat was the star of a long post last year: http://www.duckboats.net/...%20bay%20spa;#272548
The vessel spent some time here at Pencil Brook Boatworks and has been getting my attention off-and-on since August. The big job was a Spray Dodger - the traditional "baby carriage hood" style with 2 bows - more complicated than the several single-bow Dodgers I have made over the years. This Dodger will both keep the helmsman drier when under way and also provide shelter when gunning in driving rain.
As usual, I got my materials and supplies from Sailrite - along with a new sewing machine earlier in the summer. I also watched their how-to video on building a Dodger (for a cruising sailboat) to learn how the pros do it. The best takeaway message for me was their use of a special patterning material (DuraSkrim) held in place by either double-sided tape or SeamStick (used instead of pins to hold fabric in place before sewing).
The Dodger was planned since last year - so I had taken the necessary measurements.
The bows needed to fit down inside the coaming when stowed so the hard cockpit cover would still fit.
I made a bending jig from 3/4-inch ply. I used some thin PVC lumber and a bunch of finishing nails to draw a fair curve.
Instead of re-purposing ready materials, I got the bow stock (3/4-inch aluminum) and hardware from Sailrite. I used the end fittings to contain the sand I poured into the tubing so it would not kink when bent.
This cleat keeps the tubing from jumping out of the jig.
With the jig clamped to the bench, I used decoy line to pull in the ends until I could grab the tubing itself.
These fittings attached the main bow to the coamings and the secondary bow to the main bow.
This chock keeps the folded bows level. That's strapping tape on the screw - to help in making the pattern.
Here is how the bows will be rigged.
The strapping tape is pulled taut to the stern deck.
I first attached the DuraSkrim to the coamings and framework with double-sided tape. However, I soon found that it is too aggressive and hard to clean off when no longer needed. I switched to SeamStick - a milder form of DS tape.
I marked the important margins on the DuraSkrim.
And I also made sure to keep notes on orientation, et cetera.
Here is the finished Dodger:
Because I would also be adding a Stool Rack on the foredeck - and thereby hiding the temporary nav light there - I sewed a pair of Velcro straps on the forward part of the Dodger to hold the light.
I also added some webbing to the Dodger so thatch could be stuffed in as needed when gunning with the Dodger up.
I first installed plastic swivel clips on the straps that hold the Dodger up. However, the little "keepers" made it almost impossible to remove the clip from the eye strap.
So, I "upgraded to brass swivels - which allow for easier unhooking.
Once I made to Dodger, it occurred to me that an "awning" to cover the rest of the cockpit might solve another problem. The owner keeps this South Bay at a dock during the gunning season. Whereas installing and removing the hard cockpit cover (hatch) is fairly easy when the boat is on a trailer, it is much more challenging dockside. I am hoping this will be easier to deploy when leaving the boat - and easier to enter when arriving in the early morning.
The zipper is opened from the port side - and started from the starboard side. ( I think I remember the owner to be right-handed.....). I added this pull (light tarred decoy line) to make grabbing the zipper easier in winter conditions.
A half zip and a few snaps and a gunner is welcomed inside in the early morning.
To completely cover the nose, a "cat's cradle" of eye straps and shock cord was installed.
Here it is ready for some Salt Hay.
I cut the shock cord generously - and secured it with a reef knot (square knot to you non-sailors.....)
Here is the pair of "flap boards" that serve as a Stool Rack on the foredeck. They will be thatched up just like the rest of the boat.
Here they are - in the "up" position to carry stool (in bags).
Tee-hinges hold the boards to raised blocks that are bolted through the deck (and backed up with fender washers below).
These round-head machine screws are all that projects into the decoy storage space.
Here they are down - as for gunning or trailering.
I toned down the white registration letters/numbers with some Behr Ashwood - the color I use for "Brant Sides".
Inside the cockpit, I repainted the gas tank. I scrubbed the floorboards (and the interior of the hull) but did not re-paint them - mostly because use anytime soon would wear any new paint quickly.
I did re-paint the Storage Tray that fits under the stern deck. I used a gloss paint for the interior bottom so it would wear better than duckboat paint.
All the gear in the Tray received Full Valet Service. Everything was cleaned and bagged or lashed or coiled to a fare-thee-well - to stay organized - at least until the First Hunt.
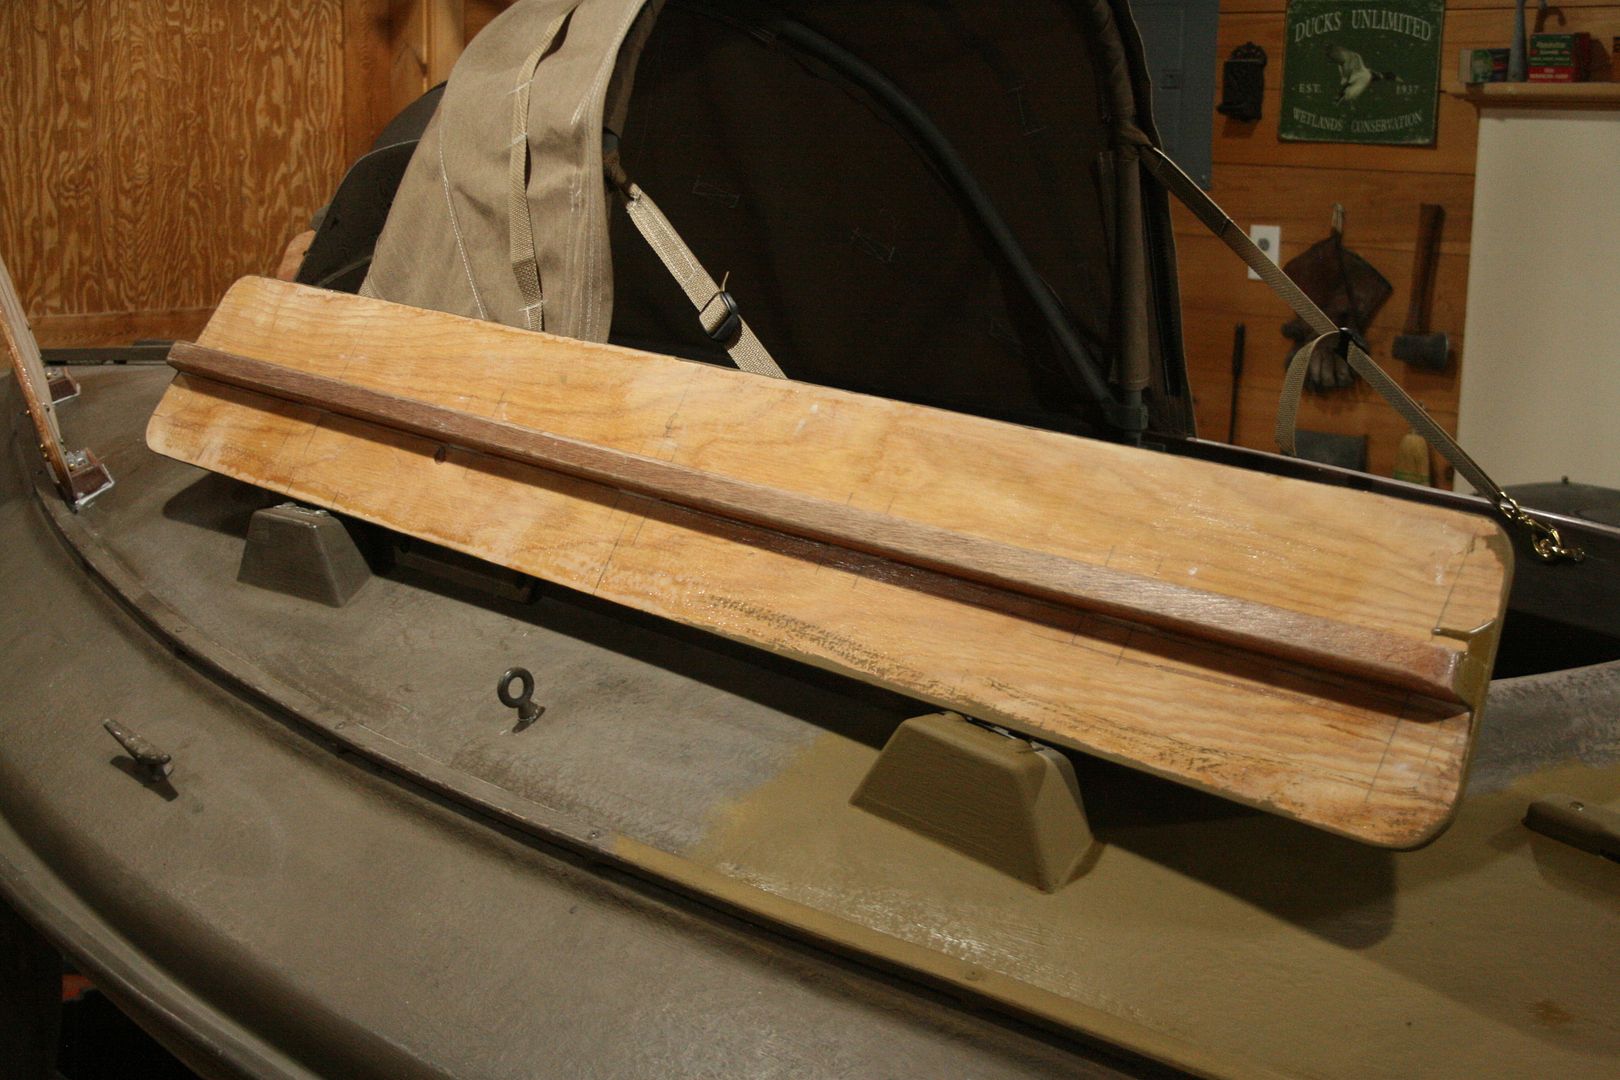
The Flap Boards made last year were tall - about 14 inches. They provided a good hide and could hold decoys when setting or picking up the rig. They were tough for the retriever to negotiate, however. So 2 portside boards were made: one solid (my mistake) and one open-frame (so the retriever can see through it).
Because the board are removable - via loose hinge pins - matching the hinges was a challenge. I got some heavy, solid brass hinges that needed some fine tuning to match the existing hinges on the boat. My stationary disc sander did the job. (NOTE: How did I get to be 63 and not know that Brass and Aluminum should NOT be worked on a bench grinder ? - the grinding wheel can overheat and fly apart!)
Four more brass hinge pins and lanyards were made up for the 2 new Flap Boards.
Ends of all lines were melted with my soldering iron.
Each hinge gets it pin lashed nearby.
The open-frame Board has rows of heavy decoy line rove through a system of holes. Bundles of Salt Hay get lashed to these lines with twine.
I also installed 2 more Thatch Rails on the stern deck.
When I worked on the Motor Board in 2015, I bored 2 shallow "sockets" to hold the mounting pads on the outboard. However - being an OMC guy - I did not realize that Mercs need a slightly larger socket. So, I enlarged the 1-3/8" sockets to 1-1/2" using a clamped-on jig to guide the Forstner bit.
The enlarged sockets got 2 coats of epoxy and 2 coats of paint.
Everything started to come together around the Super Moon....
She sat for her portraits in some glorious 60-degree sunshine.
But now, White-Wing has taken her place inside - and gotten a wider cockpit and new coamings next to the stove.
Sunday morning brought plenty of snow.
So South Bay now sits "out in the cold" - dreaming of her forthcoming journey southward......
All the best,
SJS
Last edited: