Steve Sanford
Well-known member
All~
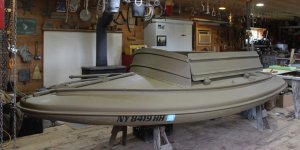
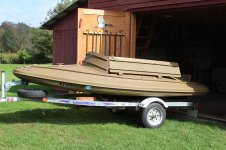
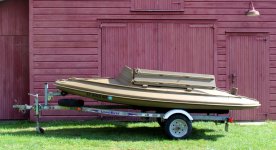
As you may have noted, I have been flat-out in recent weeks trying to complete the JAMES CAIRD for the ill-fated Tuckerton Show. You may not know that I was also trying to progress on a South Bay Duckboat restoration at the same time. Quite simply, I did not have the time to post progress on either....
So, here is an update. I hope to be wrapping up all the installations and myriad tasks in a few days. I still have 2 "pieces" to fabricate and finish - and then install.
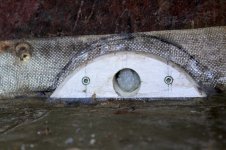
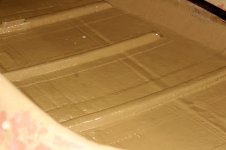
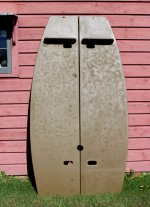
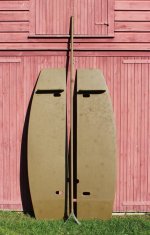
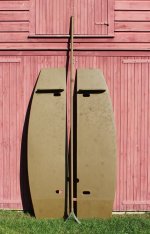
Here are the new removable floorboards. (Stock South Bays installed their floorboards permanently - leading to a number of problems....) You can probably make out the "curbs" up forward to keep the gas tank and other gear from drifting aft when under way. I applied anti-skid in the area open to the cockpit. The 4 oblong slots are for the wooden turn buttons with which the 'boards are held in place. And, the semi-circular cuts allow for the use of a hand bilge pump should one find oneself with a bit too much of Great South Bay within the vessel.
BTW: I was able to re-use the original floorboards - re-cutting them to my pattern and sealing them thoroughly with straight epoxy.
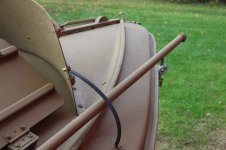
The 11-foot pushpole is a reasonably straight length of closet pole with a duck-bill (Richmar, not the original Herter's). The portion of the pole that fits in the socket is sealed with epoxy - and the pole is set in a slathering of 3M 5200. It is still waiting patently for a Turk's head at its upper end. The pole was sealed with spar varnish before getting its first coat of Parker's Marsh Grass.
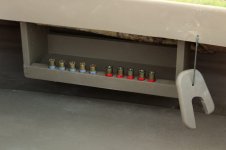
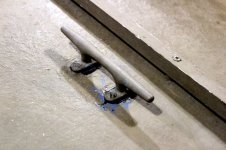
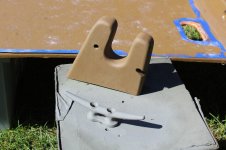
The aft chock to secure the pushpole is Mahogany sealed with straight epoxy. The 6-inch galvanized dock cleat has been primed. There will be one each on the central thatch rails, one forward, one on the stern deck. In the background you can see how I masked for the anti-skid.
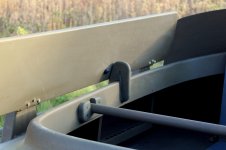
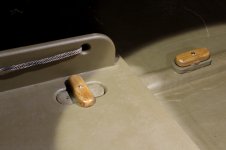
Here are the central thatch rails - drying in the sun. They are Mahogany and were sealed with spar varnish before getting paint. The block on the foredeck rail will hold the portable navigation light. I used some 1-inch Azek - and a 5/8-inch spade bit bored the perfect socket size.
I made the motor board weeks ago - but my preferred sequence of installations has kept it awaiting its turn. It is wider than usual because the owner bolts a 25-horse onto the craft.
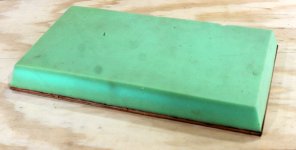
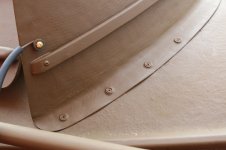
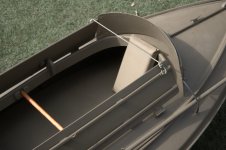
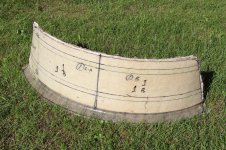
Here is the spray shield before trimming - one of the XLs I lay up on a male mold. It'll get 2 wooden (laminated Mahogany) thatch rails.
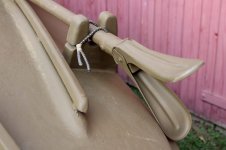
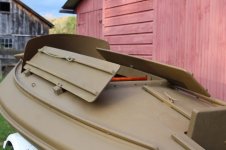
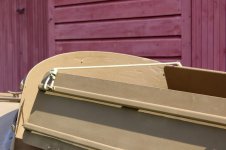
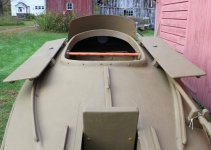
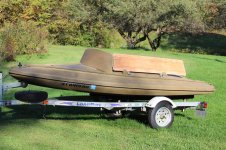
Here it is tacked onto the boat - along with one of the flap boards - for measurement and fitting purposes.
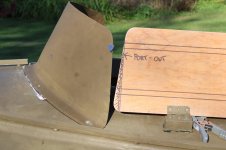
As it happens, I have since trimmed the forward ends of each board. I like the rake of the board to match - be parallel with - the rake of the spray shield. There will be a gap of a half-inch or so when both are finally secured.
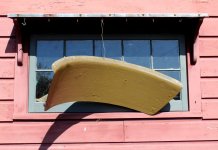
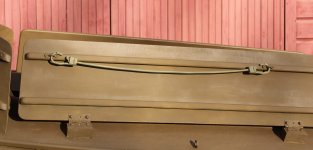
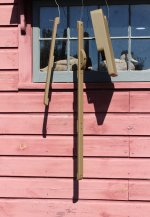
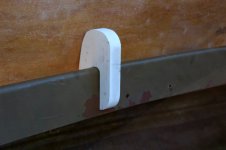
There are many ways to hold flap boards up where the gunner wants them - either for hiding or for crossing the bay. I made these out of the same piece of Azek - which I had salvaged from the original floorboards - where it had served as a curb. Each will hang via a decoy line lanyard to the inside of the coaming - so they cannot get lost. After this photo, they got some more machining and a coat of primer.
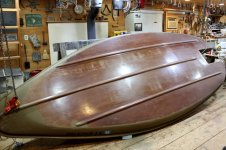
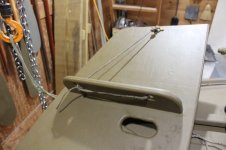
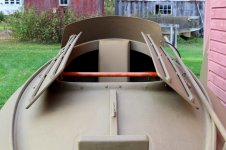
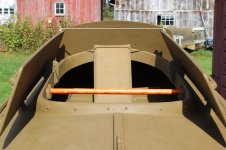
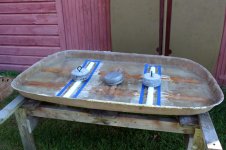
One unusual challenge was the cockpit cover. Some earlier attempts to "reinforce" it produced a concave top - that held about a gallon of water after each rain. The 100+ pounds of lead weights - a gift last year from a LI gunner - seems to have done the trick. I milled some PVC lumber to a trapezoidal section and glued the 2 in place with epoxy + milled fibers + chopped 'glass strands. Just before I came in from the shop I laid wide strips of 1708 biaxial (with mat) over each frame with straight epoxy. The cover now sports a shallow convex "dome" - as it must.
Stay tuned!
SJS
As you may have noted, I have been flat-out in recent weeks trying to complete the JAMES CAIRD for the ill-fated Tuckerton Show. You may not know that I was also trying to progress on a South Bay Duckboat restoration at the same time. Quite simply, I did not have the time to post progress on either....
So, here is an update. I hope to be wrapping up all the installations and myriad tasks in a few days. I still have 2 "pieces" to fabricate and finish - and then install.
Here are the new removable floorboards. (Stock South Bays installed their floorboards permanently - leading to a number of problems....) You can probably make out the "curbs" up forward to keep the gas tank and other gear from drifting aft when under way. I applied anti-skid in the area open to the cockpit. The 4 oblong slots are for the wooden turn buttons with which the 'boards are held in place. And, the semi-circular cuts allow for the use of a hand bilge pump should one find oneself with a bit too much of Great South Bay within the vessel.
BTW: I was able to re-use the original floorboards - re-cutting them to my pattern and sealing them thoroughly with straight epoxy.
The 11-foot pushpole is a reasonably straight length of closet pole with a duck-bill (Richmar, not the original Herter's). The portion of the pole that fits in the socket is sealed with epoxy - and the pole is set in a slathering of 3M 5200. It is still waiting patently for a Turk's head at its upper end. The pole was sealed with spar varnish before getting its first coat of Parker's Marsh Grass.

The aft chock to secure the pushpole is Mahogany sealed with straight epoxy. The 6-inch galvanized dock cleat has been primed. There will be one each on the central thatch rails, one forward, one on the stern deck. In the background you can see how I masked for the anti-skid.

Here are the central thatch rails - drying in the sun. They are Mahogany and were sealed with spar varnish before getting paint. The block on the foredeck rail will hold the portable navigation light. I used some 1-inch Azek - and a 5/8-inch spade bit bored the perfect socket size.
I made the motor board weeks ago - but my preferred sequence of installations has kept it awaiting its turn. It is wider than usual because the owner bolts a 25-horse onto the craft.

Here is the spray shield before trimming - one of the XLs I lay up on a male mold. It'll get 2 wooden (laminated Mahogany) thatch rails.

Here it is tacked onto the boat - along with one of the flap boards - for measurement and fitting purposes.

As it happens, I have since trimmed the forward ends of each board. I like the rake of the board to match - be parallel with - the rake of the spray shield. There will be a gap of a half-inch or so when both are finally secured.

There are many ways to hold flap boards up where the gunner wants them - either for hiding or for crossing the bay. I made these out of the same piece of Azek - which I had salvaged from the original floorboards - where it had served as a curb. Each will hang via a decoy line lanyard to the inside of the coaming - so they cannot get lost. After this photo, they got some more machining and a coat of primer.

One unusual challenge was the cockpit cover. Some earlier attempts to "reinforce" it produced a concave top - that held about a gallon of water after each rain. The 100+ pounds of lead weights - a gift last year from a LI gunner - seems to have done the trick. I milled some PVC lumber to a trapezoidal section and glued the 2 in place with epoxy + milled fibers + chopped 'glass strands. Just before I came in from the shop I laid wide strips of 1708 biaxial (with mat) over each frame with straight epoxy. The cover now sports a shallow convex "dome" - as it must.

Stay tuned!
SJS


