What's on your Work Bench - MAY 2023

Steve Sanford

Well-known member
Good morning, All~


To wet and windy for me to celebrate our opening of Turkey Season this morning. Even the ample nearby gobbling at dusk last night could not fire me up. I got up early and dressed for it - but wound up in my shop instead - where I started a fire in the stove.


I will post some "bench" stuff later - but the farm has been calling in recent days. Last Thursday was planting day for this Bur Oak.
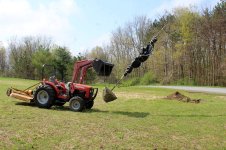

Bur Oak - lifted with tractor.JPG


I may not live long enough to see their really cool acorns - as they first set fruit at around age 35 - but there is plenty to enjoy in the meantime....
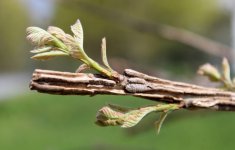

Bur Oak - corky wings and new leaves.JPG


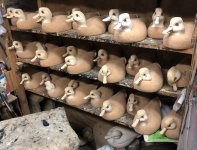
Of course, there has been production From the bench of George Williams:
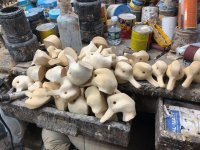

G Williams - Teal heads.jpg


And yet more work to do....


G Williams - Eyes.jpg


All the best,


SJS


Last edited:
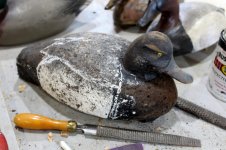
All~


Too wet again this morning for me to sit in the woods waiting for Mister Longbeard...


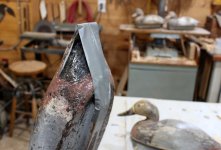
Aong the many projects was an unanticipated one - reattaching a tail section on a Bean's Coastal Pintail. I was wrestling with the head - more particularly trying to back out the galvanized flathead screw - when the tail jumped right of the body. Coastals are nice decoys - but are notorious for problems on the stern end. The tail inserts commonly delaminaste or crumble - and even the best ones were never long enough. They need to go much further forward into the body. I did the simpest repair as I had some thickened epoxy mixed up for another project (duckboat).


Duct tape is the only clamp needed in this application.


Beans tail repair 1.JPG


It cured well. However, this project is relegated to Round 2 - until after I complete the many projects that are currently in process. So, sanding, sealing and prime are a couple of weeks away.


Beans tail repair 2.JPG


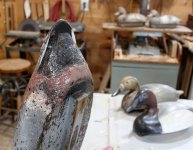
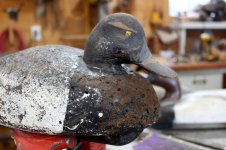
Another "small" project was re-attaching the bill on this Al McCormick Broadbill. The bill had been "bent" but not broken off - so thickened epoxy and a single clamp got in headed back in the right direction.


McCormick Broadbill bill repair 1.JPG


Some careful sanding got it ready for a base coat.


McCormick Broadbill bill repair closeup.JPG


But, I then noticed the breast contours - a bit too square for my eye.


McCormick Broadbill breast contour BEFORE.JPG


I can imagine Mister Decoy himself (Al McCormick) scolding me - but my medium rasp went to work, along with some 80-grit paper.


McCormick Broadbill breast contour AFTER.JPG


Next, I chalked in the major color areas for the oil base coat.


mcCormick Broadbill paint markings.JPG


He still needs his White sides....


McCormick Broadbill - base coat - partial.JPG


Stay tuned.....


SJS


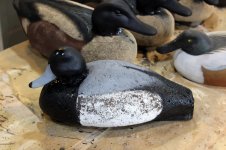
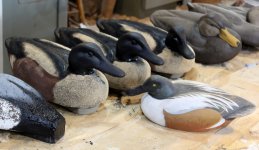
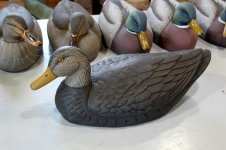
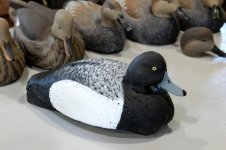
These Chesapeakes had been Black Ducks - but the owner wants some Drake Spoonbills.


I coated them with epoxy + fine sawdust - then began the base-coating with flat oils earlier today. They will get their White base-coat sometime tomorrow.


BENCH - Shovelers.JPG


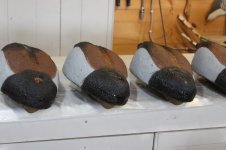
Some Herter's Model 81 Brant bodies also got the epoxy +sawdust followed by oil base-coating.


Model 81 Brant - base coat on bodies.JPG


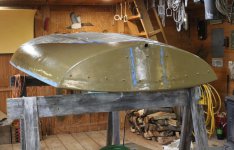
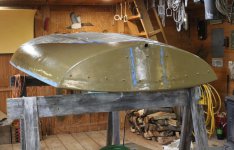
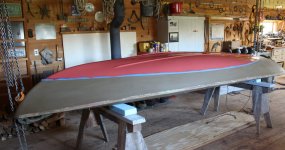
I have also been working on the bottom of the JAMES CAIRD (Ernest Shackleton fans will catch the reference.). Built by a friend and me in the early 90s, I plan to have it ready in time for Tuckerton. Once the hull is in good shape, it'll be replaced with the first of several gunning vessels I'll be working on for customers this Spring.


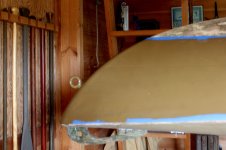
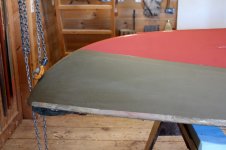
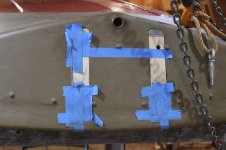
I taped the waterline - because the bottom itself will be red - and the gunwales - because the rubrails will beset in 3M 5200 so I want a nice grippy surface. The bearing surface of the new motor board have been masked for the same reason.


CAIRD - first hull paint + taping.JPG


It's a sweet hull - nice and beamy and very shoal draft - with very traditional sweeping lines.


CAIRD - first hull paint + taping along side.JPG


I suspect that bow handle will be replaced with some sort of "hood ornament" down the road.


CAIRD - first hull paint + taping on waterline and rubrails.JPG


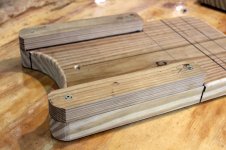
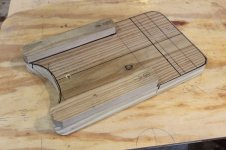
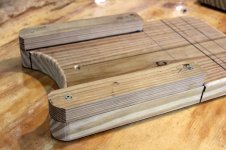
I will be posting the full rehab process in future posts. I have begun a new motor board. The 2 cleats (aka "standoffs") were clamped in place before I drove the deck screws. The screws will hold the cleats in place during glue-up - and will be removed after the epoxy cures. After final shaping and sanding, the motor board will get 3 coats of straight to seal it thoroughly.


The countersunk hole in the middle of the board will take a short length of decoy line and the transom plug.


CAIRD - motor board - deck screws for gluing.JPG


No shortage of projects!


SJS


Steve, what type of wood is that motor board? Will be interesting to see how that evolves. I am thinking of upgrading from plywood to something more durable on my BBSB...mine has taken a beating...
 
David~


Treated lumber has worked very well for me. The one I just removed from the JAMES CAIRD was installed about 30 years ago. The 2 cleats were as new. The motor board itself had just a bit of punkiness in one lower corner - but that was back in the day when epoxy was too costly for our wallets. So, treated SYP (southern yellow pine) with s/s hardware, libreal use of 3M 5200 around hardware and the between the cleats and the hull is a sound approach. As I mentioned, my motor boards in recent years get 2 or even 3 careful coats of straight epoxy.


I look for dimension lumber - usually 2x10 - with an approximation of quarter-sawn grain to minimize cupping. Small tight knots are OK - but I cut around any big knots.


IMG_2135.JPG


I have replaced numerous South Bay Duckboats motor boards made of marine plywood, Mahogany and even Teak. None are impervious. I believe the cleats/standoffs avoid most of the rot threat by minimizing the surface area that could trap moisture.


Hope this helps!


SJS
 
Steve

You sir are a BUSY man. I'm looking forward to seeing progress on the James Caird sneak box. The fact that you built it means you get the chance to fix anything you didn't like or wanted different.

Sorry no pictures right now, my workbench is sort of cleared for the moment. We've been working on a twenty-acre food plot. Spent last weekend getting a John Deere 7000 planter ready and the week before spraying herbicide. The planter is something new for me. A lot of moving parts! I'm not convinced it's ready, but we are going to try anyway just as soon as the ground is dry. I'm also about to get back to machining the heart pine for the upstairs. Lastly, I have been gathering parts for a bigger rotary phase converter and a pneumatic press I'll use to assemble boxes. I'll be posting pictures on those projects as soon as the parts gathering phase is done an I'm actually making something.

Eric
 
Steve, restored a manasquan duck boat in the 70's and made the motor mount out of laminated cca using two part epoxy. It is still in decent shape. My southbay motor mount was done with laminated marine ply in the 90's. I coated with west system and painted with lou tisch paint, it's not good holding as good as the cca. I think yearly maintance is very important.
 
All~


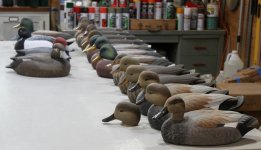
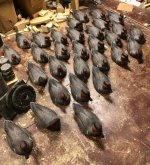
Looks like breeding conditions in Delaware must be exceptional this Spring - especially for Greenwings. This, of course, is From the Bench of George Williams:


G Williams - Teal assembled.jpg


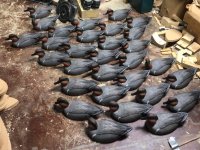
Here at the Pencil Brook Duckboat & Decoy Infirmary, I continue to practice my juggling skills. This photo shows less than half of my current decoy projects.....and includes birds for 5 different customers....


sm Work Bench - 8 May 2023.jpg


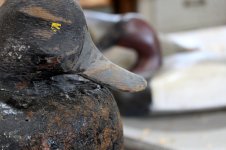
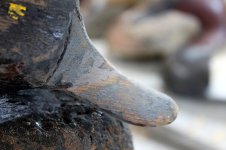
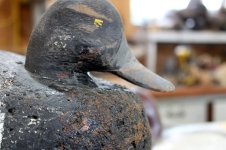
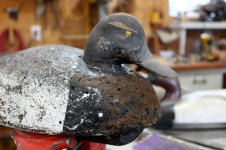
This old Ariduck needed a new bill - back in February. He belongs to a young student of mine. The new bill is thanks to White Pine and thickened epoxy. The amber eyes are charming originals - but the owner may replace them with something darker.


sm Ariduck Black Duck - DONE portrait.jpg


This Al McCormick Broadie-beak had minor rhinoplasty - followed by a bit of breast reduction....


sm McCormick Broadbill breast contour AFTER.jpg


He is now ready-to-hunt.


sm McCormick Broadbill - bill repair and repaint for Castelli.jpg


Progress continues on the bottom of the JAMES CAIRD. Taping at the gunwales and on the transom is to protect the freshly sanded surfaces from paint - so the 3M 5200 that will bed the new rubrails and motor board will have a chemically welcome substrate to work its magic.


CAIRD - first hull paint + taping.JPG


Below the waterline, the bottom got a coat of primer followed by a coat of glossy enamel. My reasons are primarily aesthetic - but a hard bottom makes sense both in marshes and shoal waters and on and off the trailer.


CAIRD - Gloss red bottom paint - with tape.JPG


No surprises when I pulled the tape off the next day. I just bought the rubrail lumber earlier this morning.


CAIRD - Gloss bottom paint - bow.JPG


The new motor board has been built - but I am still fitting it the transom. And, I have not yet sealed it. On this radiused transom, I need to first bevel each standoff. Those deck screws have been removed - now that the epoxy has cured.


CAIRD - motor board - deck screws for gluing.JPG


I had to fine-tune the transom holes a bit. After some filling in 3 of them, the 4 holes are now where they need to be.


CAIRD - filling motor board holes.JPG


All the best,


SJS


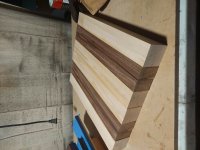
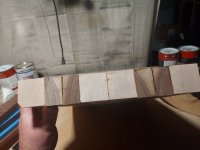
Cutting board Housewarming gift for a friend. Hard maple and dark walnut. After I get it planed flat I will cross cut it and alternate rows to create a diamond pattern with the sapwood in the Dark walnut. We'll see how it come out.


20230508_205230.jpg20230508_205244.jpg
 
As usual, the Work Bench thread is so impressive and inspiring. I am grateful to all for sharing your talents.
 
All~


Completion - except for their keels, I presume - From the Bench of George Williams:


G Williams - Drakes DONE but for keels.jpg


Did I miss the Hens? Were they reported previously?


G Williams Teal - done but for keels.jpg


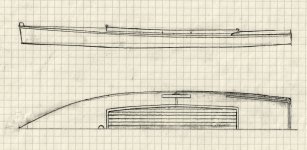
I cannot even guess at the number of projects I'm juggling right now - farm, camp, decoys, duckboats, history.... One totally unforeseen "project" was a 1918 Grassboat owned/built? by Ralph Cranford of Babylon, LI. I will be reporting in much more detail sometime in July. I have only seen it in storage thus far and could take just a few key dimensions. Here is my rough sketch.


Cranford Grassboat - SKETCH PLANS.jpg


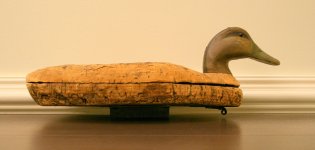
BTW: Cranford was featured in Joel Barber's Wild-Fowl Decoys. His cork-bodied Black Duck caught my eye when I first saw it, age 12 or so - and I was smitten by the elegant head. I have heard that Barber spent some time in Babylon. I wonder if he met/knew Cranford. This one belongs to a collector friend:


Ralph Cranford - Natural Cork Black Duck SHARPER.JPG


All the best,


SJS


Decoy Monster Machine does it again. Amazing.

Just seeing all those GWT drakes makes me dizzy talk about dedication to ones purpose in life....

Small Shop = Incredible Work, and little time wasted.

Keep On Keepin On Mr. George!


Best regards
Vince
 
Made the group for a DELTA chapter in Southern Delaware.. I will be supplying two hens from my personal rig for auction so that two folks who get the drakes will end up with a pair if they bit well.
Presently, i am playing with two more drake greenwings and a speckled teal.. Pics to Rooster when done.
G
 
Last edited:
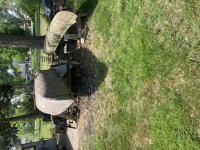
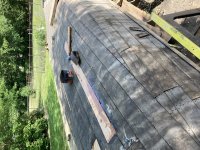
Getting back to this project after a long time. Had to saw some thin planking out of cedar and patch some rot but overall the canoe has come through without much more damage than when I started a few years ago. The bottom had a little oil canning and i used a jack from the inside to fix most of that. For comparison the canoe next to it is an Old Town OTCA that is a future project.6FC5B3E6-8E5E-4CA2-85BE-1B1F17C576D4.jpeg4AD1DA03-C8AE-4556-9E66-5AF1F0FD28CD.jpeg
 
Back
Top