What's on your workbench? July

As many know, I’m not a carver. I’m barely a decoy maker as I just started in February. So I’m literally a nobody in the game. Molding is my only way of making a decoy as I work 60 hours a week and have way too many hobbies in life. But I refuse to copy people and solely rely on my own processes. Of course I’ve gotten a lot of pointers and have had an incredible influence in Don with the air brushing. But all the molding and creative aspects are 100% from my brain. Don’t laugh, but these little cones I can get 50 for like $10. The pvc will make 40 decoys for $17. Im using 5oz of onyx per mold and I found a white version that is 1/3 the price of the black stuff. I’ve taken the time (and it’s been a process) to cast in onyx bills on all my heads, cast onyx tails on all my decoys, and cast my own cup for the stake to sit in. By doing it this way, I can use about 3 oz less foam when casting the decoy and I get just the slightest amount of foam slip under the cone. About 10 seconds with a dremel and I clear out the foam for the stake to go in. Theres been a lot of mold making to make all the pieces work, but I had 3 hours to work in the shop this weekend and I was able to make, and glue together, 18 feeder snows. Itll take me about an hour to put all the apoxie sculpt on and then will restle coat and hand paint flat white paint and black. If my math is correct, I’m able to make 2 dozen full body snows for ~$120-150. Most important part is that I truly believe I’m putting in the correct pieces for the decoy to last a good long time. As I’m pretty darn tough on my decoys, especially snow goose decoys.
Hey William! I just bought my first puddle duck molds, and some 2 part foam 4# and 8#. I'm brand new at this and at the forums. What are the little traffic cones for?
 
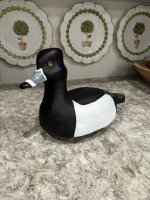
I’ve been molding and making components for full bodies and making my floaters better (bills and tail inserts). I am messing around with making silicone molds and hardened plaster as well. Trying to see if I can take a custom carve and cast a foam decoy out of the master carve. So I’ve slowed way down on production, but getting all the pieces in place to really crank out some decoys. I’m very very close to making full body restle coated snow goose decoys. I don’t have any pics of the last two I casted (they’re the best thus far), but this is kind of where I am at in the process.
Bill, I use plastic corrugated 1" strips as a dam to contain the silicone. Hot glued to the base. Thivex thickener for subsequent coats will build up the silicone thickness quickly. What hardness and what brand silicone are you using? I have been pricing and find the Shore 20A on Amazon the best deal.
 
Hey William! I just bought my first puddle duck molds, and some 2 part foam 4# and 8#. I'm brand new at this and at the forums. What are the little traffic cones for?
Sorry for late replies guys. I been in bed sick for like 4 days. BEEN AWFUL!

Little traffic cones are where my full body stakes will go into. Its a CHEAP CHEAP alternative to buying decoy cones for stakes to sit in. They were a wee bit short for the mold I am using. So I am cutting 1.75" of 2" PVC and using PVC cement to glue the cone to the top of PVC. I also made a custom "liner" that holds the PVC perfect. I cast a silicone mold of that liner and I set it in the mold. I then pour my foam, seal the mold, and when it comes out, just the smallest amount of foam will make it in the "stake hole". Zip it with a quick dremel and all is well. You can kind of see all of this going in my pictures posted above.

Careful! it gets addicting quick! Do not hesitate to reach out with any questions. I am only using 4# foam for now, and still contemplating the need for 8#. I am guessing the 8 is for the heads? Up to this point, I have just bought autumn wing bass wood heads as they fit my mold so well. With that said, I am going to cast some custom silicone molds for foam heads. Its been kind of a hush hush project, but I should have the first one out tonight. Hoping I can cast lots of foam heads, but do not think I will go with 8# foam. Instead I will make custom bill mold that I can set in place of the head mold and continue to put onxy bills in. I am going to find a way to put threaded inserts in the bottom of each head and that will be how I continue to attach heads to body.

Anyways, I have lots of private videos and techniques I have learned over this last 6 months. I feel like I am finally making strong durable foam decoys and toughening up all the spots that foam decoys likely can break. The last step is making my own foam heads and making them worth while. Although I enjoy the bass wood heads from autumn wings, I cannot fully say these are my decoys through and through without doing this final step. Also, a whole lot easier to shape and work some foam, than it is with wood. The plan is to have all the molds I need, done by the season, and I can slowly just cast heads and bodies all winter, then come spring I can hit the shop for 6-8 weeks and really crank out decoys. Figuring out paint doesn't stay good for very long once shop starts to get hot. A major reason I have also slowed way down on airbrushing and painting at this time.
 
Bill, I use plastic corrugated 1" strips as a dam to contain the silicone. Hot glued to the base. Thivex thickener for subsequent coats will build up the silicone thickness quickly. What hardness and what brand silicone are you using? I have been pricing and find the Shore 20A on Amazon the best deal.
I bought 2 of these kits and they are AWESOME when making the border for the molds.


I can make all different custom sizes and I have had 0 issues with leaks out the sides. Some leaking out the bottom, but since I use clay to do 2 part molds, I just put a fine strip of clay on the bottom side edges and havent had any issues with silicone leaking. No more need for hot glue and makes for super quick clean up. I have been using 30A silicone. I am only thickening up the silicone when I am painting it on. You can kind of see my first attempt at this on the silicone going around the wood master carve body. This is all in the experimental phase for bigger things coming. I ordered thivex like 3 weeks ago and filed for a replacement/return on the order. Next weekend I am hoping to attempt a foam cast out of that silicone mold with hardened plaster as the outside shell. I need to make the base and get a 10lb weight to set on top for when the foam is casting. I want to set up the board though with a way of allowing tie in points for a keel. So need to create that little contraption before casting foam out of the custom mold I made.
Bill, what is the material you used for your mothermold?
 
Bill, what is the material you used for your mothermold?
Im sorry I do not understand? I will do my best to explain my thought process and what I am trying to achieve. But if you go back to post #11, I had a basic body made out of wood. At that point I started building up the silicone rubber around the wood. Once it was thick enough and cured, I then applied the thick plaster and it hardened. This was like spreading frosting on a cake... WHICH IM TERRIBLE AT I FOUND OUT! I then remove the hardened plaster from the silicone rubber, the rubber peels away without tearing, and then I can set the rubber back into the hardened plaster. I am going to buy a sheet of clear acrylic from a box store and drill 2 small holes in it. I will screw in a small 2x2 square of composite board into these holes up against the acrylic sheet. These pieces will be inside where the foam is setting up. Once foam is hardened and cured, I will back the screws out, peel off the acylic sheet and I know have 2 small blocks, set in the foam, that I can screw in a keel to the decoy (if I choose). What will be nice is I will have a way to remove the keel if I want flat bottom decoys.

Hope this makes sense, and as soon as I cast my first body this way, I will take photos along the way. I am doing all this for future projects. All of this work i am doing now is 100% playing around and getting comfortable with this process. I am hoping there are much bigger and better projects that stem from this idea and testing process.
 
Back
Top