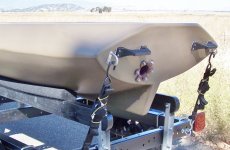
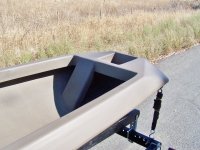
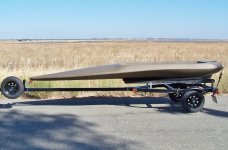
No Name Scull Boat Build......update........ We named her the Double Nickel.........

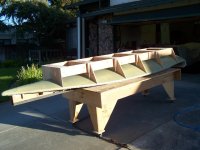
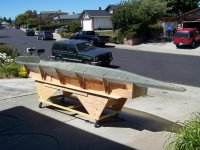
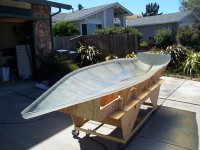
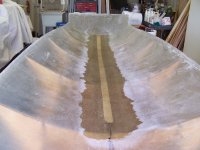
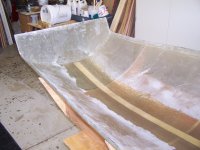
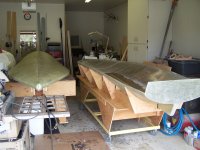
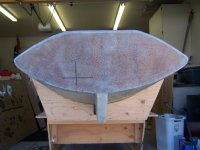
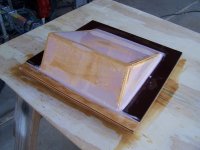
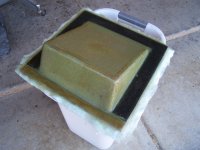
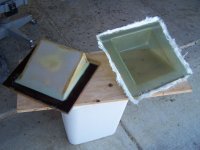
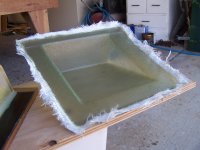
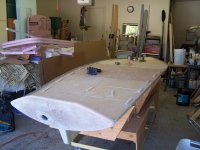
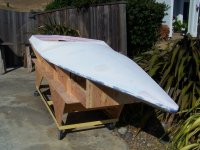
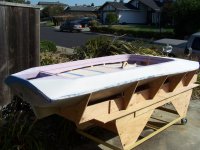
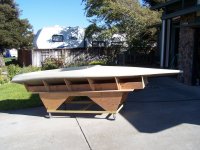
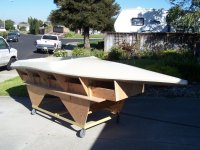
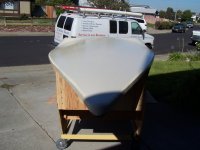
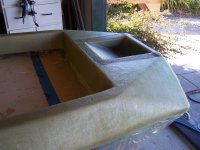
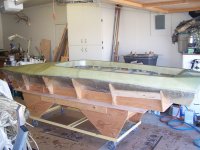
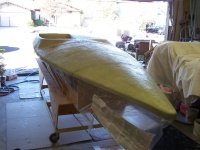
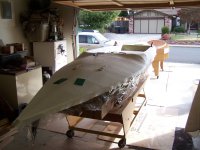
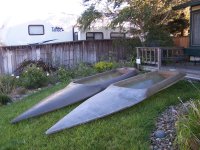
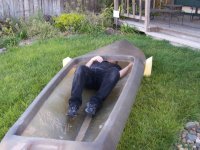
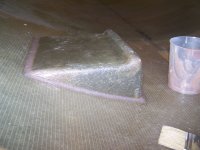
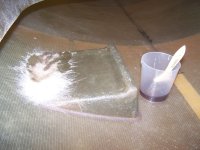
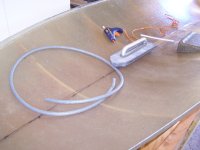
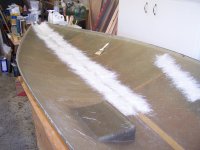
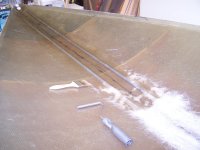
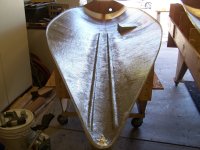
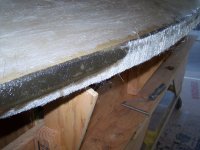
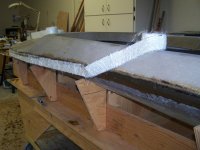
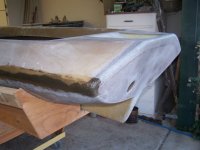
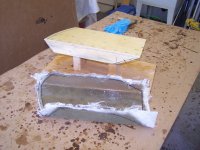
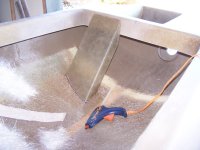
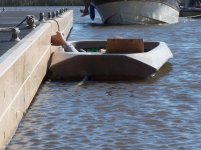
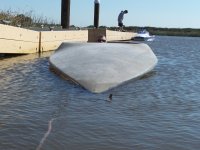
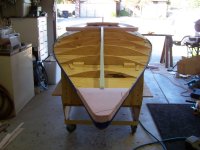
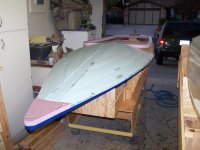
Before the de molding. I thought, that I had better make a cradle to hold the boat in position. The boat will be very bendy when it has been de molded. As you can see in the pics, I made the cradle to support the hull, and keep it strait and true, while I make the mold for the deck. I had to make another cart also. To de mold the hull, we went all around the perimeter, pulling the hull away from the mold. I then tried using an air hose, and spraying air between the hull and the mold. That helped a little. But it was stuck pretty good. We then used a furniture pad. I lifted the hull up in the front as high as I could, and OLD Leonard started stuffing the pad in between. With the pad giving steady even pressure, it slowly started coming apart. I would lift, then slide the pad further back. We kept this up, then it just popped off. There was a fair amount of friction in the keel area. We had the cradle all ready, flipped the hull over, and she laid in perfect. One hull down! The mold held up great..... We had to do some repairs where the resin had seeped through the plastic sheeting. I’m pretty sure the plastic has small pinholes, since it is really designed to just keep dirt off of carpeting. Also, we had to kind of massage it down, to make it stick. We could have inadvertently, caused some holes doing that. Since this will be the last boat, this time we were not concerned if the mold gets ruined. The second layup went off without a hitch....... More to come............

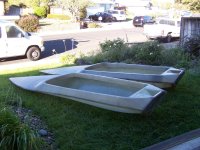
This shot shows both hulls.....
001.JPG001.JPG003.JPG005.JPG
Before the de molding. I thought, that I had better make a cradle to hold the boat in position. The boat will be very bendy when it has been de molded. As you can see in the pics, I made the cradle to support the hull, and keep it strait and true, while I make the mold for the deck. I had to make another cart also. To de mold the hull, we went all around the perimeter, pulling the hull away from the mold. I then tried using an air hose, and spraying air between the hull and the mold. That helped a little. But it was stuck pretty good. We then used a furniture pad. I lifted the hull up in the front as high as I could, and OLD Leonard started stuffing the pad in between. With the pad giving steady even pressure, it slowly started coming apart. I would lift, then slide the pad further back. We kept this up, then it just popped off. There was a fair amount of friction in the keel area. We had the cradle all ready, flipped the hull over, and she laid in perfect. One hull down! The mold held up great..... We had to do some repairs where the resin had seeped through the plastic sheeting. I’m pretty sure the plastic has small pinholes, since it is really designed to just keep dirt off of carpeting. Also, we had to kind of massage it down, to make it stick. We could have inadvertently, caused some holes doing that. Since this will be the last boat, this time we were not concerned if the mold gets ruined. The second layup went off without a hitch....... More to come............

This shot shows both hulls.....
 
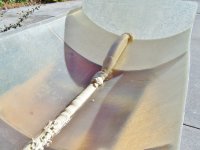
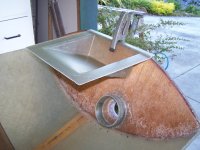
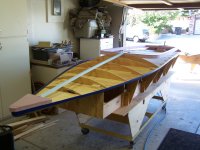
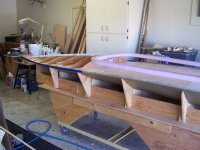
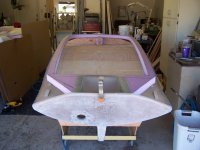
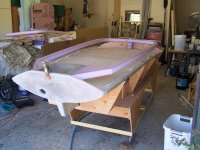
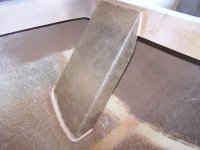
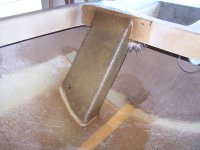
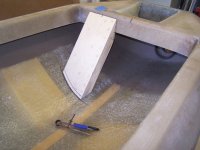
We used two part foam to fill in the void in the keel. We then, sanded the foam flat to conform to the shape of the hull. Then laid down a couple layers of glass. While we have been laying up the hulls, I have been going over options on the deck design in my head. There were several things that I was sure, that I wanted to incorporate into the deck. Number one, was that I wanted to move forward in the boat. With the shape of the hull sloping down. Moving forward will lower my body. And possibly gain more leverage on the oar. My old Lyn Lee combing, was to low to hide me, so we increased the height of this boat by one inch. So with moving forward one foot, and raising the height an inch, we gained two inches of hide ability. You can see in the pics, that I’m fitting the transom. Also you can see the final shape of the transom. I had left over wood from my Bluebill build. So that’s what I will use. I laminated a 3/4” and a 1/4” to make a 1” thick okoume plywood transom. I’ll go over my other ideas on the deck as I post more pics. ............ More to come............


Before the de molding. I thought, that I had better make a cradle to hold the boat in position. The boat will be very bendy when it has been de molded. As you can see in the pics, I made the cradle to support the hull, and keep it strait and true, while I make the mold for the deck. I had to make another cart also. To de mold the hull, we went all around the perimeter, pulling the hull away from the mold. I then tried using an air hose, and spraying air between the hull and the mold. That helped a little. But it was stuck pretty good. We then used a furniture pad. I lifted the hull up in the front as high as I could, and OLD Leonard started stuffing the pad in between. With the pad giving steady even pressure, it slowly started coming apart. I would lift, then slide the pad further back. We kept this up, then it just popped off. There was a fair amount of friction in the keel area. We had the cradle all ready, flipped the hull over, and she laid in perfect. One hull down! The mold held up great..... We had to do some repairs where the resin had seeped through the plastic sheeting. I’m pretty sure the plastic has small pinholes, since it is really designed to just keep dirt off of carpeting. Also, we had to kind of massage it down, to make it stick. We could have inadvertently, caused some holes doing that. Since this will be the last boat, this time we were not concerned if the mold gets ruined. The second layup went off without a hitch....... More to come............

This shot shows both hulls.....

001.JPG004.JPG006.JPG008.JPG
 
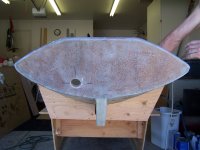
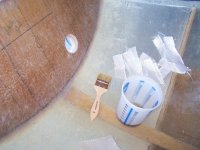
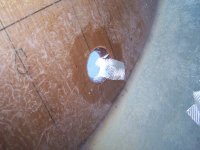
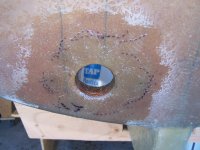
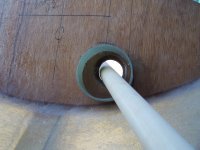
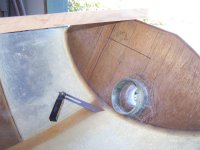
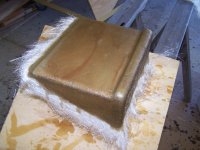
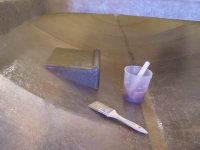
Now, it’s time to install the transom. First step was to encapsulate the plywood. Almost every Humboldt style boat that I have ever messed with has some rot in the transom. We designed this boat to have the plywood totally encapsulated. And I figured out a way to make a collar to attach the oar boot, without screws penetrating the transom. OLD Leonard came up with a perfect way to attach the leather to the oar hole without using having to remove and replace the screws every time. With these new ideas we won’t have to worry about water seeping into the wood. I’ll go over these ideas later. To encapsulate the plywood we used two layers of 1 1/2 oz. chopped strand mat. After that kicked off, we used a sheet of chopped strand mat between the transom and the rear of the boat. this will act as a gasket between the two, so there are no air pockets, and help bond the two. We made a filet of thickened resin along bottom three sides. Then a couple layers of mat over the filets. We then bored the oar hole. We rounded over the edges. I ground the thickness of the hull down a little around the oar hole, to make room for additional fiberglass cloth, wrapping the inside of the oar hole. That way the transom will be flat, and not have a bump around the oar hole...... More to come..........
002.JPG003.JPG006.JPG007.JPG008.JPG001.JPG002.JPG004.JPG001.JPG002.JPG001.JPG
 
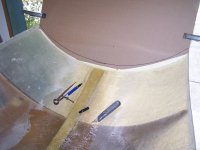
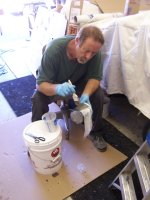
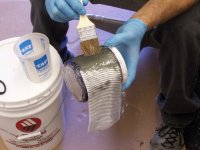
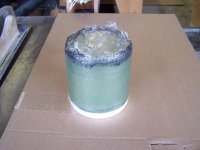
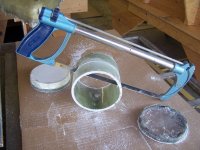
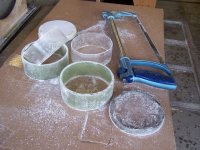
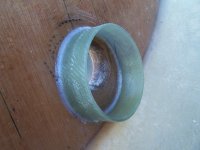
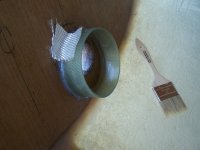
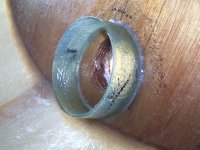
Next step........ Building the boot collar. Most if not all Humboldt style scull boats, use a metal ring, or flange to attach the neoprene boot. This old method is a pain to install. It has screws that penetrate the transom. So I figured out a way to make it a snap, to change an oar boot, with a hose clamp, and a little silicone sealant. To start this off you need a straight sided plastic cylinder. I used a plastic jar. Cut some strips of scrap glass cloth, wet out and wrap around the cylinder. It wants to end up around 1/8” to 3/16”thick. After it cures, cut it to around 1 1/2” tall. It should be around 4 1/2” in diameter. I then held it in place, and checked oar clearance. I ended up installing mine off center. OLD Leonard installed his centered, and had no problems with oar clearance. We then took a very small bead of hot glue and stuck it in place. We used a small filet of thickened resin in and out. Then a couple layers of cloth, in and out. Now to install your boot just apply a small amount of silicone sealant to the inside of the boot, and secure with a stainless steel hose clamp. Ta Da.................


004.JPG005.JPG001.JPG005.JPG007.JPG008.JPG001.JPG002.JPG003.JPG004.JPG
 
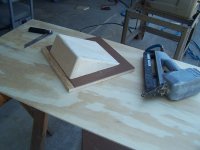
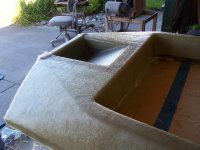
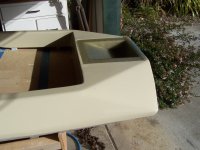
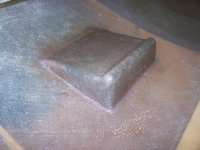
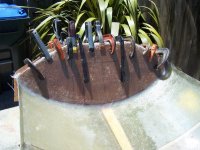
Next step, is the motor well. Since I plan on moving the sculling position up a foot. I decided to make a motor well, instead of raising the transom. I want the boat as low as possible. After figuring out the size, and angles. Time to make the mold. I decided to make it out of wood. I made it with a flange around the sides. That way when we do the layup on the deck, it will be bonded to the deck via the flange. I made the mold, then used bondo to fill in any imperfections. After final sanding, I gave it two coats of epoxy. I gave it two coats of pva, then laid it up using the same layup schedule as the hull. After using the boat, I’m super happy with the motor well design. If I ever build another scull boat design I will use the motor well again............ More to come................
003.JPG004.JPG006.JPG008.JPG001.JPG002.JPG003.JPG006.JPG

 
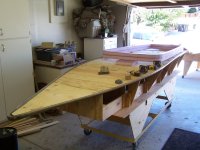
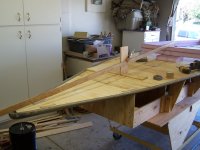
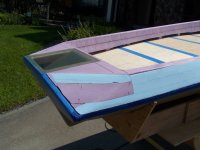
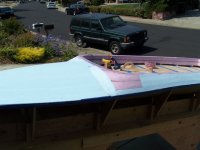
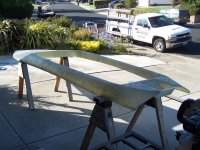
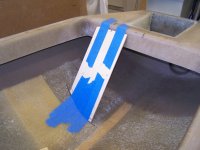
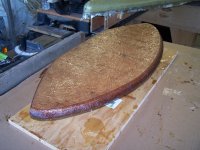
Time to start the deck mold......there are a few things, that I want to incorporate into the deck design. First thing that I want to eliminate, is the combing. I really don’t care for the shadows that a combing will cast. Most scull boats have an abrupt angle were the combing rises from the deck. This is what the ducks will see coming at them. Also, if the deck is wet, it can reflect the sun, and have bright spots. So my deck will rise up out of the water, with a crowned deck to shed a wave, with no combing. I started off the process, by cutting scrap plywood in segments, to follow the curve of the hull. This will support the mold. I then cut out the cockpit opening out of a 2” sheet of foam. I increased the deck height 1” from my old Lyn Lee. You can see the cut out, for the motor well. The motor well will be recessed down, even with the mold, so it can be bonded in, when we do the layup. I put about a 1” crown in the front of the deck. Once I cut all of the frames, and secured them in place, I glued all the foam in place. I applied 4 layers of blue tape to the edge of the hull, at the joint. This will give a little space between the hull and deck. As I said earlier, I’m going to use a shoe box joint, instead of a flange joint. A flange joint is a weak spot in a Humboldt design. They tend to split open, over time, also if you have to roll the boat on it’s side, it will be way stronger. In a flange joint, it tends to chip the edge, if you do this. Now time to sand and fare, to final shape....... More to come...........
001.JPG002.JPG003.JPG004.JPG005.JPG006.JPG007.JPG008.JPG009.JPG001.JPG002.JPG003.JPG001.JPG004.JPG007.JPG
 
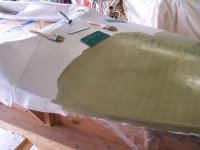
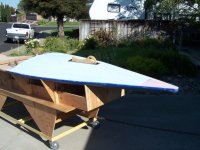
Next step....... Time to put a layer of taping mud over the deck. Then sand to the final fare shape. Then a couple coats of oil base gloss paint. We used gloss paint, so the tape will stick. The surface has to be smooth, before the packaging tape will stick. For the deck we used only the tape, and skipped the plastic sheeting. With the tape only, they de molded with zero problems. We sprayed two layers of pva, then used the same layup schedule as the hull. Here again, we could have went lighter. Next time, I would use 3/4 oz. chopped strand mat instead of the 1 1/2 oz. I really like the 7725 modified twill. It drapes very well, over complex curves, like a boat hull. I urge you to give it a try. So both decks are laid up with no problems. More to come...........

001.JPG002.JPG003.JPG004.JPG005.JPG007.JPG
 
Thanks for reposting. I was wondering where this old post was, I've been thinking about trying the strip insulation build for a while, although on a pond box. Very cool.
 

Attachments

  • 008.JPG
    008.JPG
    235.3 KB · Views: 0
Before we assemble the boat, there are a few things, that we want to add to the inside of the hull. I use an electric trolling motor to get from point a to point b. In my other boats, the battery would end up sliding to the center of the boat. Always in my way. These pics show how I made a shelf to keep it where it belongs. If you plan on going with two hunters, the shelf would be in the way. I scull by myself. The pics don’t show, that after I had it installed I realized that it was to tall. So I cut it out... cut the height down, and re installed it. If you notice that I’m using torn pieces of chopped strand mat. That way, the torn edges, just blend in with the bottom, with no lumps to sand down. One thing that I forgot to mention. We laid down a layer of 3/4 oz. chopped strand mat on the inside of the hull. That gave us a nice non skid uniform surface on the inside of the hull. Since we used a male mold, the inside of the boat, was way to smooth, and slippery....... More to come...........


[URL=http://s1258.photobucket.com/user/dcducker/media/scull%20build/005_zps629a15db.jpg.html][URL=http://s1258.photobucket.com/user/dcducker/media/scull%20build/007_zpsf92db05a.jpg.html][URL=http://s1258.photobucket.com/user/dcducker/media/scull%20build/009_zps0b07da44.jpg.html][URL=http://s1258.photobucket.com/user/dcducker/media/scull%20build/010_zpsb69fafc3.jpg.html][URL=http://s1258.photobucket.com/user/dcducker/media/scull%20build/011_zpsdfa8e930.jpg.html][URL=http://s1258.photobucket.com/user/dcducker/media/scull%20build/012_zps0013a472.jpg.html]
001.JPG003.JPG007.JPG001.JPG002.JPG004.JPG007.JPG009.JPG010.JPG
 

Attachments

  • 011.JPG
    011.JPG
    336.5 KB · Views: 1
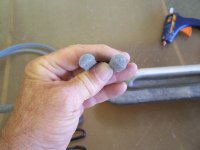
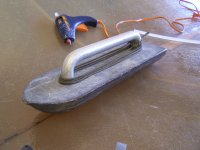
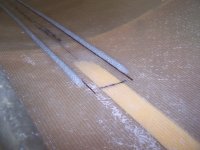
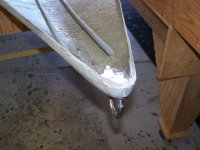
Here are a couple more things we wanted to do before we assemble the boat. First, I wanted to add a bow eye, for a couple reasons. I trailer my scull boats, so the eye will enable me to attach it to the trailer. Also when I beach the boat, the eye will protect the hull from getting all gouged up, scraping on the bottom. The next thing will be runners that will guide the weight up front. The boat is very wide across the front, and trying to push the weight forward, without the guides is very difficult. My weight is 60 lbs. and rounded on the bottom, for less friction, when sliding. To make the guides, I used backer rod. Backer rod is closed cell foam, that is used in construction to fill gaps before a caulking bead is laid down. I split the backer rod down the center, to make a 1/2 round. I’m not sure of the type of material it’s made of, but polyester resin wont eat it. I hot glued it to the hull, then added a few layers of torn glass mat. Now the weight slides with zero problems...... More to come...............

001.JPG002.JPG003.JPG005.JPG006.JPG007.JPG008.JPG009.JPG010.JPG
 
This next step is to bond the deck to the hull. Unfortunately, for some reason I did not take pictures of the first step. Probably, because we had to work fast, to get it done before it set up. Here is how we did it. First we painted the inside of the hull, and the underside of the deck. We used Lou’s FME paint. I like dead grass green. I use his paint on all my boats. I have had scull boats, painted many different colors. I have killed birds with every color. What I have found, in the places that I scull, the green is the most effective. Also, I have made a camo cover for my boat. I use the cover 90 % of the time........ Next, we laid the deck on the hull, then we temporarily screwed the two together at around the edge, at three foot intervals. Once we were satisfied with the fit, it was time to do the bonding. We took it back apart, and bonded the stern first.We used Dyna-glass waterproof fiberglass filler with fibers, to bond the halves This material is like bondo, when it kicks off, you can no longer work it. So we mixed enough to do the stern only. We applied the material, to the pre-marked areas, where the motor well and deck make contact with the hull. We set the deck in place, clamped the area where the motor well makes contact with the transom. Then quickly remove the excess that oozed out. After that was set up, we set up a set of saw horses, making sure they were nice and level with each other. This way the boat, wont get twisted. We then, flipped the boat over.......... Now, Old Leonard started mixing the Dyna-glass in small batches, and I started at the rear of the boat. As each batch was mixed, I would force the mixture down in the shoe box joint. That way we could, do the entire seam, in one continues operation. When I would come to a temporary screw, I would remove it. The material was setting up behind us, so the screws were no longer necessary. We worked our way around the boat, till we completed the job. As we went around the boat, I would take the excess material, and use it to fare out the transition between the deck and hull. After everything was set up, we sanded, an fared out the seam.......... Next, we flipped the boat over and applied two layers of 1 1/2 oz. chopped glass mat over the joint for additional strength. Now it’s an official boat............ We still have lots of work ahead. Since we used a male mold, we have a ton of sanding and faring........... More to come............


001.JPG002.JPG004.JPG005.JPG
 
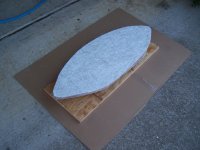
Next step, the backrest. In order to get the proper angle, we had to get her wet...... All Humboldt scull boats, don’t have motor wells. So you just, put some sort of pad against the transom and prop your head up, on the transom. So our new boat, with the motor well, will need a backrest. We used a scrap of plywood as a temporary rest. We took turns in the boat, till we were satisfied with the angle. I then, made a mold. I covered it with packing tape. Then a couple coats of pva. I had some 1708 biaxial cloth. So I decided to use that over a layer of 1 1/2 oz. mat. I then, set it in place, added a small fillet. Then a couple layers of torn glass mat over the fillets..... In between waiting for the weekend, to get the boat in the water, and waiting for OLD Lenard to come over, I have been sanding, and sanding, and sanding............... More to come............

003.JPG004.JPG005.JPG007.JPG009.JPG
001.JPG003.JPG005.JPG010.JPG011.JPG012.JPG
 
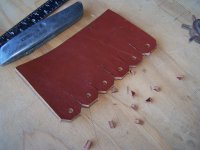
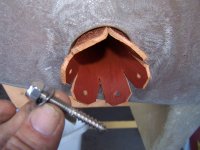
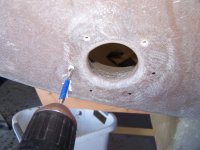
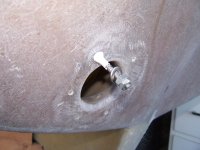
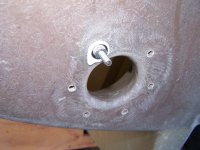
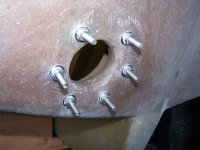
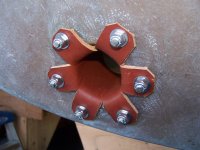
Next step......... Leather for the oar hole..... This here, is OLD Leonards’ idea. Scull boats have many different methods, of padding/quieting/protecting, the contact between the oar, and the transom, or the oar notch. Some, put leather on the oar. Some, put leather on the boat. Some, just use lube of some kind, with no leather at all. I prefer using leather on the oar hole. The drawback to this is, there are screws that penetrate the transom. So when the leather wears out, you have to run the screws in and out of the transom, giving the possibility of water damage to the transom. So what OLD Leonard came up with, is to use stainless steel hanger bolts. First I cut my leather to shape. The leather extends past the inside, of the transom about an inch. The leather does not have to be fastened to the inside. I made a pattern of the completed leather, for the future replacements. Then I put the leather in place, and marked where the holes will be drilled. Then, took the leather out, and drilled the pilot holes to the proper depth. We used 1/4” 20 hanger bolts. I applied 3M 5200 to the treads, and used a toothpick to get sealant deep in the hole. I also, used a stainless washer, that will be permanently glued in place, to help make a water tight seal. I used a jam nut affair, to sink the bolts. After they were fully cured I cut the bolts to the proper length. So now it’s a breeze to change out the leather. Just 6, 1/4” 20 stainless steel nylock nuts, and washers, takes just minutes, without compromising the seal....... The leather will be removed prior to painting..... Now back to sanding.................. More to come......................


[URL=http://s1258.photobucket.com/user/dcducker/media/scull%20build/002_zpsedca378a.jpg.html][URL=http://s1258.photobucket.com/user/dcducker/media/scull%20build/003_zps7076a693.jpg.html][URL=http://s1258.photobucket.com/user/dcducker/media/scull%20build/005_zpsbd4ecc43.jpg.html][URL=http://s1258.photobucket.com/user/dcducker/media/scull%20build/006_zps98958904.jpg.html][URL=http://s1258.photobucket.com/user/dcducker/media/scull%20build/007_zpsf21371bc.jpg.html][URL=http://s1258.photobucket.com/user/dcducker/media/scull%20build/008_zpsb36350de.jpg.html][URL=http://s1258.photobucket.com/user/dcducker/media/scull%20build/009_zps306eefba.jpg.html][URL=http://s1258.photobucket.com/user/dcducker/media/scull%20build/010_zps6986132e.jpg.html][URL=http://s1258.photobucket.com/user/dcducker/media/scull%20build/011_zps0e56905f.jpg.html][URL=http://s1258.photobucket.com/user/dcducker/media/scull%20build/012_zps7ecd53ce.jpg.html][URL=http://s1258.photobucket.com/user/dcducker/media/scull%20build/012_zps7ecd53ce.jpg.html][URL=http://s1258.photobucket.com/user/dcducker/media/scull%20build/013_zpsf90f0ee2.jpg.html][URL=http://s1258.photobucket.com/user/dcducker/media/scull%20build/014_zps627a2495.jpg.html]
005.JPG006.JPG008.JPG009.JPG010.JPG011.JPG013.JPG014.JPG
 
Hi Troy,


I used Photobucket at the time, and they used to be free. I didn't want to pay for their service, so now all my pics won't load. I still have all my pics in my computer. I'm not sure if I can go back and edit my old posts and insert more pics. I'll se if I can play around and and do that.


Dale
Dale
No worries if its too much trouble, however I remember it being a very interesting build and I expect others might think so too. If it were in some format where newcomers (or old guys) could access your ideas and any success you had, that would be pretty cool.
 
Dale
That was fantastic! I'm so glad you reposted wour work from so long ago. Beautiful boats. Top quality and craftsmanship!
Thank you!
 
Last edited:
Back
Top