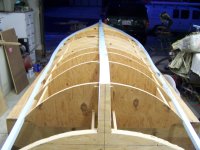
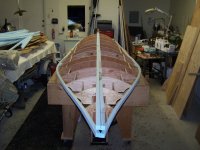
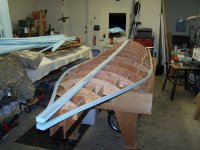
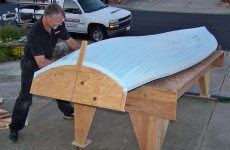
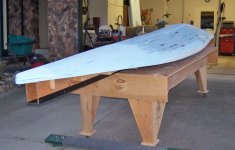
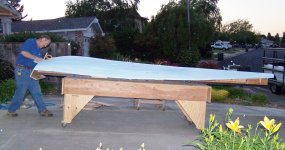
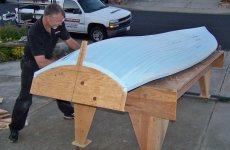
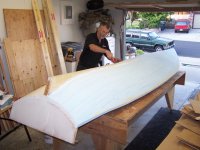
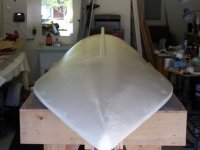
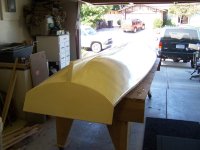
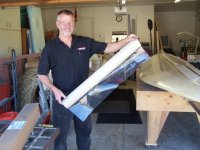
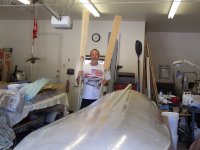
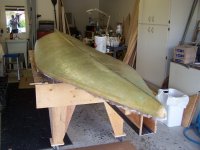
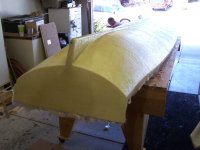
No Name Scull Boat Build......update........ We named her the Double Nickel.........

awesome pics i am very jealous of your boat and your birds.

i only had my float out 2 times this year. i towed her around scouting 2 more times but it was low tide and there was NOT 1 BIRD in all of the tidal bays.


That's the beauty of your boat, it's made to be towed. Old Leonard & I built racks, on our john boats, to carry our scull boats, but it's a pain.
 
Beautiful work, I really enjoyed reading your photo essay of the build. The hunt photos show a wonderful diversity of birds too - wow.

Be careful, you are going to convince people that sculling is a good way to kill ducks.


Thanks a bunch Tod,

It’s very common for someone to Buy a Scull boat, thinking it will be a cakewalk. They try it a couple of times, and get disenchanted, when they don’t have immediate success. Once you get a couple seasons under your belt, things start to click. It can be one of the most enjoyable forms of hunting. There might not be a bird in the sky, but the guy in the scull boat can spot a couple birds off in the distance, and now is where the fun comes in. Slowly stalking in, watching the birds reaction to this floating thing, that seems to be getting closer. Playing a cat and mouse game, until they loose their fear of this floating thing. Maybe a half hour goes by, then, there you are at 10 yards. You now, just lay in your little boat watching them, seeing them interact with each other. At that moment, it just can’t get any better. The shooting is almost anticlimactic.......... Of course there is nothing like having a fifty bluies, land in your hand made decoys either.


Dale
 
Last edited:
I always wondered what they made camo Crocs for. lol!

Sweet boat and some sweet hunts.

How did you attach the camo netting? Looks like you did a good job getting it right to but no below the waterline.


Jeff,

Those Crocs are way comfortable, and I don’t care who sees me in them! I don’t recommend them in the mud though.

On the camo...... We took some netting, like the kind for a soccer goal. Laid it over the boat. Then made a loop around the bow eye, to hold the front in place. Then ran a length of bungee cord along the under side of the deck. Weaving in and out of the netting, with a hook at the end, that hooks in the tie down eyes in the stern. Trimmed off the edges, cut a hole for the cockpit. Then we tied down various colors of camo material to it. It takes maybe two minutes to put on.

Dale
 
Wow, Great build, Awesome pictures of the boats in action.

Now how about a video maybe a go-pro mounted on the front as you stalk some ducks?

Have never sculled before but thinking about it now!

Thanks for taking the time to post all this it was great!


Thanks Craig,

As far as the video goes, maybe some day, With a go-pro, the birds look to far away. Sculling aint for everyone, but for us, it’s hard to hunt any other way. For me, I live alone, kids are grown & gone. I don’t really need, or want, to get a limit every time. When I go sculling, I can pick out the birds that I want to try for. I only take ones that I enjoy eating. I try to only take drakes. It is physical, but very relaxing at the same time. AND I believe it is very good for ones head......

Dale
 
Dale, awesome work and enjoyed the photo essay a ton. Your in use pics inspire my scull restoration and desire to give this sculling thing a try :)

Brad
 
Dale~

Wonderful photos all around. I especially appreciate those of the birds dead on the water - but not yet touched by human hands. I always "plan" to take such photos but never seem to have the camera with me when I need it.

And, great hide on the boat!

All the best,

SJS
 
Dale, awesome work and enjoyed the photo essay a ton. Your in use pics inspire my scull restoration and desire to give this sculling thing a try :)

Brad

Hi Brad,

Thanks, I’ve been watching your restoration. That float seems to be in good hands. When you get her in the water, just imagine the places she has been, the stories she could tell. Kinda makes you get goose bumps. I would say good luck, but I don’t think you need it! Give a shout if I can help somehow.....

Dale
 
Dale~

Wonderful photos all around. I especially appreciate those of the birds dead on the water - but not yet touched by human hands. I always "plan" to take such photos but never seem to have the camera with me when I need it.

And, great hide on the boat!

All the best,

SJS


Thanks Steve,

Ya know, when I was 17, I took my first wood duck. It landed in some backwater, with a bunch of duckweed. I could not believe how beautiful it was. It was floating with it’s belly down, it had a few beads of water on its back. I didn’t even want to disturb the scene. From then on, I just love that look...

Dale
 
Dale, awesome work and enjoyed the photo essay a ton. Your in use pics inspire my scull restoration and desire to give this sculling thing a try :)

Brad

Hi Brad,

Thanks, I’ve been watching your restoration. That float seems to be in good hands. When you get her in the water, just imagine the places she has been, the stories she could tell. Kinda makes you get goose bumps. I would say good luck, but I don’t think you need it! Give a shout if I can help somehow.....

Dale

Thanks Dale. My mind wanders a lot when I'm working on her, thinking of the men who built her and hunted her and the history of America that she has seen.

Brad
 
Maybe some of you would like to see how I constructed a new scull boat of my own design. I have owned a few scull boats over the years. I have never been totally happy with any of them. I started off building a Sculldugery II. I had a blast building it. But that is where it ended. I can’t recommend this design to anyone. The hull does not have enough upsweep in the stern. Thus making it extremely hard to scull. It takes way to much effort just to keep it in motion. It is also way to tall. If you get in a crosswind, it is uncontrollable. After I got rid of that boat I was pretty unsure if I even liked sculling. I looked at a used Lyn Lee sculler years earlier, but the guy wanted way to much, and it was in terrible shape. I didn’t buy it. If you have never heard of a Lyn Lee sculler before, it was the predecessor of the Hayden boat. I found out this years later. Bob Hayden, with permission from Lyn & Lee, started building new boats under the Hayden name. Well... that Lyn Lee that I had looked at popped up in my head. I remembered where the guy lived. I was working in the area, so I thought I would stop and see if he still had the boat. I knocked on the door and a different person answered the door. I thought I was to late. I told the guy my story, and to my surprise he told me that he had left a bunch of stuff out in the back 40. He said there was a funny looking little grey boat out there and I could look at it. There it was, only in much worse condition. It was sitting on an old rusty trailer, half full of water. Someone had put a open can of some type of solvent in the boat, that had eaten a basket ball size hole in the bottom. The seam was split about half way around also. What a mess. The guy said I could have it, if I hauled off the trailer too. So with the Help of my buddy OLD Leonard (a member here) We hauled her home. Over the next year or so I brought new life to her. She was beautiful! Extremely low, super stealthy, and sculled like a dream. I got quite an education using polyester resins. I had one problem with the boat, the combing was so low, that I couldn't hide my arm movement. I’m 6’2” and over 200. I’m fortunate in living on the west coast, in that there are almost always scull boats on Craig's List. I ended up three scull boats, of different designs. That got me thinking that If I could take the best features of all the boats that I have sculled, and combine then that would be cool. After a few years of this in my head. I thought, maybe I should look for a scull boat with a hull design that I liked, and redo the deck. I kind of looked around a while, but none were cheap enough to tear apart and redo.
With all these ideas flying around in my head, I found a site on the web, where this guy built a Kevlar canoe, with a foam male mold. The light bulb went off in my head, and I hatched a plan. I’ll make my own design from scratch! I talked to OLD Leonard about my thoughts. He said he would help. But he wanted one as well. This threw a fly in the ointment.... The mold would have to be strong enough, to stand up to de molding, then re used. I’m going to post up pictures, and walk you through the process. I’ll post up pictures every few days. I’m not fast at typing, so this will take me a while.
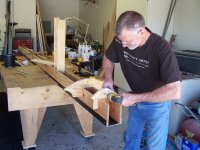
The hull of the Lyn Lee was by far, my favorite. We would base the design with a similar shape. I Really like how wide across the front it is. It really helps hide the sides of the boat. I wanted to get away from the flange joint that fastens the top & bottom halves. So I decided to use a shoe box joint instead. These first pictures show how we made the strong back and laid out the frames. The strong back is made of plywood and a length of storefront aluminum u channel.
I’m going to warn you now there will pictures of OLD Leonard. I know he looks kind of like a homeless guy, but he’s harmless, and doesn’t stink to bad.......

[URL=http://s1258.photobucket.com/user/dcducker/media/scull%20build/005_zpsd711bf37.jpg.html][URL=http://s1258.photobucket.com/user/dcducker/media/scull%20build/005_zps1f20eef4.jpg.html][URL=http://s1258.photobucket.com/user/dcducker/media/scull%20build/001_zps118d1775.jpg.html]
Dale
My name is Troy Nicolls. I was a member of the scullers net back in 2012 or so?? I built a stitch and glue Alviso at the time, which I still use today. Anyway, I remember following your build posts (and OLD Leonard jokes) about the two sculls you've discussed here. The pictures in this post will not load. By any chance, have you ever compiled your pictures and posts anywhere I could access them? I have the itch again. Thinking on a Kara Hummer style boat for a specific marsh up in Oregon, but I want lighter weight.
Thank you
Troy
Hi Troy,


I used Photobucket at the time, and they used to be free. I didn't want to pay for their service, so now all my pics won't load. I still have all my pics in my computer. I'm not sure if I can go back and edit my old posts and insert more pics. I'll se if I can play around and and do that.


Dale
 
Dale

Holy crap. I said to myself no way after almost nine years Dale responds, this thread is dead. You proved me wrong and am glad you did.
 
Maybe some of you would like to see how I constructed a new scull boat of my own design. I have owned a few scull boats over the years. I have never been totally happy with any of them. I started off building a Sculldugery II. I had a blast building it. But that is where it ended. I can’t recommend this design to anyone. The hull does not have enough upsweep in the stern. Thus making it extremely hard to scull. It takes way to much effort just to keep it in motion. It is also way to tall. If you get in a crosswind, it is uncontrollable. After I got rid of that boat I was pretty unsure if I even liked sculling. I looked at a used Lyn Lee sculler years earlier, but the guy wanted way to much, and it was in terrible shape. I didn’t buy it. If you have never heard of a Lyn Lee sculler before, it was the predecessor of the Hayden boat. I found out this years later. Bob Hayden, with permission from Lyn & Lee, started building new boats under the Hayden name. Well... that Lyn Lee that I had looked at popped up in my head. I remembered where the guy lived. I was working in the area, so I thought I would stop and see if he still had the boat. I knocked on the door and a different person answered the door. I thought I was to late. I told the guy my story, and to my surprise he told me that he had left a bunch of stuff out in the back 40. He said there was a funny looking little grey boat out there and I could look at it. There it was, only in much worse condition. It was sitting on an old rusty trailer, half full of water. Someone had put a open can of some type of solvent in the boat, that had eaten a basket ball size hole in the bottom. The seam was split about half way around also. What a mess. The guy said I could have it, if I hauled off the trailer too. So with the Help of my buddy OLD Leonard (a member here) We hauled her home. Over the next year or so I brought new life to her. She was beautiful! Extremely low, super stealthy, and sculled like a dream. I got quite an education using polyester resins. I had one problem with the boat, the combing was so low, that I couldn't hide my arm movement. I’m 6’2” and over 200. I’m fortunate in living on the west coast, in that there are almost always scull boats on Craig's List. I ended up three scull boats, of different designs. That got me thinking that If I could take the best features of all the boats that I have sculled, and combine then that would be cool. After a few years of this in my head. I thought, maybe I should look for a scull boat with a hull design that I liked, and redo the deck. I kind of looked around a while, but none were cheap enough to tear apart and redo.
With all these ideas flying around in my head, I found a site on the web, where this guy built a Kevlar canoe, with a foam male mold. The light bulb went off in my head, and I hatched a plan. I’ll make my own design from scratch! I talked to OLD Leonard about my thoughts. He said he would help. But he wanted one as well. This threw a fly in the ointment.... The mold would have to be strong enough, to stand up to de molding, then re used. I’m going to post up pictures, and walk you through the process. I’ll post up pictures every few days. I’m not fast at typing, so this will take me a while.
The hull of the Lyn Lee was by far, my favorite. We would base the design with a similar shape. I Really like how wide across the front it is. It really helps hide the sides of the boat. I wanted to get away from the flange joint that fastens the top & bottom halves. So I decided to use a shoe box joint instead. These first pictures show how we made the strong back and laid out the frames. The strong back is made of plywood and a length of storefront aluminum u channel.
I’m going to warn you now there will pictures of OLD Leonard. I know he looks kind of like a homeless guy, but he’s harmless, and doesn’t stink to bad.......

[URL=http://s1258.photobucket.com/user/dcducker/media/scull%20build/005_zpsd711bf37.jpg.html][URL=http://s1258.photobucket.com/user/dcducker/media/scull%20build/005_zps1f20eef4.jpg.html][URL=http://s1258.photobucket.com/user/dcducker/media/scull%20build/001_zps118d1775.jpg.html]
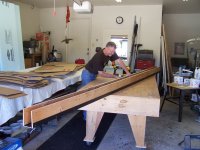
001.JPG002.JPG005.JPG007.JPG
 
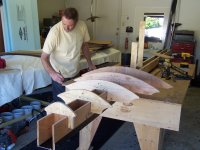
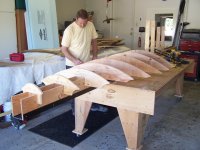
After setting all the frames in place,and squaring them up, it’s time to start gluing the strips of foam in place. We used 1” DOW foam sheets ripped into 1” strips. Looking back now I would have used 1”x 2” strips instead. That’s what we ended up using on the deck. The 2” strips are twice as fast to apply. We used hot glue, to glue them to the frames, and to each other. It was more important for this to be strong, since we will be making two boats. The de molding is very tough on the mold. If you were only building one boat it wouldn't matter if the mold came apart when de molding. You can see the lines of the boat starting to take shape, with the first strips of foam applied. You might notice the transom is tall, and squared off. This will be trimmed to it’s final shape after the layup.


Dale


001.JPG002.JPG004.JPG005.JPG
 
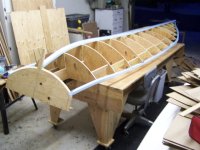
Here is the hull, with all of the foam applied. Where the hull narrows we had to cut the foam in wedges. The foam around the edge, has a uniform 1” vertical edge to form the lower half of the shoebox joint. The joints between the individual pieces of foam do not have to be tight. as long as they are glued to each other securely. Any of the hot glue, that oozes out, should be trimmed off now. The next step is rough sanding with 40 grit paper on a very long, body & fender sander. After sanding and faring the foam, to it’s final shape, the hull will be coated with a layer of drywall mud. More to come..........


001.JPG003.JPG006.JPG
 
If you notice the upsweep, in the stern, in this pic. This is one reason, the west coast scull boats are so easy to scull. After you get the boat in motion, the water wants to push upwards, thus pushing on the stern and propelling the boat forward. In a boat similar the sculldugery there is not enough upsweep, witch takes more energy to keep the boat in motion.


001.JPG
 
carrying on.......... After faring the foam, it’s keel time. We took two 1 x 6 pine boards. We then scribed, and cut them to fit the contours of the hull. we then splayed out the bottom to give an angle to the keel. This will make de molding possible. We then, glued it in place. We used polyurethane construction adhesive to glue it down, and make a coved fillet, where it makes contact with the hull. Then we applied about an 1/8” thick coat of drywall mud. After final sanding and faring, we gave it two coats of oil based gloss paint. Getting close to layup time.......
001.JPG002.JPG005.JPG006.JPG
 
carrying on.......... After faring the foam, it’s keel time. We took two 1 x 6 pine boards. We then scribed, and cut them to fit the contours of the hull. we then splayed out the bottom to give an angle to the keel. This will make de molding possible. We then, glued it in place. We used polyurethane construction adhesive to glue it down, and make a coved fillet, where it makes contact with the hull. Then we applied about an 1/8” thick coat of drywall mud. After final sanding and faring, we gave it two coats of oil based gloss paint. Getting close to layup time.......
001.JPG002.JPG003.JPG
 
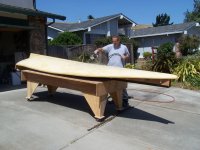
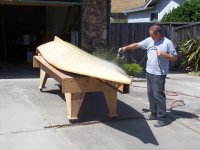
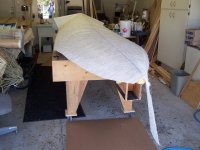
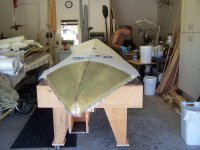
The next step is to put a protective film over the mold. We will be using polyester resin for the project. Polyester resin will attack and dissolve the Styrofoam. We both work in the glass industry. There is a product that we use to cover a broken car window. It is self adhesive plastic sheeting that comes in a roll. Here is where we came upon our first problem....... At first it went on easy, but toward the rear of the boat there are compound curves. That made the plastic want to pucker, and cause wrinkles. We weren’t really worried about the appearance because, since it is a male mold, it would only show on the inside. No big deal. Well........... the next morning I pushed it outside to prep for the layup, when it sat outside in the sun, the plastic started to separate from the mold. It would not stick back down. So........... I took it all off. I’m still not sure why it came loose. Foam off gassing in the sun? Adhesive not sticking to the oil base paint? So, then I thought about putting a coat of carpet adhesive on the mold. That seemed to work. It stuck tight... so we thought. Same problem. Over night it let go again. I scratched my head for a good long while. Then I remembered about a similar product. Protective plastic, for flooring. They use it during construction, and seemed quite sticky. Now this will be our third attempt......... We got it all down, and used clear packing tape to seal off the overlaps. By the day came to do the layup, it was stuck down tight. After the layup, we noticed several places that the resin penetrated the plastic, pinholes? It wasn’t a real big deal, but it meant repairing the mold. We sprayed pva on the mold before the layup as a mold release. I tell you this, to maybe save someone the same problems, if they should use this method in the future. If I was to try this again I would cover the entire mold, with the clear packing tape only. It stuck to the mold really well, not expensive, and held up for both boats. (that’s what we used for the deck, and worked perfect) The next update I will go over our layup schedule, and my... if I do this again thoughts.... In the pics you see the film installed, and a couple sculling oars I was building. Dale
001.JPG005.JPG007.JPG
 
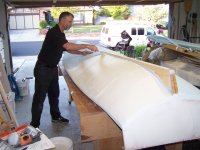
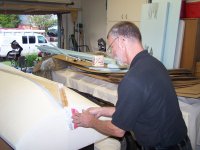
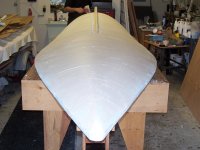
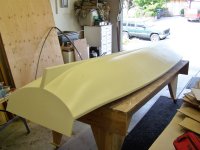
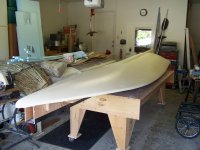
Getting prepared for the layup. This is my first attempt at building a boat out of just glass. I asked many people, what layup schedule that they recommend. Lou Tisch was very helpful. I went down to my local Tap Plastics store, and bought a little 1.5 oz. chopped strand mat, 3/4 oz. chopped strand mat, and some 8.5 oz. 7725 modified twill. I did some test layups with 6”x 6” square pieces. I did various combinations of the cloth & mat. I wanted something that would be as strong as possible, but still remain light weight. Lou told me that I should use mat on the top & bottom layers, and to use a layer of mat between layers of cloth to get the best bond. This was great advice and helped a lot. I settled on 1.5 mat / 7725 twill / 1.5 mat / 7725 twill / 1.5 mat . Making five layers. The boats came out a tad heavy. If I had it to do over, I would substitute the 1.5 mat for the 3/4 mat. I really like the 7725 twill. It is designed to conform to compound curves, and it does perfectly. We purchased our supplies from US Composites. I was pleased with the quality, BUT.... We bought a 5 gallon pail of resin. We noticed that it wasn’t filled to the top. We thought it was odd, but we trusted it was correct. We later bought 5 gallons from Tap Plastics. We decided to pour the resin from Tap, into the US Composites pail, and sure enough, we were shorted at least a gallon from US Composites! We started off with a couple coats of pva mold release. Then we laid up the first layer of 1.5 oz. mat. Waited till it kicked off, then used a course file to knock off any stray fibers sticking up. We are not fast enough to do more than one layer at a time. Then the twill, same process, till we had all five layers done. We really took great pains to make sure we used the minimum amount of resin. And to fix any air bubbles between layers. I think it turned out great. We let it set up a couple days before the de molding. I’m not sure why, but when I make a post on this site, it smashes all the text together, and gets rid of any spaces, and paragraphs. I’m not sure if my settings are all correct. It makes my posts very hard to read. More to come........... Dale [URL=http://s1258.photobucket.com/user/dcducker/media/scull%20build/009_zps41fdd029.jpg.html][URL=http://s1258.photobucket.com/user/dcducker/media/scull%20build/006_zps16612d59.jpg.html][URL=http://s1258.photobucket.com/user/dcducker/media/scull%20build/008_zps41eca6b4.jpg.html][URL=http://s1258.photobucket.com/user/dcducker/media/scull%20build/011_zps56115f0b.jpg.html]
003.JPG004.JPG005.JPG006.JPG008.JPG011.JPG
 
Back
Top