BBSB Pond Box Build

Thank you.

I'm considering interior cloth instead of just resin. You are no doubt correct, but I suspect with the number of planks involved water will eventually get in no matter what I do. I wonder if it's worth the weight increase, and I never hold onto a boat I build for more than a couple of years anyway. If this one turns out nice, I'll build a couple more. I learned a little and could probably build the next one in a week using wider planks. Decisions, decisions.
 
SJ

4 oz cloth wouldn't add much weight. If you try and seal it up but miss a passage way water will be badly trapped. Maybe the thing to do is not to seal it up but to flip the boat after the season and get a lot of air on it to dry the wood. I'm not sure which is best.
 
I store my wood boats upside down whenever possible, even when inside. That's part of my dilemma regarding the canvas. It needs to be removable.
 
I'll likely give it a try. My primary concern isn't aesthetics, more not putting my finger in the machine. :oops: :D

Speaking of machines, I broke two bandsaw blades yesterday. Both failed while the machine was idling as I laid out the next cut. Probably has a bulge in a tire, one more thing to fix.

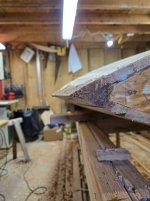
I spent a few minutes before dinner to glue up the coaming support frame and the rest of the gussets. It's starting to resemble a boat. Next big challenge is planing everything so the deck and bottom planks meet. It's very tight along the sides due to the small (36") rib radius, so a sander, chisel and rasp will be employed in ittybitty spots.


View attachment 68601

Then we revisit the aforementioned jinky station #1 frame. I think I said previously mold #2 stays, it's actually #1. This is boat # five I've built from the Megargee plans, although this one is scaled down. Every one had some degree of separation at this station. More of an annoyance than anything, I'll add a deck rib alongside it. If you build one from the plans keep this in mind or tell me where I'm going astray. All the other molds worked and the lines are nice with minimal fussing.


View attachment 68602
SJ,

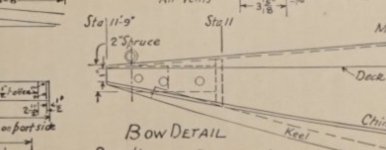
On my build the bow piece is about an 1” to 1 1/2” solid oak. I made a mortise for the keelson to fit into so the bottom of the keelson rests against the frame.

On the widgeon plans he has a profile drawing so you get an idea of what I am referring to.

I worked from bow aft since the bow has the greatest curvature. After cutting mortise into bow so the keel fit against station 11 I then sprung the keel aft to the stern so it rested against the building frames.

Rick
 

Attachments

  • IMG_9902.jpeg
    IMG_9902.jpeg
    76.4 KB · Views: 4
Last edited:
Thank you.

I'm considering interior cloth instead of just resin. You are no doubt correct, but I suspect with the number of planks involved water will eventually get in no matter what I do. I wonder if it's worth the weight increase, and I never hold onto a boat I build for more than a couple of years anyway. If this one turns out nice, I'll build a couple more. I learned a little and could probably build the next one in a week using wider planks. Decisions, decisions.
SJ and Eric~

I am in the school that says wood is better off if left to breathe. Paint or oil on the interior has worked on many gunning vessels since 'glass (exterior sheathing) came of the scene in the '50s. For many years I used Penetrol - but your niceCedar shouldn't need the help.

No need for the work or the weight - and much lower risk of trapping moisture (= dry rot over time).

All the best,

SJS
 
SJ,

On my build the bow piece is about an 1” to 1 1/2” solid oak. I made a mortise for the keelson to fit into so the bottom of the keelson rests against the frame.

On the widgeon plans he has a profile drawing so you get an idea of what I am referring to.

I worked from bow aft since the bow has the greatest curvature. After cutting mortise into bow so the keel fit against station 11 I then sprung the keel aft to the stern so it rested against the building frames.

Rick
Like you, the bows on the 12' Megargee boats I built were made of solid oak or mahogany. It works great for a sheerside boat because the rearmost part needs almost no planing and provides a great bearing surface to screw/glue to. Also like you, I generally plank from the bow aft to create and preserve the pretty curves that define these boats. For instance, when I plank the short foredeck on this one, full length planks will be clamped all the way to the stern while being nailed and glued. After the glue sets, the excess is trimmed. The planks take a more pleasing and consistent curve when done that way.

Because this one will be a feather edge, or at least very narrow edge, the 3/4" plywood should do the job when planed down. That one mold (#1) is the real aggravation, I studied and measured the assembly to see if I screwed up but the numbers check. It's where the gremlins live.
 
SJ~

Great progress! Of course, I have yet another "day late" suggestion....

When I have contemplated such builds - especially like so many Barnegats where one master curve (radius) is used for all frames - I would laminate them. For thatch rails on my spray shields, I use 3 layers (laminae....) of Philippine Mahogany set in epoxy.

Lots of c-clamps overnight and packing tape to protect the mold. I usually clean the edges after the cure on my table sander. Then I knock off the hard corners with my smallest block plan. (Of course, an eight-inch round-over bit on the router table would give a fine effect.) Everything gets hand-sanded with 80-grit paper. I seal with spar varnish prior to installation or painting.

(Sorry for the blurry image!)

View attachment 68209

Because they are not solid lumber, I would cant them fore or aft as needed so that they met the planking square - and ignoring the ages-old practice of plumbing frames - and thus avoiding most of the beveling during planking.

Maybe you can file this for your next arc-bottom vessel - or in your ever-growing "Sanford's Hare-brained Ideas" folder.....

All the best,

SJS
Steve, I steamed ash for all my grass rails on the southbay. Used a pvc pipe, slow but worked.
 
SJ and Eric~

I am in the school that says wood is better off if left to breathe. Paint or oil on the interior has worked on many gunning vessels since 'glass (exterior sheathing) came of the scene in the '50s. For many years I used Penetrol - but your niceCedar shouldn't need the help.

No need for the work or the weight - and much lower risk of trapping moisture (= dry rot over time).

All the best,

SJS
I've been thinking for a while about doing as you suggest. I lean toward full epoxy on this boat because of the sheer number of planks. Every one is going to want to work, I'm concerned that the boat will tear itself apart. My thought is to seal the wood as much as possible. Maybe it's overkill, I'm still thinking.
 
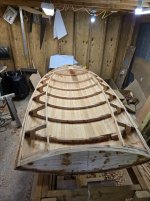
Tonight's progress...first photo is what it looks like with the ribs and chine log planed and ready for planks. The chine log is tiny now, but I got it planed without having to remove a bunch of hardware from the bottom.
20250910_170946.jpg

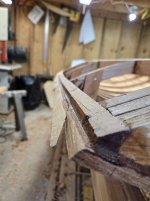
Closeup of the planed surfaces between the top ribs, chine log and bottom planks. There's barely enough plank to get it fair, but some thickened epoxy fixes many sins.
20250910_171001.jpg

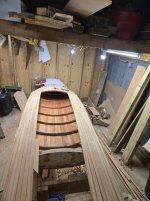
Pretty close to done planking the deck. A couple of pieces need to be ripped down so the last plank on either side will overhang the chine log enough to create an edge with the bottom plank. That darn bow assembly caused fits with the planks, more thickened epoxy coming to the rescue. Time to hunt rail tomorrow and Friday, with luck I'll get it finished and sanded this weekend.
20250910_193603.jpg
 
SJ,

You are flying with your builds! Looking great. Expecting launch is probably a few days away at your speed.

Rick
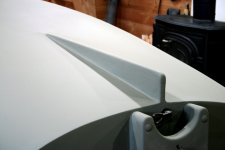
Thanks. Shouldn't be too long for the hull. I'm going to add a couple of things, such as shell holder, oarlock holders, removable floor and thinking about a mini skeg...in case it gets rowed, mainly just for looks. A BBSB looks naked without a skeg. I originally thought a 9' box would be scary in open water (say a large creek) but as it takes shape I'm curious to test it out. Before the water gets cold. :)
 
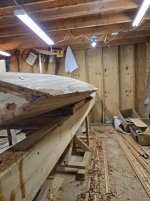
Finished planks last night, planed the edges and filled the sin with thickened epoxy. Definitely needs more filling before sanding. I was able to come close to a decent feather edge. The bow is still a work in progress, no photos of that yet. :rolleyes: The Spanish Cedar is a joy to work with and plane. All the nails and screws driven through it and not one split. Far beyond a new record for me. Easy stuff to work with and pretty lightweight. It only needed about 20 minutes of hand planing to get it to where it is.

20250912_170445.jpg20250912_170504.jpg
 
Finished planks last night, planed the edges and filled the sin with thickened epoxy. Definitely needs more filling before sanding. I was able to come close to a decent feather edge. The bow is still a work in progress, no photos of that yet. :rolleyes: The Spanish Cedar is a joy to work with and plane. All the nails and screws driven through it and not one split. Far beyond a new record for me. Easy stuff to work with and pretty lightweight. It only needed about 20 minutes of hand planing to get it to where it is.

View attachment 68771View attachment 68772
SJ~

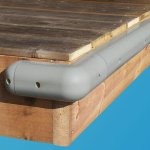
Spectacular! Although, I'm thinking "knife edge" rather than "feather edge". You may want to add WARNING stickers all along her gunwales - and wear heavy gloves.

Safety first!

DocKushionSm_a.jpg

All the best,

SJS
 
Back
Top