Steve Sanford
Well-known member
Good morning, All~
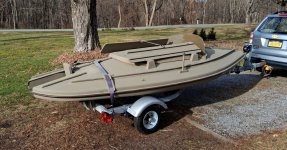
This is a long post about oarlock stanchions. I have restored and customized a bunch of South Bay Duckboats - and finally was asked to set one up for rowing. I was happy to do so - because I would not leave terra firma in any small vessel that did not have a truly reliable way to get me back home. My gunning vessels have always had paddles (for canoes) and a good pair of oars for everything else.
Putting that prejudice aside, I have always enjoyed the world of oars, oarlocks and rowing. Although most rowing craft are open and have their oarlocks attached to the gunwales (more or less), most duckboats are decked over and so need oarlocks mounted on stanchions of some sort. The first boat I ever rowed, I believe, was the TED SANFORD, my Dad's Great South Bay Scooter built by Benjamin Hallock of Center Moriches (south shore of Long Island), probably in the 1920s.
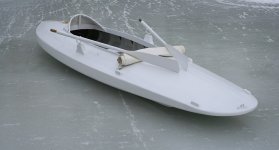
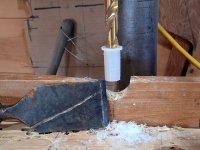
These were simple blocks, curved elegantly at each end, and beveled to meet the crown of the deck. They were bolted through the deck and backed up below with some Oak. (I can never be certain which details were the work of Hallock -or of my Dad - who restored the Scooter in 1954.) My Dad liked pinned oars - so they would not escape when picking up birds and stool in icy waters. I inherited that preference. But, I did bore the scuppers through the blocks - having encountered sockets filled with ice more than once. Rain water can escape through the ports.

Because most gunning boats have coamings around their cockpits, the oarlocks need to mount above the coaming height - for the proper geometry relative to the rower and the bay. The blades of the oars need to both dig into the sea and clear the wavetops on the backstroke. Also, the looms need to clear the coamings. Thus, the oarlock sockets need to be mounted on an elevating structure. I have always called them stanchions - but I am not sure that this term is widely used - or accepted.
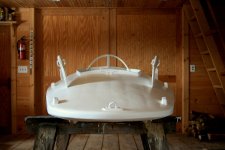
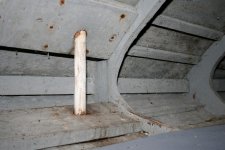
Here is a taller stanchion. I cut the opening to both reduce weight and to allow the oarlock socket to drain straight down.

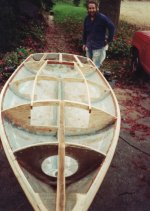
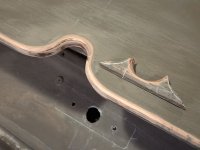
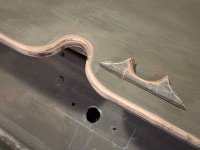
This stanchion has a larger scupper - for drainage. And, I integrated it into the thatch rail. So, I put thin (3/16") spacers under each end so that Salt Hay could be wedged beneath the stanchion. It and the backers are beveled so that the stanchions sits vertical (perpendicular to sea level).
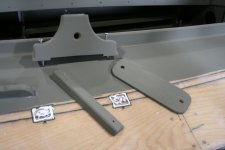
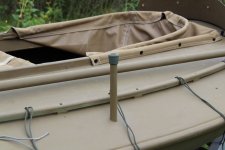
Here it is in line with the thatch rails - on my Sneakbox RED-LEG.
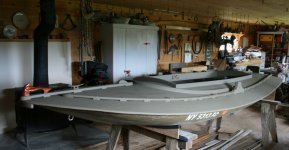
If possible, I like the oars to almost meet amidships. However, on many narrower vessels, the handles cross and so the rower must pull each oar alternately - a technique I later learned was called the "Dutch roll" - and which has been a natural rhythm for me life-long.

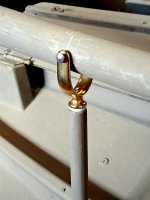
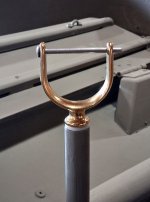
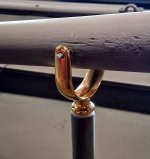
As an aside, these clamp-on oarlock are less-than-elegant - but are easy to install and they do not weaken the oar by penetrating the loom at its fulcrum.

Barnegat Bay Sneakboxes are well-known for their folding oarlocks.
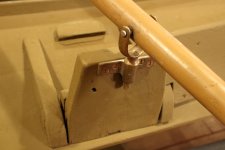
These are on a Van Sant Sneakbox - and tie into the stool rack.

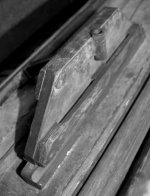
This folding oarlock is on a grassboat built for Ralph Cranford (of Babylon, NY - see Barber's WILD-FOWL DECOYS) in 1918. They are the only ones I have seen with their own thatch rails.
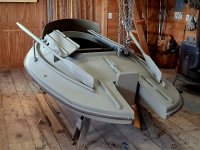
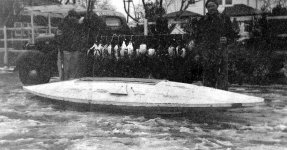
This Scooter was from the same era. Note how tall they are - because this "whaleback" had lots of deck crown.
Now I will take a break - and continue this as a Reply. Not sure how many images I can jam into a single post. (It used to be 10, I believe.)
Stay tuned!
SJS
This is a long post about oarlock stanchions. I have restored and customized a bunch of South Bay Duckboats - and finally was asked to set one up for rowing. I was happy to do so - because I would not leave terra firma in any small vessel that did not have a truly reliable way to get me back home. My gunning vessels have always had paddles (for canoes) and a good pair of oars for everything else.
Putting that prejudice aside, I have always enjoyed the world of oars, oarlocks and rowing. Although most rowing craft are open and have their oarlocks attached to the gunwales (more or less), most duckboats are decked over and so need oarlocks mounted on stanchions of some sort. The first boat I ever rowed, I believe, was the TED SANFORD, my Dad's Great South Bay Scooter built by Benjamin Hallock of Center Moriches (south shore of Long Island), probably in the 1920s.

These were simple blocks, curved elegantly at each end, and beveled to meet the crown of the deck. They were bolted through the deck and backed up below with some Oak. (I can never be certain which details were the work of Hallock -or of my Dad - who restored the Scooter in 1954.) My Dad liked pinned oars - so they would not escape when picking up birds and stool in icy waters. I inherited that preference. But, I did bore the scuppers through the blocks - having encountered sockets filled with ice more than once. Rain water can escape through the ports.

Because most gunning boats have coamings around their cockpits, the oarlocks need to mount above the coaming height - for the proper geometry relative to the rower and the bay. The blades of the oars need to both dig into the sea and clear the wavetops on the backstroke. Also, the looms need to clear the coamings. Thus, the oarlock sockets need to be mounted on an elevating structure. I have always called them stanchions - but I am not sure that this term is widely used - or accepted.

Here is a taller stanchion. I cut the opening to both reduce weight and to allow the oarlock socket to drain straight down.

This stanchion has a larger scupper - for drainage. And, I integrated it into the thatch rail. So, I put thin (3/16") spacers under each end so that Salt Hay could be wedged beneath the stanchion. It and the backers are beveled so that the stanchions sits vertical (perpendicular to sea level).

Here it is in line with the thatch rails - on my Sneakbox RED-LEG.

If possible, I like the oars to almost meet amidships. However, on many narrower vessels, the handles cross and so the rower must pull each oar alternately - a technique I later learned was called the "Dutch roll" - and which has been a natural rhythm for me life-long.

As an aside, these clamp-on oarlock are less-than-elegant - but are easy to install and they do not weaken the oar by penetrating the loom at its fulcrum.

Barnegat Bay Sneakboxes are well-known for their folding oarlocks.

These are on a Van Sant Sneakbox - and tie into the stool rack.

This folding oarlock is on a grassboat built for Ralph Cranford (of Babylon, NY - see Barber's WILD-FOWL DECOYS) in 1918. They are the only ones I have seen with their own thatch rails.

This Scooter was from the same era. Note how tall they are - because this "whaleback" had lots of deck crown.

Now I will take a break - and continue this as a Reply. Not sure how many images I can jam into a single post. (It used to be 10, I believe.)
Stay tuned!
SJS
Last edited:


