Any duckboat's only as good as its trailer

Steve Sanford

Well-known member
Good morning, All~

The title of this thread came fom Jode Hillman at Tuckerton this year. I believe I had posted here about the merits of TrailerCoat - now RustLok - a Pettit brand paint originally made for galvanized trailers. I have been using it for over 30 years. I hauled the JAMES CAIRD down to Barnegat Bay for the 42nd Annual Old Time Barnegat Bay Decoy & Gunning Show. Shortly after arriving, Jode came over to say Hello and to ask about that trailer paint....
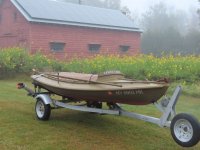
1 sm CAIRD - to Tuckerton - stbd bow quater.JPG

Like anyone who has trailed small craft around for any reason, Jode knew first-hand the importance of a sound and reliable trailer. And, if it looks ell-cared-for, too, that's not a bad thing.
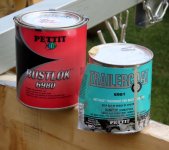
2 sm 10 Pettit TrailerCoat-Rustlok.JPG

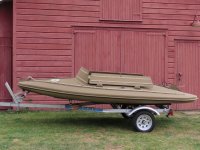
As usual, I have a few vessels in the yard that have been commanding my attention of late. The most recent one in the COMPLETED column is this South Bay Duckboat for a gunner on Oyster Bay - a nice little village on Long Island's North Shore - and once the home of Teddy Roosevelt.

I did not take a full suite of BEFORE photos, but here is how she began the journey through Pencil Brook Boatworks... Both boat are trailer were fundamentallty sound - but notice how the vessel sits nose-high on her transport.
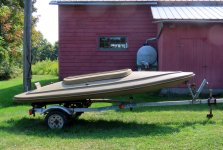
3 sm Trailer 1 - BEFORE full profile.JPG

The winch stand arrangement put the bow higher than it should be. I prefer that the hull sit level on the bunks. And there was serious rust in all the usual places - especially the appurtenances like the winch and jack stand. Note, too, those "one-size-fits-all" cleats on the jack stand - a longstanding "peeve" with me.
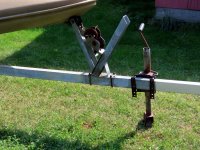
4 sm Trailer 2 BEFORE - posts, U-bolts, winch, jackstand.JPG

The two posts would work fine with a "normal" boat that had a high bow - but not for a low-slung "grassboat" like the South Bay.
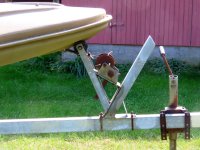
5 sm Trailer 2 - BEFORE winch, jackstand, post, U-bolts.JPG

The "demolition" commenced with the usual batch of products. I have become a fan of this rust-seeker-and-destroyer in recent years. Evey suspect fastener got a liberal dose - and sometimes repeatedly over the days.

6 sm PB Blaster.jpg

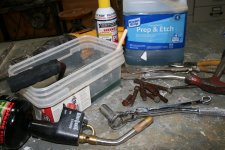
All the usual helpers played their roles. The Prep & Etch is phosphoric acid - same as Coca-Cola.....
7 sm Acid bath.jpg

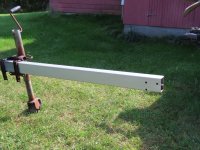
The first victim was the coupler - which was removed and enjoyed a full-immersion bath in the (diluted 50:50) acid - overnight. I went ahead and painted the tongue - with the TrailerCoat I still had on hand. My shop was not ready to take the boat itself, so I began work on the trailer in piecemeal (haphazard?) fashion. I did get the jack stand to work - thanks to the solvents - but ultimately decided to put a new one on instead.
8 sm Trailer 3 - Tongue paint with coupler removed.JPG

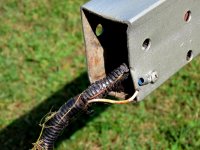
Amy rehab is all about attention to every detail....
9 sm Trailer 4  - ground connection.JPG

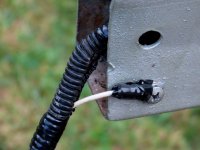
So, the ground wire got a new connection (and later the entire wiring harness got replaced).
10 sm Trailer 5 - new ground connection.JPG

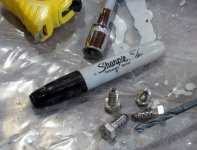
As a general rule, I upgrade trailer fasteners to stainless and always apply anti-seize to threads. Most nuts become s/s Nylocs.
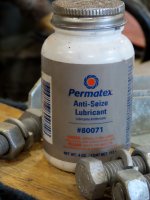
11 sm 6 Bunks - anti-seize.JPG

I bedded the restored coupler in caulk to prevent water/moisture hiding in the crevices. The couple was painted thoroughly with TrailerCoat before re-installation and lubrication.
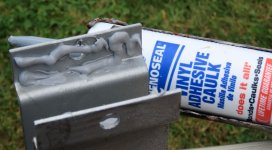
12 sm Trailer 6 - Support bedded in caulk.JPG

The "block" on the underside got the same treatment.
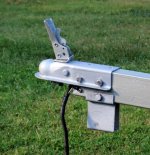
13 sm Coupler with trailercoat.JPG

The safety chains were acid-bathed the painted with just silver spay paint. The TrailerCoat is a bit too heavy for loose and moving parts like chain links.

14 sm 14 Ground and chains.JPG

So, the "bow" of the trailer is all done.

15 sm 13 Coupler and tongue restored.JPG

Stay tuned....

SJS
 
Trailer - Part 2

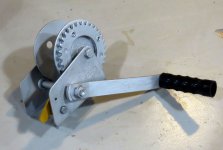
You'll have to take my word for it....the winch was quite rusty, the plastic grip on the handle was cracked,and the "cable" was worn beyond use. So, the winch got taken apart, bathed and TrailerCoated. Re-assembly took a bit because I did not take the "as was" photos I should have beforehand. The interwebs and trial-and-error got everything back in working order - oiled and greased as appropriate. Some friend (cannot recall who...) had given me an extra winch handle - so no more split-grip.

16 sm 11 Restored Winch.JPG

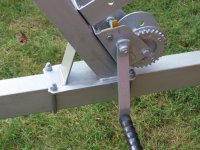
One of the biggest challenges in the entire project (trailer and boat) was bolting the winch down low where it needs to be. I had to buy a set of stubby wrenches to get to the nut inside the u-channel and its welded support.

17 sm 17 Winch on post.JPG

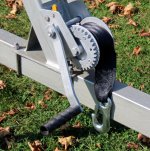
I rewarded the winch with a new strap and hook.

18 sm Winch with new strap and hook.JPG

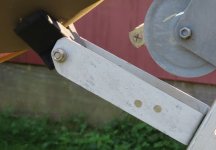
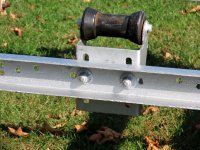
I got a new support for the bow chock - but mounted it ABOVE the winch - so the winch will be snugging the hull DOWN onto the chock.

20a sm Bow stop bracket with TrailerCoat.JPG

Here is the final configuration.

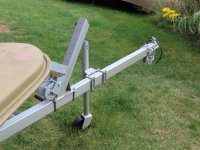
21 sm 12 Tongue with winch, post and jackstand.JPG

You may have noticed (above) the new jack stand AND the neatly-trimmed cleats that hold it on the tongue....

19 sm 15 Jackstand cleats with Trailercoat.JPG

Although new, I painted the jack stand with TrailerCoat. I wish someone made a jack stand with hot-dipped galvanizing. Stock bolts were upgraded to stainless.

20 sm 16 Jackstand with Trailercoat.JPG

The bunks got my attention next.

22 sm 10 Bunk Brackets OLD.JPG

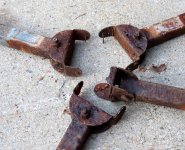
These supports were in the Accident-Waiting-to-Happen department....and went out with last week's recycling.

23 sm 9 Bunk Brackets OLD - closeup.JPG

The bunks themselves were OK.

24 sm 11 Bunks - underside.JPG

The carpeting was worn at a couple of the usual wear points.

24a sm Bunk Wear 1.JPG

So, I re-oriented each bunk so these spots were no longer in harm's way. (And later recommended to the owner that he replace the carpet - or even just cover the existing with new.)

24b sm Bunk Wear 2.JPG

I marked each for new orientation, then prepared to re-fasten the carpet and install new supports et cetera.

25 sm 1 Bunks - tools 2.JPG

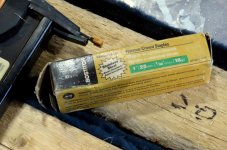
I had some s/s staples on hand from my house project (earlier this year). So glad to be able to use the pneumatic stapler!

26 sm 7 Bunks - ss staples.JPG

The new supports are heavy and hot-dipped! I used s/s lags to attach their brackets to the bunks....

27 sm 1 Bunks - brackets on cleats.JPG

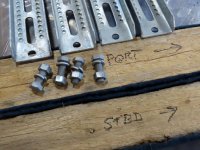
- but used galvanized hardware for brackets-to-bunks and bunks-to-trailer. All got anti-seize, of course.

28 sm 2 Bunks - parts and notes.JPG

I painted the rest of the trailer - now that the boat was resting elsewhere. (Note rusty light brackets, however.)

29a sm 6 Trailer Frame - new paint.JPG

I backed up the bolt heads with heavy washers and then mounted the bunks in their approximate locations.

29 sm 33 Trailer - new brackets mounted.JPG

I set the bunks level - but not yet sure where they would land on her hull - especially viz. the strakes on her bottom. Note that the lights and rusty brackets are off to the ICU.....

30 sm 31 Trailer - bunks mounted, frame coated.JPG

Two of the 3 keel rollers were fine. The forward one had a heavy bolt instead of a smooth shaft and barely rolled.

31 sm 7 Forward Keeler Roller Brackets - painted.JPG

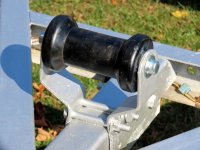
I used the original roller but got a new shaft (axle) and PAL caps. Lots of grease inside before assembly!

32 sm New forward keeler roller shaft and pal nuts.JPG

The stern and midships rollers were fine. I painted over the fasteners just to slow continued rusting.

33 sm Keel rollers not changed.JPG

I made sure to clean and coat the aft corners before re-installing the restored brackets and new lights. I had hoped to use the existing wiring, but no luck!

34 sm 30 Trailer - aft corner coated.JPG

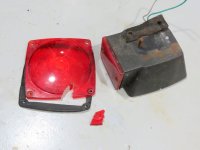
I had to saw off 3 or the 4 mounting studs (carriage bolts embedded in the plastic housing) - so new lights - LEDs this time - were the obvious decision.

36 sm Lights - boken lens and rusted studs.JPG

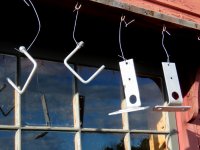
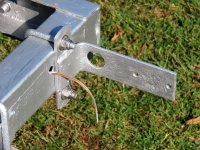
Brackets and U-bolts got acid-bath and TrailerCoat.

37 sm 34 Trailer - light brackets a U-bolts coated.JPG

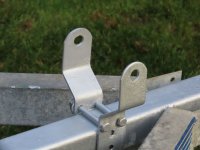
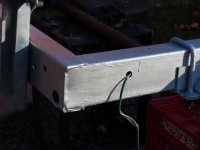
Still the original wire - which was the necessary "fish-tape" for reeving the new wires. I like the nice big hole in the brackets - for the belly strap later on.

39 sm Light Bracket - port.JPG

More to come....

SJS
 
Trailer - Part 2

You'll have to take my word for it....the winch was quite rusty, the plastic grip on the handle was cracked,and the "cable" was worn beyond use. So, the winch got taken apart, bathed and TrailerCoated. Re-assembly took a bit because I did not take the "as was" photos I should have beforehand. The interwebs and trial-and-error got everything back in working order - oiled and greased as appropriate. Some friend (cannot recall who...) had given me an extra winch handle - so no more split-grip.

View attachment 60853

One of the biggest challenges in the entire project (trailer and boat) was bolting the winch down low where it needs to be. I had to buy a set of stubby wrenches to get to the nut inside the u-channel and its welded support.

View attachment 60854

I rewarded the winch with a new strap and hook.

View attachment 60855

I got a new support for the bow chock - but mounted it ABOVE the winch - so the winch will be snugging the hull DOWN onto the chock.

View attachment 60856

Here is the final configuration.

View attachment 60857

You may have noticed (above) the new jack stand AND the neatly-trimmed cleats that hold it on the tongue....

View attachment 60858

Although new, I painted the jack stand with TrailerCoat. I wish someone made a jack stand with hot-dipped galvanizing. Stock bolts were upgraded to stainless.

View attachment 60859

The bunks got my attention next.

View attachment 60860

These supports were in the Accident-Waiting-to-Happen department....and went out with last week's recycling.

View attachment 60861

The bunks themselves were OK.

View attachment 60862

The carpeting was worn at a couple of the usual wear points.

View attachment 60863

So, I re-oriented each bunk so these spots were no longer in harm's way. (And later recommended to the owner that he replace the carpet - or even just cover the existing with new.)

View attachment 60864

I marked each for new orientation, then prepared to re-fasten the carpet and install new supports et cetera.

View attachment 60865

I had some s/s staples on hand from my house project (earlier this year). So glad to be able to use the pneumatic stapler!

View attachment 60866

The new supports are heavy and hot-dipped! I used s/s lags to attach their brackets to the bunks....

View attachment 60867

- but used galvanized hardware for brackets-to-bunks and bunks-to-trailer. All got anti-seize, of course.

View attachment 60868

I painted the rest of the trailer - now that the boat was resting elsewhere. (Note rusty light brackets, however.)

View attachment 60869

I backed up the bolt heads with heavy washers and then mounted the bunks in their approximate locations.

View attachment 60870

I set the bunks level - but not yet sure where they would land on her hull - especially viz. the strakes on her bottom. Note that the lights and rusty brackets are off to the ICU.....

View attachment 60871

Two of the 3 keel rollers were fine. The forward one had a heavy bolt instead of a smooth shaft and barely rolled.

View attachment 60872

I used the original roller but got a new shaft (axle) and PAL caps. Lots of grease inside before assembly!

View attachment 60873

The stern and midships rollers were fine. I painted over the fasteners just to slow continued rusting.

View attachment 60874

I made sure to clean and coat the aft corners before re-installing the restored brackets and new lights. I had hoped to use the existing wiring, but no luck!

View attachment 60875

I had to saw off 3 or the 4 mounting studs (carriage bolts embedded in the plastic housing) - so new lights - LEDs this time - were the obvious decision.

View attachment 60876

Brackets and U-bolts got acid-bath and TrailerCoat.

View attachment 60877

Still the original wire - which was the necessary "fish-tape" for reeving the new wires. I like the nice big hole in the brackets - for the belly strap later on.

View attachment 60878

More to come....

SJS
great job
 
Now onto the wheels....

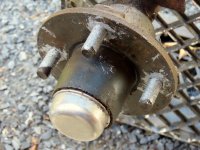
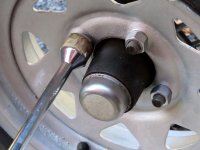
This photo shows my wheels just before rehab a couple of years ago. Of course, I always want: good rubber, enough air, well-lubricated bearings, and lug nuts I can remove on the side of the road if necessary. (I never trail without spare, jacks, wrenches, et cetera.) Note how I have taped the size (13/16?) I use the most.

40 sm  Lubing hubs and lugs plus air.JPG

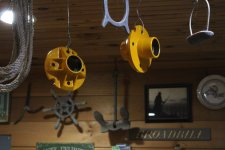
On my own trailer, I replaced the bearings, treated the hubs to some splashy Caterpillar Yellow, and re-installed Bearing Buddies.

41 sm Hubs needing bearings.JPG

The owner of this rig had re-packed the bearings before hauling it north to me - so I did not go "inside". I did, however, clean and paint the wheels inside and out.

42 sm 8 Wheels - RustLok.JPG

Each lug nut got the bath and paint treatment. Like the safety chains, though, the nuts got just silver spray paint.

43 sm 36 Trailer - lug nuts silver-painted.JPG

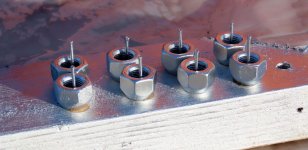
I put anti-seize on the lug nuts - to ensure roadside change-ability. I double-checked with my own mechanic, though, because I have had some (dealerships) refuse on the basis of policy. My mechanic puts it on all vehicles.

44 sm Anti-seize on lugs.JPG

Final torque is applied once the trailer is back on the ground.

45 sm Lug nuts torqued on ground.JPG

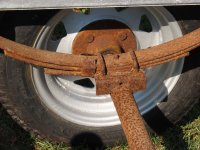
I also recommended to the owner that he replace the springs. The axle is fine - but springs are relatively inexpensive and should be (!) straightforward to unbolt.

46 sm Spring Rust A.JPG

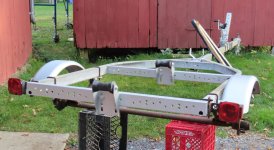
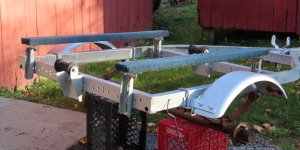
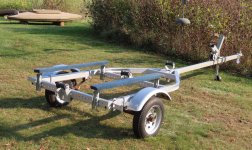
Here's the trailer all refurbished - just waiting for her new lights and wiring.

47 sm Trailer - portrait.JPG

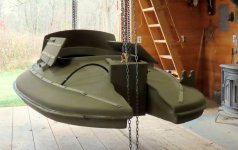
The chain hoists in the shop make fitting the trailer to the boat a pleasure.

48 sm Tolmie - DONE in air from stern quarter.JPG

Everything is now snug and roadworthy.

49 sm Emergence.JPG

Note how the vessel sits level on her trailer - as a proper boat should.

50 sm 50 South Bay on trailer - better trim.JPG

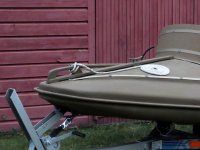
I added a large shackle to the eye-strap beneath her bow - to make it easier to insert the winch hook. I prefer a rigid s/s U-bolt for this purpose but did not have access to the bow compartment on this South Bay. (Note: The flemished bow painter on the foredeck got secured aft through 2 cleats before hitting the road.)

51 sm Tolmie 30 - Bow Section only.JPG

As the traffic control drones will see her on the journey home....

52 sm Aerial.JPG

All the best,

SJS
 
Nice redo on the trailer. Its a cryin shame that anyone would be hauling a boat on trailer as it came to you. Its a wonder that he hadn,t damaged hull with that set up.
 
Good stuff Steve.
Reminds me that my trailer is in need of serious attention.
 
Oh boy that axle and springs. That pictures really shows how saltwater does a number on unprotected steel. There are a ton of great tips in your write-up. Thanks for showing them.

One thing I'll add to your great photo-essay I've learned from setting up countless trailers is to get the bow line to finish level. By that I mean the winch is pulling the boat, specifically the eye, on a horizontal path into the winch. Sometimes that last foot of winching gets really tough because you aren't moving the boat along the bunks, rather you are pulling the nose down into them as the angle gets too steep in the final approach. A little bit of downward pull is fine, but I have seen boats nearly cracking the hull trying to get it to snug up against the bow stop because too much work was pulling down and not forward.
 
Last edited:
Oh boy that axle and springs. That pictures really shows how saltwater does a number on unprotected steel. There are a ton of great tips in your write-up. Thanks for showing them.

One thing I'll add to your great photo-essay I've learned from setting up countless trailers is to get the bow line to finish level. By that I mean the winch is pulling the boat, specifically the eye, on a horizontal path into the winch. Sometimes that last foot of winching gets really tough because you aren't moving the boat along the bunks, rather you are pulling the nose down into them as the angle gets too steep in the final approach. A little bit of downward pull is fine, but I have seen boats nearly cracking the hull trying to get it to snug up against the bow stop because too much work was pulling down and not forward.
Eric~

Indeed - your point about NOT winching down on the bow is an important one. On this rig, the pull is as I want it - a straight line from the water right until she's snugged (is "snubbed" the proper nautical jargon?) up against the bow chock.

regarding the springs and axle: I am old enough to remember trailers-before-galvanizing. That was truly a Great Leap Forward - but - as we know all too well - rust never sleeps!

I left it to the owner to install the safety chain - which I supplied. I think he'll attach it to one of the U-bolts that holds the winch stand - but every trailered boat should have one.

All the best,

SJS
 
Nice redo on the trailer. Its a cryin shame that anyone would be hauling a boat on trailer as it came to you. Its a wonder that he hadn,t damaged hull with that set up.
Roy~

The owner has a very short journey to his launch site - but I, too, could envision the bunk(s) slipping sideways and those jagged supports piercing the hull. (Of course, he did haul the rig 200+ miles here with those old supports.....)

All the best,

SJS
 
Steve

What hardware are you using to attach the thatch straps? The straps look spiffy. Again, a wonderful write-up on the trailer work and the boat is first rate too as we've grown accustom to all that comes out the doors of your shop.
 
Steve

What hardware are you using to attach the thatch straps? The straps look spiffy. Again, a wonderful write-up on the trailer work and the boat is first rate too as we've grown accustom to all that comes out the doors of your shop.
Good morning, Eric~

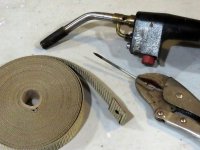
I use s/s fender washers - sanded, etched and painted - with either panhead self-tappers or panhead machine screws. I put them every 10 or 12 inches. I burn the holes with a 16 penny finishing nail (held in a Vise-Grip) heated with my BernzOmatic.

sm Jankowski - Webbing and ViseGrips and 16d nail and Bernzomatic.JPG

I double the webbing (1-inch heavyweight polypropylene - I like Khaki from Strapworks) at each end before burning the hole.

https://www.strapworks.com/1-inch-heavyweight-polypropylene-khaki

sm Jankowski - Webbing, fender washers and panhead screws.JPG

I will create a separate post later today (I hope!) on webbing vs. wooden thatch rails et cetera.

All the best,

SJS
 
Well, that clearly answers the question. Thanks. A hunting partner of mine has a boat with nylon web thatch rails and I was suspect at first that they would not hold camo as firmly as the wood ones do. He stuffed them tight, and I don't think lost any camo after quite a bit of trailering. My skepticism eroded as a result.
 
Well, that clearly answers the question. Thanks. A hunting partner of mine has a boat with nylon web thatch rails and I was suspect at first that they would not hold camo as firmly as the wood ones do. He stuffed them tight, and I don't think lost any camo after quite a bit of trailering. My skepticism eroded as a result.
Eric~

The other benefit is less grass. One needs a "fid" ( screw driver are hardwood stick) to hold the webbing away from the deck whilst thatching, but it stays in place. I have been told that Marsh Hawk duckboats use webbing. One owner is on his 17th season with the original webbing.

SJS
 
Good morning, Eric~

I use s/s fender washers - sanded, etched and painted - with either panhead self-tappers or panhead machine screws. I put them every 10 or 12 inches. I burn the holes with a 16 penny finishing nail (held in a Vise-Grip) heated with my BernzOmatic.

View attachment 61088

I double the webbing (1-inch heavyweight polypropylene - I like Khaki from Strapworks) at each end before burning the hole.

https://www.strapworks.com/1-inch-heavyweight-polypropylene-khaki

View attachment 61087

I will create a separate post later today (I hope!) on webbing vs. wooden thatch rails et cetera.

All the best,

SJS
I,ve used for several years a wooden handled scratch awl as my heated hole punch for nylon webbing/Cordura nylon. Actually the same thing i,ll use to open a small tube of 5200! Works great and the tapered scratch end terminating in a 1/4" shaft allows for variation in hole size. Also works perfect for installing stainless snaps in webbing or Cordura.
 
Back
Top