Steve Sanford
Well-known member
As many of you have no doubt learned, the life of a Duckboat Detective can be unpredictable....

Sometimes the “evidence” comes to you out of the blue. In classic noir detective stories, the clue would arrive “over the transom”….
Just last night I got an e-mail from an old friend/colleague. His Dad had an “Old Long Island Duckboat” in his barn – out in the Finger Lakes area of central New York State. Tom had some photos of the vessel – and his Dad remembered that he had gotten it from a park manager 30 or 40 years ago. My antennae went straight up!
Once I saw the photos and Tom’s Dad verified that the park was Sampson State Park, I knew my “suspicions” were right on the money. I bought the boat in the Summer of 1972 – whilst I was in college but working at a local golf course “off -season”. I never did anything with this charming craft – so my Dad hauled it “upstate” sometime between 1975 and 1987.
Origins
I was working as a laborer at what is now a Suffolk County Golf Course – right on Great South Bay at the mouth of the Connetquot River. As it happens, the land had just become public. During my earlier gunning years, my Dad and I hunted it when it was a private country club. (No – my family were not members. My Dad was a policeman. He befriended the owner and had secured the gunning rights there throughout the 1960s.) The golf course had lots of waterfront on the Bay and River – and quite a bit of saltmarsh within its bounds. We shot Broadbill on the Bay and Black Ducks in the marsh.
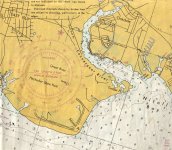
In the Summer of 1972 I began working at Timber Point. There was always a large seasonal crew. One such crew member learned that I was a duck hunter and offered me this boat. I think his name was Nick – and maybe the boat came from Mt. Sinai – up on the North shore. I’m pretty sure I paid him $40. He and a friend delivered it to my home. I do not know who built it – or where or when. Nevertheless, I envisioned filling seams and sheathing with ‘glass and putting it to work on Great South Bay. But, my studies and limited budgets – of both time and money – kept the craft idle throughout my college years. I graduated from Cornell in 1975. Coincidentally, just months after I graduated, my Dad took a Park Manager job in the Finger Lakes – Sampson State Park on Seneca Lake. Cornell is on Cayuga Lake – just East of Seneca.
The Vessel
This duckboat was /is very well-built, but defies a simple label. It does not adhere to one classic type.
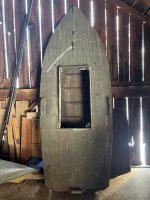
Her bottom.....
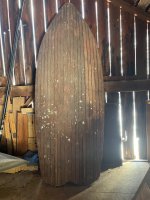
It has many of the features of a Barnegat Bay Sneakbox: spoon bow, decked over with a small, rectangular cockpit, a transom stern – and remnants of a “breakwater” on the foredeck.
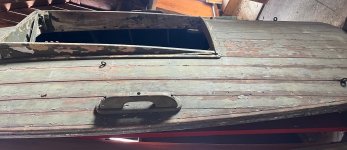
The deck joins the bottom in almost a “feather edge” – but a gunwale and rubrail show perhaps 2 inches of vertical “sides”. There is no sweep to the sheerline.
I think both my Dad and I used the term “pumpkinseed” to describe her shape – as seen from above. Although she has a motor board on her transom, her exceptionally low profile and generous beam suggest she was meant for the open bay. However, her olive paint says “saltmarsh” – whereas a Battleship Grey or even White would clearly say “open bay”.
Below is Schuyler Watts’ Dodge & Krowl Scooter rigged in Great South Bay for Broadbill (what gunners elsewhere call Bluebill and the lay public call Greater Scaup.)
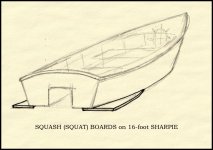
The squash boards extending beyond the transom are unique in my experience – at least on gunning vessels. Most Sneakboxes have a central skeg aft – and many Scooters have a pair of ice runners – but I have never seen a duckboat with two skegs.
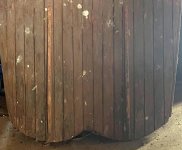
Motor board and squashboards from above.
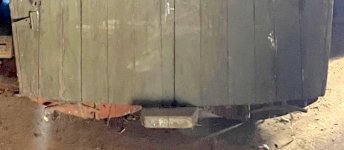
However, an owner of the venerable South Bay Duckboats explained to me that the 2 “tails” on their boat were intended to keep the nose down when power was applied – thus functioning as do squashboards.
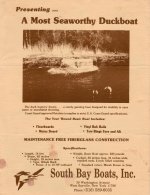
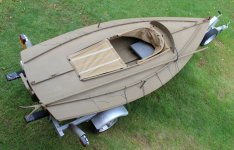
Here’s a South Bay Duckboat from above.
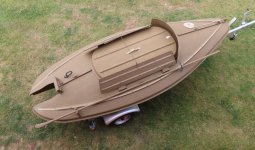
The oarlock stanchions do not fold down. So – not traditional Barnegat – more likely Great South Bay. The cockpit coaming is also unique in my experience – taller up forward and tapering to almost flush aft. I cannot figure out the functions of the various pieces of deck hardware – but there are no thatch rails. Traditional Sneakboxes had no thatch rails – but virtually every Long Island grassboat does.
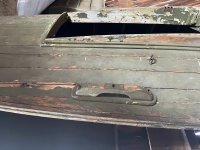
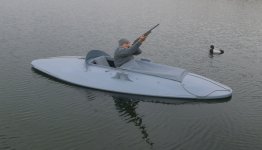
Here is a Dodge & Krowl Scooter – showing almost flat sheer and very narrow “sides” – gunwale with rubrail.
She is a bit longer - 12’3” LOA - and significantly beamier – 4’8”- than the traditional 12x4 Sneakbox. She is about the same size as my JAMES CAIRD.
The Work Ahead
When I first saw this vessel – about 43 years ago – I was struck by the narrow planking. My old brain recalled it being strip-built – but it is clearly not. The planks look about 2 inches wide. I cannot tell from either these photos or my memory how (if?) the planking had been caulked. In any event, this boat should probably be ‘glassed if she’ll be hunted. So, first scraping and sanding. If the scraping were difficult, I would probably burn it off – with my Bernz-O-matuic, a stiff putty knife and a damp rag at hand. I would then wipe it down with acetone or lacquer thinner and then use my orbital sander with 80-grit discs. BTW: I’m fairly certain that hole is the “sea” side of the garboard plug – a nice feature!
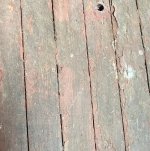
I would clean out the seams as best I could – with any tool that works – then fill them just a bit proud with 3M 5200. This is not a job for traditional seam compound. I want the seams to harden up – though still like rubber – and be sandable. After a week of curing, I would sand everything flush – and then sheathe the entire outside of the vessel with fiberglass set in epoxy resin. In fact, I would roll on a sealing coat of epoxy resin and let it almost cure – to the light tacky stage – before laying on the “cloth” (specific product to be determined) with its own saturating coats of resin.
Of course, I would have first removed all deck fittings, the cockpit coamings and the motor board. I am not sure what I would do about the skegs. They require close inspection before landing on a solution. I would give special attention to wrapping the squashboards carefully and thoroughly.
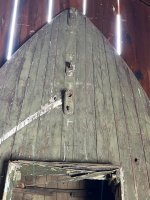
A glimpse into the cockpit shows what look like sound frames and planking – and the garboard plug. A set of floorboards (duckboards) needs making – along with a comfortable back rest. The delaminated forward coaming, though, reminds me of my biggest concern. My recollection from 1972 is that at least some of the deck framing had been laminated – and that they had delaminated, i.e., the glue had failed.
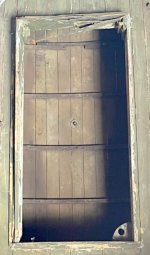
The conventional way of replacing frames – whether deck or hull – involves removing at least some of the planking for access. I would try to avoid this measure (although I will be removing the entire deck from a vintage Barnegat Bay Sneakbox later this year.) Instead, I would determine which ones need replacing – or at least sistering. I would laminate new deck frames with 1/8-inch Mahogany and thickened epoxy. I might even do it right on the boat – laying down plastic to prevent adhesion and using a ratchet strap and wedges to provide clamping pressure during the cure. This saves having to make bending jigs for each frame. Although – all frames might very well share the same radius – so a single jig could suffice. Determining the best process to use is what my Dad would call “doping it out”. And, he always said it was “the fun part of the job”. In any event, it reminds us why Howard Chappelle advised every boat shop to a have a “worrying chair’ for such deliberations.
The new owner will decide whether this vessel is destined for open waters or marsh. Power? Row? Tow? Then, decisions about a cowl, spray dodger, thatch rails, deck fittings, et cetera will follow. I wish them luck and many fine times afloat.
All the best,
SJS

