January "What's on your Workbench?"

the hardest part of the process for me right now is pattern development. It also the most rewarding for me and something I can work on inside the house and not get in trouble.

P1030160.jpg


hurry this one up tom.. i want to see it in 3d!
 
You don't want to see my work bench besides, it is buried under too much just plan junk right now.

I do have a decoy on the kitchen table tho. I painted this one this summer and didn't get it keeled until just before the hunting. I rushed the keeling job and did not do a test float. Naturally it didn't float right, so some rework was on the menu.

First it went to the bandsaw to slice off a slab along the base so I could hollow it out.

IMGP0584.jpg


The glue is drying right now.

IMGP0586.jpg


Next step will be a little sanding then a reseal and repaint job.
 
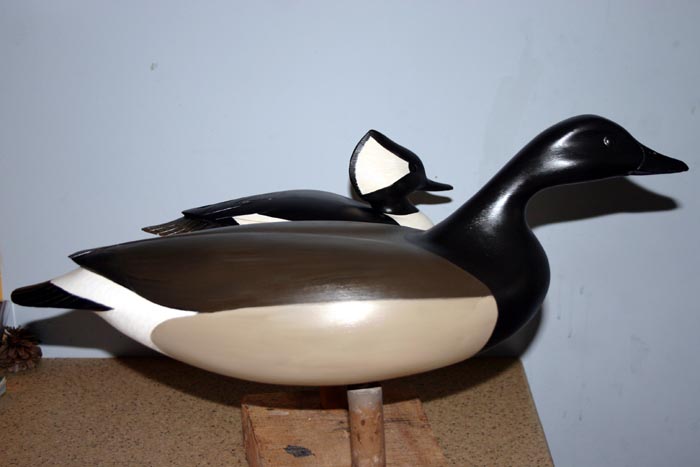
Andy, is that goose for a gunning decoy or for your collection ? And what pattern is it off.

Mike

That goose is for hunting. I have a couple more in the works. It will take me a little while to build up a spread of a couple dozen of those. The pattern is from Frank Werner, my carving mentor. I think the pattern was available in a back issue of Wildfowl Carving magazine.
 
I thought it could have been, that will make a nice spread, I think I will start to do up 6-10 myself to add to my production plastics.

I have been looking around for a pattern but will probably trace one from some of the ones I have.

Nice work, and nice to see the use of the draw knife, I use mine on every bird allthough I have a foredom for the mid to finish workings.

Take care
 
It is a big double cut file. It works great for smoothing things out quickly. I don't use a rasp. The rasp teeth marks can be hard to chase out. A goose is a bit large for a foredom. That much dust could choke a horse. All hand tools for carving that bird. Although I did use some power sanding for finishing up and a very large Kutzall bit for hollowing.
 
eiders
made these three last week and painted them with ronans to dry quick, just some test birds off of the new lathe, very pleased with the way they rode the big waves. simple design and simple paint, they worked well


Uploaded with ImageShack.us
 
Last edited:
Tom:
I see you mentioned using a lathe , I posted asking if anyone still used lathes for their decoys. Would you mind sharing how you have your lathe set up, any pictures ?

Mike
 
Looks like great work from everyone.

Here's what on my bench (well actually the Kitchen counter!, to cold to paint outside today)


Here's a couple I just finished up. (One old +one new!)


First off, thanks to all of the carvers on here for posting! You guys have some serious skills and are great motivators!

I finally got around to trying out carving for the fist time ever! My references were Don Mintz's Foamer Method DVD and Mark Costilow's Diver book. I am using a homemade hot-wire bandsaw and a Milescraft flexshaft with rasp burrs powered by a RotoZip.

Universal Diver Body Pattern and Canvasback Head Pattern from Mark's Book.
101_2239.jpg

101_2238.jpg

101_2237.jpg

101_2240.jpg

 
Tonight I laid down the first coat of acrylpro and burlap.
A second coat will go on tomorrow, then a few days to cure and then apoxie sculpt for the bill, tail, and wingtips and finally, paint and keel!
101_2244.jpg

101_2245.jpg

101_2243.jpg

 
Thanks Dennis and Andy.

Dennis, I haven't given up on molding at all. I just wanted to try my hand at carving and I had some foam laying around so why not? I would like to make a few of each diver species by hand and then mold a whole bunch too! Who know, maybe I'll be carving wood someday and then casting my own molds for foamers like Tom Rowe! He's the man!
 
I've been working on a hoodie (looks like a popular breed this month.

I did a little fancy joinery on the neck. It is sort of placed in a slot with an undercut at the back of the neck. It really locks in the head and it gives a little tab where the base of the neck meets the body. I just hate having a little flat spot there. This makes a great alternative to putting filler around the neck.
View attachment hoodie.JPG
Not a great picture - I think I needed a flash. I hope I'm getting a little better at posting too.
Here is an update with paint on.
View attachment HoodiePost.JPG
 
Last edited:
Back
Top