
You are using an out of date browser. It may not display this or other websites correctly.
You should upgrade or use an alternative browser.
You should upgrade or use an alternative browser.
Restoration Thread and Interesting Finds on the Late 1800s Scull
- Thread starter Brad Taylor (NC)
- Start date
Phil Eager
Well-known member
Your shop is way to neat. How do you find anything? Nice garage. well thought out. Boat looks good too.
Phil
Phil
Brad Taylor (NC)
Well-known member
Brad~
Congratulations on your new shop! Lots of great ideas - I really like your under-bench plywood storage.
Just a thought on your Cedar floorboards. I have built some using Cypress (in sailboats) which I have simply finished with deck stain (I use a Flood product). It maintains just enough grip so they are not slippery and very easy to re-coat each year.
All the best!
SJS
Thanks Steve. That's a good idea, I'm kind of 50/50 on staining or painting.
Brad
Brad Taylor (NC)
Well-known member
Very nice shop, neat, Good job on the boat, Can't wait to see pics of it in the water.
Thanks Jim. Can't wait to get her on the water, but no rush, so makes it easy to take my time. Would definitely like to see some pictures of the boats you've restored.
Brad
Brad Taylor (NC)
Well-known member
Your shop is way to neat. How do you find anything? Nice garage. well thought out. Boat looks good too.
Phil
Thanks Phil. It's going to be nice to not be working off of shelves/piles and tons of dust! Everything now has a place and is put back in its place. I'm really an organized person on the inside, but when work is hectic I tend to get cluttered. Going to try my best not too this time around!
Brad

JIM MARSH
Member
View attachment color 20.jpg
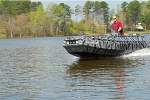
Here is a boat that was bought new in 1880, Made by Nate Quillin 1831-1908 of Rockwood, Michigan. Nate was Michigan's most famous early decoy carver and duck boat maker. I restored it several years ago, pic was taken on the Pte Mouillee Marsh. The pic is from our new book Pte. Mouillee Shooting Club, History & Decoys
Here is a boat that was bought new in 1880, Made by Nate Quillin 1831-1908 of Rockwood, Michigan. Nate was Michigan's most famous early decoy carver and duck boat maker. I restored it several years ago, pic was taken on the Pte Mouillee Marsh. The pic is from our new book Pte. Mouillee Shooting Club, History & Decoys
Last edited:
Brad Taylor (NC)
Well-known member
Very nice float Jim. You should definitely start a thread, would love to see the rest of the collection.
So I'm pretty much in the short rows now. The rub rails are on the sides and rear. I'm going to go in this evening and remove the screws do a light sand to smooth up the counter bores and coat the rails with epoxy.
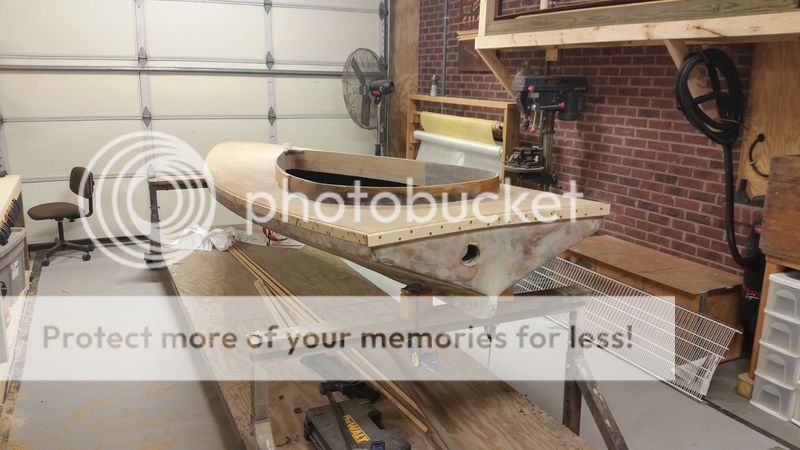
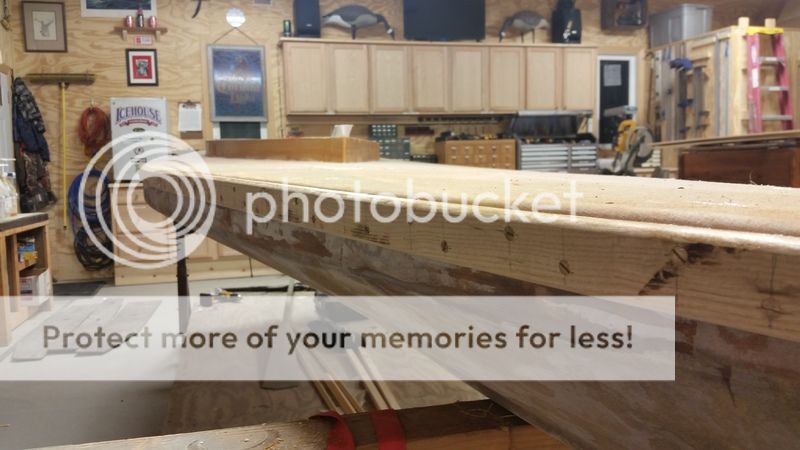
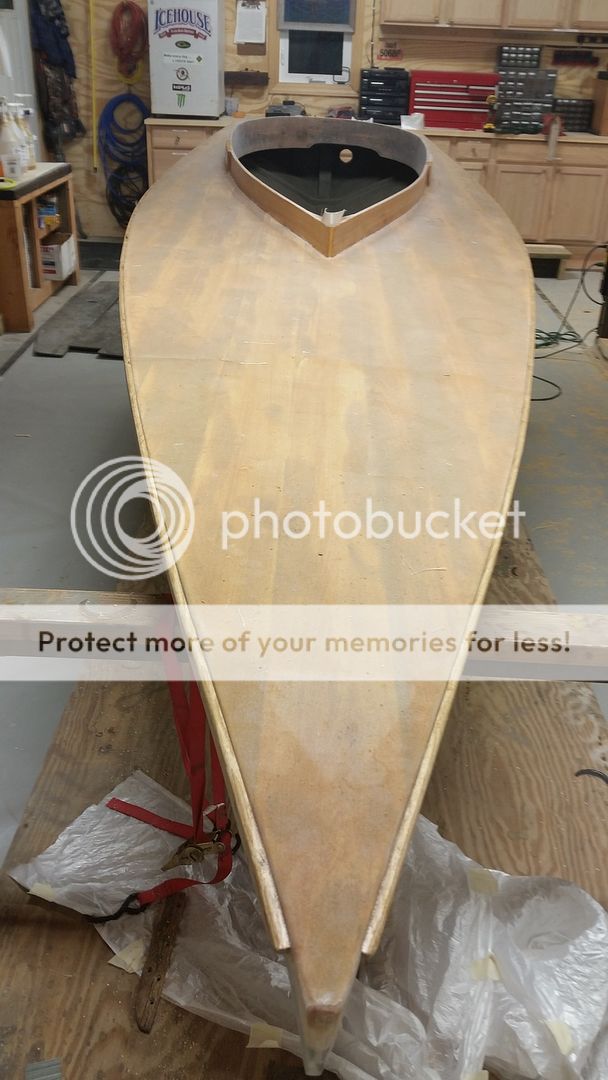
The interior of the coaming has its final coat of epoxy and has been sanded. I need to install the catches for the seat which will be a copy of the original but has yet to be made.
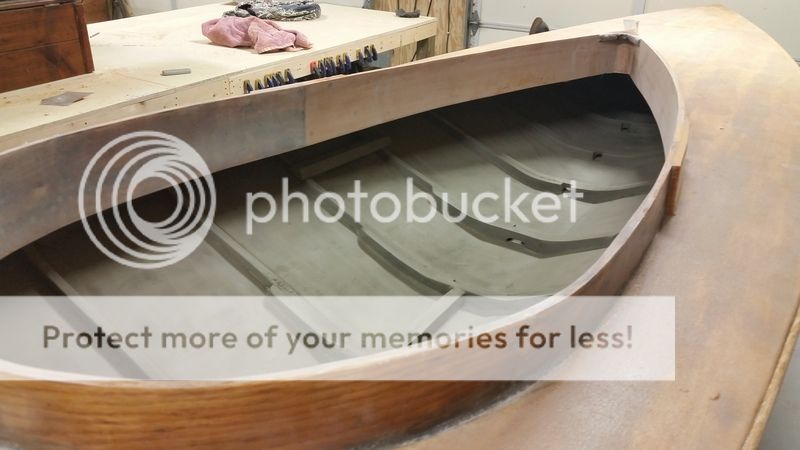
The exterior of the coaming has been glassed and has a second coat of epoxy. I will finish up what I hope to be the last coat this evening.

I'm going to use a piece of ash 1/4 round that will be steam bent to go around the cockpit. Best I can tell from pictures there was something like this that was used to fasten the canvas down to the deck.
I still need to attach the oar lock blocks, and drill the holes for all hardware before painting as well as make the removable transom motor mount. I'm going to get one of the little Suzuki 2.5 hp 4 stroke motors and paint it to match. Weight on the motor comes in at a pretty amazing 29 lbs. I'm ordering a Jim Whitney oar from Shaw & Tenney, which is the original oar style that was used with this boat.
Speaking of the oar, I wasn't happy with the plastic collar & neoprene boot. So after giving it a little thought. I used canvas to make a boot that is sized on one end to slide over the brass fitting for the oar hole. The hole through the transom is slightly oversized and will work perfectly once the canvas boot is glued to the fitting. I used waxed canvas dressing to coat the canvas, hit it with the heat gun so that it was saturated, let it dry and will hit again with the dressing. Should be plenty waterproof and look more authentic as well as easy enough to replace should the need ever arise..
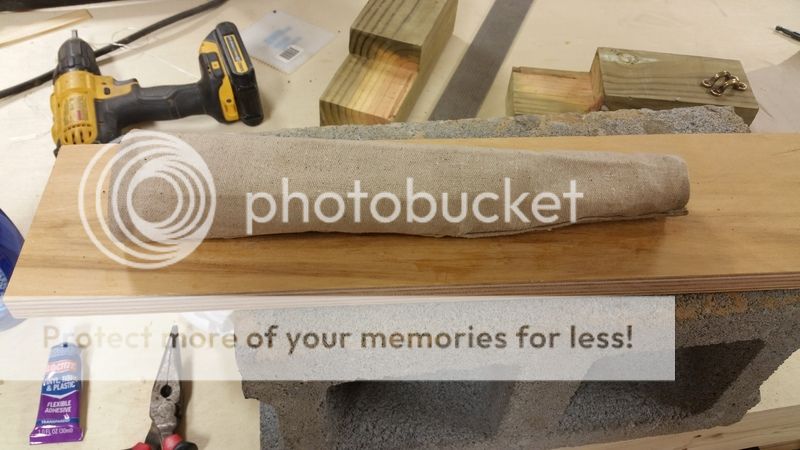
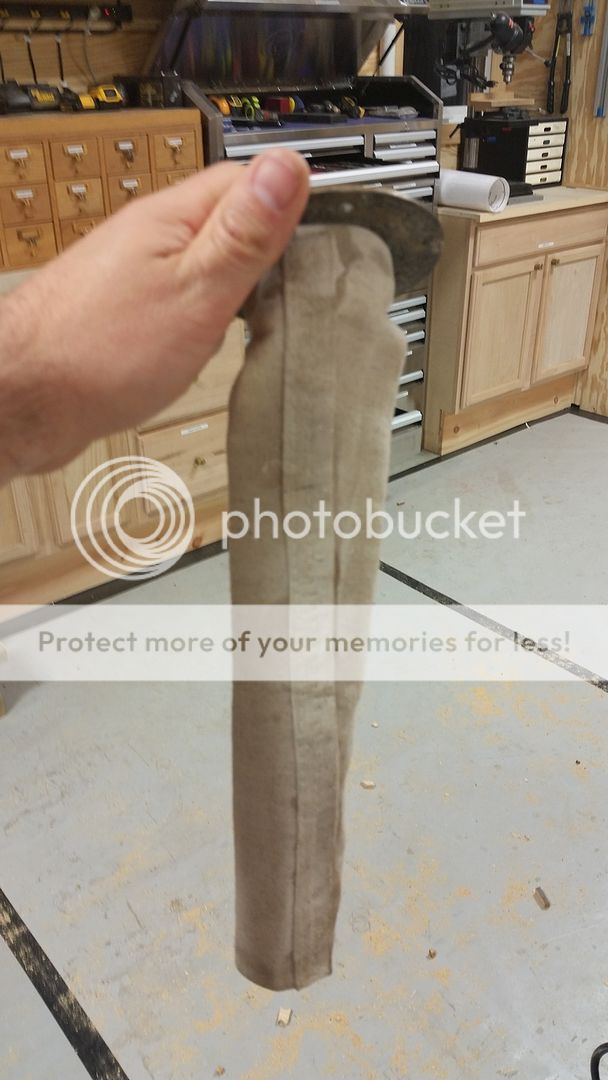
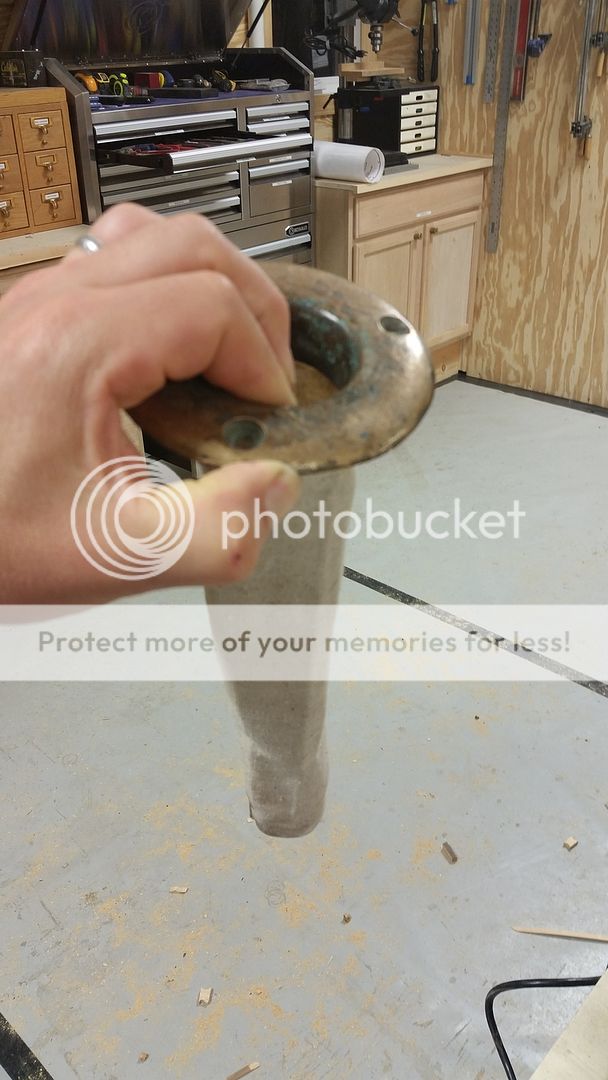
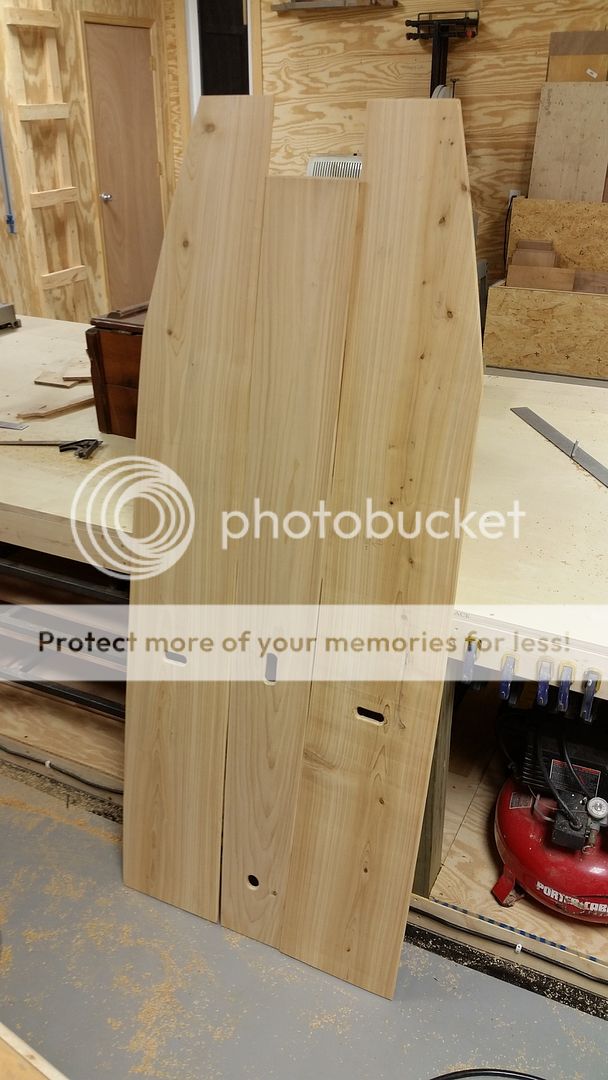
I also finished up the floor boards. I need to coat them with epoxy and paint but otherwise they are done.
So all in all, the end is quite near. Can't wait for the maiden voyage and ensuing cursing of learning to scull!
Brad
So I'm pretty much in the short rows now. The rub rails are on the sides and rear. I'm going to go in this evening and remove the screws do a light sand to smooth up the counter bores and coat the rails with epoxy.
The interior of the coaming has its final coat of epoxy and has been sanded. I need to install the catches for the seat which will be a copy of the original but has yet to be made.
The exterior of the coaming has been glassed and has a second coat of epoxy. I will finish up what I hope to be the last coat this evening.
I'm going to use a piece of ash 1/4 round that will be steam bent to go around the cockpit. Best I can tell from pictures there was something like this that was used to fasten the canvas down to the deck.
I still need to attach the oar lock blocks, and drill the holes for all hardware before painting as well as make the removable transom motor mount. I'm going to get one of the little Suzuki 2.5 hp 4 stroke motors and paint it to match. Weight on the motor comes in at a pretty amazing 29 lbs. I'm ordering a Jim Whitney oar from Shaw & Tenney, which is the original oar style that was used with this boat.
Speaking of the oar, I wasn't happy with the plastic collar & neoprene boot. So after giving it a little thought. I used canvas to make a boot that is sized on one end to slide over the brass fitting for the oar hole. The hole through the transom is slightly oversized and will work perfectly once the canvas boot is glued to the fitting. I used waxed canvas dressing to coat the canvas, hit it with the heat gun so that it was saturated, let it dry and will hit again with the dressing. Should be plenty waterproof and look more authentic as well as easy enough to replace should the need ever arise..
I also finished up the floor boards. I need to coat them with epoxy and paint but otherwise they are done.
So all in all, the end is quite near. Can't wait for the maiden voyage and ensuing cursing of learning to scull!
Brad
JIM MARSH
Member
Brad, Your boat is sure looking good, You are doing a fine job. THANKS for posting your pics.
maybe I will start a thread?, I have posted very little on the net. I have lots of pics of restoring boats. I have restored 10 so far, But I said I retired TWO BOATS AGO. I have a pretty good shop but nothing like your shop, WOW An old retired boat restorer ??? Maybe one more ???LOL Regards, Jim
maybe I will start a thread?, I have posted very little on the net. I have lots of pics of restoring boats. I have restored 10 so far, But I said I retired TWO BOATS AGO. I have a pretty good shop but nothing like your shop, WOW An old retired boat restorer ??? Maybe one more ???LOL Regards, Jim

Really enjoying this thread Brad Thanks for posting the restoration.
Jim, I am really enjoying your book. You and Barbara did a outstanding job.
30yrs of collecting all that material and preserving the history of the
Pte. Mouillee shooting club. You are my hero.
Tom
Jim, I am really enjoying your book. You and Barbara did a outstanding job.
30yrs of collecting all that material and preserving the history of the
Pte. Mouillee shooting club. You are my hero.
Tom
JIM MARSH
Member
Tom I am not a hero but we are very pleased that you are enjoying the book, Yes lots of work over 30 years of research, we enjoyed doing the research it was fun, We never knew where it would lead us to next. I am amazed at the club and the members. The Pte. Mouillee Shooting Club was a fascinating old duck club. Pheasant Run was a great trip again this year. Neat place lots of great people from all over the country.
Regards, Jim
Regards, Jim
Brad Taylor (NC)
Well-known member
Here's the latest.
To simulate canvas being tacked down around the cockpit opening I used a piece of ash formed to a quarter round. The front was easy enough. The screw holes were filled with thickened epoxy and I will tack some copper nails through the quarter round to finish off the faux finish once the float is painted.

The back piece needed to be bent so I rigged up a quick and easy steamer box out of 10' section of 3" PVC with a cap on one end and a clean out plug on the other and 3" deck screws inserted into the side to elevate the work piece. Was my first attempt at steaming wood to bend it and it worked like a charm. Note to self, I ended up having to support the PVC in the middle as it began to sag during the steaming process.

After about an hour of steaming, it bent like a soft piece of plastic!

After a little over 24 hours of being clamped in place I pulled the curved section, completed the round over and installed the rest of the quarter round around the cockpit.

I ripped down a section of the quarter round and piece milled it in over the coaming butt joint backer so that the quarter round sticks out an equal distance around the entire cockpit.

Finally I coated the floor boards with epoxy the other day. They still need to be sanded but put them in place and laid some weights on the center board so that it will begin to take on the natural curve of the floor. You can also see the original chocks for the seat bases have been installed.

Next up will be the oar locks and probably fitting of some hardware. Probably going to weight until my motor gets here to make the removable transom mount.
Brad
To simulate canvas being tacked down around the cockpit opening I used a piece of ash formed to a quarter round. The front was easy enough. The screw holes were filled with thickened epoxy and I will tack some copper nails through the quarter round to finish off the faux finish once the float is painted.
The back piece needed to be bent so I rigged up a quick and easy steamer box out of 10' section of 3" PVC with a cap on one end and a clean out plug on the other and 3" deck screws inserted into the side to elevate the work piece. Was my first attempt at steaming wood to bend it and it worked like a charm. Note to self, I ended up having to support the PVC in the middle as it began to sag during the steaming process.
After about an hour of steaming, it bent like a soft piece of plastic!
After a little over 24 hours of being clamped in place I pulled the curved section, completed the round over and installed the rest of the quarter round around the cockpit.
I ripped down a section of the quarter round and piece milled it in over the coaming butt joint backer so that the quarter round sticks out an equal distance around the entire cockpit.
Finally I coated the floor boards with epoxy the other day. They still need to be sanded but put them in place and laid some weights on the center board so that it will begin to take on the natural curve of the floor. You can also see the original chocks for the seat bases have been installed.
Next up will be the oar locks and probably fitting of some hardware. Probably going to weight until my motor gets here to make the removable transom mount.
Brad

Steve Sanford
Well-known member
Good morning, Brad~
Congratulations on that steam bend! Interesting about the PVC sag....
The details are always my favorite part.
SJS
Congratulations on that steam bend! Interesting about the PVC sag....
The details are always my favorite part.
SJS
JIM MARSH
Member
Your boat is coming very nice, almost done, I have steamed many pieces of wood, mostly white oak for ribs or trim. I had PVC sag also and learned to support the center. Looks like you are ready for paint maybe? Great old boat, I am very glad you got the boat and not some shoemaker to restore it beyond repair. Many screw up more than they restore. GOOD JOB LOOKS GREAT

Brad Taylor (NC)
Well-known member
Brad, the same thing happened to me. I switched out the pvc for a aluminum rain gutter downspout problem solved
Sounds like a plan. No issues with keeping heat up?
Brad
Brad Taylor (NC)
Well-known member
The end is definitely getting closer. I flipped the other day and along with a little help from Toller Boatworks Jr. we gave it a good scrub down in preparation for paint!

As payment for his services we took a little time out for some Red Ryder action. He can slap tear a monster cup at at 10 yards! Haha!

After letting it dry for a day, I painted the bottom. As I said on the Toller FB page, the thought of the moment of reinstalling the heavy bronze half round on the keel had occupied my thoughts many times since removing it back in Dec.

Spent about 3 hours working last night and don't have many more hours left until she sees water.

Flipped her back upright and set off to work. Here's the seat set in place. I need to round over the edges and coat with epoxy/paint but its for the most part done.

I painted the interior of the coaming and while you can't see them I also drilled the holes for the pad eyes that hold the rope that goes around the interior of the cockpit that was on the original. The coaming is only a 1/2" thick and the shortest #8 SB screws I could get were 3/4. So I'll need to snip the back off and grind them flush so I didn't want to go ahead and paint the rest of the top.

The hardware is just set in place on the deck, there will be 4 larger pad eyes for lifting to the garage ceiling if I decide not to leave it on the trailer. and a cleat centered towards the bow.

Lastly, all the transom hardware is on, however the bronze bung thru hill is only set in place. I need to glue the canvas boot to it before mounting it with a little silicone under it.

Brad
As payment for his services we took a little time out for some Red Ryder action. He can slap tear a monster cup at at 10 yards! Haha!
After letting it dry for a day, I painted the bottom. As I said on the Toller FB page, the thought of the moment of reinstalling the heavy bronze half round on the keel had occupied my thoughts many times since removing it back in Dec.
Spent about 3 hours working last night and don't have many more hours left until she sees water.
Flipped her back upright and set off to work. Here's the seat set in place. I need to round over the edges and coat with epoxy/paint but its for the most part done.
I painted the interior of the coaming and while you can't see them I also drilled the holes for the pad eyes that hold the rope that goes around the interior of the cockpit that was on the original. The coaming is only a 1/2" thick and the shortest #8 SB screws I could get were 3/4. So I'll need to snip the back off and grind them flush so I didn't want to go ahead and paint the rest of the top.
The hardware is just set in place on the deck, there will be 4 larger pad eyes for lifting to the garage ceiling if I decide not to leave it on the trailer. and a cleat centered towards the bow.
Lastly, all the transom hardware is on, however the bronze bung thru hill is only set in place. I need to glue the canvas boot to it before mounting it with a little silicone under it.
Brad
Steve Sanford
Well-known member
Brad~
I sure enjoy watching your workmanship!
The bottom of that hull sure looks slippery. And, you have provided more proof that there nothing that comes close to bronze hardware!
All the best,
SJS
I sure enjoy watching your workmanship!
The bottom of that hull sure looks slippery. And, you have provided more proof that there nothing that comes close to bronze hardware!
All the best,
SJS
Brad Taylor (NC)
Well-known member
Well, minus a few small the things the hull is done. I'm going to leave the original cover as is. It has been glassed with poly resin at some point but it still has great adhesion and would be a pain to remove. Plus the cover boards are warped all up. I'll work on it before too long, but the reality is, it isn't a necessity as this float will be stored indoors. I need to attach the the pad eyes on the decks. I've drilled the pilot holes but picked up the wrong size screws. I need to install the drop down hasp that the cover attaches to and the wood ring I made to go around the bung hole. Also, I need to pick up a longer section of sisal rope, as I guessed at the length and am about 2' short. Lastly, I'll work on the removable transom. But to look at, she is done!


Brad
Brad
Brad Taylor (NC)
Well-known member
Brad~
I sure enjoy watching your workmanship!
The bottom of that hull sure looks slippery. And, you have provided more proof that there nothing that comes close to bronze hardware!
All the best,
SJS
Thanks Steve and I appreciate your input along the way. The
Dynel suggestion is awesome as it looks identical to canvas! And of course I can't thank you enough for the handle suggestion/pattern!
Brad