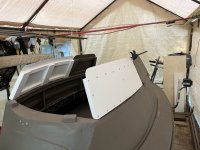
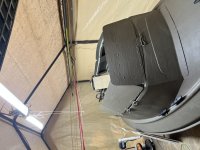
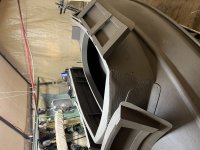
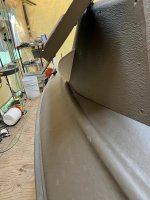
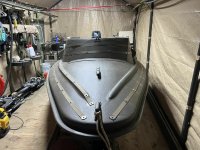
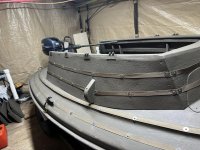
South Bay Duck Boat -Blind ground rule #1 recovered.

Dave Diefenderfer

Well-known member
Sponsor
With 2 new grandchildren in 2021, and 2 more in 2023, I suspect this might be the last 1 man boat I mess with. As you already know, I found a SBDB back in March, and have been doodling a plan for a couple months. Last week I took a "ME" week of PTO. No fixed agenda, just a week to do what I needed and wanted to do. It did include chores, cutting grass, servicing the lawn tractor, new brakes, headlights and a power steering reservoir on Maria's car, and washing both her car and my truck. I also got to see Mom and the rest of the family and each of the children and grandchildren.

And I got to tear into the SBDB!

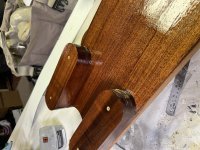
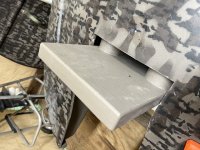
The first order was to replace the motorboard, which was too short for my yamaha. Following Steve's tutorials, I shaped a very nice piece of mahogany.
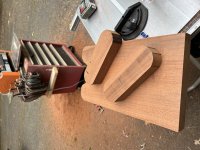

IMG_8224.JPG


IMG_8227.JPGIMG_8236.JPG


IMG_8237.JPG

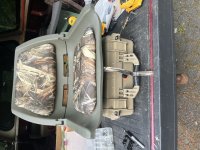
Then it was onto working through the blind. Brian Garman has been using a cut down milk crate and a layout seat. He commented that he wished it had some dry storage included and that the seat was fixed to the crate somehow. So I though about how I might address both of those needs. My first thought was to cut down one of the dove/deer seats that I have, the kind that is the square cooler bucket with the swivel seat. So I searched for a deal on one, but they were more than I wanted to spend to cut it up. Then I thought about the Harbor Freight "Pelican" cases. In the long run, I spent more putting this together, but it is more dry storage, and is more stable than the other seat would have been.


IMG_8264.JPG

While I will sit higher than Brian does, I find it comfortable and fits within the cockpit reasonably well.

Having now establishing the seat height, I can work on the blind.

My ground rules for the blind were:
1. allow for the use of the original cockpit cover
2. allow for the use of the original navy dodger/canvas
3. minimize weight
4. minimize maintenance by using PVC and FRP in place of any wood products
5. minimize the damage to the original hull, limit holes and perform no cuts

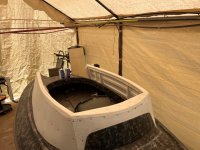
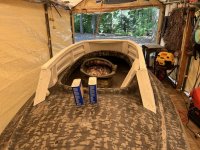
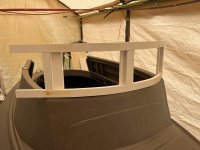
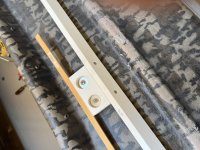
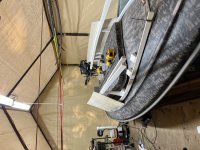
So I started working with a bunch of PVC trim and framed out the Starboard side with 1x2s


IMG_8266.JPG

I utilized the original flap board holes for 2 of the 3 mounts on each side.


IMG_8270.JPG

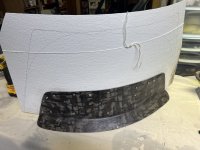
I also added some FRP to the Spray Sheild


IMG_8272.JPG

Continued......
</html
 
Last edited:
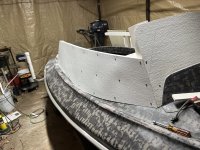
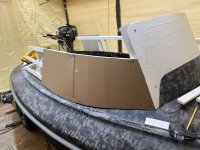
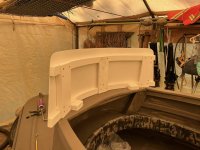
After I got everything framed up, cardboard templates were made to cut the FRP


IMG_8289.JPG

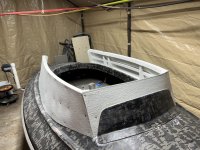
Then the FRP was installed, the spray shield adjusted and tied in, and a railing was installed to the top


IMG_8292.JPGIMG_8307.JPG

And here is where I am now,


IMG_8327.JPGIMG_8328.JPG

Tonight, I need to fill a couple of holes in the deck where I originally extended the sides another 8". Brian Garman stopped over and suggested I was making it too difficult to climb about at the stern. I agreed and shortened the length by 8" in each side. So fill those holes, sand the rails, and vacuum everything tonight and start getting that white, dead grass green color! In parallel, I will be working on the flap boards.

So overall, I am pleased with the work so far, I had hoped to be further in my week off, but it is what it is.... sometimes when you plan as you go, it takes a couple tries!
 
Last edited:
Dave

That looks super fantastic. The lines are quite pleasing. Excellent work and I know fitting all those angles wasn't easy.

Eric
 
Good morning, Dave~


Great progress! (I hope I have time later this year to make something similar, as we have discussed....)


Question: What will you be doing "above the rail" for hide/shooting?


(I can just be patient snd wait 'til you get there....)


All the best,


SJS


Good morning Steve,

My flap design is still being noodled out. Last night I filled a few more holes and took a heat gun to a piece of the PVC to see if I could create the bends I would like. I had already tried to bend the FRP with a heat gun so knew that was possible.

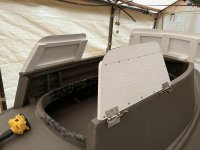
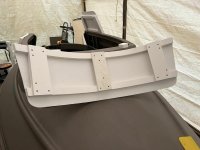
So the basic plan is to make a 10" high 1x2 PVC frame for the flaps, and put 12" high FRP on them. The front flap will be first, and overlap the sides a little to ensure it keeps the wind off my neck.

The side flaps will be 2 pieces, as I don't think I need a 5ft long flap most if any of the time. I am thinking a 3ft for me, and a 2ft that will have 2 positions. Either outboard like the front, or inboard to tilt inside to cover the cockpit hole. I am working through if this will be a double hinge, or simply pull the hinge pin and have another hinge half mounted inboard.

Brian and I are also thinking about an aft deck/driving seat that includes some flap with grass to hide the back of the cockpit. Dave Clark has done similar on his Estuary 2 and we are trying to figure out how to make that work for us, without being in the way when boarding and working decoys.
 
I only ordered 6 hinges, wanted to make sure I could dis-assemble them and use them with hitch pins, so can only get these 3 installed today.

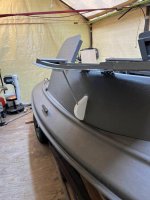
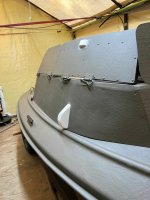
Made the bow flap first, and it is oversized at this time. Once the sides are done, I may be able to trim it some but I want it to overlap the side so I don't get wind on my neck?

353028811_10232750138082088_3262515898508719146_n.jpg

352563733_10232750138162090_9020419662426373197_n.jpg
I then made the 2 side aft flaps and got them installed.

Need to get this project near complete, so I can move back to some big batches of decoys that I need to rehab and paint.
353431350_10232750834219491_8861777258847284051_n.jpg353445797_10232750833899483_3222482527583529366_n.jpg353050256_10232750834299493_8367802839147691975_n.jpg
 
Good morning, Dave~


Looks great! How are you maintaining the curve? Are your upper and lower rails laminated? Wood or PVC?


Also, this struck an all-too-familiar note for me: "Need to get this project near complete, so I can move back to some big batches of decoys that I need to rehab and paint."

All the best!


SJS
 
Good Morning Steve,

I have been using a heat gun to soften and reshape the PVC framing. I had thought about making a Steaming Chamber, but wonder if that would be enough heat on the PVC? I stretched a bungie cord like stringing a bow, and then worked areas with the heatgun to make the adjustments needed. The FRP bends easily without heat, though if you want to make sharper bends, the heat gun does allow for that too. I played with the FRP and can make 90deg bends with heat.
 
Young Man~


Your process reminded me - a recovered memory? - of something I learned at one of the very first SSWA Duckboat Shows. Al Griswold had a sweet layout rig (great Lakes-style 'glass vessel) for Broadbill gunning. He trolled his decoys - maybe with long line clips...


In any event, he had made up several drums for storing the long lines. He used short lengths (maybe 12" ?) of 4-inch PVC pipe (I do not recall the Schedule....). He sawed 4 or more cuts an inch or 2 into each end. After softening the PVC with heat, he formed the end of the drum by having it cool on the "shoulders" of a 20-lb propane tank. It produced a nice even flare on both ends of the pipe. I do not recall if he heated the PVC with a torch or a heat gun.


I never took a photo of the drum - but it is still clear in my old brain.


Al (Griswold) has been gone a few years now. Here he is at an early Duckboat Show with Al McCormick (McCormick on left, Griswold on right).


mccormick 30 Al and Al Griswold at Duckboat Show - Heckscher.JPG


All the best,


SJS

 
Good Morning Steve,

I had a 3 day weekend, so I got some boat work done. Got all 4 side flaps built, and then decided I need to rebuild the front flap to fit them better. I got that one done too, and all 5 are in stages of painting the base color. Last night I ordered 40 yards of webbing, and now need to order the hardware. My hull is foam and glass under decks, so I am hoping the wood screws will suffice. Generally I find the glass rather thick on this hull and since I will use webbing and twine to attach the grass, I don't think it will put much stress on the screws.

What size screws did you use, #8 or #10? How close did you attach, 10" or 12" or more?

I'll post pictures of the finished flaps in another day or so.....


IMG_8343.JPG
 
Dave~


I spaced my fasteners every 12 inches.


Since you won't be backing them up with nuts, I'd be tempted to use an adhesive at each fastening location. Might need to do some chemistry research to see what sticks to the webbing.


I used #10 panheads with 7/8" or 1" s/s fender washers - primed and painted prior to installation.


All the best,


SJS


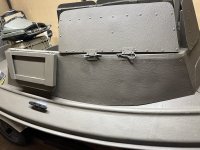
Flap boards are done, though I see I missed some spots with paint that I will fix later when painting a second coat on the inside. Webbing and hardware arrived today, but first I think I need to install the cleats where they need to go. The bow cleat will fit where I can reach it easily, and still be inboard of the front sealed bulkhead. I have the beckson covers for the bow and sponsons, but not the right hole saw. And I get wicked vertigo if I need to work laying down anymore, so I need to be quick. I have about 15 minutes before I turn green and take an hour to recover each time!


IMG_8350.JPGIMG_8351.JPG

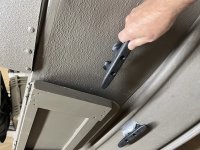
So where to mount the side cleats? I would anticipate using them primarily to steady along the bank with the spud poles, and quick pole anchoring when setting and picking up decoys. When I open water layout, I will lay off the bow anchor and use a side anchor to control sway, as I have done in my BBSB on open water.
IMG_8352.JPG
Alternatively, I could mount on the side of the blind. In any case, there will be grass mostly covering them?


IMG_8353.JPG

And finally with respect to cleats.... painter on the cleat, or on the bow handle? On my BBSB, the Painter is snapped on the tow eye, is cleated off on the port cleat as I hunt off the Starboard.


IMG_8354.JPG
 
Dave~


Great to see the progress!


Question: What are you using for those hairpin clips? I always made mine from 1/8-inch brass rod - because I could never find factory-made in s/s or anything rust-proof - at least not ones that were big enough to hold my hinges together. (The first ones I ever saw on a duckboat were by a friend who was an aircraft mechanic. So, I'm guessing they were either s/s or a strong aluminum alloy...)


BTW: I understand the vertigo. I always try to do my underdeck work with the vessel upside down on mu tallest horses. It keeps my feet on the ground and my head and eye upright.


All the best,


SJS


Steve, the clips are off a cart I had out in the back woods. They were chromed at one time, but were peeling and rusty. I took a wire wheel to them, then soaked them in Oso-something that turns rust black and supposedly seals it. I put them in a jar of it and they bubbled for a couple hours. I then took them out and hung them overnight. Repeated the next day, then painted them with etching primer so far.

How did your talk go? Anthony said he would record it for those of us that could not be there.
 
Good morning, Dave~


My talk to the Village of Babylon Historical Society has not yet happened. It's on Sunday, June 25. I am looking forward to it.


In the meantime - I plan to enjoy a Happy Fathers Day - with a bit of birding with friends in the morning and then working hammer 'n' tongs to complete a Woodly and a Greenwing carving - both "on deadline".


All the best,


SJS

 
Dave, Fantastic Job!

I do plan on recording this next weekend so stay tuned & of course I will have it posted for all to enjoy.

Have a great father's day

-Anthony
 
You guys all know me, I over-engineer everything. Guess it comes from building microelectronics for Space? Anyway, I wanted a horizontal flap to layout decoys both setting and picking up. My first mental design was similar to what I did, but others on the South Bay Duck Boats page on FB offered simpler wedge designs. When I mocked them up, I had either a large wedge mounted to the flap of the blind and both seemed unwieldly to me. I want a solution that allows me to use a trailer cover as we are 4+ hours to the salt. The fiberglass rods are into the bottom block about 3" so I don't think they will fall out too easy, though I made a spare just in case. I may add a keeper of sorts yet, just to be safe. I might motor out with the flaps supported, not sure.

I installed the motor today, anticipating a cruise tomorrow. I am pleased to see that in the down trim and shallow drive the prop does not hit the hull. Though I am not going to be running any slalom courses either!


354459041_10232806886500763_5457999855495888389_n.jpg


354876735_10232806887620791_382498084959879323_n.jpg


355124035_10232806886900773_3943860794583036769_n.jpg
 
Last edited:
About 20yrds of webbing installed, and more screws than I had guessed! Spacing is 10" between fasteners, each screw is bedded, to reduce stress on screw holes in webbing. Each hole is melted with a hot finish nail.


352512257_10232842414548942_7548112582168794144_n.jpg


355852878_10232842414468940_3199289967176699651_n.jpg
 
Back
Top