South Bay Duck Boat -Blind ground rule #1 recovered.

Eric, thank you. I am anxious to get this grassed and hunted. I did take it out Sunday for a ride for a few hours. It was windy and choppy, which was good to get a feel for how she will handle when hypothermia is not a concern! Did take a couple waves over the bow that were broken well by the spray shield/blind. Will be a dry ride as long as I am reasonable at the helm.


355027356_10232819214288950_6988173040888521147_n.jpg
 
Young man~


Sweet vessel! She looks great on the water. The proportions and rakes etc all work together - she has that elusive "stylistic integrity" that all the best boats have.


Congratulations!


SJS


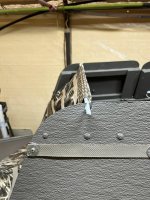
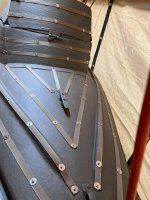
I have installed nearly 40yrds of webbing (assuming it was properly measured when purchased) and over a hundred screws and washers! I have 5ft left, so need to order more as I plan to add more webbing to aft deck after the canvas is made and fitted.


357057113_10232914827479220_3069394869525151976_n.jpg


355859183_10232845726911749_6610696179289915047_n.jpg

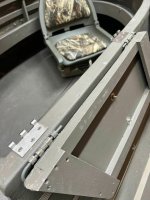
Cleat for the aft deck arrives today. Canvas arrived yesterday. Will lay it out with seam allowances and webbing reinforcement so that grommets can be installed. Plan to use finger cleats and the aft deck cleat to secure it with bungie. Working on a detail for the rear side flaps that allows them to be installed outboard for larger cockpit, or inboard, tilted in to hide the cockpit and make it smaller for solo hunting. Need to made some support blocks to mount to the inside railing to support them at the right position.


356633957_10232910126161690_2118513631379370646_n.jpg357081277_10232910125961685_8844721174096721385_n.jpg
 
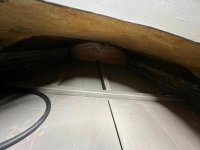
Working on little details..... Made a front floor section, that slides under the main floor to keep the main floor from moving fore and aft. It also holds the fuel tank to the port side of center, configured to hold both my 3gal and 6gal tanks.

358064398_10232940189193247_8290377428011032873_n.jpg

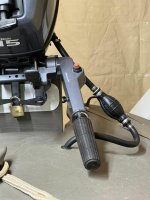
Created new 3/8" fuel line, with a common tank side fitting that matches what is in the Scaup, and configured the stock Yamaha fuel line as well so everything is compatible.

357426504_10232940189513255_53778091786181337_n.jpg

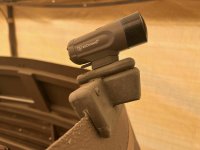
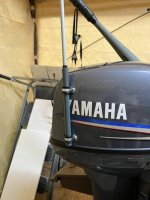
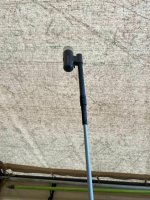
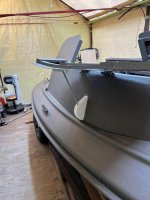
Played with a couple different removable bow navigation light mounts. While more complex, and not as compact, the 2nd version affords me space on the bow deck, with the front flap down for a bag of decoys.

Version 1
357521059_10232961285640645_1234736019423977396_n.jpg

Version 2

358109409_10232977308641210_1994548341432742337_n.jpg

The rear mount, is quite simple. I disassembled the 3 piece pole that the rear light had, and used 2 parts of it, along with a fiberglass fence post, and some heat shrink.

358107213_10232977308961218_9209335253412813258_n.jpg
358096890_10232977308841215_2948871260868080312_n.jpg
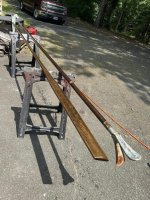
I also soaked down the shoving oar, and push pole with BLO. They took quite a bit!
357527978_10232961286040655_4399496518436948289_n.jpg
 
Last edited:
Dave~


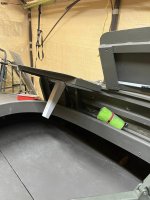
All looks great! I am puzzled by one photo, though. Your last image shows what looks lie a pale blue "leg" (or strut) suspended from the forward flap. What am I seeing?


All the best,


SJS

 
Steve, that is the support I made, and posted awhile back. I have since added a finger cleat, and a shock cord to secure them from vibrating loose. 354459041_10232806886500763_5457999855495888389_n.jpg

I also finished up my baseball bat tiller extension.


IMG_8526[1].jpg

A $2 yard sale aluminum bat, cut down several times to get the taper to match up with the tiller handle. Then cut off the knob end to clear the blind. A rubber chair foot for an end cap, some glue and rope and electrical tape to build up the grip and then a final wrap with a real bat grip. 3 holes/slots in the head end and a clamp make a tight fit.
 
Rich, I have not figured out how/where I will mount the poles yet. It may include a hole through the front shield and a hook on the inside rear of the fixed portion of the blind, but I am not decided yet. Do you have some suggestions?
 
Paul, yes. We hunt Chincoteague, and I hope to hunt LI and NJ out of it too. Any concerns with my build with respect to salt water?
 
Our boats get our asses kicked on the Great South Bay and we joke about how even plastic rusts out here is all........
Love the tiller handle.
Mc
 
Dave, never liked batteries and salt water. I put in 12v bow and stern lights, bilge pump and under deck lighting. Couldn't remember to shut then off, then I had to change batteries if I remembered to bring them? Wrapped the stern lite in nylon camo cloth [ calelas ]. Lite shines thru very well.
 
Rich, I hear you.... I have done as you suggested on both my BBSB and the Scaup and have been quite pleased with the functionality. That said, on this build I wanted to go simpler. When we hunt Chincoteague, we usually are the only boats at the launch, and get up the creek within 15 or 20 minutes. Our exposure to any boat traffic in the dark is nil, and the lights are more to be legal than needed. I will be very surprised if I need to change these batteries at all during a season. LED lights draw so little.
 
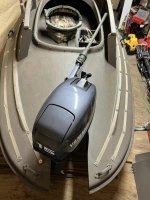
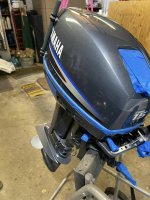
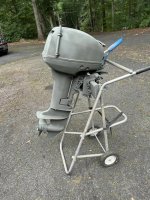
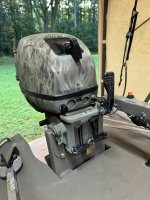
I bought this motor, with Mike Braden's help, new in the box, out of Arkansas somewhere. It is a 2009, October build, just before the 2010 EPA tightening that mostly eliminated the 2 strokes. I have been using a canvas cover that my Mom sewn for me to grass it up and hide it. The cover drags water on the back deck of my BBSB as I can't run the motor with it on. The SBDB does not have the rear deck and decoy boards that the BBSB has to contain the cover. So after much mental debate, I painted it!


358705156_10233012353677314_6427365376842503296_n.jpg


358714769_10233012354237328_350918838927390826_n.jpg

I first washed it down with Simple Green. Removed all the grease I could.

Then masked off all the plastic, labels, and such, I attacked with a can of self-etching Primer. I have since learned that the Rust-o-leum Primer is for bare metal only. So, we will see what happens?


358717510_10233012353837318_2659656052680394948_n.jpg


358732974_10233012354757341_2564931853380779844_n.jpg

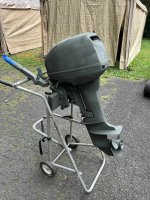
I then broke out the Redleg stencils, and 5 colors of flat camo paint.


359352904_10233019702981042_1688185829214637005_n.jpg

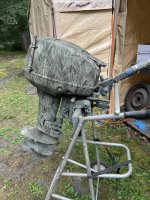
After is cured overnight, I stripped off all the masking.


361570290_10233047806163604_1586561952069572841_n.jpg

I also had drilled the motorboard to bolt the motor on, then oversized the holes so I could pack them with thickened epoxy. The motor is now clamped and bolt. No need for a safety chain!
 
Last edited:
Dave, takes guts to paint a new engine. Looks great, great stencil job. My nephew stenciled my SBay entirely, bow to stern, could have hunted it with out grass. I still use burlap potato bag over the motor to break up the outline. I dip it in the water so it doesn't blow in the wind. Bags are hard to find now, people frame them for their house in the former potato field [ go figure it out ].
 
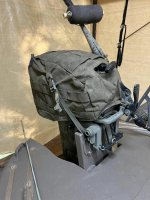
Rich, I have had the motor since 2010, so it is not new per se, but still looked quite new. The canvas cover my Mom sewn for me was kind of a "mullet" fit the cowling, and hung down along the drive. Over the years I shortened it a couple times, and now with the painted motor, and being better hidden by the sponsons, I trimmed to back to just cover the cowling. This way I can install it for the day, run the motor with it installed, and have the grass on it to break up the shape.
 
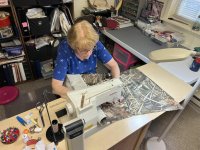
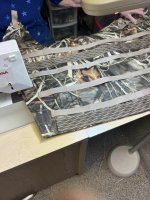
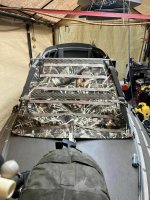
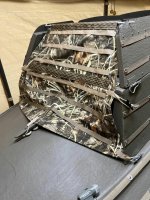
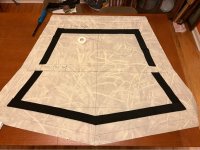
Yesterday, I spent the day with Mom, my personal canvas maker. I did not tow the boat up this time, as the project was smaller, and I figured I had it all measured and laid out well. Of course, I was off a little... but certainly close enough for a duck boat!
357478603_10232948723086589_6241119766907003998_n.jpg

360172604_10233089718491386_6108568103157276037_n.jpg

362892079_10233089721171453_6076980056728609168_n.jpg

362649644_10233089723011499_1381684121576350435_n.jpg

362642394_10233089718691391_7103586326113225387_n.jpg

362650284_10233089719011399_2731607141686091471_n.jpg

I had allowed too much seam allowance, so we trimmed that down, and my thought to fold the fabric to make a pole slot was changed to a piece of webbing sewn across the face. I suspect that is what through my measurements off a little, but again, function and serviceability is as I envisioned.

She also modified the motor cover so now, it can stay on for the hunt, and the motor can run just fine with it on. As I intend to have a highway boat cover, I think it can stay on for the season, with the grass attached.
360159268_10233089722451485_4491401580218464747_n.jpg

Next I need to add a few more straps to the back deck, and install some anti-skid tape to the rear deck, then stencil the hull, and grass her! I received a batch of the BlindGrass this week. Looks much better than the FastGrass, just need to figure out how I will use it. I plan to get some Salt Hay too in September.

The synthetic BlindGrass on the left, and aged FastGrass on the right.


IMG_8535[2626].jpg
 
Back
Top