You are using an out of date browser. It may not display this or other websites correctly.
You should upgrade or use an alternative browser.
You should upgrade or use an alternative browser.
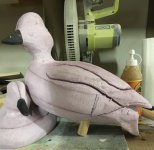
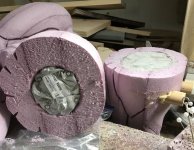
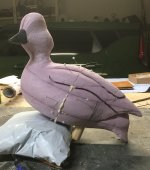
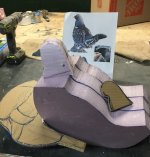
The foamer urn.
- Thread starter Don Mintz
- Start date
Don
I would never know the decoy was burlapped if you didn't say it. I supposed you filled the weave with something and then combed in texture. Very nice decoy.
I would never know the decoy was burlapped if you didn't say it. I supposed you filled the weave with something and then combed in texture. Very nice decoy.
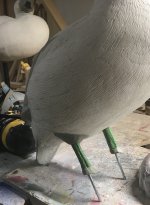
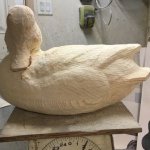
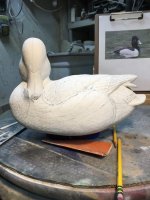
Unless I'm going to flock a decoy I use this surface process whether it's wood or foam. Foam decoys get the typical burlap process, then a 2nd layer of tile adhesive to smooth things up a bit. Wood decoys get a coat of tile adhesive as well to smooth out the wood grain. If I'm going to do the feather detail instead of a flocked decoy I start additional coats of tile adhesive.
I got the idea nearly 15 years ago when I was seeing guys putting texturing paste on wood and cork divers and then combing in the vermiculation. When I tried texturing paste I noticed that it's not much different than tile adhesive. I started out trying to comb the feather lines while the adhesive was still wet, but that wasn't very fast or productive. It didn't take long to figure out that stoning the tile adhesive was going to be the best approach for details on a foamer. It takes several coats of tile adhesive over a burlapped decoy, smoothing it out with a wet brush roughly in the direction of the feathers, probably at least 4 or 5 coats before you have a surface thick enough to detail. It's got to cure a few days before stoning.
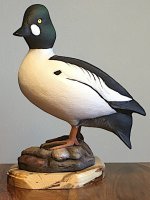
I do the same with wood carvings, it helps to avoid sanding. About the only thing I sand by hand is the bill on a wood carving, I mold my own bills from my own carvings for the foamers. For decoys like the ringer, that are expected to hunt I put two coats of high performance gloss oil based enamel from rustoleum as a sealer, it's a bit thinner than regular rustoleum oil base, it soaks into the tile adhesive very well. You can get a ton of detail in a short amount of time with this process.
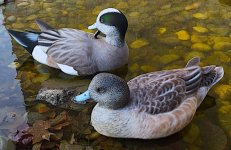
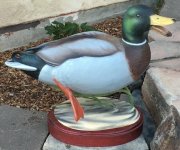
This full body floating mallard is a foamer.
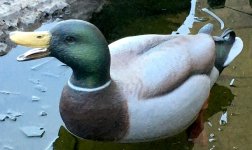
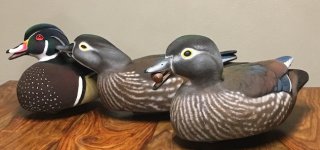
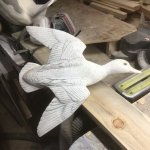
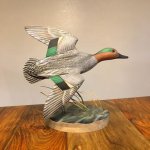
This full size green wing is a wood carving, but surfaced the same way with tile adhesive.
I got the idea nearly 15 years ago when I was seeing guys putting texturing paste on wood and cork divers and then combing in the vermiculation. When I tried texturing paste I noticed that it's not much different than tile adhesive. I started out trying to comb the feather lines while the adhesive was still wet, but that wasn't very fast or productive. It didn't take long to figure out that stoning the tile adhesive was going to be the best approach for details on a foamer. It takes several coats of tile adhesive over a burlapped decoy, smoothing it out with a wet brush roughly in the direction of the feathers, probably at least 4 or 5 coats before you have a surface thick enough to detail. It's got to cure a few days before stoning.
I do the same with wood carvings, it helps to avoid sanding. About the only thing I sand by hand is the bill on a wood carving, I mold my own bills from my own carvings for the foamers. For decoys like the ringer, that are expected to hunt I put two coats of high performance gloss oil based enamel from rustoleum as a sealer, it's a bit thinner than regular rustoleum oil base, it soaks into the tile adhesive very well. You can get a ton of detail in a short amount of time with this process.
This full body floating mallard is a foamer.


This full size green wing is a wood carving, but surfaced the same way with tile adhesive.


Don
Sure looks like you have perfected the technique and maybe even pioneered it. Way to innovate.
Sure looks like you have perfected the technique and maybe even pioneered it. Way to innovate.
I didn't pioneer the carved foamer process, the first time I heard of it was in 2003. I had experience with molded foam decoys, but had never seen anything like a carved and burlapped decoy. The first ones I made were pretty crude and didn't hold up as well as I wanted and wouldn't hold the paints I was using at the time. I kept hearing people tell me it couldn't be done, that just made me more determined. I don't think there was much in the way of full body flocking for ducks back when I started doing it, but plenty of people were flocking goose heads, I just took flocking a little farther. With flocking I went through a lot of different processes along the way. I'm not sure that carved foamers are any easier than when I make a hollow wood or cork decoy, but I can do things with them that would be a lot more difficult to get a good float, balance is rarely an issue. I've been a full time wildlife artist for the past 43 years, but didn't make a hunting decoy out of anything till 2003. It opens up a whole new world for decoys that you can get all the components easily at home depot, the farm store and amazon. I have no secrets, I'm always willing to share what I know.
