George & Vince, thank you both for your concern and I appreciate you guys pointing it out. Unfortunately, that saw is a combo vertical/horizontal metal band saw, and that height is the guard's lower extent. I might have to make an extension if he wants to continue making anything. It was a concern of mine though, I used a finer-toothed blade so it wasn't cutting as aggressively, I know it isn't perfect, but I'll see what I can come up with. I've been doing most of the cutting, but if something should happen I would feel pretty bad.
You are using an out of date browser. It may not display this or other websites correctly.
You should upgrade or use an alternative browser.
You should upgrade or use an alternative browser.
What's on your Workbench - JUNE 2023
- Thread starter Steve Sanford
- Start date
George Goodsell
Active member
Dave,
Could you maybe build up a new "table" attached to the existing one to narrow that gap? You need your fingers too... [wink]
George
Could you maybe build up a new "table" attached to the existing one to narrow that gap? You need your fingers too... [wink]
George
Steve Sanford
Well-known member
Good morning, Dave~
My old Walker-Turner lacks a blade guard as well. I have been thinking of making something out of Plexiglas/Lexan that would attach (somehow?) to the blade guide so it would raise and lower with it. I have yet to work out the details.
All the best,
SJS
My old Walker-Turner lacks a blade guard as well. I have been thinking of making something out of Plexiglas/Lexan that would attach (somehow?) to the blade guide so it would raise and lower with it. I have yet to work out the details.
All the best,
SJS
George, That is a possibility I'll have to look at some when I get back over to the shop.
john townsend
Active member
Steve Sanford
Well-known member
John~
New shop! An Important Day for sure...congratulations! I wish you many happy hours and projects therein.
All the best,
SJS
New shop! An Important Day for sure...congratulations! I wish you many happy hours and projects therein.
All the best,
SJS
Charles H.
Active member
Chuck J
Well-known member
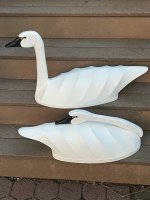
Brad F said:Well it's been a while but if I finally finished up the swans that have been setting in the shop for a loooong time. Probably set on a shelf until someone talks me out of them as I haven't hunted them for years now.
Brad
Been a while. Love those swans! I especially like how the prominent lines on the cheeks and necks plays with the canvas ribbing. Very neat.
Best
Chuck
Richard Lathrop
Well-known member
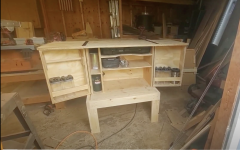
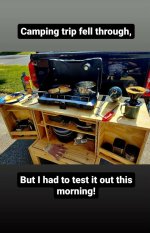
That is great looking chuck box. I like the functionality of it.
Rick Lathrop
Rick Lathrop
Charles H.
Active member
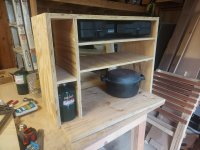
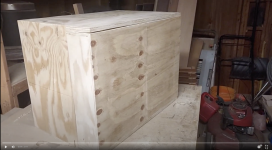
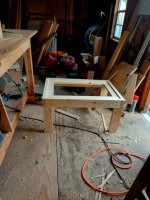
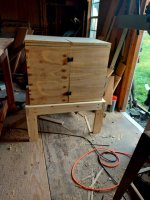
Dani, I'm definitely planning on using thinner plywood. I used 3/4 for the main framework, parts of the doors and the fold out counter space on top. I think I could definitely switch out a lot if not all of it to 1/2, especially if I use a high quality birch ply.
Right now it could easily hold enough supplies to serve 4-6 people, I rarely get that many people together for a trip. That is what drives me to make a smaller version.
This one might see more service tailgating at Penn State Games.
Right now it could easily hold enough supplies to serve 4-6 people, I rarely get that many people together for a trip. That is what drives me to make a smaller version.
This one might see more service tailgating at Penn State Games.
Charles H.
Active member
Carl, I will try and put a cut list together when I can. A big part is taking all the stuff you want to put into it into your shop and building around your personal needs. I started by ordering the stove I wanted and building from there.
There are lots of different styles out there if you search for "Chuck box", "Patrol box" or "camp kitchen". REI has a set of plans on line for a different configuration. Lots of Youtube videos out there as well.
There are lots of different styles out there if you search for "Chuck box", "Patrol box" or "camp kitchen". REI has a set of plans on line for a different configuration. Lots of Youtube videos out there as well.
Huntindave McCann
Well-known member
My little project is boat related, so I guess that's close enough to include in the workbench thread. [cool]
In one of my boats, I felt the need for an additional cup holder. One that was handy, yet out of the way. The selected location called for some creativity in providing a surface for the cup holder to drop into.
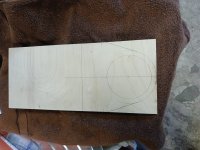
(A) Penciled in a layout on a small piece of 1/2" Baltic Birch.
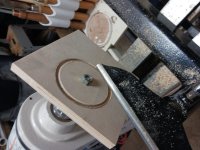
(B) Drilled a 3/8 center hole to mount onto a 3/8 lathe mandrel.
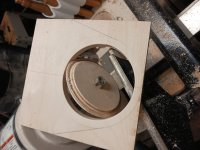
(C) Cut into the face from both sides to part away the waste in the middle. Using the lathe allowed me to make a perfectly round and perfectly sized hole for the plastic insert.
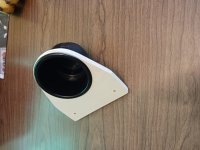
(D) Example of how the bracket will be installed. I still need to apply a finish to the wood.
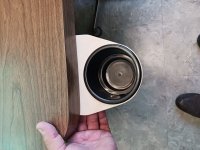
In one of my boats, I felt the need for an additional cup holder. One that was handy, yet out of the way. The selected location called for some creativity in providing a surface for the cup holder to drop into.
(A) Penciled in a layout on a small piece of 1/2" Baltic Birch.

(B) Drilled a 3/8 center hole to mount onto a 3/8 lathe mandrel.

(C) Cut into the face from both sides to part away the waste in the middle. Using the lathe allowed me to make a perfectly round and perfectly sized hole for the plastic insert.

(D) Example of how the bracket will be installed. I still need to apply a finish to the wood.


Steve Sanford
Well-known member
Dave~
It's the little things that make the hunt enjoyable - nice job!
I'm still juggling (too many) jobs....fortunately I have "someone" to care for the gardens.....

I'm working on two "mantel-piece" birds for a looming deadline. This will be a Drake Woodly - from hollow Basswood.
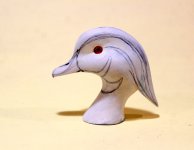
Here he is mostly painted - probably 3 more hours tomorrow.
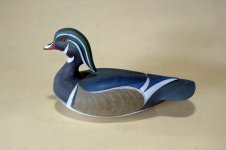
This Greenwing just got marked and sealed. He begins to get his colors tomorrow as well.
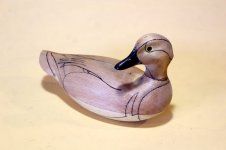
I had been puttering on some gunners. This LL Bean Coastal Pintail needed an all-new bill: White Pine reinforced with a 16d galvanized finishing nail - all set in thickened epoxy.
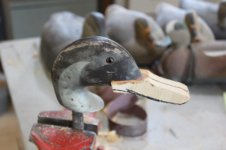
Carved down - and shortened about a quarter-inch - then sanded and burned.
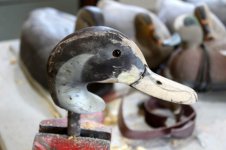
Here is my "corrected" paint pattern. Both eyes have been cleaned up and re-set.
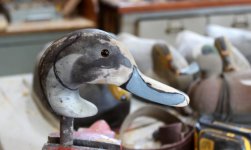
The basecoat. His bill is OK - but every time I glance at him I want to grab the knife and hollow his upper mandible just a bit.... It's one of those "gift and curse" things. It'll make no difference to incoming birds - but will help me sleep better.
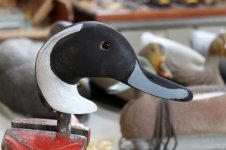
Stay tuned!
SJS
It's the little things that make the hunt enjoyable - nice job!
I'm still juggling (too many) jobs....fortunately I have "someone" to care for the gardens.....

I'm working on two "mantel-piece" birds for a looming deadline. This will be a Drake Woodly - from hollow Basswood.

Here he is mostly painted - probably 3 more hours tomorrow.

This Greenwing just got marked and sealed. He begins to get his colors tomorrow as well.

I had been puttering on some gunners. This LL Bean Coastal Pintail needed an all-new bill: White Pine reinforced with a 16d galvanized finishing nail - all set in thickened epoxy.

Carved down - and shortened about a quarter-inch - then sanded and burned.

Here is my "corrected" paint pattern. Both eyes have been cleaned up and re-set.

The basecoat. His bill is OK - but every time I glance at him I want to grab the knife and hollow his upper mandible just a bit.... It's one of those "gift and curse" things. It'll make no difference to incoming birds - but will help me sleep better.

Stay tuned!
SJS
Great portable kitchen setup, Charles!

