What's on your Workbench - JUNE 2023

Steve Sanford

Well-known member
Good morning, All~


I see Bob and Jode snuck some fine work in on the tail end of the May 'bench.....


I am in the midst of uncountable projects - but thought I would begin this month with 2 smaller tasks. This Whimbrel is for a long-time customer....


Whimbrel - sanded + eyes.JPG


He is a good reminder of how finish sanding usually takes more time than the actual phase. - at least for me when I'm working on a "mantel-piece" bird. Next is a sealing coat of thinned spare varnish. The eyes still need some careful attention.


The bill is limbwood from Shagbark Hickory. I use a length grown to the needed curve and then mortise it deep into the cranium. Thickened epoxy keeps everything tight and strong.


Whimbrel - head closeup.JPG


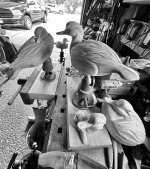
The Black Duck is another - maybe the final - addition to my Old Saybrook/Quogue rig that I've been assembling the last few years. I am planning/hoping to bring the completed rig to Tuckerton in late September - ready-to-hunt. His eyes, too, need some final shaping. Such meticulous jobs are a challenge for my monovision and its lack of depth perception.


Wildfowler Black Duck Drake - ready for sealing.JPG


All the best,


SJS


Good morning, Bill~


Sweet rig! That finished bird looks great.


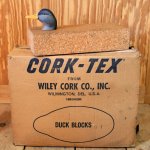
I think you know I'm a big fan of burnt cork for this species. I a wondering how you do it. Mine are all the old (extinct) Wiley Cork (Cork-Tex).


1 Wiley Cork-Tex.jpg


Have you found a way to "water-proof" newer cork and not cover the wonderful scorched surface?


All the best,


SJS

 
Thanks Steve, I've done it a handful of different ways. Usually I make a concoction of linseed oil, some type of thinner, and tube oils. I've used just plain old spar varnish (thinned), and various deck seals (Thompsons water seal type finish). they all seam to work equally well. I think since the decoys don't spend more than a few hours a week for a few days a year in the water, in most cases they don't need to be too saturated in sealer. That being said I made my first ones over 15 years ago and have never re-sealed them, and they are fine to this day. My first batch was made of Wily cork in the late 90s, all since then have been HD cork from the duck blind.
 
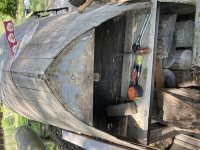
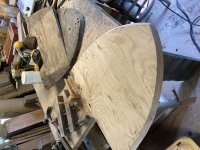
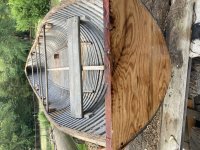
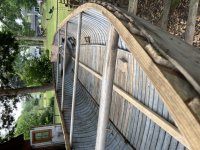
I replaced the original transom using the old one as a pattern. I left it uncut for the motor because i'm not sure if I am using a SS or LS . I doweled together two pieces of ash and used epoxy and nails to attach. My plan is to at least have the hull glassed by the fall. I started this project in 2014 and documented the initial restoration on this site if anyone wants to see the start.9A8493FD-E769-4D2C-AA6F-05C2740529F9.jpeg9CAA1F37-0F54-474E-8DE6-5AFBB9901F4A.jpeg8906E59B-A862-425C-9E47-F844272DDFD3.jpeg35A2B9A6-8A1B-4042-8017-1812184CEE86.jpeg
 
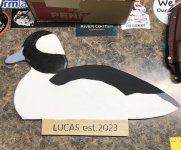
I made this little silhouette for a friend of mine that recently purchased a house. I used one of the patterns Carl Ferraro posted years ago on Y/V-Board thread. First attempt at any decoy or duck art of any kind, I'll be making more, as my 9 yr old son saw it on the bench and wants me to cut him one out that he can paint.
IMG_1438 2.JPG
 
Very nice!! Glad to see my pattern getting used.
I used Buffy y-boards for years, they work great.
 
Dave~


Very nice job!


And - glad to see your son is interested. I will be prepping some goose decoys over the next week or so - so a couple of young ladies can "help" me get them ready for the gunning season. It's always wonderful to see the concentration new painters bring to bear on such tasks.


All the best,


SJS

 
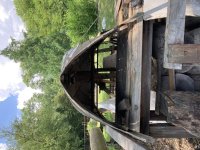
I got her flipped and I have some problems. As you can see by the inwales the old girl has settled and my fair curve has disappeared. I'll have to noodle on that a bit. some water and steam plus some station molds should get her back. 2CFFCEBC-F8B7-437E-ACCA-BECC08AC047E.jpeg
 
Bob~


A challenge, indeed! You have my sympathies - but also my interest....


Would the station molds be temporary? Fastened to a strong-back - and then let the steam do its work?


I'll stay tuned!


SJS


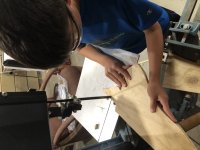
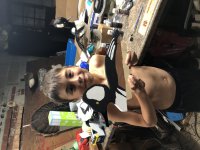
Thanks Steve, This morning my son asked about do his silo and we came across a different pattern that he liked instead of the butterball. So we did a hooded merganser instead, he did probably 95% of the work himself including the cutting on the bandsaw. If anyone has any other silhouette or sideview patterns they'd be willing to share, let me know. I don't mind spending money of this kind of stuff for my kids, I'd rather have them painting boards that kind of look like ducks than watching youtube all day!!


IMG_1451.JPGIMG_1454.JPGIMG_1457.JPG
 
Good morning, Dave~


Great work! Please pass along my congratulations to your son.


I would be happy to send you profile patterns for just about any species. However, I recommend you and your son go the next step and make your own patterns. Back in the day - long before Google Images - I photographed ducks and geese to make my own patterns. I got down low to the water and tried to get true profiles. Then, once the film was developed as slides, I would project the image onto a piece of paper taped to a wall. If I wanted a body say 14 inches long, I put 2 marks 14 inches apart on the paper, then adjusted the projector so the body fit right between those 2 marks. I have every pattern I ever drew that way - from about 1980.


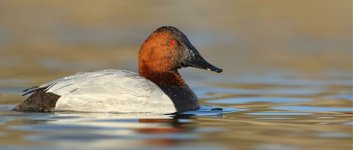
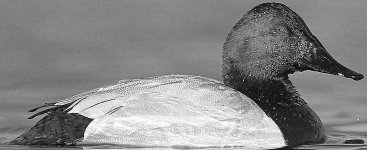
Nowadays, I look for profiles I like on the interwebs - primarily Google Images. For example, here is a nice Drake Can profile:


Drake Canvasback - PROFILE.jpg


If I were going to make a pattern, I would crop it to just the bird itself, then maybe convert it to B&W, and perhaps sharpen the image and adjust the contrast.


Drake Canvasback - PROFILE - CROPPED etc.jpg


There are numerous ways to enlarge the image to your desired size. Old School would be to draw a grid of 1-inch squares over the bird - then transfer each square to a grid of 1.5-inch squares (or whatever size you want). The 21st century way would be to use a photocopier that can enlarge. I just used Staples a couple of months ago to enlarge scanned images to make a pattern for a Common Merganser (based on an old Wildfowler decoy).


Making your own patterns helps you build the skills helpful in this passion of making decoys - and can be applied to many other projects. I'm predicting that you and your son will be carving in 3D before too long.....


I hope this is helpful. And, if you want a particular pattern, just let me know.


All the best,


SJS


This what I did back in the day, scanned in the diver page from my Peterson's guide and then enlarged them in MS Paint until I had them a little larger than life size.
Some of the patterns also came from DHBP members, the buffy was based on a patter that Tom Mattus sent me. I simplified it and then printed.
 
George Goodsell said:
Dave,


Please, Please, Please set the guard down lower on your bandsaw, if that young man slips....

Best,
George


VERY TRUE. Have seen fingers severed while in Wood Shop many years ago. It happens Very Fast even on a Band Saw.
 
Well i got most of the twist out of it . I would not call it fair, but i pulled it in at one point 5 inches. I took my detail tool and cut the inwale free of fasteners and dropped it about an inch. Probably did 50 laps around the boat checking on things. Just about out of oak but glued up the sled and soaking metal parts in paint remover.
 
Back
Top