You are using an out of date browser. It may not display this or other websites correctly.
You should upgrade or use an alternative browser.
You should upgrade or use an alternative browser.
What's on your workbench ? MARCH
- Thread starter Steve Sanford
- Start date
jode hillman
Well-known member
I think your Woodies are my favorites that you make Vince. So much life to them.
Heres a first, 20 years carving and still making stuff for the first time.
View attachment C2972B54-7405-4D31-BC59-B10143D396AE.jpeg
Heres a first, 20 years carving and still making stuff for the first time.
View attachment C2972B54-7405-4D31-BC59-B10143D396AE.jpeg
Last edited:
I didn't get much done after installing the replacement switch and blower control in my dust collector, just this bird and another started in rough-out phase. We are in the process of transiting from 34" of standing snow cover, the result of the 215" or so snowfall YTD, to 24" of hard icey snow. Secondary roads are skating rinks, with water pooling everywhere until the frost cap is pierced. I spent the day clearing eave troughs, and cutting snow back to enable the sun to "work" on diminishing the remainder of snow on the roof.
This is the last unique redhead pose I am carving; with the remaining seven copies of previous poses. I had to add a piece of cork via an epoxy patch because this body was cut from the end stock of the cork sheet. Out of five sheets, I squeezed these thirty-four birds out of three sheets and some scrap cork pieces too large to burn. This head pose is generally what I envision as a standard redhead drake. I have a second drake and hen in this pose still to go...View attachment Standard redhead 001.JPGView attachment Standard redhead 002.JPG
This is the last unique redhead pose I am carving; with the remaining seven copies of previous poses. I had to add a piece of cork via an epoxy patch because this body was cut from the end stock of the cork sheet. Out of five sheets, I squeezed these thirty-four birds out of three sheets and some scrap cork pieces too large to burn. This head pose is generally what I envision as a standard redhead drake. I have a second drake and hen in this pose still to go...View attachment Standard redhead 001.JPGView attachment Standard redhead 002.JPG
Last edited:
Vince Pagliaroli
Well-known member
Decoy Monster Machine -
Thank you.
I cut the body out last year, before I did the recent painting, or it would have had the high back.
The slim body, like a canoe, is cuz it's made for river, and stream use. I can't wait to see it where it belongs as well.
As for the Funky...
You can take the man outta Farrell, PA but you can't take Farrell, PA outta the man.
"We need the funk. We gotta have that funk..." - George Clinton Parliament Funkadelic - We Want The Funk
Best regards
Vince
Vince Pagliaroli
Well-known member
Jode -
Your pair of Eurasian Wigeon are Kick A$$! Man they look GOOD. Lotta style & color.
It is always good to add new creations to your accomplishments, keeps the artistic juice flowing.
Thanks for the kind words.
Wood Ducks & Teal have always been favorites. So I always go back to them, no matter what else I carve or make.
Best regards
Vince
RLLigman,
Those redheads are stellar! Love the attitude. How do the raised cork feathers fair from season to season? Maybe I am too rough on my blocks, but I would think those would get beat up. Do you add some strength with epoxy or something else?
Either way, they are blocks I would love to hunt over.
Brad
Those redheads are stellar! Love the attitude. How do the raised cork feathers fair from season to season? Maybe I am too rough on my blocks, but I would think those would get beat up. Do you add some strength with epoxy or something else?
Either way, they are blocks I would love to hunt over.
Brad
Brad, thanks for the compliment! My black cork decoys carved with raised primaries don't hold-up well, despite being treated with thinned gel epoxy that penetrates and strengthens them. IF I can find the chunk I broke off, I add an epoxy coated dowel to pin it pack in place and reinforce it. Tan cork, once treated with two coats of sealer is quite strong and resilient. Almost all the birds I carve with raised and crossed primary feathers also have elevated tail boards, lending them some additional degree of protection from errant foot placement, man and dog! I damage the tips and then just regrind them to cross at a point.
View attachment DSC01138.JPG
View attachment redheads row.jpg
The top photo contains some birds I carved back in 2013, all of whom have survived, with some minor bill and head crown wear. I carved the wings and cape feather groups in a more stylized fashion to enable them to shed water a little better and not ice up as quickly in a late season chop, since they ride so low.
Note in the lower photo that several of these semi-alert birds have crossed primaries, only one of them fully crossed with tips extended, but all with lowered tails indicating they are alert and moving to avoid a threat.
My painting goals for these blocks are to avoid the monochromatic head color and to add the vermiculation in a way that suggests feather blocks, rather than just random combing.
Last edited:
View attachment Low redhead 004.JPGView attachment Low redhead 001.JPGView attachment Low redhead 003.JPG
Our extended melt continues, so I had ample time to grind out another two redheads. I reinforced the bill on the first bird with an epoxy coated finishing nail. This head stock (southern Michigan sourced) is oddly soft and fuzzy, beyond being cut incorrectly to be sold as head stock by the vendor, when compared to the Wisconsin basswood I now use from Heinecke Wood Products. The bandsaw "wandered" into the cheek on the visible side of the head, necessitating the epoxy repair.
Our extended melt continues, so I had ample time to grind out another two redheads. I reinforced the bill on the first bird with an epoxy coated finishing nail. This head stock (southern Michigan sourced) is oddly soft and fuzzy, beyond being cut incorrectly to be sold as head stock by the vendor, when compared to the Wisconsin basswood I now use from Heinecke Wood Products. The bandsaw "wandered" into the cheek on the visible side of the head, necessitating the epoxy repair.
Last edited:
MLBob Furia
Well-known member
[size 4]Rick,
Usually pick up my bass from a local source, but when they were short on the stock thicknesses I wanted for carving wings on deadmounts, I sent off to Heineke and they cut me blocks to size. Impressed with the quality and the friendly treatment. When I placed my order and asked if they wanted a credit card number, I was told that wasn't necessary. Order was shipped and invoice sent out later with prices as quoted, and they went out of their way to keep packaging dimensions to a minimum for UPS. Not too many places willing to do business that way anymore. Good to know they're available.
Usually pick up my bass from a local source, but when they were short on the stock thicknesses I wanted for carving wings on deadmounts, I sent off to Heineke and they cut me blocks to size. Impressed with the quality and the friendly treatment. When I placed my order and asked if they wanted a credit card number, I was told that wasn't necessary. Order was shipped and invoice sent out later with prices as quoted, and they went out of their way to keep packaging dimensions to a minimum for UPS. Not too many places willing to do business that way anymore. Good to know they're available.
Your story is an exact match to the one I was offered originally that motivated me to switch to them as a wood source. Their basswood is a littler "tighter" than what I was buying. I can see why so many carvers use them as their exclusive wood source. Now...if I can only find a replacement for my soon to be non-existent supply of Val-Oil! Looking at a penetrating/sealing oil used in the Marine industry for wooden decks as a potential replacement.
Bob, you should at least get a chuckle out of this: when MSU was down thirteen points to Michigan yesterday, I ran a search and your Facebook site came up on the first page of results. I entered to view the current photos, which is essentially all I can do as a non-member. While viewing the wing gouging and feather group carving photos, I was admiring the quality of the wood you had for base stock, particularly in the close-up shots- nice wood; better skill and technique!! Your fourth bird in that sequence will be a "stunner"! Are you modifying Godin's wing layout patterns, or simply drawing them up from scratch?
We should start a Go Fund Me page for funds to purchase a S X S with percussion triggers for the base of that pintail display. Dave had a very good idea to suggest that as an addition to complete it!
View attachment Standard redhead drake 003.JPGView attachment Standard redhead drake 002.JPGView attachment Standard redhead drake 001.JPG
Brad, here is another primary feather position that is an option. To me, this signifies an alert bird. The only down-side of this position is that water pools and freezes in the "well" between the primaries
Brad, here is another primary feather position that is an option. To me, this signifies an alert bird. The only down-side of this position is that water pools and freezes in the "well" between the primaries
Last edited:
Steve Sanford
Well-known member
Good morning, All~
More from The Bench of George Williams....
View attachment GW Ohio 1 - GWT.jpg
Apparently all migrated west to Ohio....
View attachment GW Ohio 2 - 4 Redheads.jpg
Not sure how "Obi" arrived...via broomstick?????
View attachment GW Ohio 3 - Group TEXT.jpg
All the best,
SJS
More from The Bench of George Williams....
View attachment GW Ohio 1 - GWT.jpg
Apparently all migrated west to Ohio....
View attachment GW Ohio 2 - 4 Redheads.jpg
Not sure how "Obi" arrived...via broomstick?????
View attachment GW Ohio 3 - Group TEXT.jpg
All the best,
SJS
MLBob Furia
Well-known member
[size 4] Rick,
I doubt we'll ever see a "replacement" for Val-Oil. Mine is holding out OK. My hope is that I might deplete my stockpile at the same time I don't have the hand strength to carve anymore. That would be perfect timing [crazy].
The patterns for wings (as for each bird) come from scratch drawings. With a basic knowledge of what happens with the feather groupings where the wings connect & how they layer & fold, it's not too hard to figure out what should happen. A good supply of wings saved in the freezer each season for use with dummies while dog training also comes in handy, as they go a long way toward answering questions about the structure of wings on a deadmount, as well as and the various contours that can be incorporated to make them look effective. I'm finding that the biggest challenge is deciding which details to include and which to leave out, so that the viewer uses his imagination.
Just turned up the heat and will be headed out to paint as soon as the studio has had time to warm up a bit.
View attachment IMGP1823 (700 x 465).jpg
Steve Sanford
Well-known member
Good morning, All~
A few repairs and re-paints on my bench this month. After the LIDCA Annual Show at the beginning of the month, I'm now gearing up for the Northeast Woodworkers Ass'n (NEWA) Showcase - in Saratoga Springs March 30 &31. I'll be teaching a couple of classes, one about boats and one about decoys.
I carved this head about a year ago. I finally sawed out its body about a month ago. I used it for a prop at the regular monthly meeting of the local NEWA in February. At that time, it was sawn and shaved, but still in one piece.
I normally saw the bottom board separate from the body, but a friend had given me a nice 8x8 balk of Northern White Cedar. So I sawed the entire body out of a single chunk - but kept the bottom "half" attached by leaving about 2 inches of the parting line unsawn.
This past weekend, I finished carving the body - about 98% ready for paint (sealer, really). The head is just tacked on with a deck screw from below at this point.
View attachment sm 01 Cedar Black Duck - fully carved.jpg
I then cut the last 2 inches with a hand saw and hollowed it on the drill press with a 1" Forstner bit. I "cushion" the top half of the body with a slab of tan cork to prevent denting. I set the depth gauge on the press at about 1/2 inch. The bird now weights about 1.5 pounds.
View attachment sm 02 Cedar Black Duck - hollowed.JPG
I next attached the head - into a bed of thickened epoxy with plenty of squeeze-out. I always carve the base of the head very close to finish dimensions but leave the base (on the body) at least an 1/8" larger than needed.
View attachment sm 03 Cedar Black Duck - neck fill b.JPG
After the filler has cured (overnight), I VERY carefully carve the base of the neck into the body. My goal is to see perfectly fair curves when viewed from any point of the compass. It's always my favorite part of carving a decoy.
It's eye sweet now - at least to my eyes.
View attachment sm 04 Cedar Black Duck - neck faired b.JPG
Here it is faired, sanded and marked - ready for glue-up. But, it'll stay this way until I use it as a prop again at the end of the month.
View attachment sm 05 Cedar Black Duck - fully faired, sanded and marked.JPG
All the best,
SJS
Craig F
Well-known member
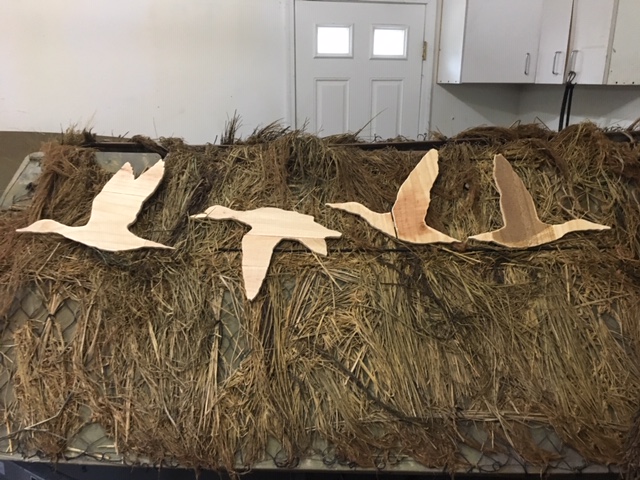
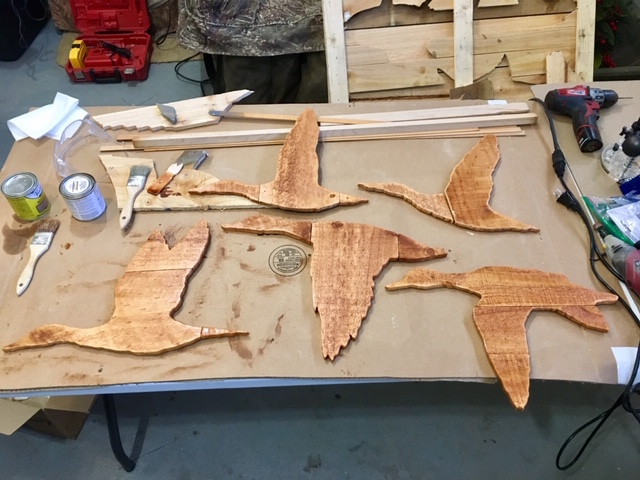
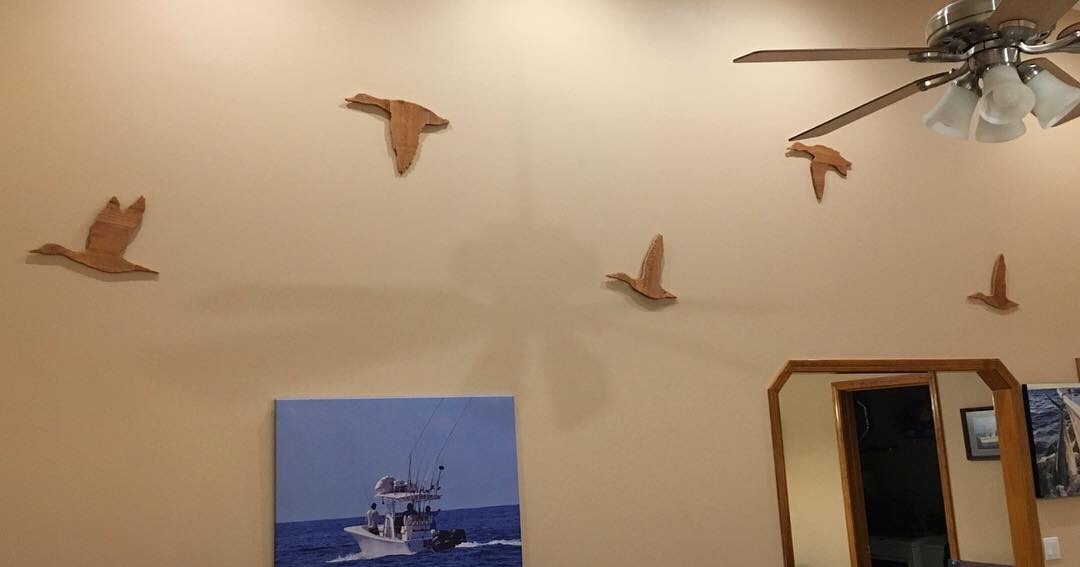
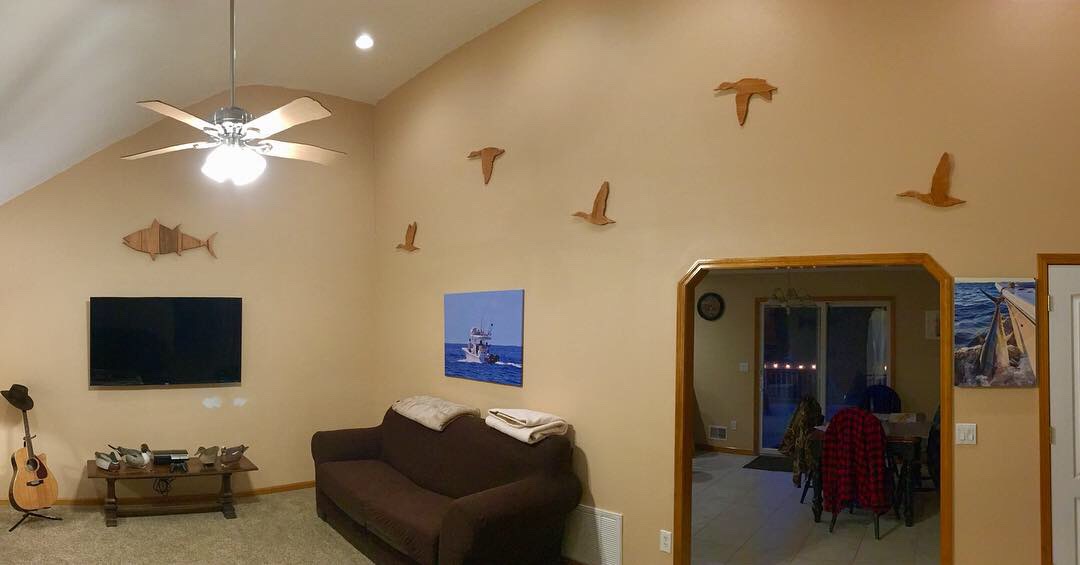
Not on the same level as the rest of the talented carvers/artists on here, but I did my own duck related wood working recently.
Wrapped up a painting project in my living room with trying to figure out how to fill some of the space that 16 ft ceilings bring... this was my idea:
Multi-species silhouettes of various puddle ducks arranged in flight along the wall, made out of pallet topper wood from my warehouse and then stained.


Steve Sanford
Well-known member
Craig~
Excellent - and very creative - idea! It certainly does the job of making those upper spaces more visually exciting.
(as it turns out, I've just been asked to make more bird silhouettes for our local Fort Edward Grasslands Important Bird Area (IBA) educational efforts - no waterfowl, though....)
All the best,
SJS
MLBob Furia said:Rick,
I doubt we'll ever see a "replacement" for Val-Oil. Mine is holding out OK. My hope is that I might deplete my stockpile at the same time I don't have the hand strength to carve anymore. That would be perfect timing [crazy].
The patterns for wings (as for each bird) come from scratch drawings. With a basic knowledge of what happens with the feather groupings where the wings connect & how they layer & fold, it's not too hard to figure out what should happen. A good supply of wings saved in the freezer each season for use with dummies while dog training also comes in handy, as they go a long way toward answering questions about the structure of wings on a deadmount, as well as and the various contours that can be incorporated to make them look effective. I'm finding that the biggest challenge is deciding which details to include and which to leave out, so that the viewer uses his imagination.
Just turned up the heat and will be headed out to paint as soon as the studio has had time to warm up a bit.
I am going to try Owatrol's two-part Deks product (1 quart each combined) against the Val Oil gallon plus I have left unopened to seal these redheads and scaup for a direct comparison of what two coats imparts...
