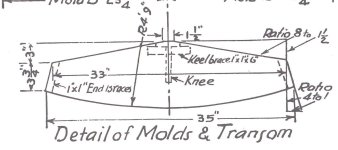
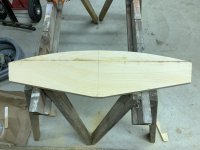
The Widgeon plans call for a 7/8" transom. I glued up 1.25" thick Atlantic White Cedar boards using epoxy mixed with wood flour. After the part was dry I ran it through the planer to achieve the 7/8" thickness called out in the plans. Lines were laid out as set forth in the plans and cut. I used a sander to get to the final size. I will add the end braces and keel brace later but you can add them at this time prior to setting up the transom on the building jig. I used a long strip of thin plywood to draw the required arc of 4' 9' . A finish nail was used as the pivot point and a hole for a pencil was placed at 4' 9'. I used computer drafting software to check the curve. Drawing a line between the top of each transom corner and placing a finish nail at each end and another at the middle of the line 2 3/4" above the line will achieve the same radius curve. Use a thin flexible batten placed at the 3 points to achieve a fair curve and draw the curve on your transom stock. Rough cut 1/8" off the line and finish to size.


