You are using an out of date browser. It may not display this or other websites correctly.
You should upgrade or use an alternative browser.
You should upgrade or use an alternative browser.
Devlin bluebill build thread.
- Thread starter Paul W
- Start date
Before you finish the bottom epoxy, make the stern/hull line sharp instead of rounded. Use fiber reinforced epoxy for a strong edge. This might diminish the porpoising that is often seen in this build.
Copy that, I will do so. I had seen the thread son that as well, you suggest just some sort of tape to hold it in place and keep it from running down?
kenmack
Active member
Maybe something more ridgid. You could temporarily screw on an edge of some sort. The other thing to consider is "wedges". Likely they were in previous discussions too. Now would be the time to do it as it is, at least psychologically, harder to go back and do it after you are "finished" (assuming they are needed). My porpoising was only at high speed when the area of the hull on plane becomes too small to support the hull. So, the wedges only need to be made on the rear hull nearest the keel and inner edge of the sponsons. Also, if you have not cut out the motor space yet, only cut out that necessary for motor clearance and leave the rest. This will decrease the likelihood of porpoising and also splash back up the transom.
Tom H.
Member
On the outside bottom, add a 1/4" tall by 1/2" front to back by 4" wide. Taper it to the rear with a nice very fine edge. Not sharp, but not round. Use thickened epoxy with silica. One on each outer side. This will help it so it will not bounce. You can go up to about 1/2" thick and make it longer front to back for a more tapered look. But I would not go any thicker. You can grind it down to make it the best amount of down force. You want just enough to give a very little bit of bounce. You do not want it to plow the front in. If it is plowing, grind a little off. A little goes a LONG ways.
You do not want the "hook" anywhere near the motor. That is why you do it on the out trailing edge. If you get a hook in front of the motor, you are going to be cussing like crazy trying get the prop to bite. Been there, done that!
You do not want the "hook" anywhere near the motor. That is why you do it on the out trailing edge. If you get a hook in front of the motor, you are going to be cussing like crazy trying get the prop to bite. Been there, done that!
Cody Williams
Well-known member
I want to add that on my modified BB3 the transom is moved all the way back to the rear and there is no gap in the bottom for a motor well, and I've never had any problems with porposing at all. It must be the sponsons that cause that to happen, or maybe a combination of the sponsons and rear rocker but as I recall the bluebill has a fairly flat rear rocker.
Ray
Well-known member
you suggest just some sort of tape to hold it in place and keep it from running down?
Hot melt glue a strip of metal onto the stern and place it at the height of the bottom of the hull. Make sure your epoxy is really thick and if you have cabosil use lots of it since it makes for a really hard surface. Make the entire built up edge square with the bottom of the hull and not the stern on both the inner edge and the outer sponsons.
Huntindave McCann
Well-known member
Hot melt glue a strip of metal onto the stern and place it at the height of the bottom of the hull. Make sure your epoxy is really thick and if you have cabosil use lots of it since it makes for a really hard surface. Make the entire built up edge square with the bottom of the hull and not the stern on both the inner edge and the outer sponsons.
Ray,
Would one need to use some type of mold release agent to prevent the epoxy from adhering to the strip of metal?
Ray
Well-known member
Hot melt glue a strip of metal onto the stern and place it at the height of the bottom of the hull. Make sure your epoxy is really thick and if you have cabosil use lots of it since it makes for a really hard surface. Make the entire built up edge square with the bottom of the hull and not the stern on both the inner edge and the outer sponsons.
Ray,
Would one need to use some type of mold release agent to prevent the epoxy from adhering to the strip of metal?
yes, thanks for mentioning that. The issue comes with the hot melt glue use. A release would work on that as well and it will not stick. So a narrow strip of clear packing tape would work as a release agent that can be sanded off without messing up paint adhesion. During the construction you can just screw the molds to the hull and then fill the holes once done.
There is a way to do this after the build. You scoot the boat back off the trailer a foot, then sand the edges clean, then make a notched trowel out of a plastic putty knife, use it to spread really thick epoxy and slowly work it until it gets set up enough to leave alone. Then sand to remove all the boogers. I do not recommend this way as its not fun to work laying on your back. I made hard sharp edges in the motor well, and installed wedges on the sponsons. All while laying in the dirt.
I used the squeeze out too, gloved finger is all. My ice runners are trapizoidal shapped. Just want the edge buried so there is nothing to catch.
I used the squeeze out too, gloved finger is all. My ice runners are trapizoidal shapped. Just want the edge buried so there is nothing to catch.
Copy that. Mine are rectangular, with the wide side being the one attached to the boat.
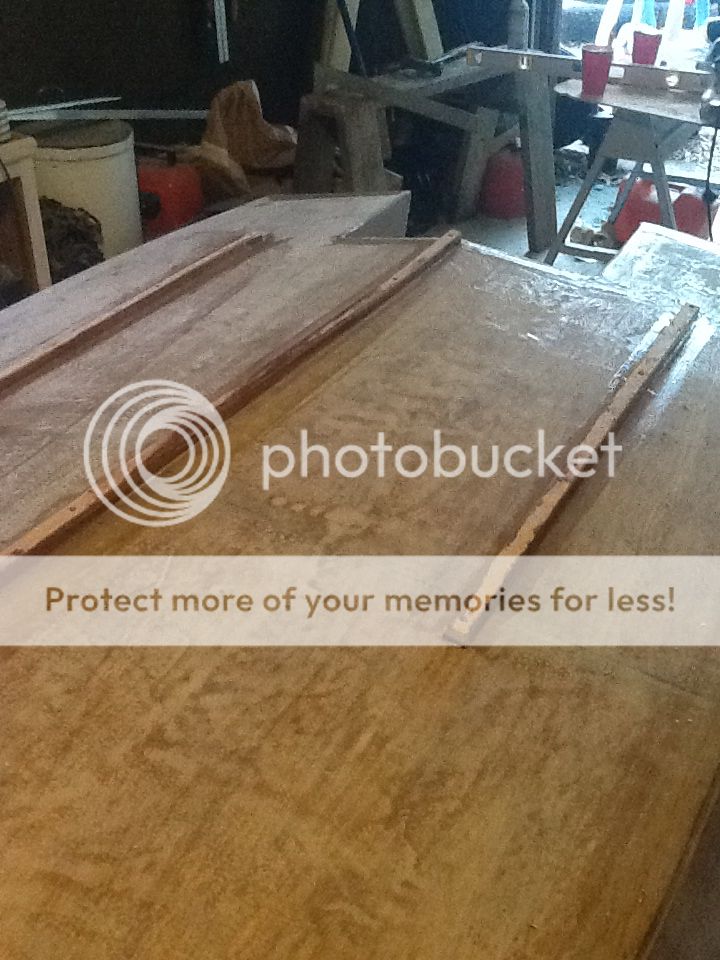
Attached the keels and keelsons, I went with shorter keelsons, not for any reason in particular, just because I did.


The epoxy had set yesterday and I removed all the fasteners holding the keelsons down and filled the screw holes, sanded all the unsightly boogers off, and I rounded the front right into the forward transom.


Then this morning I gave the keels their second coat of epoxy.

And I've been using the little leftovers and mixing them with cabosil to make a paste that squares up the edges of the sponsons and transom.

Hoping to have my aluminum rub strips on the keels, paint and flip this thing by th end of the weekend.


The epoxy had set yesterday and I removed all the fasteners holding the keelsons down and filled the screw holes, sanded all the unsightly boogers off, and I rounded the front right into the forward transom.


Then this morning I gave the keels their second coat of epoxy.

And I've been using the little leftovers and mixing them with cabosil to make a paste that squares up the edges of the sponsons and transom.

Hoping to have my aluminum rub strips on the keels, paint and flip this thing by th end of the weekend.
Paul, I would suggest you reconsider the short keelsons, and at the very least, significantly bevel the leading and trailing edges to prevent snagging, and damage to them. My ice runners on my sneakbox are nearly full length, and I should have gone another foot to 18 inches. When breaking ice, fully loaded down with decoys, and going slow, they are right at the interface.
Steve Sanford
Well-known member
Paul~
I agree with Dave re fairing the ends of your strakes/runners. Here are the brass-shod runners on my Scooter - they are faired similarly at both ends. Notice how the brass is worked right down onto the hull ahead of the runner.

Great progress - I'm sure you'll be happy to flip her rightside up.
All the best,
SJS
I agree with Dave re fairing the ends of your strakes/runners. Here are the brass-shod runners on my Scooter - they are faired similarly at both ends. Notice how the brass is worked right down onto the hull ahead of the runner.

Great progress - I'm sure you'll be happy to flip her rightside up.
All the best,
SJS
Paul~
I agree with Dave re fairing the ends of your strakes/runners. Here are the brass-shod runners on my Scooter - they are faired similarly at both ends. Notice how the brass is worked right down onto the hull ahead of the runner.
Great progress - I'm sure you'll be happy to flip her rightside up.
All the best,
SJS
Agreed, you are going to tear them off.
Capt Rich Geminski
Well-known member
Paul, I'd go with daves suggestion... Dragging the boat foward or back will hang up. Lost my s/s runners breaking ice, should have longer taper...
Paul, I would suggest you reconsider the short keelsons, and at the very least, significantly bevel the leading and trailing edges to prevent snagging, and damage to them. My ice runners on my sneakbox are nearly full length, and I should have gone another foot to 18 inches. When breaking ice, fully loaded down with decoys, and going slow, they are right at the interface.
How would you stop the keelsons then? With significant narrowing of the bottom of the hull I'd have to end them out towards the sides of the boat to keep them all parallel. Anyone have good pics?
run them forward until they are a couple inches above waterline. They don't need to run all the way forward, but they do need to be out of the water.
When you install your aluminum strips, make sure you use a bedding compound like 4200/5200, since the metal will expand/contract much more than the hull with temp changes. The cure time may throw your schedule off if you use 5200, you may want to use some fast cure.
When you install your aluminum strips, make sure you use a bedding compound like 4200/5200, since the metal will expand/contract much more than the hull with temp changes. The cure time may throw your schedule off if you use 5200, you may want to use some fast cure.
