Workbench Find and Restoration

Eric Patterson

Moderator
Staff member
PART 1. Discovery

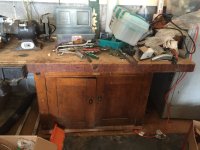
Going back six years ago I was cruising the local estate sale listings and ran across a picture (below) that jumped out at me. "What a cool vise" I thought to myself even though I could only see a portion of it. So off to the estate sale I went dragging a coworker with me to help load should it still be there. It was, and not only was there one vise, but there were two! For a fee the vises were mine and the sad bastard bench they were stuck to.
12764663_1135090879869534_8932149014387839935_o.jpg


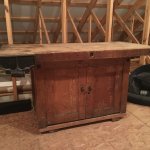
Back at the workshop I started looking the bench over and realized I had sold it way short. There was a lot of character there despite it being horribly abused. Evidently the bench was left standing in water as the legs rotted from the ground up. Trying to save the bench a previous owner whacked all four legs off just below the doors and nailed 2x4s to the stumps to keep it together. A quadruple amputee was now in my care. I could save it, but it would have to wait.
IMG_0599.JPG


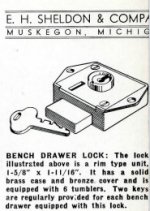
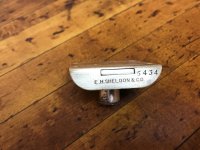
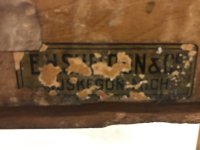
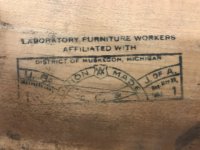
Looking the bench over I found a decal identifying the original maker, E.H. Sheldon and Co. from Muskegon, Michigan. Along with it were several union labels that narrow down when the bench was built and give more clues.
IMG_4087.JPG

Img_4085.jpg


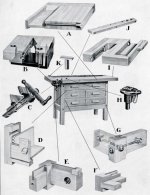
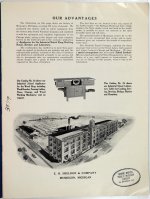
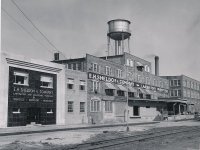
Armed with this info I started googling and uncovered the fact that E.H. Sheldon manufactured workbenches, vises, and even lathes and other woodworking machinery since the late 1800s and was best known for equipping trade schools and shop classes.
2017.1.622_original__2.jpg

m0801lookback-1jpg-65388eccde242364.jpg

More info on the company history can can be found at the link below.

http://www.vintagemachinery.org/...x/detail.aspx?id=740


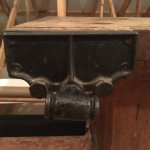
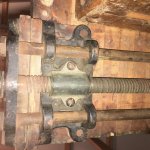
The vises are somewhat of a mystery. There are no markings on them and nowhere in any Sheldon publication have I been able to find any information about them. They are however very much the original vises. No questioning that fact.
IMG_0598.JPG

IMG_0604.JPG

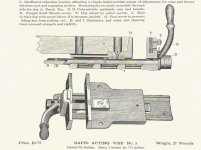
Below is the quick release vise popularized by Christopher Schwarz that Sheldon is known for and very well documented in Sheldon's literature. Sheldon made other vises too but nothing like the ones on my workbench. So I did some digging...
RapidActingVise.jpg

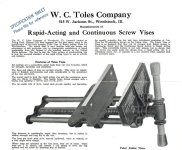
After many searches I ran across a vise, W.C. Toles rapid acting #20, that was popular and common during the early part of the last century and IDENTICAL except for two things. The vises on my bench are not rapid acting, meaning there is no quick release, and they do not have the Toles markings. Other than that they are identical to the #20 in every possible way. My theory is Sheldon either made a copy, or they bought unmarked vises from Toles. I suspect its the latter. I mean why would you put a competitor's name on your product?
TolesNo20.jpg

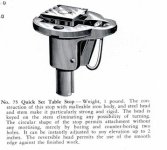
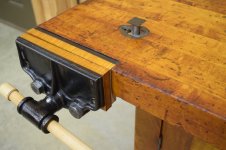
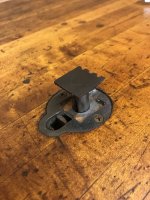
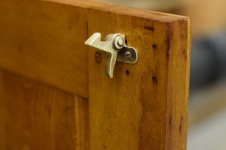
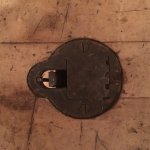
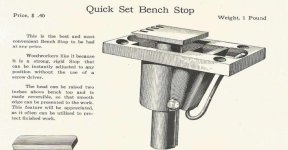
Another item on the workbench that intrigued me were the bench dogs. The bench doesn't have a series of holes to insert your traditional dog into. Rather it has two metal "pop-up" dogs conveniently located. A little literature review revealed this was a patented design by E.H. Sheldon. Until yesterday I could find no information on these round dogs. Every illustration by Sheldon, including the original patent drawings, showed the dogs having a square base. Then I got lucky and uncovered a 1940 catalog that shows the round base dogs. My hunch is the round shape was easier to inset in the bench top so Sheldon dropped the squared shape in favor of round.
IMG_0601.JPG

BenchDogSquare.jpg

BenchDogRound.jpg

Time to start the teardown and restoration...
 
Last edited:
Part 2. Teardown and Restoration

About six years passed while the workbench sat in the attic of my shop patiently waiting. That space is now being converted into a one bedroom apartment so it was time to get the bench out of there and either restore it or find a new home. Not very good at walking away from projects I decided to restore it.

You'll have to excuse the lack of teardown pictures because when I'm working I hate fooling with a camera. But let me say this bench was built to last several lifetimes. E.H. Sheldon cut no corners in construction. The hard maple doors and side panels are haunched mortise and tenon and pinned! The base is also mortise and tenon and uses draw bolts to keep it rigid under the forces a worker imparts to it. The side panels are held in place via tongue and groove. The hard maple top is butcher block construction with very long bolts running crossways to keep it together should the glue ever fail, which it didn't. Every last part was disassembled. All the way down to individual styles and rails. I was very fortunate that hide glue was used sparingly and there was no damage done during the take-down.

Construction.jpg

IMG_4088.JPG

IMG_4089.JPG


With all the pieces apart it was time to sand the original finish. I agonized over this. I hated to wipe away a century of patina but how could I replace the four legs and not make it look like the bench had fake prosthetic legs? I could only come up with one solution. Strip the base parts down, faithfully rebuild the missing/damaged parts, and then refinish similarly to what E.H. Sheldon did originally, oil and shellac. That was my plan!

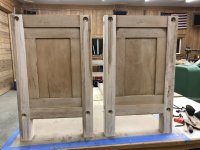
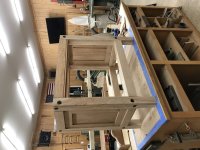
Rebuilding all four legs and the bottom stretchers was challenging. I had the tops of the original legs, which were a huge help, but everything had to be exact for it to all work together. Who wants a workbench whose doors won't close or have huge gaps. Not to mention the left vs. right and front vs. back that had to be kept up with, lest I end up with three left legs and a very limited supply of hard maple to right the wrong. Somehow by moving very slowly and deliberately, I pulled it off. I faithfully recreated eight missing/damaged components right down to the draw bolt locations, mortise and tenons, and tongue and grooves. Everything, old and new, went together beautifully. Damn it felt good. I mean REALLY GOOD!

IMG_4121.JPG

IMG_4122.JPG

IMG_4124.JPG

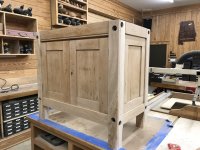
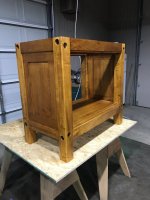
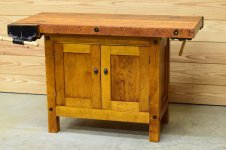
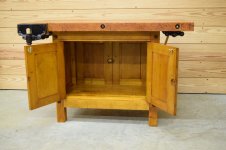
So now I'm asking how do I put back the finish. How do I not end up with the top having all its patina and the bottom looking like it was just built? That won't work. Well I got a huge boost by the original wood holding it's aged color well in spite of sanding. The only way I knew to bring it all together was to apply a dye. After some research I settled on using General Finishes water based dyes, amber and light brown. Applied with an HVLP gun it went about as well as I could hope for. Don't let the pictures fool you. The color match to the bench is actually quite close. I think the fluorescent lighting downstairs make the bench look more yellow than it is. When I hold up one of the original rotted off legs the match is very good. Below shows the base cabinet after applying the water-based dye.

Img_4237.jpg

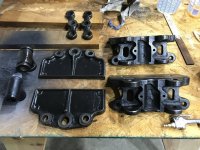
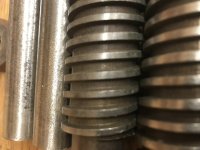
The vises were completely disassembled and cleaned. One of the "tees" was missing so I fabricated one with plumbing fittings, a tee and two unions screwed into the tee to yield the correct 1" inside diameter for the wooden handle. I welded the seams over and ground flush. It's not original but it will do. Instead of stripping the lead paint, ruining their patina, I simply cleaned them and wiped down with Penetrol. One other note. People often assume the threads one these vises are Acme, and as such they can replace the "nut" should it be missing with off-the-shelf components. Not so. Vises made around the turn of last century used square threads, not acme which have angled walls. Good luck finding any supplier of square threads today. They don't exist. Just thought I'd point that out.

Img_4238.jpg

IMG_4242.JPG

IMG_4246.JPG


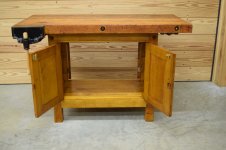
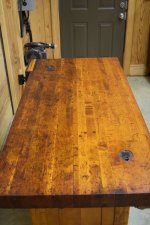
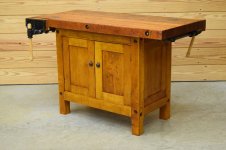
With the dye applied and dried the bench top and base cabinet were wiped down numerous times with a 50/50 mix of turpentine and boiled linseed oil (BLO). Reading E.H. Sheldon's literature I learned their benches were shellacked. So after the BLO dried I moved on to applying shellac via HVLP to the base. Then came more sanding, more shellac, more sanding, more shellac.... With that done the bench got a good rub down and buffing with Johnson's paste wax. The top and base are satiny smooth. Finally, all the doors and vises were remounted.

I hope you enjoyed this blow-by-blow tale of my Sheldon workbench. I wish I had more photos of the missing part reconstruction and joinery, but like I said I'm not real good at taking pictures in the middle of battle.

On to the finished bench in Part 3.
 
I want to make you a cash offer on that, but anything I could offer would be an insult given the quality of the work. Beautiful!!!!!!!!!!!!!! I need to find one of those for myself in operational condition.
 
Eric,
I don't know if you are a saint or a glutton for punishment. [huh]

What I do know )as I sit in the lobby at my heart doctor) is, I hope my doctor is as meticulous as you are.
BTW, You would have made an excellent machinist at my former place of work.
 
Eric,
Beautiful work as always. Got me excited enough to go down and check out who made the old quick release vice I grew up with (50/60's). Turns out it was manufactured by Richards-Wilcox. The old work bench, Dad built into my folk's basement had a blacksmith post vice on one end and the quick release wood vice on the other. Needless to say I grabbed both vices before we sold the house. Thanks for sharing.

Scott
 
Thank you all for the kind words. This was a challenging project that somehow didn't hit any major snags. Feels good to have it completed as I'm about to really launch into a big project, that being turning the attic area above the shop into a livable space. Time to put on some jogging shoes because that project is going to be a marathon, not a sprint.

Tod, I think you are in a better area than I am for lucking up on a vintage bench. Keep an eye out for auctions, estate sales, Craigslist and Market Place. About two weeks ago I saw an amazing bench not too far from you go cheap. It was cast iron, 9' long, weighed 2800 pounds, and had that vintage look people are after. How they'd get into their house is another matter.

Dave, I certainly hope you were there for a routine visit and thank you for the compliment of the highest order. I'm flattered.

Scott, I remember you telling me your dad had a very well equipped shop. Glad you snagged the vises. I have the vise off my father's workbench I saw everyday growing up. It's a basic Craftsman that I'm holding onto and will pass down. I like utilitarian items that have family history, more so than china.

Eric
 
Eric,
Outstanding job! It's definetly a keeper. You need to find a place for this peice in your home, or in a loved ones home.
 
tod osier said:
I want to make you a cash offer on that, but anything I could offer would be an insult given the quality of the work. Beautiful!!!!!!!!!!!!!! I need to find one of those for myself in operational condition.

This bench just sold a couple weeks ago not too far from you. It lasted about a day. I think they underpriced it. The vise is missing and the swing-out stool is gone, but otherwise I'd call it operational.

Marketplace - Antique Cobblers Workbench | Facebook
 
Last edited:
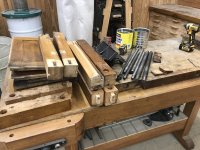
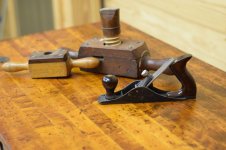
Eric, as I have said before, an excellent save. Nicely done. I like how you laid out that old plane and wooden thread cutter. I can't tell the size of the plane an old Bailey's perhaps in the 2 size?

When I look at the bench it appears that it is two sided so two students could use opposite sides at once. The vises are set for right handed students and there is no end vice. You did a great job on the hardware, its hard to tell which tee you fabricated.
 
Last edited:
Brad Bortner said:
Eric, as I have said before, an excellent save. Nicely done. I like how you laid out that old plane and wooden thread cutter. I can't tell the size of the plane an only Bailey's perhaps in the 2 size?

When I look at the bench it appears that it is two sided so two students could use opposite sides at once. The vises are set for right handed students and there is no end vice. You did a great job on the hardware, its hard to tell which tee you fabricated.

Brad and everyone, thank you for the compliments. This has been one of my favorite projects so getting all the nice comments is a cherry on top.

The bench had to have been meant for two students. In fact there was a vertical divider running longways that created two equal sized compartments in the cabinet. That sure makes it seem like the bench was split with each student getting one side of the bench. I ended up needing that board for the floor and did not recreate the space killing divider. The two identical opposed vises is more evidence it was for two students. I can't think of any other reason for this bench's configuration. Regardless, I like the fact it has two vises.

The plane is a Stanley 40 1/2 scrub so it is a little longer than a #2. The thread cutters were Jeff's. I haven't researched them yet. I do remember Jeff telling me in the very early days of ebay he scored a rare 2" (?) threader and I'm pretty sure that's it in the picture. I need to measure the actual thread it makes but it is BIG.

Eric
 
{size 4]
Eric, Just revisiting this thread.
I am constantly amazed at the restorations & "saves" you have made on vintage equipment.
 
Back
Top