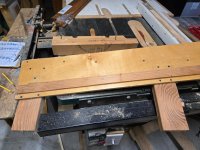
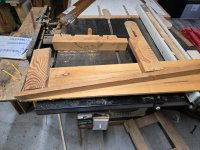
Got my keel, strakes, and sheer clamps ripped today, then spent a bit of time futzing with ideas for a scarfing jig for the table saw. Hopefully I'll get bits scarfed and glued tomorrow.
Good mail day today - cleats from
@TA Smith (Thanks!!) as well as the following:
View attachment 65531
I'd pretty much decided to go with Tod's interceptor plate idea, but came across these old Step-n-trim tabs for about what SS bar stock would have cost me - and no machining to do! Plus an emergency step for getting in. I have a ultrasonic cleaner I use for cleaning old car parts, should make quick work of cleanup.


") I like posting this up every so often....
I like posting this up every so often....